panzer campaigns user manual - john tiller...
TRANSCRIPT

1
Panzer Battles User Manual
Introduction
Panzer Battles is a series of games covering the major campaigns of World War II. In addition to covering the historical events of these campaigns, many hypothetical and what-if situations are addressed. The game can be played alone versus the computer, or against a human opponent using Play-By-E-Mail and
Network Play (over a Local Area Network or the Internet). The game is turn-based with each side moving and firing in their designated turn. Each game consists of a number of battles making up a larger campaign.
The documentation for Panzer Battles is divided up into several parts:• The Getting Started Help File covering the basics of play. This Help File
is tied to one of the scenarios in the game and will assist you in learning the basics of the game.
• This User Manual covering the game basics, main features and additional information.
• The Main Program Help File covering issues specific to the main game engine. Note: each menu, menu item, and dialog of the main program is discussed in detail in this Help File.
• The Scenario Editor Help File covering issues specific to the scenario editor.
• The Order-of-Battle Help File covering issues specific to the Order of Battle editor.
• The Database Editor Help File covering the Database Editor.
This manual last updated: February 24, 2014
2

Panzer Battles User Manual
Differences with Panzer Campaigns
The Panzer Battles game engine is similar to that of Panzer Campaigns and has some concepts taken from Squad Battles. This section describesfor players of the Panzer Campaigns series the main differences between the two game engines so they can quickly become oriented to the style ofplay in Panzer Battles.
The scale is the first difference as described below:
• Panzer Campaigns – 1 km hexes, 2 hour turns.
• Panzer Battles – 250 m hexes, 30 minute turns.
• Squad Battles – 40 m hexes, 10 minute turns.
Thus Panzer Battles fits in scale between Panzer Campaigns and Squad Battles and borrows features from both.
The main differences with Panzer Campaigns are described below.• No phased play, only turn-based play.• Indirect fire is always alt resolved. Direct fire and assaults are never alt
resolved.• Persistent concealment (as in Squad Battles).• Unlimited op fire (as in Squad Battles).• No Penetrated hexes.• No Operational AutoMove, only Move in Column.• No Stockpiling during scenario.• Standard ranged fire modifier is 1.5.• Inherent Quality Fire Modifier is 2.5 (instead of 1).• To spot for artillery and air strikes, a unit must not have moved that turn.• Vehicles crossing Hedge Row become Vulnerable and have half defense
value.• Vehicles assaulting across Hedge Row have half assault and defense
and become Vulnerable if successful.
3

Panzer Battles User Manual
• Recon Spotting is standard rule and can result in spotting of concealed units.
• Wrecks. Visibility is blocked when more than 7 per hex• No strength recovery.• Added sides to special markers such as fortifications and mine fields.• No night fatigue.• Vehicles only get ½ terrain defensive benefit and ½ improved and trench
benefit.• Stack Fire Modifier applies to DF and IF from ½ max-stack (1.0) up to
max-stack (2.0).• Added “Raised” rail and roads.• Added Transport unit type which can carry other units, plus ability for
vehicles to carry “external” foot riders.• Units with Assault = 0 are automatically overrun when attacked at only
the cost of movement into the defending hex.• External riders are automatically eliminated when on a vehicle that
attacks or defends in an assault.• External riders are 4 times more vulnerable to mine field attacks.• External passengers have defense=16 and can be fired upon even when
carrier is hard.• Obstacles in Shallow Water only take half the movement allowance to
move into them and Mines in Shallow Water are only half as effective.• Passengers on Naval units that are eliminated in Shallow Water take ½
casualties and become Disrupted instead of being eliminated.• New game file checksum feature that deters changes to game files in an
encrypted PBEM game.• Total indirect fire on any one hex per turn limited to 1.5 max stacking
value.• Op Fire Engagement limits can be set by the player.• Intel markers are used to describe previously known enemy positions.• Air Missions are requested on one turn and then launched on the next
turn (as in Squad Battles).• Isolated non-artillery units do not become Low Ammo if they fire.• The binoculars icon in a unit picture means that the unit has seen the
enemy, not that it has been spotted by the enemy.
4

Panzer Battles User Manual
The Interface
The game screen contains several parts of the interface that allows you to play the game.
The Menu BarAlong the top of the screen is a Menu Bar that contains the various game commands you will need to access from time to time while playing. Under each menu is a list of
commands, each of which is discussed in detail in the Main Program Help File.
The ToolbarAlso along the top of the screen, directly under the menu bar is a series of buttons. These buttons provide quick access to many of the game features. If you place your cursor over a button and pause for a moment a "Tooltip" will be revealed. For more information on the Toolbar, consult the Main Program HelpFile.
The MapMost of the game screen is covered by a map. The map has three views in 2D. The default view is Normal, but this can be changed using the View Menu,or the Zoom-In or Zoom-Out buttons. The Map can be scrolled using the Windows scroll bars on the right and bottom of the screen. Alternatively, selecting the Auto Scroll option from the Settings menu puts the map in a mode where moving the mouse cursor to any edge of the screen automatically scrolls the map in that direction. See the Settings Menu under Main Program Help File.
Hex Info AreaOn the left side of the screen is the Hex Info Area (the location of the Hex Info Area can be changed from the Settings Menu). As you click in a hex on the map containing units, the specific info about the units in that hex is displayed inthis area. When there are more units in the Hot Spot hex than can be displayed in the available Unit Boxes, then scroll arrows that appear after the list of units can be used to scroll the Unit Boxes. The Hex Info Area also
5

Panzer Battles User Manual
contains information about the terrain in that hex. More information on the units and terrain can be viewed by pressing and holding the right mouse buttonin the Hex Info Area. For more information, see the Hex Info Area in the Main Program Help File.
Status BarLocated at the bottom the main window, the Status Bar displays information about the current battle or information about other commands you are accessing. The default view shows the current turn and date information together with the hex coordinates. For more information, see the Status Bar section in the Main Program Help File.
Map Views
There are a number of ways you can view the map.
Normal View
This is perhaps the most common view usedin the game. It presents a top-down two-dimensional view of the map showing the various terrain features and units on the map. In this view, you use the Hex Info areaquite a bit to determine specific data associated with the units and terrain.
Zoom-Out View
This view shows more area on the screen while giving you less detail. This view is playable especially if you are looking at ranged fire situations or using indirect fire.
6

Panzer Battles User Manual
Extreme View
This view shows little detail associated with units but a much larger area. While you canplay the game in this view, most of the time you use it to give yourself some overview of the situation to help you make a decision, orto survey the situation before going on.
Jump Map View
This view is most useful for quickly changingyour view from one part of the map to another. You get this view when you invoke the Jump Dialog. With this view, youcan click on any part of the map and have your view moved to that location.
How to Change Views
• Normal View: This is the default view. To restore this view, use the Normal View option of the View Menu. Alternatively, you can use the ‘3' hot key.
• Zoom-Out View. To switch to this view, use the Zoom-Out View option ofthe View Menu or use the ‘2’ hot key.
• Extreme View. To switch to this view, use the Extreme View option of theView Menu or use the '1' hot key.
7

Panzer Battles User Manual
Quick Overview
This section provides a quick overviewto playing the game and the functions of the main program. For more information, see the various sections found in the help Contents.
Sides
A Panzer Battles battle is played by two sides, one Allied and one Axis. A
battle may be played by one person against the computer, or by two persons using a variety of modes such as Two-Player Hot Seat, Play-By-E-Mail (PBEM), or Network Play. See the Mode Menu in the Main Program Help File for more information on these modes.
Hexes
Each battle is played on a map made up of hexagons (hexes). Each hex measures 250 meters across. Each hex contains terrain that affects movement and combat in that hex. See the Hex Info Area in the Main Program Help File for more information on terrain and its effects.
Time Scale
Each battle is conducted in turns each of which typically represents 30 minutesof real time, although this may vary by scenario. Each player has a number of units under their control, some of which are on the map at the beginning of the battle, while others arrive as Reinforcements. See the Units Menu in the Main Program Help File for more information.
End of Game
As each player finishes their turn, they advance the battle to the next turn by using the Next Turn function of the Turn Menu (see the Main Program Help File). This continues until the time limit specified in the scenario at which point the win, lose, or draw outcome of the battle is determined. Winning and losing are determined by a calculation based on the ownership of certain Objective hexes and the relative losses of the two sides. See the Victory selection of the
8

Panzer Battles User Manual
Info Menu (in the Main Program Help File ) for more information on victory conditions.
9

Panzer Battles User Manual
Units
Typically, each unit is a company, platoon or section of Infantry, Artillery, or Tanks. Each Infantry unit has a strength value in increments of single men, each Artillery unit has a strength value in number of guns, and each Tank unit has a strength value in number of vehicles. In addition there are specialized units such as Headquarters, Air Units, and Ships.
Infantry, Artillery, and Tank units are capable of firing on enemy units (for towed Artillery, only when unlimbered) and each has a range value indicating the number of hexes that unit may fire.
Unit Information
When you click on a hex, the units in the hex are shown in the Hex Info Area beside the map. This display shows information about the units such as strength and fatigue. In addition, special conditions associated with the unit such as Disruption are shown in this display.
Right clicking in this area will display other information about the unit such as range. This area also is used to display the organizational hierarchy of the unit including its parent organization and so forth. See the Hex Info Area in the Main Program Help File for more informationon these values.
When Fog-of-War (FOW) is in effect, then you will not see complete information on enemy units. In particular, exact strength information is not shown. Approximate strength will be shown using the following notation:
• X means a strength from 1 to 9.
10

Panzer Battles User Manual
• XX means a strength from 10 to 99.
• XXX means a strength from 100 to 999.
Stacking
Within each hex, stacking is measured in terms of total number of men, or equivalent. For stacking purposes, each vehicle or gun is considered to be thesame as 10 men. The total stacking value in the current hex can be found in the center of the Terrain Info box by right-clicking in the Hex Info Area. Two stacking limits apply in the game. Both of these values can be found in the display of Parameter Data. The Maximum Stacking Limit is the total number ofmen or equivalent that can be in the hex at any one time, not counting units in Rail Mode (see Movement). The Road Stacking Limit is the maximum number of men or equivalent that can travel via Road Movement through a hex. It is also the maximum number of men or equivalent that can travel via Rail Mode through a hex. As a special case, only 4 ships can stack in the same hex.
Selecting Units
Most actions require that units first be selected. Clicking on a hex on the map with the left mouse button causes that hex to become the current Hot Spot. The units in the current Hot Spot are displayed in the Hex Info area (see the Main Program Help File). These units may be selected by clicking on their pictures in the Hex Info Area with the left mouse button. Alternatively, all units in a hex may be selected by double clicking on the hex with the left mouse button.
Moving and Other Actions
During each turn, a player may move, fire, and assault using units under their control. Each action that the unit performs costs that unit some Movement Points. Units can be moved in any order you wish and you need not expend all movement points. To move, fire, or expend any movement points, a unit must first be selected.
Once selected, units may be moved by right clicking on the adjacent hex. Alternatively, once units are selected, the player may move them by holding down the left mouse button in the starting hex, moving it to the destination hex,and releasing the mouse button (this is the so-called "drag and drop" method). The computer will determine a path from the starting hex to the destination hexof minimum movement cost and automatically move the selected units towards
11

Panzer Battles User Manual
the destination hex. Selected units may fire by right clicking on the target hex while holding down the Control (Ctrl) key. Alternatively, the player may toggle the Main Program into Fire mode and then fire selected units by simply right clicking on the target hex (see the Toolbar in the Main Program Help File).
Zone-of-Control
The six hexagons immediately surrounding an occupied hex make up that unit’s Zone of Control (ZOC). Zones of Control affect the movement and supply of the other side. When a unit enters an enemy Zone of Control it may be fired upon. The cost to move from a hex that is an enemy Zone Of Control to another hex that is also an enemy Zone Of Control will be greater than normal.
There are a few units which do not exert a Zone-of-Control:
• HQ units do not exert a Zone-of-Control.
• Supply units do not exert a Zone-of-Control.
• Broken units do not exert a Zone-of-Control.
• Units which have a Facing do not exert a Zone-of-Control in the hexes they are not facing.
• Partisan units do not exert a Zone-of-Control.
• Concealed units do not exert a Zone-of-Control.
Reinforcements
In a scenario, additional units can be scheduled to arrive on a particular game turn. They can even arrive on the first game turn, as some scenarios start withno units from one side on the map at the start. The arrival of reinforcements is announced in the Command Dialog at the start of the turn. To bring these units into play, select the Units Menu and then chose the Arrived option. Alternatively you can press the Arrived Units Button on the Toolbar.
If you have reinforcements that have not been placed on the map when you advance the turn, then the Arrived Dialog is automatically displayed for you.
Reinforcements usually arrive on a map edge hex, but this is not always the case. Ships at sea may "appear at Dawn" and Airborne units will just "drop in" and appear. In all cases, you cannot alter where the unit will arrive, and in factairborne reinforcements will often scatter and arrive in different hexes each
12
Panzer Battles User Manual
time you play a scenario. Once dropped, airborne units fight as normal groundtroops and have no further special benefit or movement capabilities.
Depending on the scenario, the arrival of reinforcements may be affected by a "Protection Value" defined in the reinforcement data. The purpose of this Protection Value is to prevent crowding of the arrival hex by enemy units. Typically this is used to protect reinforcements arriving by road on the map edge, but not amphibious or airborne reinforcements. When the Protection Value is in effect, then any enemy units within that distance of the arrival hex are Broken and any enemy units on the arrival hex are eliminated.
13

Panzer Battles User Manual
The Basics
Movement
To move units, you first select the units to move and then right click in anadjacent hex. Alternatively, you can click in the starting hex, move the mouse to the destination hex, and release the button (this is "drag-and-drop"). The Main Program will calculate a path of minimum movement cost and automatically move the selected units toward the
destination hex. Unless Fog-of-War is in effect, you can undo movement by using the Undo Movement command of the Command Menu. The cost of moving units depends on the terrain being moved into and the current Conditions. These values are Parameter Data and can be determined using the Parameter Data Dialog.
Travel, and Rail Modes
Travel and Rail Modes are special deployments used when units wish to take advantage of roads and railroad lines. To place a unit in Travel or Rail Mode, first select it and then from the Command menu, choose the appropriate command, either Change Travel Mode or Change Rail Mode. As a shortcut, there is a Change Travel Mode button on the Toolbar. A unit is said to be Deployed when it
is not in Travel or Rail Mode.
Travel Mode represents units in a column formation, and for towed artillery, being limbered. Roads have no effect on units that are not in Travel Mode. While in Travel Mode, units are less combat effective and are more vulnerable to enemy units. Towed artillery units must be in Travel or Rail Mode in order tomove. A unit in Travel Mode has a white bar at the bottom of its counter in 2D
14

Panzer Battles User Manual
graphics mode and has the letter T following its Movement value in the Hex Info Area.
Rail Mode represents units entrained for rail movement. Units in Rail Mode cannot fire or assault attack. A unit in Rail Mode has the letter R following its Movement value. Units cannot changeRail Mode in a hex that is over stacked.
For most units there is no cost to change into Travel Mode, but 1/3 of their movement allowance is expended to change out of Travel Mode back into Deployed mode (except under the Optional Rule - Manual Defensive Fire.) Heavy towed artillery and Siege Guns expend their full Movement allowance tochange to and from Travel Mode. Other Towed artillery expend 1/3 of their Movement allowance to change to and from Travel Mode.
For all units, it costs the full Movement allowance to convert to and from Rail Mode. Furthermore, units can only convert to Rail Mode if they are in a hex containing a valid rail line and their side must have a rail capacity (defined in Parameter Data). A unit in Travel or Rail Mode does not receive any defensivebenefit from the terrain it occupies.
A unit must be in Travel or Rail Mode in order to use a bridge. Furthermore, some units must be in Travel or Rail Mode in order to enter certain types of terrain. For example, vehicles are normally prohibited from entering Marsh terrain and must do so traveling by Travel or Rail Mode. If a unit was moving through such terrain by road, it must also leave the terrain using the road as well.
A unit moving by road movement through terrain that it could not otherwise enter cannot leave Travel Mode while in such terrain. Towed guns are an exception and they can leave Travel Mode in such terrain, but have the same firing and defensive effects placed on them after doing so as if they were in Travel Mode to simulate their deployment in restricted terrain.
15
Panzer Battles User Manual
Carry/Uncarry
It is possible for units to be carried on other units. If a unit is of type Transport, then it can carry other units which consist of men or guns. If
the unit is of type Naval, then it can carry units which consist of men, guns, or vehicles. Otherwise, a unit consisting of vehicles can carry men as external riders. External passengers can only be foot type units. “On Foot” motorized/mechanized troops cannot be external passengers.
The capacity of a unit to carry other units depends on the type of carrier.
• A Transport unit can carry 10 men or 1 gun per transport vehicle.
• A Naval unit can carry 40 men, 4 guns, or 4 vehicles per naval vehicle.
• A non-Transport unit can carry 5 external riders (foot only) per vehicle.
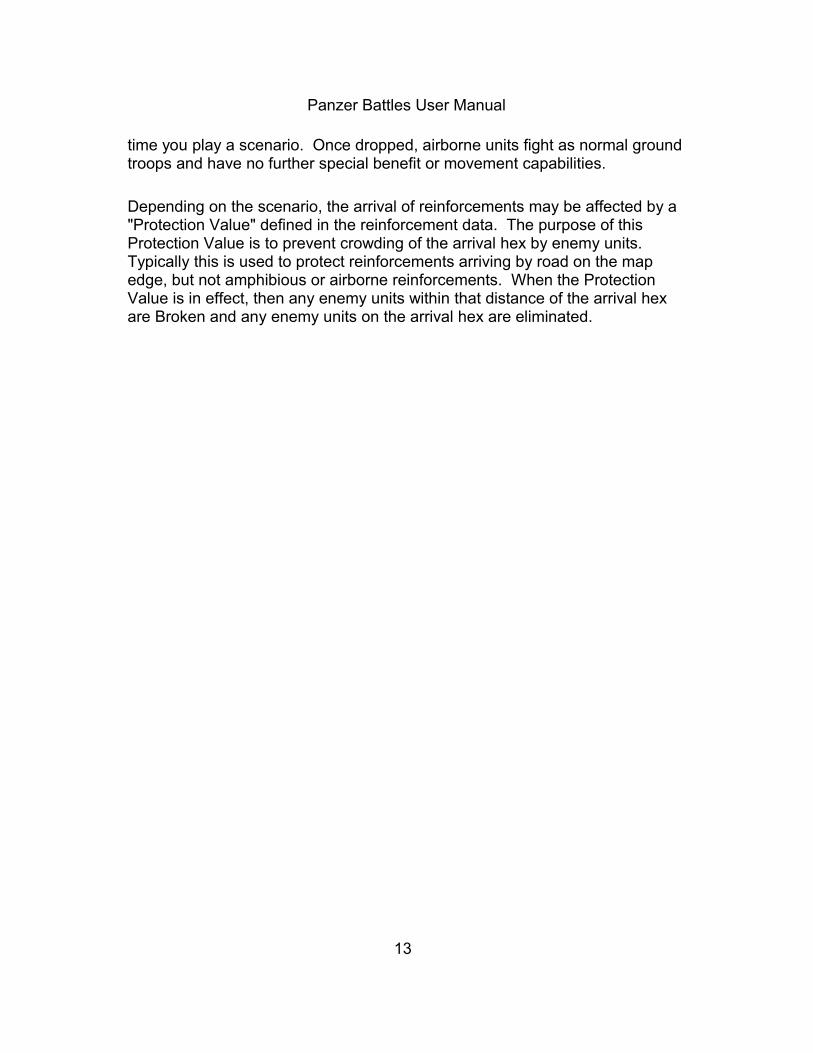
To initiate carrying, select both the units to be carried and the unit to do the carrying and then invoke the Carry/Uncarry command. The unit carrying the units will then be shown the notation CARRYING. Right clicking on the unit picture will reveal the unit being carried. To uncarry, select the unit carrying and invoke the Carry/Uncarry command.
Special rules apply to carrying:• External riders are automatically eliminated when on a vehicle that
attacks or defends in an assault.• External riders are 4 times more vulnerable to mine field attacks.• External passengers have defense=16 and can be fired upon even when
carried by a hard vehicle. • Passengers on Naval units that are eliminated in Shallow Water take ½
casualties and become Disrupted instead of being eliminated.
Rail Units
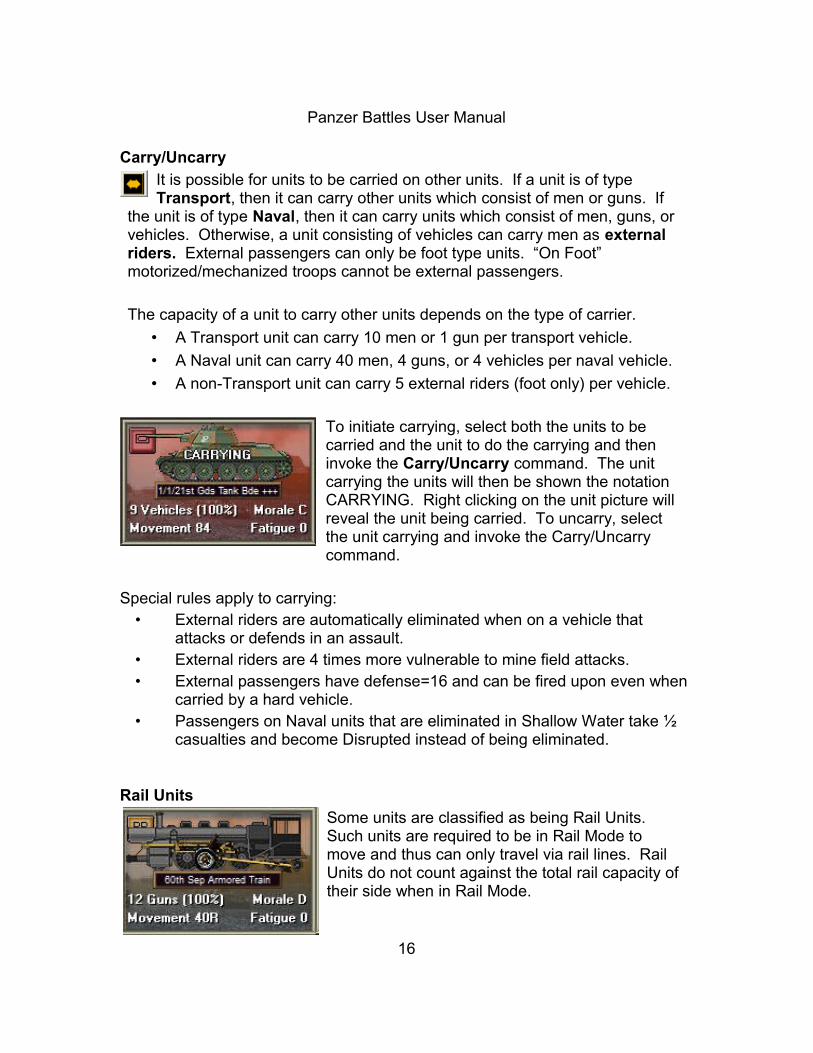
Some units are classified as being Rail Units. Such units are required to be in Rail Mode to move and thus can only travel via rail lines. Rail Units do not count against the total rail capacity of their side when in Rail Mode.
16

Panzer Battles User Manual
Amphibious Units
Some units are classified as being Amphibious. Amphibious units in Travel Mode have the ability to cross Rivers and Canals at the cost of their entire Movement Allowance.
Quality Modifiers
The following modifiers apply to the movement allowance of units based on their Quality rating:
• The movement allowance of vehicle Quality A units is increased by 20%.
• The movement allowance of all Quality B units and non-vehicle Quality A units is increased by 10%.
• The movement allowance of all Quality D units and non-vehicle Quality E units is decreased by 10%.
• The movement allowance of vehicle Quality E units and non-vehicle Quality F units is decreased by 20%.
• The movement allowance of vehicle Quality F units is decreased by 30%.
Rubble
Rubble can be created in a Village, Town, City, or Industrial hex by the effects of Indirect Fire or Air Strikes against the hex. Rubble has no effect on combat in the hex but does triple movement costs through the hex and also negates the ability to use road movement through the hex.
Engineer units may attempt to clear the Rubble. Once cleared, Rubble still triples movement costs through the hex, but does allows road movement. Rubble that is not cleared is reported as "RUBBLE" in the Terrain Info Box while Rubble that is cleared is reported as "Rubble"
Obstacles
Obstacles can be placed on the map using the Scenario Editor, but cannot be created while the scenario is being played.
17

Panzer Battles User Manual
Obstacle hexes cost the full movement allowance of units to enter, but cause no casualties. Obstacles can be removed by mine-clearing units in the same way that minefields are removed. Obstacles do not block supply. Obstacles inShallow Water only take half the movement allowance to move into them.
Congestion
Congestion markers are placed on the map using the Scenario Editor. They cannot be removed or created by the players while the scenario is being played. Congestion markers may affect only one side in a scenario or they may affect both sides depending on the value of Congestion Side in the Parameter Data. When Congestion affects a given side, then it requires the full movement allowance of a unit from that side to enter a Congestion hex. Hexes with Congestion are also reported with the description "CONGESTION" in the Terrain Info Box.
A value that affects how long Congestion markers remain on the map is the Congestion Expiration value in the Parameter Data. If this value is 0, then Congestion markers are never removed from the map. Otherwise, for each turn that a unit of the Congestion Side is in the same hex as the Congestion marker, a number value relative to that marker is increased by one. When the number value reaches the Congestion Expiration value, then the Congestion marker is removed from the map. Congestion markers that affect both sides are never removed.
Minefields
Minefields can be placed on the map using the Scenario Editor and can also be created by Engineers while the scenario is being played. Minefields come in three strength values of 1, 2, and 3. These strength values are displayed in the Terrain Info Box. The strength value determines the level of casualties caused when
units enter the hex with minefields of strength 2 causing twice as many casualties as those of strength 1, and minefields of strength 3 causing three times as many casualties as those of strength 1. By default, a minefield blocksSupply through that hex. Minefields can be removed by units which have the Mine Clear or Demolition attribute. Mines in Shallow Water are only half as effective.
When a unit enters a minefield and suffers a minefield attack, it loses movement points equal to S / 3 of its allowance, where S is the strength of the
18

Panzer Battles User Manual
minefield equal to 1, 2, or 3. Therefore, it costs a unit 1/3 of its movement allowance to enter a strength 1 minefield and so forth.
Rail Damage
Any Deployed unit that is not Broken, Digging-In, or building a bridge can damage the rail lines in the hex that it is occupying unless there are other unitsin the same hex that are in Rail Mode. To damage rail lines, select the unit to perform the damage and invoke the Damage Rail command from the Command Menu. It costs a unit 1/3 of its Movement allowance to damage rail lines.
Light, Medium, and Heavy Bridges
There are three types of hexside bridges: Light, Medium, and Heavy.
Light Bridges represent simple foot-bridges and can only be used by infantry. Light Bridges are also used to represent Railroad Bridges to reflect their poor ability to handle vehicular traffic.
Medium Bridges represent wooden bridges and can be used by infantry and non-armored vehicles.
Heavy Bridges represent metal bridges and can be used by all units.
For more information on damaging or building Bridges, see Engineers.
Ferries
Ferries can be used to cross river and canal hexsides. They are similar to bridges but with several important differences.
• A Ferry can only be used to move a single un-Combined unit across a hexside per turn.
• It costs the entire movement allowance of the unit to perform the movement and the unit must not have used any movement points prior tothe move.
19

Panzer Battles User Manual
• The unit moving using a Ferry cannot be Disrupted or Broken and must be in Travel Mode.
A Ferry can be destroyed by any Deployed unit, not Broken, Digging-In, or building a bridge, adjacent to the Ferry using 1/3 of its movement allowance. See the Command Menu of the Main Program for the command to do this.
By holding down the right-mouse button in the Terrain Info Box, you can see the current status of a Ferry. When the Ferry is designated in all upper-case, itis capable of carrying a single unit, but when it is written in normal case, it has carried a unit already in the current turn and cannot carry any additional units until the next turn.
Fords
Fords represent shallow places that allow movement by a unit in Travel Mode across otherwise impassible rivers. When a unit crosses at a Ford, they pay an additional movement cost determined by the Ford movement Parameter Value (Unless theyare moving using a road that crosses at the Ford and thus are
paying road movement costs). Since Fords allow movement, then Supply can be traced across a Ford. Fords are permanent to the map and cannot be created or destroyed during the course of a scenario. A unit assaulting across a Ford must be in Travel Mode.
Full-Hex Ferries
A Full-Hex Ferry is one that spans a Water hex. It can be used for movement by units in Travel Mode, but requires the entire movement allowance of the unitto enter the hex containing the Ferry. The unit moves off the Ferry normally. Full-Hex Ferries cannot be damaged or destroyed, nor can they be built during a scenario.
Fixed Units
It is common in the game for certain units to begin the scenario Fixed. Depending on the game title and scenario, some units may become Fixed after the scenario starts. The purpose behind having Fixed units is to prevent unrealistic movement by those units at the start of the scenario or to force a
20
Panzer Battles User Manual
player to halt movement as per historical conditions that could occur at night. Units that are assaulted or Spotted automatically become un-Fixed. In addition, depending on the scenario, certain organizations may have Releases assigned to them that will cause their units to become un-Fixed at a certain time in the scenario. Depending on the Release, if any unit in such an organization becomes Spotted, then the Release may be automatically triggered.
Immobile Units
Depending on the Order of Battle information, certain units may be given a speed of 0. This means they cannot move in the game. Typically, these units are artillery guns without available transportation and are found in static defenses. However, even though they cannot move and do not have a Movement Point allocation, these units
can still fire. In place of the Movement Point allocation field, the Fire Ability of these guns is displayed.
Digging-In
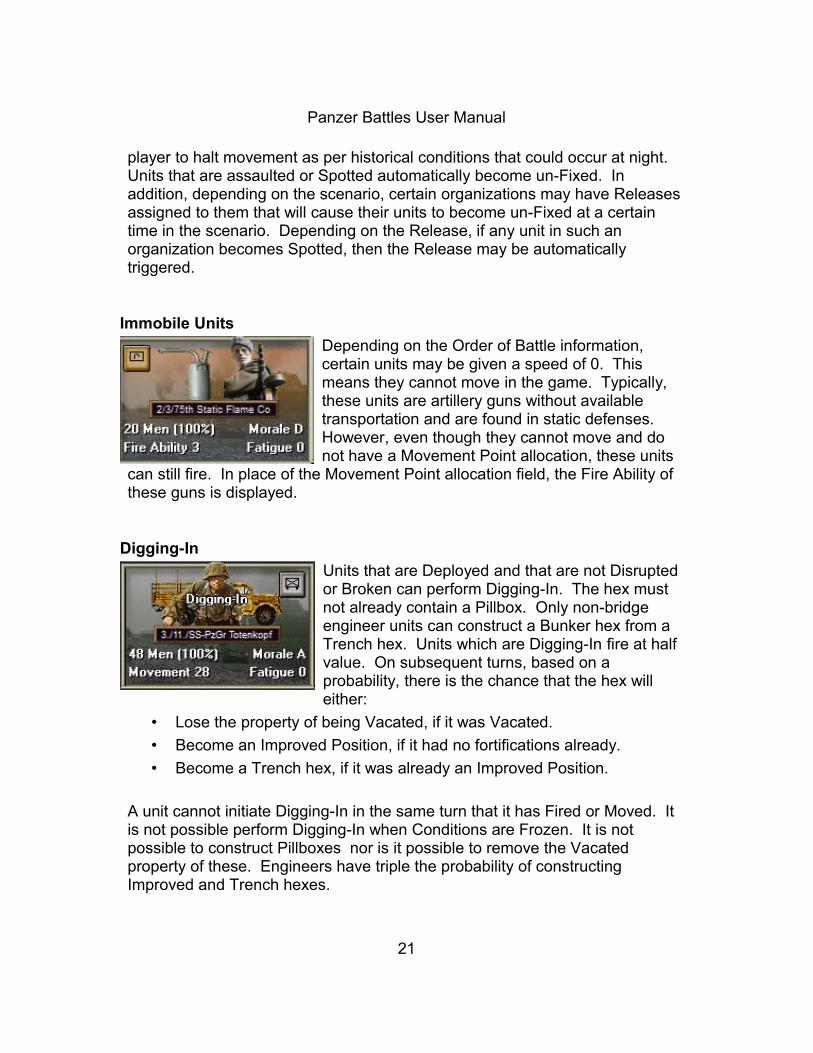
Units that are Deployed and that are not Disrupted or Broken can perform Digging-In. The hex must not already contain a Pillbox. Only non-bridge engineer units can construct a Bunker hex from a Trench hex. Units which are Digging-In fire at half value. On subsequent turns, based on a probability, there is the chance that the hex will either:
• Lose the property of being Vacated, if it was Vacated.
• Become an Improved Position, if it had no fortifications already.
• Become a Trench hex, if it was already an Improved Position.
A unit cannot initiate Digging-In in the same turn that it has Fired or Moved. It is not possible perform Digging-In when Conditions are Frozen. It is not possible to construct Pillboxes nor is it possible to remove the Vacated property of these. Engineers have triple the probability of constructing Improved and Trench hexes.
21

Panzer Battles User Manual
Fortifications are shown on the map as larger counters or Icons that are a neutral color. In the Hex Info Area, the Fort type is written in text. When forts such as trenches are written as "TRENCH", in upper case, they are in the "normal" state. When such a fort has been vacated, they will be shown in lowercase, and be of less protection to the defender.
The probability that a platoon unit will be successful in its Digging-In operation per turn is three times normal as is the case for combined platoon with three ormore units. Combined platoons or squads with two units have a two times normal probability of completing the Digging-In operation. Single platoons have the normal probability.
Supply Units (under the Explicit Supply Optional Rule) and Head-Quarter units cannot perform Digging-In.
Withdrawals
Selecting Withdrawals under the Units Menu displays the Withdrawal Dialog so that any Withdrawals associated with the current scenario can be viewed. Withdrawals in the scenario will cause the specified units to be removed from the map at the specified time. This represents historical withdrawal of the unitsduring the battle.
Combine and Breakdown
The basic unit scale is Company. However, in certain instances, there may be scenarios where Companies have been broken down into Platoon-sized units. The Combine feature may be used to combine such smaller units into single units. This feature can only be used to combine units that are both:
• Platoon units from the same Company, and
• Units which have the same Component. (that is, they must be made up ofa common unit type and thus all be Men, Guns or Vehicles).
To combine two or more Platoon size units into a single unit, select all the unitsin the Hex Info Area and press the Combine/Breakdown button on the toolbaror select the Combine/Breakdown option from the Command Menu. Note: holding down the Alt key when selecting this option will cause all possible unitsin the current hex to be Combined regardless of which units you have selected.
22

Panzer Battles User Manual
When units combine, the combined unit will have the worst unit conditions of any of the individual units. The new combined unit will have the least number of movement points of the units that madeit. Combining a Disrupted Unit with a non-Disrupted unit will result in one Disrupted unit with the average Fatigue of both units. Units that have
combined or that start the game as a combination of two or more units will show the number of combined units in square brackets after the unit name of the owning organization. For example in the figure on the left, it shows that the Combined unit consists of 3 subunits using the notation [3].
When you right-click on the unit picture of a Combined unit, then the number of subunits making up the Combined unit is also shown in square brackets after the name of the owning organization. Units that can potentially combine with other units in their organization, but have not done so have the notation [1] following the unit
name.
Combined units may be broken down into their individual parts by selecting them and then selecting the Combine/Breakdown function. This causes a single individual unit from the Combined unit to be created. Additional individual units may be broken out by reselecting the Combine/Breakdown function.
Note: combining and breaking down units is considered to be a game function that facilitates game play by reducing the number of smaller units in play at anyone time. As such, the action of combining or breaking down units does not require Movement Points and can be performed at any time by the controlling player.
Reinforcement Stacking Limits
Except for amphibious reinforcements, when reinforcements are brought on the map, they are not subject to stacking limitations. In the case of amphibiousreinforcements, stacking in the arrival hex is allowed to be twice what is normally allowed.
23

Panzer Battles User Manual
Reinforcement Protection Values
In most scenarios, reinforcements arrive on map-edge hexes. Without a special rule, it would be possible for the opposing player to block those reinforcements by occupying the reinforcement hex. To avoid this tactic, a reinforcement can be defined to have a Protection Value. This Protection Value causes all enemy units within that distance from the arrival hex to become automatically Broken and any enemy units in the arrival hex to be automatically eliminated, when the reinforcement arrives. Other reinforcements, such as Airborne Reinforcements, generally do not have a protection value and thus do not cause this effect. The specific Protection Value assigned to a given reinforcement is determined in the scenario by the designer and can vary from scenario to scenario as a result. In general, you should avoid moving within 5 hexes of a map-edge hex that the enemy will arrive on to avoid being affected by this feature.
Airborne Reinforcements
Airborne reinforcements are of two types, paradrop and glider. They arrive similarly to normal reinforcements using the Arrived Dialog of the Main Program. However, depending on the scenario, airborne reinforcements may be subject to random scatter which is determined at the time the reinforcementis brought on the map. In addition, airborne reinforcements are subject to losses when they are brought on depending on the terrain and the presence of enemy units.
• Airborne reinforcements that land in Water or Impassible hexes are eliminated.
• Airborne reinforcements that land in Marsh or Swamp hexes suffer up to 60% losses.
• Glider reinforcements that land in Rough, Village, Town, City, Industrial, Orchard, Forest, or Jungle hexes suffer up to 60% losses.
• Airborne reinforcements that land in enemy hexes suffer 80% losses and are moved to an adjacent non-enemy if possible where they may suffer additional losses due to terrain in that hex.
• Airborne reinforcements that do not suffer losses mentioned above will suffer up to 20% losses.
Airborne units that do not land in enemy hexes and thus suffer the 80% loss mentioned above, are also subject to these additional losses:
24

Panzer Battles User Manual
• Airborne losses are increased by 10% times the distance the reinforcement scatters. For example, an airborne reinforcement landing 2 hexes from its intended location will suffer an additional 20% loss.
• Airborne units that land in hexes containing Mine Fields suffer an additional 2% loss for each Mine Field factor (resulting in additional losses of 2%, 4%, or 6%).
These losses count towards the Victory Point calculation in the current scenario.
Partisan Units
Partisan units represent unconventional military forces with limited abilities. They are mainly used to harass enemy forces behind the main line, causing delay and confusion. They cannot be used to spot for indirect fire or air strikes.They are never considered Detached or suffer Low Ammo nor can they become Isolated.
Partisan units cannot be used to damage rail lines since the damage represented by hex rail damage in the game is extensive, requiring repairs beyond the scope of any one scenario. The limited damage achieved by Partisan units can easily be repaired and thus Partisan units in the game only block rail movement when they actually occupy the rail hex. Partisan units cause the same movement and bridge destruction disruption as Deception Units without having to be deployed or being subject to detection.
Infiltration Reinforcements
Infiltration reinforcements differ from normal reinforcements in that they alwaysarrive in an empty hex, either in the hex they are determined to arrive in by placement or scatter, or if possible, in a hex adjacent to that. If no valid empty hex exists for a partisan reinforcement, then it cannot arrive that turn.
Commandos and Impassible Hexsides
Certain hexsides in the game such as Cliffs are normally impassible to most units. This is shown in the Parameter Data Movement Costs as a cost of –1 MP. However, for Commando units it is possible to cross any hexside, even those that are normally impassible, at a movement cost equal to the full
25
Panzer Battles User Manual
movement allowance of the unit. This allows Commando units to move acrossand assault attack across hexsides such as Cliffs.
Naval Movement
Normally Naval units can move from Water hex to Water hex up to the limits of their movement allowance. However, there are two restrictions on such movement:
• Naval units cannot move adjacent to ground hexes. This represents the fact that the water in such cases is not deep enough for the movement.
• Naval units cannot cross hexside features in the water such as Dikes. These represent jetties in the water for harbors and other man-made features.
Dust Spotting
There are parameter data values for each side associated with the Dust Spotting rule. These values must be nonzero before Dust Spotting can occur in a scenario. Dust Spotting allows units that have moved outside of the normal visibility limits to be spotted as Unknown units based on a certain probability. Dust Spotting can only occur during Day turns (this includes Dusk and Dawn turns) and only during turns where the Conditions are Normal..
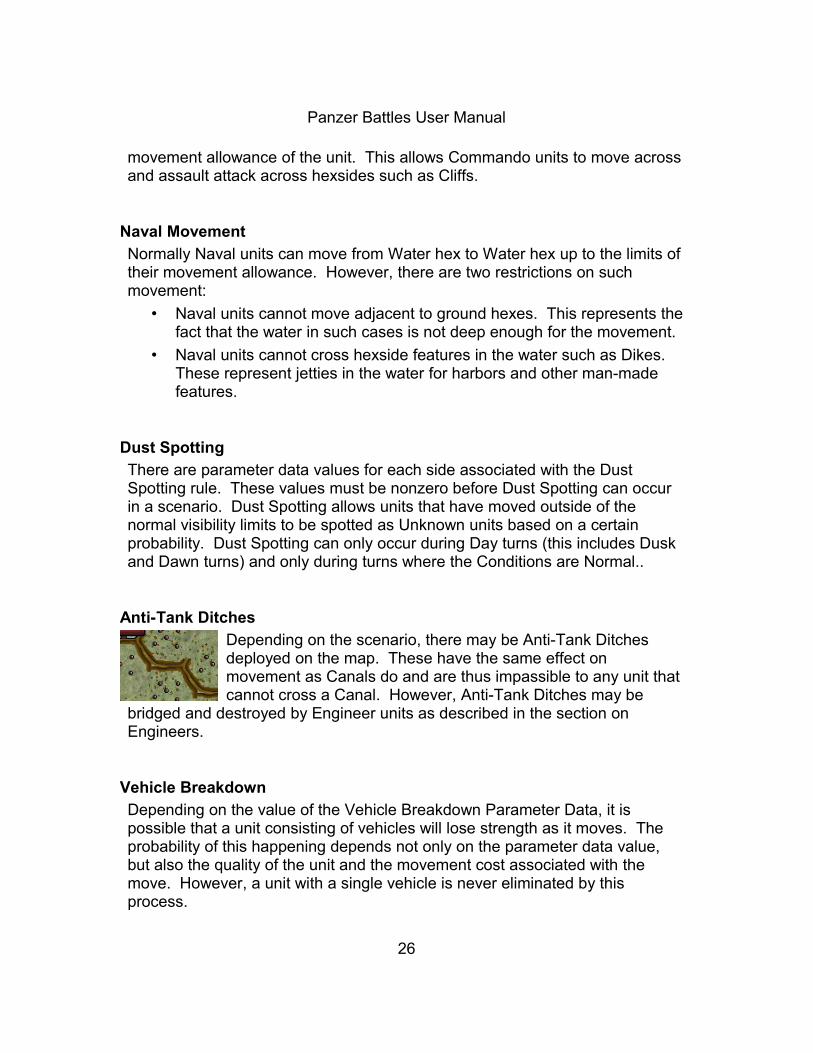
Anti-Tank Ditches
Depending on the scenario, there may be Anti-Tank Ditches deployed on the map. These have the same effect on movement as Canals do and are thus impassible to any unit that cannot cross a Canal. However, Anti-Tank Ditches may be
bridged and destroyed by Engineer units as described in the section on Engineers.
Vehicle Breakdown
Depending on the value of the Vehicle Breakdown Parameter Data, it is possible that a unit consisting of vehicles will lose strength as it moves. The probability of this happening depends not only on the parameter data value, but also the quality of the unit and the movement cost associated with the move. However, a unit with a single vehicle is never eliminated by this process.
26

Panzer Battles User Manual
Given a movement cost of C for a given unit with V vehicles, a parameter data Breakdown value of B, and a quality modifier of Q, the probability that the movement will result in a strength loss of 1 vehicle is given by:
Probability = V * C * B / (40000 * Q)
Note that this probability is scaled so that when B = 1, then a 100 vehicle unit of C Quality will on average suffer a 1 vehicle loss when moving 100 hexes via primary road. The Quality Modifier is given by:
• A Quality => Modifier = 1.2
• B Quality => Modifier = 1.1
• C Quality => Modifier = 1
• D Quality => Modifier = 0.8
• E Quality => Modifier = 0.6
• F Quality => Modifier = 0.4
When a unit is flagged as being Low Reliability in the Order of Battle, then theprobability of having a breakdown is 3 times the normal probability.
On Foot Infantry
It is possible for motorized and mechanized infantry units to be classified as "On Foot". This means that these units have left behind their transportation and are advancing on foot. While in this state, the units move as though they were normal foot infantry. At the beginning of the player turn when the units are stacked with their HQ unit,
this state is removed and the units return to normal status.
Color Coding
Movement values displayed in the Unit List are color coded according to the remaining movement points compared with the total movement allocation:
• White – Full movement allocation remains. No movement points have been used.
• Green – At least 2/3 movement allocation remains but not full allocation.
27

Panzer Battles User Manual
• Yellow – At least 1/3 movement allocation remains, but less than 2/3.
• Red – Less than 1/3 movement allocation remains.
Objectives
An objective hex contains a numerical square, colored according to the side owning it. Initial ownership of an objective hex is set at a scenario's start.
An objective hex is worth Victory Points equal to its number. To capture an objective hex, move a unit onto it. Its color will changeand its Victory Points will accrue to the capturing side. Once captured an objective hex may be left vacant and is subject to recapture an endless number of times during a scenario but only
the side owning it at a scenario's end will receive its benefit.
An objective hex worth "0" (or "?" for the enemy with Fog of War active) at a scenario's start, is an Exit Objective. This objective earns Victory Points for its side whenever a friendly unit is removed from the map at its hex. Exit Objectives are found at a map's edge. To exit a unit, move it onto an Exit Objective and
with it selected use the menu options Command and Remove From Map. The unit will permanently exit the game and the value of the Exit Objective will increase. Exit Objectives never change ownership but the presence of the enemy will deny its use.
Min Path Algorithm
When you move units by the Drag and Drop method (by selecting them, moving the mouse while holding down the left mouse button, and releasing in the destination hex), the program uses a Min Path Algorithm to determine the shortest path between the starting and destination hexes for the units you haveselected. There are a couple of issues related to this process:
• The algorithm will avoid big detours required to get to the destination hex.In this case, you may be told that there is no direct path to the destinationhex. The reason for this is to avoid problems when the algorithm determines a very round-about path to the destination hex and then proceeds to move your units along that path, when you had no intention of moving them in such an indirect direction.
28

Panzer Battles User Manual
• Unless the unit selected is a Mine Clearing unit, the algorithm will avoid known mine fields, even if these are technically on the shortest path to the destination.
A second way to use the Min Path Algorithm is with the Reachable Hex feature(described in the View Menu and Toolbar descriptions). This feature also usesthe Min Path Algorithm to determine how far the selected unit can move, but with two exceptions to the previous version:
• The algorithm will investigate all paths, no matter how devious, up to the movement limits of the selected unit.
• The algorithm will consider movement through mine field hexes since technically these may be reachable, although not desirable.
If you perform a Drag and Drop move while the Reachable Hex feature is active, then the alternative algorithm described above will be used for that movement. This can result in slightly different results than a normal Drag and Drop move.
Column Movement Orders
Column Movement Orders are issued to units from a single division for the purpose of moving by transport mode toward a designated location. To issue acolumn movement order for a division, select any hex containing a unit of the division and then right click on the destination hex while holding down the Alt key. In immediate mode, you do not select any units in the division, only a hexcontaining units of the division. When a column movement order is issued, units in continuous hexes will automatically move toward the destination hex changing into travel mode and following one another in a column.
Note, unlike other methods for movement, no unit is to be selected for a column movement order.
Units that do not have enough movement points will end up stopping and causing breaks in the columns. Also, if two or more divisions become mixed orshould there be some ambiguity about which unit within a single division should move next, a gap will appear in the column. Gaps can be corrected by using another column movement order on the trailing portion. Column movement orders can be issued one hex at a time when you wish to control the exact path taken to a destination hex without letting the A/I select the path.
29

Panzer Battles User Manual
For More Information on Movement
The following contain more information on features of the Main Program that are related to Movement:
• The Removed Units item of the Info Menu can be used to view a list of units that have been removed from the map.
• The Fixed Units item of the Highlight submenu of the View Menu can be used to highlight Fixed units on the map.
• The Moved Units item of the Highlight submenu of the View Menu can be used to highlight units on the map that have used Movement Points inthe current turn.
• The Road Stacking Limits item of the Highlight submenu of the View Menu can be used to highlight units on the map that are in stacks that exceed the limits for using Road Movement.
30

Panzer Battles User Manual
Firing
In Panzer Battles, ranged fire is an important feature. Most units can fire several hexes although with reduced effectiveness. In addition, certain Artillery units are able to perform Indirect Fire. In this case, another unit in the firing unit’s controlling organization is used to spot the target unit. Units capable of Indirect Fire areidentified as such in the unit window, seen by right clicking on the unit picture in the Hex Info Area. In
addition, Indirect Fire units are listed in the Artillery Dialog, seen when you press the Artillery Dialog button.
Other combat units (non-Indirect Fire) must be able to see the target in order toengage it. Seeing the target is based on the combined effect of Line-of-Sight and Visibility range. Basically, units cannot see through towns, woods or over hills, nor see beyond the maximum visibility for the environmental conditions.
Basic Fire Resolution
Fire against a target unit is resolved using the Combat Results calculation. The combat value used is the modified attack value of the firing unit divided by the modified defense value of the target unit. The following describes the modifiers and restrictions that apply to this calculation.
Indirect Fire Spotting
When a unit performs Indirect Fire, the target hex must be in the Line-of-Sight of a valid spotting unit from that side.
• Broken units (see Morale) cannot perform spotting for Indirect Fire.• Units that have fired or moved cannot perform spotting for indirect fire • Detached units (see Command) can spot for Indirect Fire, but if only
Detached units can see the target hex, the fire is half value.You can determine all of the units capable of spotting for an Indirect Fire unit by selecting the unit, and then using the Highlight/Indirect Fire Spotters menu
31

Panzer Battles User Manual
item from the View menu. Alternatively, after selecting the Indirect Fire unit, you can press the "W" hotkey.
Fire Mode And Fire Costs
To fire a unit, the game must be in Fire Mode by pressing the Mode button at the left side of the toolbar. To return to Move Mode, press the button again. Veteran players will find it more convenient put the game in Fire Mode temporarily by holding down the Control (Ctrl) key. Using either method you right click on the target hex to fire. Pressing the Artillery Dialog button on the toolbar is another method used for firing artillery. Refer to Main Program Help File for more information on this topic.
For most units, the cost of firing is 1/3 of the unit’s Movement Allowance. For units firing using Indirect Fire, the cost is 1/2 of the unit’s Movement Allowance.Ships pay twice the normal firing cost, but their fire value is doubled when firing. Indirect Fire can sometimes create Rubble in the target hex depending on the fire value of the firing unit and Parameter Data.
Fire Effects
When a target unit is attacked, the effects are calculated and expressed in terms of:
• Lost Strength - in Vehicles, Guns, or Men.
• Increase in Fatigue – depending on the fire effect.• Disruption - if the fire result affects the target unit, then the target unit
performs a Morale Check based on the amount of the effect. If it fails theMorale Check, it will become Disrupted. If it is already Disrupted, fails the Morale Check, and is at Maximum Fatigue, then it becomes Broken.
A unit that is Disrupted represents a unit has beenmade less combat effective because it has been exposed to very heavy fire. This represents the fact that control of the formation has been reduced,thus reducing fire effect of the unit as a whole. The men are still firing but more at the target of their choice. If the unit is composed of tanks, then many of the crew commanders have "buttoned up".
Disrupted units have 1/2 fire value.
32
Panzer Battles User Manual
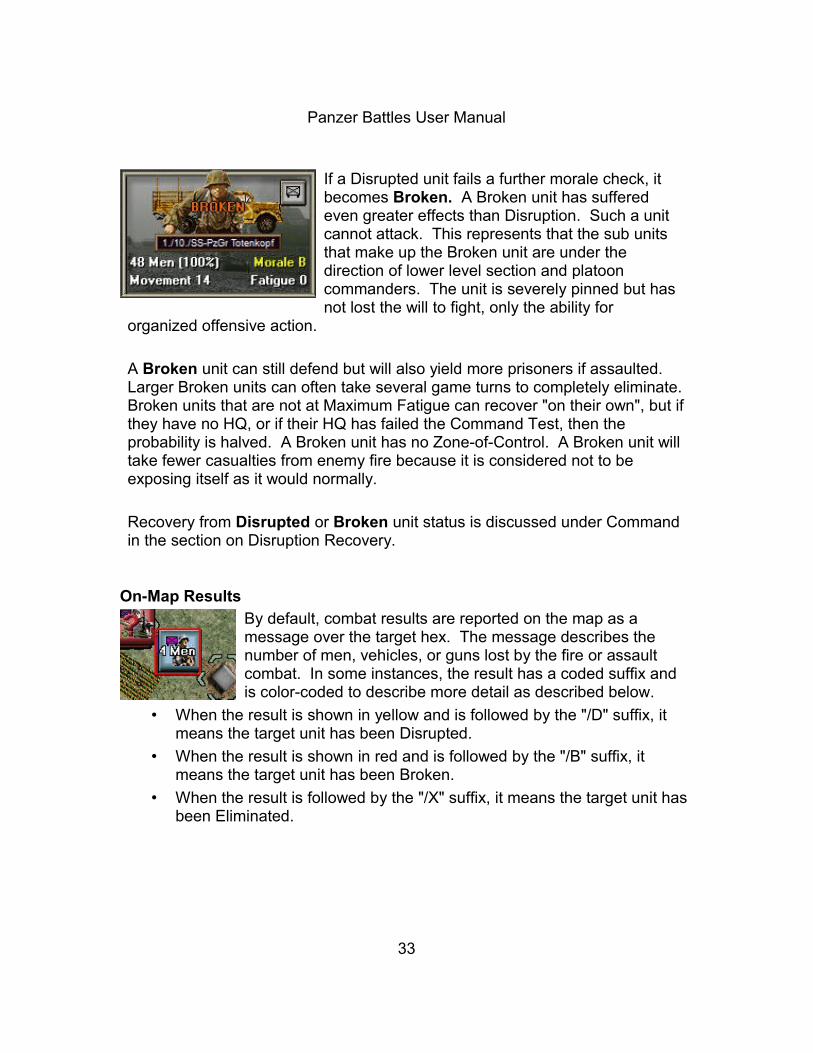
If a Disrupted unit fails a further morale check, it becomes Broken. A Broken unit has suffered even greater effects than Disruption. Such a unit cannot attack. This represents that the sub units that make up the Broken unit are under the direction of lower level section and platoon commanders. The unit is severely pinned but has not lost the will to fight, only the ability for
organized offensive action.
A Broken unit can still defend but will also yield more prisoners if assaulted. Larger Broken units can often take several game turns to completely eliminate.Broken units that are not at Maximum Fatigue can recover "on their own", but ifthey have no HQ, or if their HQ has failed the Command Test, then the probability is halved. A Broken unit has no Zone-of-Control. A Broken unit will take fewer casualties from enemy fire because it is considered not to be exposing itself as it would normally.
Recovery from Disrupted or Broken unit status is discussed under Command in the section on Disruption Recovery.
On-Map Results
By default, combat results are reported on the map as a message over the target hex. The message describes the number of men, vehicles, or guns lost by the fire or assault combat. In some instances, the result has a coded suffix and is color-coded to describe more detail as described below.
• When the result is shown in yellow and is followed by the "/D" suffix, it means the target unit has been Disrupted.
• When the result is shown in red and is followed by the "/B" suffix, it means the target unit has been Broken.
• When the result is followed by the "/X" suffix, it means the target unit has been Eliminated.
33

Panzer Battles User Manual
Understanding Basic Attack Strength
Target class - Depending on whether the target unit is a Hard Target or not, the Hard or Soft Attack value of the firing unit is used. Right Click on the Unit Picture in the Hex Info Area to see the Hard and Soft Fire factors. Some units may not be able to engage Hard targets such as tanks or Pillboxes at a range of even 1 hex.
The attack value is multiplied by the strength in vehicles or guns of the firing unit, (if the unit’s strength consists of men its strength is divided by 10, equalizing 1 Vehicle or Gun = 10 men).
Target Defense Modifiers
• Hexsides - if direct fire from the enemy unit passes through a hexside of the target hex, then the target unit benefits from the hexside modifier of that hexside (see the Parameter Data for these values).
• Base Terrain - a target unit that is Deployed benefits from the terrain modifier of the terrain in the target hex.
• Improved Positions and Trenches – Deployed units benefit from the presence of Improved Positions or Trenches in the target hex
• Bunkers and Pillboxes - non-vehicle units (and Deployed Motorized or Mechanized Infantry) that are Deployed benefit from Bunkers and Pillboxes in the target hex.
Quality Fire Modifiers
There is a Quality Fire Modifier Parameter Data value, which is by default equal to one, that applies to fire modifiers for A and B units below.
• If the Quality of the firing unit is A, then +20% times the Quality Fire Modifier value applies.
• If the Quality of the firing unit is B, then +10% times the Quality Fire Modifier value applies.
• If the Quality of the firing unit is C, then no firing modifier applies.
• If the Quality of the firing unit is D, then a –20% modifier applies.
• If the Quality of the firing unit is E, then a –40% modifier applies.
• If the Quality of the firing unit is F, then a –60% modifier applies.
34

Panzer Battles User Manual
Additional Fire Modifiers
• Unless the fire is Indirect, if the target unit is at a higher elevation than the firing unit, then the elevation modifier Parameter Data value applies.
• If the firing unit has Medium Fatigue, then a –10% modifier applies.
• If the firing unit has High Fatigue, then a –20% modifier applies.
• If the firing unit has Maximum Fatigue, then a –40% modifier applies.
• Disrupted units have 1/2 fire value. Broken units cannot fire but they can defend themselves.
• Units that are Digging-In or Low on Ammo have 1/2 fire value.
• Normally, units in Travel Mode have 1/2 fire value. However, if the unit isfiring from a hex it cannot enter except using Road Movement, then the fire is 1/4 value. Examples of this include tanks in Travel Mode in Swamp hexes and artillery deployed along a road in a Swamp hex. Unitsin Rail Mode cannot fire.
• Indirect fire against a hex not spotted by a friendly unit has 1/4 fire value (this only applies under the Indirect Fire by the Map Optional Rule).
• Target units in Travel or Rail Mode, other than Towed-Guns, have 1/2 defense value. Towed-Guns in Travel or Rail Mode have 1/4 defense value.
• Target units in Travel or Rail Mode do not benefit from any terrain effect.• When the target is hard and the firing unit is artillery or heavy artillery
firing at a range of 4 or less, then the fire value is multiplied by the Artillery Hard Target Mod Parameter Data value.
Direct Fire Range Effect
Direct fire is modified by the range from the firing unit to the target in the following ways:
• At range 0 (AA fire), fire values are doubled.
• At range 1, fire values are nominal.
• At ranges greater than 1 is modified by the Range Effect Parameter Data Value. If the range is N and the Range Effect is R, then the fire value is divided by 1 + (N-1) * (R-1).
For example, if the Range Effect value is 1.5, then the fire value of direct fire at a range of 2 hexes is divided by 1.5. At 3 hexes, it is divided by 2, and so on.
35

Panzer Battles User Manual
Indirect Fire Modifier
A modifier applies when a unit fires Indirect Fire during the opposing turn.This modifier depends on the side of the firing unit and its value is determined by the Indirect Mod Parameter Data values. For example, if the Allied Indirect Mod value is 50%, then whenever a Russian artillery unit fires Indirect Fire during the Axis turn, the fire value of that unit is only 50% of its normal value. Indirect Fire during the unit’s turn is not affected. If the Indirect Mod value for aside is 100%, then there is no change to the fire value.
Infantry Fire Effectiveness
Infantry units have an effective strength that is used when firing that is differentfrom their actual strength. The justification is that when infantry units take casualties, the remaining infantrymen will use the heavy weapons in the unit compensating for the loss in men. Parameter Data (see the Parameter Data Dialog in the Main Program ) determines the "breakpoint" used in this calculation. For example, suppose that Infantry Effectiveness was given as 70% men equals 90% effectiveness. Then for Infantry units between 70% and 100% in strength, effectiveness is calculated between 90% and 100% using linear interpolation. Likewise, for Infantry units between 0% and 70% in strength, effectiveness is calculated between 0% and 90% using linear interpolation. In general, this will result in higher fire effectiveness associated with the Infantry unit.
Armor Effectiveness
Due to the nature of Armored Warfare, when anti-tank guns of different calibers direct fire against armored targets of different strength, special consideration has been given to the game’s combat results. When direct fire occurs against an armored target, these penetration considerations are appliedto the target in what is termed a non-linear effect. This non-linear effect is described further below.
There are two cases for this Armored Effectiveness special rule, each with a different calculation of the fire modifier. Case 1 is where the Firing Unit’s hard attack value is smaller than the defense of the target. This is the Small Gun vs.Strong Target case. Case 2 is where the Firing Unit’s hard attack value is larger than the defense of the target, or in simplified terms represents a Big Gun vs. Weak Target.
36

Panzer Battles User Manual
The fire modifier for the two cases are shown below where the hard attack value is H and an armored unit defense value is D.
• Case 1. If H < D, then the modifier is H / D.
• Case 2. If H > D, then the modifier is 1 / Square Root (H / D).
For example, suppose a unit with a hard attack value of 4 fires on an armored unit with a defense value of 8. Then an armor effectiveness modifier of 1/2 is applied to the fire value. Also, if a unit with a hard attack value of 8 fires on an armored unit with a defense value of 2, then an armor effectiveness modifier of1/SquareRoot(4) = 1/2 is applied to the fire value. In the first example, the modifier represents the effect of non-penetration by the firing unit. In the second example, the modifier represents the fact that once penetration is achieved, then fire values do not increase linearly. That is to say, if you are firing a large caliber anti-tank gun at a weaker target and you get a hit then youdon’t get two kills. This would be like a big AT gun killing two halftracks with a single shot.
When the Armored Effectiveness modifier is applied, the ratio H/D as a percentage is reported in the Fire Report Dialog in brackets as (arms X%).
Fortifications
Fortifications consist of Improved Positions, Trenches, Bunkers, and Pillboxes. Each of these has an effect on fire against units given in terms of a percentagemodifier. These values are found in the Parameter Data and are also shown inthe Terrain Information Box of the Hex Info Area. Improved Positions and Trenches benefit all types of units and do so only with the previously mentioned modifier but do not provide any added Defense value.
Bunkers and Pillboxes provide an increase in the Defense value as well as the fire percentage modifier. Furthermore, units in Bunkers and Pillboxes are considered Hard Targets and thus are only affected by the Hard Attack value of the firing units. In order to receive the benefits of a Bunker or Pillbox, a unit must not consist of Vehicles (however Deployed motorized/mechanized infantry do benefit) and the unit must be Deployed.
The defensive benefits of a fortification are cut in half whenever:
• A Fortification is vacated.
37

Panzer Battles User Manual
• When it is occupied by the opposite side, or
• When the defenders lose an assault, but are unable to retreat.Full-strength Fortifications have the fort type displayed in the Terrain Info Box in ALL CAPS (example: TRENCH). Abandoned forts, or forts occupied by the opposite side are listed in the Terrain Info Box in upper and lower case (example Trench). Improved Positions and Trenches that have been abandoned, can be restored to the existing full strength status by a unit successfully "Digging-In" again. Abandoned Bunkers and Pillboxes can never be restored to full strength once abandoned or captured.
The following shows the on-map counters used for each Fortification type and summarizes the effects of each in the game:
Improved Positions (IP) - These are the least protective of all the fortifications in the game but the fastest to be created. They benefit all units (men, guns, and vehicles) and represent hastily prepared breastworks and foxholes using material readily at hand such as mounds of dirt, shell holes, old vehicles and enhancing whatever the
unit may find in that particular location. Part of their protection is derived simply from camouflaging the positions.
Trenches - Trenches are the next step up from IP’s as Fortifications go. Like IP’s they benefit all units (men, gun, and vehicles) and offer the best protection that units can create during play. At this stage in a fortifications life cycle, the units are now digging downward much deeper than before and throwing up
higher dirt embankments. Therefore the fortification begins to take on more defense benefits and rely less upon camouflaging.
Bunkers - Bunkers are the next step up in Fortification development. Bunkers can be part of a scenario or may be created by Digging-In during a scenario from Trenches by non-Bridge Engineers. What Bunkers offer over Trenches is generally timber protection from Direct Fire and overhead protection from
Indirect or Artillery Fire. As such, Bunkers only protect non-vehicular units andare treated as Hard Targets in terms of their defense.
Pillboxes - Pillboxes are fortifications that cannot be created during game play. They also only benefit non-vehicular units and represent a much more permanent defense complex made of
38

Panzer Battles User Manual
concrete and steel. Therefore units protected by these fortifications are considered Hard Targets.
Note: Fortifications are by default spotted by the owning side but must be visually spotted by the enemy before they are seen.
Special Disruption Rules
As a result of being fired upon, the target unit may have to take a morale checkto determine its Disruption and Broken status as described in the section on Combat Results. There are some modifiers to this effect:
• When an indirect fire unit fires on a Hard Target, either hard vehicles or units deployed in a hard fortification, then the disruption effect is twice that of normal. For hard vehicles, this is the effect of causing them to "button up" and thus have reduced effectiveness. For hard fortifications, this is a result of the "pounding" that results on the fortifications and the disruptive effect this has on the occupants.
• When an indirect fire unit fires at a Headquarters unit, then the disruption effect is twice of normal. This is the effect of the indirect fire breaking telephone lines, radio antennas, and other means of communication.
• When towed anti-tank guns or towed heavy AA guns fire on a hard vehicle, the disruption effect is twice that of normal. This effect is based on the fact that they guns are deployed in fixed locations and as a result have increased accuracy as opposed to mobile guns which are firing on the move.
Concealment
Based on the terrain in a hex, it is possible for a unit in that hex to be concealed from the enemy. When concealed, the unit is not visible to the enemy even when the enemy has a line-of-sight to the hex. Any action by the unit such as movement or firing will reveal the unit however.
The Parameter Data value for height associated with the terrain in the hex will determine its ability to provide concealment.
• Terrain with a height of 1 meter will provide concealment to infantry (dismounted if carried by vehicles) and guns. Typically this is the case for terrain like grass or single buildings. Note that terrain with a height of
39
Panzer Battles User Manual
1 does not block line-of-sight and so the height value is only to determinethe concealment properties of the terrain and has no other purpose.
• Terrain with a height of 2 meters or more will provide concealment to all units. In addition, such terrain can possibly block line-of-sight.
To become concealed a unit must begin in a hex providing concealment or move to such a hex while not in the line-of-sight of the enemy. Once a unit is revealed, it cannot become concealed again unless it moves or becomes out of the line-of-sight of the enemy.
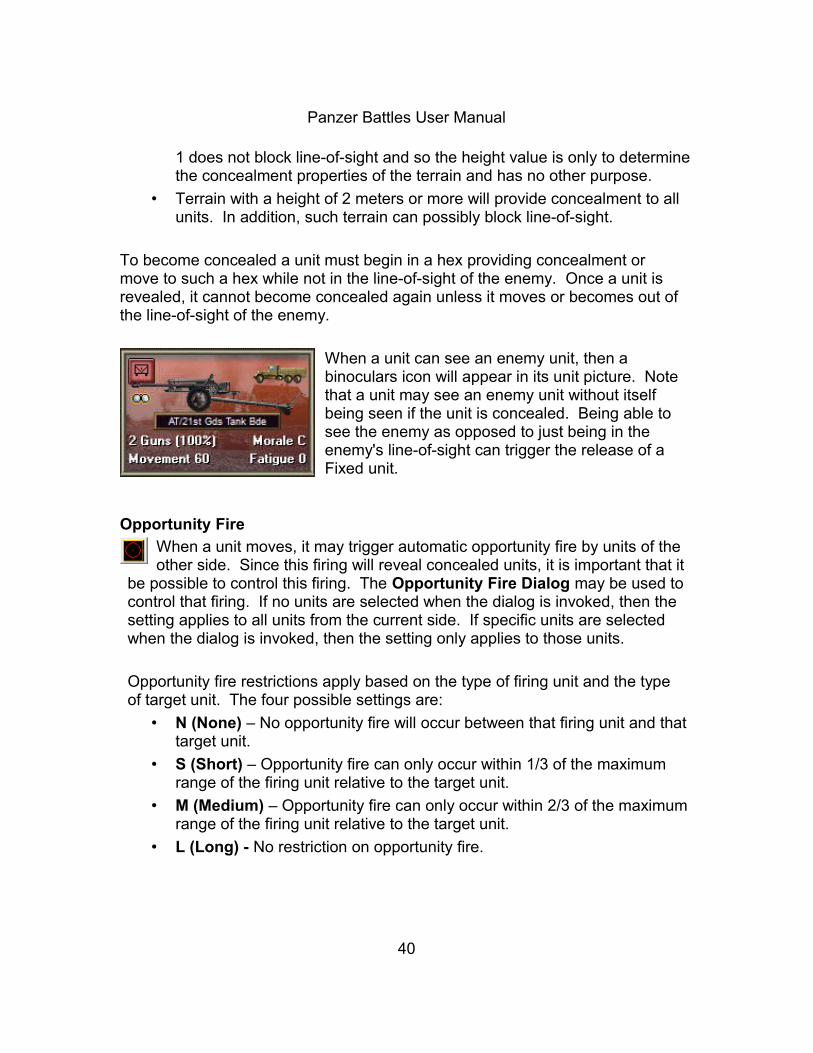
When a unit can see an enemy unit, then a binoculars icon will appear in its unit picture. Note that a unit may see an enemy unit without itself being seen if the unit is concealed. Being able to see the enemy as opposed to just being in the enemy's line-of-sight can trigger the release of a Fixed unit.
Opportunity Fire
When a unit moves, it may trigger automatic opportunity fire by units of theother side. Since this firing will reveal concealed units, it is important that it
be possible to control this firing. The Opportunity Fire Dialog may be used tocontrol that firing. If no units are selected when the dialog is invoked, then the setting applies to all units from the current side. If specific units are selected when the dialog is invoked, then the setting only applies to those units.
Opportunity fire restrictions apply based on the type of firing unit and the type of target unit. The four possible settings are:
• N (None) – No opportunity fire will occur between that firing unit and that target unit.
• S (Short) – Opportunity fire can only occur within 1/3 of the maximum range of the firing unit relative to the target unit.
• M (Medium) – Opportunity fire can only occur within 2/3 of the maximum range of the firing unit relative to the target unit.
• L (Long) - No restriction on opportunity fire.
40

Panzer Battles User Manual
Counterbattery Spotting
When the Optional Rule for Counterbattery Fire is enabled, there is the chancethat when an unspotted artillery unit fires, it will become spotted. By default, the probability of this occurring is:Counterbattery Spotting Probability = Normalized Strength / Range To Enemy
Where Range To Enemy is the range of the artillery unit to the nearest enemy unit and Normalized Strength is given by the equation:
Normalized Strength = Men-Equivalent Strength / Max Road Stacking ValueThis probability applies up to ranges of 40 hexes. The Parameter Data Value for Counterbattery is used per side to modify this default probability.
Unit Facing
In general, unit facing does not have an effect on the game. However, certain units may be specifiedin the Scenario Editor as having a specific Facing (see the Command Menu of the Scenario Editor). When this is done, the firing of the unit is restricted to the direction the unit is facing in plus the two adjacent directions. For example, a unit having a
facing of Up Right can fire at targets that are in the direction Up Right from the firing unit, plus targets in the Up direction and Down Right direction. In addition, a unit with a specific Facing will only have an Assault value when assaulted through a facing hexside..
Auto Multi-Fire
Often when you are firing at a target, you know that you are going to expend the full fire capability of the firing unit against that target. Having to repeat target selection and firing each time manually can be tedious. The Auto Multi-Fire feature is intended to facilitate this situation by allowing you to fire as many times as possible against the target unit. To perform this fire mode, simply hold down the Alt key while right clicking on the target hex. If you are toggling Fire Mode by holding down the Ctrl key, then hold both the Ctrl and Alt key down while right clicking. The standard fire sequence will be repeated, including any triggered Opportunity Fire until your firing unit is unable to fire on the target.
41

Panzer Battles User Manual
Hex Fire Limitation
To avoid a tactic where players move units into a single hex, fire twice, and then move out, over and over with different units, there is a limitation on the total number of firing that can originate from a single hex. The Hex Fire Limitation rule says that for a stacking limit of X, at most 3 * X firings, measured in men equivalent strength, can originate from any one hex in a single turn.
For example, if the stacking limit was 1600. Then one stack of 1600 men could fire twice from a single hex, but if they were to leave and another stack of1600 men enters the hex in that same turn, they could only fire once before theHex Fire Limitation applied.
Siege Guns
Siege Guns represent very large caliber guns that are designed to be used to reduce fortifications. They are similar to Heavy Artillery, but with some differences:
• Siege Guns are only allowed to fire once per turn. They cannot use Opportunity Fire or fire during the Defensive Fire Phase.
• Siege Guns when fired against Pillboxes have their nominal fire value multiplied by 50.
• Siege Guns require their full movement allowance to change into or out of Travel Mode and must always be in Travel Mode to move.
• When the optional Setting Up rule is in effect, Siege Guns have half the normal probability of setting up per turn.
For More Information on Firing
The following contain more information on features of the Main Program that are related to Firing:
• The Firing Range item of the Range submenu of the View Menu can be used to view all potential targets of the selected unit.
• The Fired/Fought item of the Highlight submenu of the View Menu can be used to highlight units that have fired or assaulted in the current turn.
• The Continuous Action of the Settings Menu can be used to avoid having to click on each report dialog associated with firing and assaulting.
42

Panzer Battles User Manual
For a more detailed explanation of common combat results calculation refer to Combat Results section.
43
Panzer Battles User Manual
Assaulting
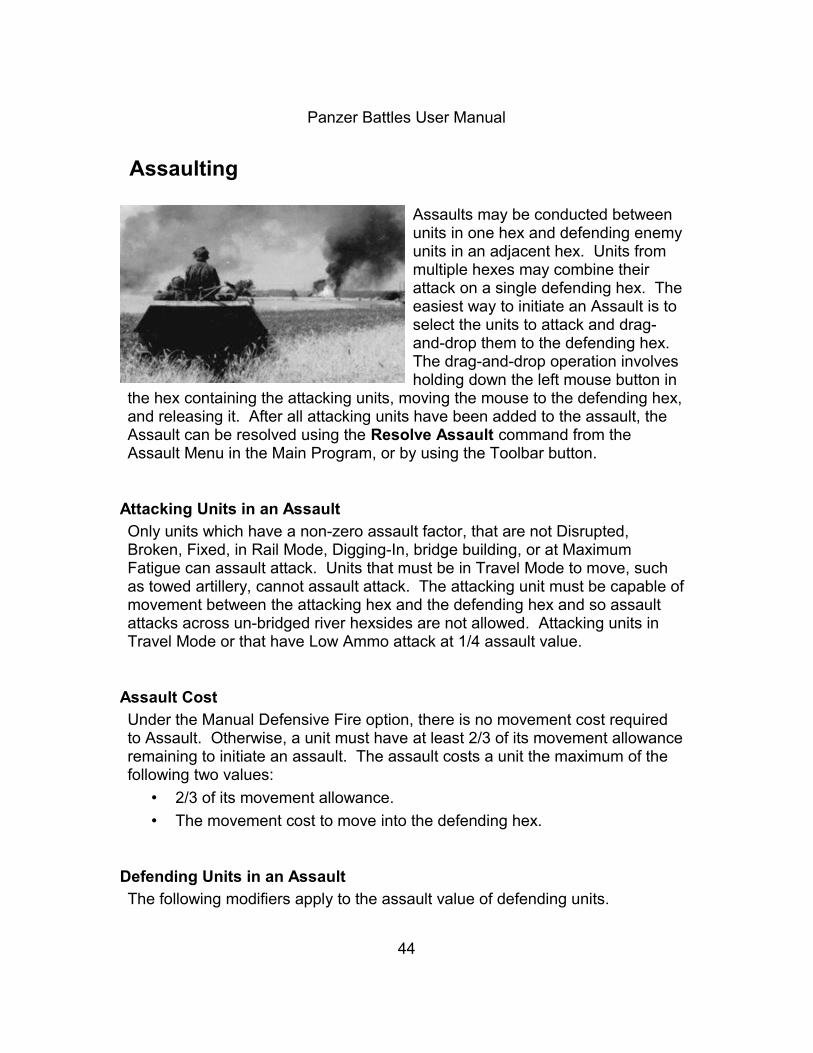
Assaults may be conducted between units in one hex and defending enemyunits in an adjacent hex. Units from multiple hexes may combine their attack on a single defending hex. Theeasiest way to initiate an Assault is to select the units to attack and drag-and-drop them to the defending hex. The drag-and-drop operation involves holding down the left mouse button in
the hex containing the attacking units, moving the mouse to the defending hex,and releasing it. After all attacking units have been added to the assault, the Assault can be resolved using the Resolve Assault command from the Assault Menu in the Main Program, or by using the Toolbar button.
Attacking Units in an Assault
Only units which have a non-zero assault factor, that are not Disrupted, Broken, Fixed, in Rail Mode, Digging-In, bridge building, or at Maximum Fatigue can assault attack. Units that must be in Travel Mode to move, such as towed artillery, cannot assault attack. The attacking unit must be capable ofmovement between the attacking hex and the defending hex and so assault attacks across un-bridged river hexsides are not allowed. Attacking units in Travel Mode or that have Low Ammo attack at 1/4 assault value.
Assault Cost
Under the Manual Defensive Fire option, there is no movement cost required to Assault. Otherwise, a unit must have at least 2/3 of its movement allowanceremaining to initiate an assault. The assault costs a unit the maximum of the following two values:
• 2/3 of its movement allowance.
• The movement cost to move into the defending hex.
Defending Units in an Assault
The following modifiers apply to the assault value of defending units.
44

Panzer Battles User Manual
• Units that are Disrupted, have Low Ammo, or are Digging-In defend at 1/2 assault value.
• Units that are in Travel or Rail Mode defend at 1/4 assault value.
• Engineer units that are building or maintaining a bridge defend at 1/2 assault value.
• Units that are laying or clearing mines defend at ½ assault value.
• Units that are Broken defend at 1/4 assault value.
• Units that have a specific Facing have an assault value of 0 when all of the attacking units are attacking through the rear facing hexsides.
On-Map Results
Under the default On Map Results setting, assault results are displayed on the map over the defending hex. These results are shown as two sets separated by a slash (/). The first set of losses are those of the attacker while the second set is those of the defender.
Movement Effects on Assault
To assault across a bridge or into normally prohibited terrain along a road, a unit must be in Travel Mode. For example, a unit needs to be in Travel Mode to assault across a bridge and a unit made up of tanks would need to be in Travel Mode to assault across a bridge or along a road in a Marsh or Swamp hex.
Terrain Modifiers in an Assault
• The maximum hexside modifier of all hexsides between attacking units and the defending units, is used to modify the attackers assault value.
• If any of the attacking units consist of vehicles, then the terrain modifier ofthe defending hex is applied to the attackers assault value. Note: this modifier applies to motorized and mechanized infantry when they are in Travel Mode, but not when they are Deployed.
Unit Modifiers
Each attacking and defending unit has a modifier calculated as the sum of the Quality and Fatigue modifiers. The Quality modifier is:
45

Panzer Battles User Manual
• +20% for Quality A
• +10% for Quality B
• -20% for Quality D
• -40% for Quality E
• -60% for Quality F.The Fatigue modifier is
• -10% for Medium Fatigue
• -20% for High Fatigue
• -40% for Maximum Fatigue.For the attackers, the lowest unit modifier of all the attackers is applied to the total attacking assault value. For the defenders, the highest unit modifier of all the defenders is applied to the total defending assault value.
Example: suppose that the defenders consist of an A Quality unit at Medium Fatigue and a C Quality unit at High Fatigue. The unit modifiers are 10% (equal to 20% - 10%) for the A unit and -20% (equal to 0% - 20%) for the C unit. The highest unit modifier is 10% and this is used for the defenders.
Suppose that the attackers consist of the same type of units, an A Quality unit at Medium Fatigue and a C Quality unit at No Fatigue. Again the unit modifiersare 10% and –20%. The lowest unit modifier is –20% and this is used for the attackers.
Combined Arms Penalty
When vehicles assault attack into non-Clear hexes, they may suffer from a lackof infantry support. If there is at least as much attacking supporting infantry as there is defending infantry, then no Combined Arms Penalty occurs. For attacking infantry to be considered supporting, it must be stacked with attacking vehicles and only that portion within 10 times the number of vehicles is considered. Otherwise, for each attacking hex, the number of infantry and the number of vehicles times 10 is compared. If the number of infantry exceeds this adjusted number of vehicles, then no Combined Arms Penalty occurs. Otherwise, for every 10 defending infantry, or fraction of 10, in excess of the attacking infantry, the Combined Arms Penalty is applied to the excess number of vehicles by having them attack at half strength.
46

Panzer Battles User Manual
Example 1: suppose that 14 vehicles supported by 100 infantry attack a hex containing 120 defending infantry. Since there is 20 more defending infantry than attacking, then 2 attacking vehicles suffer the Combined Arms Penalty and thus attack at half strength.
Example 2: suppose that 10 vehicles supported by 800 infantry attack a hex containing 200 defending infantry. The attack only requires that 100 infantry be present to support the 10 attacking vehicles, and so no Combined Arms Penalty is applied. This would be the case regardless of how many defending infantry there were. However, the excess number of infantry in this attacking hex will provide no benefit to other attacking hexes if there were any as the next example shows.
Example 3: suppose that 10 vehicles supported by 800 infantry attack from one hex while 20 vehicles with no infantry support attack from another hex against a defending hex containing 200 infantry. In the first hex, only 100 infantry out of the 800 is considered supporting. Therefore, there is 100 more defending infantry than there is attacking supporting infantry. Thus10 vehicles in the second attacking hex suffer the Combined Arms penalty and as a result attack at half strength.
Demolition Units
Demolition Units can be used in attacks on Bunkers and Pillboxes and result ina benefit to the attackers. When Demolition Units participate in an assault attack, the defense value bonus that the defending units would receive from Bunkers and Pillboxes is cut in half for that assault. All Demolition Units that participate in the assault are reduced in strength automatically. The reduction in strength is:
32 / assault-valuewhere ‘assault-value’ is the assault value of the Demolition Unit.
Combined Organization Penalty
When units from differing divisional-level organizations combine in an assault attack, a modifier of –20% is applied to the attacking forces. While the penalty applies when corps-level forces from different corps combine in an assault attack, it does not apply when corps-level forces combine with forces from a division within that corps.
47

Panzer Battles User Manual
Hedge Row Rules
Special firing and assault rules apply to the Hedge Row terrain hexside.• Vehicles crossing Hedge Row become Vulnerable and have half defense
value.• Vehicles assaulting across Hedge Row have half assault and defense
and become Vulnerable if successful.
Assault Resolution
To resolve the assault, the total assault value and the average defense value of the attacking units, as well as the total assault value and the average defense value of the defending units, are calculated with the modifiers mentioned applied to the assault values. Total assault values are calculated using the individual assault values of each unit times its strength, with vehicle and gun units having their strength value multiplied by 10. Average defense values are calculated by taking a weighted average of the defense values of the individual units based on their relative strength. Then two Combat Results are applied: one using the assault value of the attackers against the defense value of the defenders, and the other using the assault value of the defenders against the defense value of the attackers. The Low and High Combat Values used for these Combat Results is determined by Parameter Data (see the Parameter Data Dialog in the Main Program).
Attackers Disruption Effects
The disruptive effect of losses on the attackers is modified according to the following effects:
• Assault losses are doubled to determine Disruption of the attacker.
• Assaults conducted at night have a further doubling effect on losses to determine Disruption of the attacker.
• If the terrain modifier of the defending hex is M, then the assault losses ofthe attacker are scaled by 100 / (100 + M) to determine Disruption of the attacker.
Example: if the attackers are assaulting at night into a Village hex with Terrain Modifier of –20% and suffer losses of 10 men, then for the purpose of determining Disruption of the attackers,
• The value of 10 would be doubled to get 20.
• Because of night, the value would be doubled again to get 40.
48

Panzer Battles User Manual
• Because of the terrain, the value would be scaled by 100 / (100 – 20) resulting in a value of 50.
The value of 50 would be used to determine the Disruption of the attackers.
Defender Retreats
After the combat results have been calculated, if all the defenders have been Disrupted or Broken, but there are still un-Disrupted, un-Broken attackers, the defenders are forced to retreat. There are restrictions on the directions that arevalid for retreats:
• Units cannot retreat into the Zone-of-Control of an enemy unit unless the hex is already occupied by a friendly unit.
• Units cannot retreat into hexes if the movement is not otherwise valid (i.e.across a river) .
• Units cannot retreat into Mine Fields.If units are forced to retreat by the results of the assault and have no valid hex they can retreat into, then they suffer an additional 50% loss, reported as "captured" men.
Fanatical Nations
In certain games, one or more nations may be specified as being Fanatical. Units of Fanatical nations have two exceptions to the Assault rules. First, Fanatical units do not surrender when assaulted and thus do not suffer the additional losses units that could not retreat normally suffer. Second, Fanaticalunits do not retreat from Bunker and Pillbox hexes and when they lose as a result of being assaulted, remain in the hex with no additional losses.
Special Retreat Rule
Normally, units which must be in Travel Mode to move cannot retreat as a result of combat and are automatically eliminated if they are forced to retreat. There is one exception to this rule:
• Towed Anti-Tank guns (that are not immobile) suffer 50% losses to their strength after the assault is resolved, but are allowed to retreat and automatically enter Travel Mode.
49
Panzer Battles User Manual
For More Information on Assault
The following contain more information on features of the Main Program that are related to Assaulting:
• The Fired/Fought item of the Highlight submenu of the View Menu can be used to highlight units that have fired or assaulted in the current turn.
For a more detailed explanation of common combat results calculation refer to Combat Results section.
50

Panzer Battles User Manual
Engineers
Engineers are used in the game for specialized functions. You can quickly identify any Engineer units on the map by using the Highlight function of the View Menu in the Scenario Editor or Main Program. Engineer counters can also be identified by the schematic icon .
Engineer Functions
All Engineer units except for Bridgelayers (see below) are capable of:
• Improving the ability to Dig-In
• Bridge Damage and Anti-Tank Ditch Destruction
• Ferrying units across Rivers and Canals
• Mine Laying
• Clearing RubbleWhile some Engineer units are also capable of:
• Mine Clearing
• Bridge BuildingSome units other than Engineer units are also capable of clearing minefields. To determine this, right click on the unit picture in the Hex Info Area in the Scenario Editor or Main Program and look for the words Mine Clear. Engineerunits capable of building bridges will have the words Bridge Eng in this display.
In addition, Commando units are able to damage bridges and perform anti-tankditch destruction.
Bridgelayers
Bridgelayers are specific units with the following attributes:
• They are Engineer units.
• They are capable of building bridges (Bridge Eng).
• They are Tracked units.
51

Panzer Battles User Manual
Bridgelayer units are not capable of the other functions that Engineer units have and are restricted to the bridge building capability.
Demolition Units
Demolition Units are specialized units that are identified when you right-click on their unit picture. Demolition Units can be used to clear Minefields and Obstacles as a normal Engineer Unit, but doing so will reduce the strength of the Demolition Unit. When a Demolition Unit is used to clear a Minefield or Obstacle hex, then its strength is reduced by:
32 / assault-valuewhere ‘assault-value’ is the assault value of the unit.
Bridge Damage
Any Engineer unit adjacent to a bridge may attempt to damage it. To be eligible for bridge damage, the Engineer unit must not be Disrupted or Broken, cannot be in Travel or Rail Mode, cannot be Digging-In, and cannot move or fire in the same turn. To perform the damage, select the Engineer unit and invoke the Damage Bridge command from the Engineer Menu in the Main Program. The Bridge Damage Dialog will be displayed so that the appropriate hexside to damage can be selected. Note: you can damage any bridge over a stream or river hexside, but damaging a bridge over a stream hexside will not prevent subsequent movement across that hexside, only make it cost more.
A damaged bridge hexside will appear with an orange and yellowexplosion splash around the bridge graphic as shown in the illustration.
Damaging a bridge is determined like combat resolution. The assault value of the Engineer unit is used to "attack" the bridge. The defense value of the bridge is determined by Parameter Data (see the Parameter Data Dialog in theMain Program). The combat result is treated as though the bridge were a vehicle or gun. That is, the combat result is converted into an equivalent valueby dividing by 10. The resulting combat result must be non-zero for the bridge to be damaged.
52

Panzer Battles User Manual
Clearing Minefields
To use an Engineer or mine clearing unit to clear aminefield, simply move the unit into the hex containing the minefield. It costs Engineers and mine clearing units 1/3 their movement allowance to enter a minefield hex. Starting with the next turn, the unit will automatically reduce the minefieldin strength until the minefield is removed. To be eligible for mine clearing, a mine clearing unit must
not be Disrupted or Broken, cannot be in Travel or Rail Mode, and cannot be Digging-In. Units that are clearing mines cannot fire or assault attack. As long as the Engineer or mine clearing unit stays in the minefield, at the start of the next turn the unit is considered to have cleared lanes at that point and other units can safely enter the minefield in Travel Mode without suffering a minefieldattack. To stop or restart mine clearing operations, use the Clear Mines or Rubble command from the Engineer Menu in the Main Program .
Laying Minefields
To use an Engineer unit to lay a minefield, select the Engineer unit and use the Laying Mines command of the Engineer Menu in the Main Program. Starting with the next turn and continuing in each subsequent turn, a test is performed to see if the mine laying operation has succeeded. The hex must not already contain minefields of any strength. When the test
succeeds, a minefield of strength 1 is created in the hex. To be eligible for mine laying, a unit must not be Disrupted or Broken, cannot be in Travel or RailMode, and cannot be Digging-In. It is not possible to initiate Laying Mines in the same turn that a unit has moved or fired. Units that are laying mines cannot fire or assault attack. It is not possible perform Laying Mines when Conditions are Frozen. The probability that the minefield will be created in the hex based on a single Engineer unit is based on the Mine Prob Parameter Data value. However, when an Engineer unit has less than 100 men, the probability is reduced proportionally.
Bridge Building
Bridges may be built across river, stream, gully, canal, and anti-tank hexsides. Only Engineer units identified as a Bridge Eng unit in the display when you
53

Panzer Battles User Manual
right click on the unit picture can build bridges. It costs non-Bridgelayer Engineer units their full movement allowance to initiate building a bridge. Thusthey may not move or fire in the same turn they initiate bridge building. For Bridgelayer units, it costs 1/3 of their movement allowance to initiate bridge building. The Engineer unit must not be Disrupted or Broken, cannot be in Travel or Rail Mode, and cannot be Digging-In.
To initiate the bridge construction, select the Engineer unit and invoke the Bridge Operations command from the Engineer Menu in the Main Program. The Bridge Build Dialog will be displayedso that the appropriate hexside to build the bridge on can be selected. While the Engineer unit is in the process of building the bridge, the words Bridge Ops will appear over the unit picture. The
time required to complete the bridge is variable and depends on certain Parameter Data values (see the Parameter Data Dialog in the Main Program). The Allied and Axis Bridge Values in the Parameter Data determine the percentage chance that bridge operations will be completed in any given turn.
The probability that an engineer bridge will be completed in any given turn is modified by the quality of the engineer unit according to the following:
• Quality A => Completion probability is 120% of normal.
• Quality B => Completion probability is 110% of normal.
• Quality C => Completion probability is normal.
• Quality D => Completion probability is 75% of normal.
• Quality E => Completion probability is 50% of normal.
• Quality F => Completion probability is 25% of normal.
When an Engineer unit has less than 100 men, the probability of completing the bridge is reduced proportionally. In addition, an engineer platoon will have a probability of bridge completion 1/3 that of an engineer company. Otherwise,having more than one Engineer unit constructing a bridge will increase the chances of completion.
54

Panzer Battles User Manual
Once the bridge is completed, the words Has Bridge will appear over the unit picture of the Engineer unit. If you will want the Engineer unit to cross its own bridge, you must first toggle the Engineer unit to Travel Mode. If the opposite side of the bridge is held by an enemy unit (i.e. the Bridge was made under combat conditions) your units must be in Travel Mode in order to Assault
across it.
Bridge Dismantling
As long as the Engineer unit is flagged with Has Bridge, it is deemed to be maintaining that bridge and it cannot move away without first dismantling it or abandoning it (see below). To dismantle the bridge, select the Engineer unit and invoke the Bridge Operations command again. The length of time required to dismantle the bridge is based on the Allied and Axis Bridge Values found in the Parameter Data. Therefore the Bridge may possibly be dismantled at the start of the next turn or it could take longer. If an Engineer unit that has constructed a bridge is eliminated, then the bridge is considered unusable and removed from the map.
Pontoon Bridges
In certain scenarios, it is possible for Bridge Engineers to build a Pontoon Bridge over a Water hex. For this to be possible, the side of the engineer musthave a non-zero Pontoon Bridge value in the Parameter Data. If this is the case, then a Bridge Engineer can build a Pontoon Bridge from one ground hex over a Water hex to another ground hex. A Pontoon Bridge cannot be built over an existing Damaged Full-Hex Bridge however.
The process of initiating the building or dismantling of a Pontoon Bridge is the same as for a normal bridge over a river or stream. However, after the bridge operation is initiated, the number of turns specified by the Pontoon Bridge Parameter Data value for that side must elapse before the completion of the operation is possible. Once the required number of turns has elapsed, the completion is not automatic, but rather reverts to the normal algorithm for bridge operation completion.
55

Panzer Battles User Manual
Turns during which the engineer is Disrupted or Broken do not count towards the minimum number of turns required to complete the operation.
For example, if the Pontoon Bridge Parameter Data value for the given side is 10, then 10 turns must elapse after Pontoon Bridge construction is initiated before it is possible for the bridge to be completed. After those 10 turns have been completed, then there are a variable number of turns required to complete the bridge, determined by the normal algorithm for bridge building.
River and Canal Ferrying
Engineer units can also ferry some units across Rivers and Canals. The requirements are:
• The unit being ferried must be moving into the hex containing the Engineer unit or out of that hex.
• The unit being ferried must be of Foot movement class, or be of Ski, Bicycle, or Horse movement class and consist of men (right click in Unit Picture to see this information listed) or be a unit which is On Foot (see section on Movement).
• The unit being ferried must have full Movement Allowance, must be in Travel Mode, and must not be Disrupted or Broken.
• The Engineer unit must not be Disrupted or Broken, must have full Movement Allowance, and must not be in Travel or Rail Mode (Note: the Engineer unit must not be conducting Bridge Operations, but can be maintaining a bridge).
• The hex being moved into must be valid for movement for the unit being ferried.
If valid, then the unit being ferried uses its full Movement Allowance to perform the movement. (The movement does not cost the Engineer unit movement points.)
One special case is that it is possible for an Engineer unit to ferry itself. In this case, the Engineer unit must be in Travel Mode.
56

Panzer Battles User Manual
Water Hex Ferrying
Some Engineer units can also ferry units across water hexes. Engineer units with this ability have the Has Boats flag in the current scenario. The Engineer unit must not be building or dismantling abridge and must not be laying or clearing mines. In addition, the Engineer unit must not be Disrupted or Broken, must have full Movement
allowance, and must not be in Travel or Rail Mode.
The requirements for a unit to be ferried across a water hex are:
• The unit being ferried must be of Foot movement class, or be of Ski, Bicycle, or Horse movement class and consist of men (right click in Unit Picture to see this information listed) or be a unit which is On Foot (see section on Movement).
• The unit being ferried must have full Movement Allowance, must be in Travel Mode, and must not be Disrupted or Broken.
There are three limitations to this movement:
• The Water hex being moved into must be adjacent to a hex containing anEngineer unit that can perform Water Hex Ferrying.
• The Water hex being moved into must not contain a bridge.
• At most one unit at a time can enter a single Water Hex using Ferrying.
Anti-Tank Ditch Destruction and Bridging
Any Engineer unit adjacent to an Anti-Tank Ditch may attempt to destroy it. The process and rules for this are the same as for Bridge Damage. The defense value of an Anti-Tank Ditch used in this process is 1. If an Anti-Tank Ditch is destroyed, then it no longer has any effect on movement.
An Engineer unit capable of building bridges may build a bridge over an Anti-Tank Ditch. Again, the rules and procedure for this are the same as constructing a bridge over a river.
57

Panzer Battles User Manual
Clearing Rubble
All Engineer units are capable of clearing Rubble hexes. The Engineer unit must first enter the Rubble hex and then, using the Clear Mines or Rubble option of the Engineer menu, toggle the Clearing Rubble operation. If there are also mines in the hex, then these must be cleared before the Rubble can be cleared. The probability that the
rubble will be cleared in the hex is half the Digging-In Parameter Data value per turn.
When an Engineer clears a RUBBLE hex, it is designated a Rubble hex indicating that units in Travel Mode can use Road Movement through the hex. This represents the fact that the Engineer unit has clear lanes through the Rubble.
Full-Hex Bridges
A Full-Hex Bridge is one that spans a Water hex. It is possible for Engineer units to attempt to damage a Full-Hex Bridge, but it involves a multi-step process:
1. In Travel Mode, the Engineer unit must first move onto the bridge.2. In the next turn, the Engineer unit can use the Bridge Operations
command to begin wiring the bridge for demolition.3. When the Bridge Operations complete, the bridge is shown as WIRED in
the Terrain Info Box indicating that it is wired for demolition.4. At this point the Engineer unit can move off the bridge and occupy an
adjacent hex. The Engineer unit should also change into Deployed Modeat this point.
5. At any subsequent turn, the Engineer can attempt to blow the bridge by using the Damage Bridge or AT Ditch command. The program will determine the success or failure of this attempt using the standard bridgedamage procedure and using the Heavy Bridge defense parameter value.
Once a Full-Hex Bridge has been damaged, it cannot be repaired.
58

Panzer Battles User Manual
Auto Wired Bridge Demolition
When the Wired Bridge values are defined in the Parameter Data, then the Auto Wired Bridge Demolition feature is enabled. This feature causes Wired bridges to automatically be tested for possible damage whenever a unit of the given side moves either adjacent to them, for hexside bridges, or onto them, for full-hex bridges.
The Wiring of bridges using this feature is determined by the initial conditions of the scenario, as established by the Scenario Designer using the Scenario Editor. Under this feature, full-hex bridges cannot be Wired after the scenario begins. Likewise, manual bridge destruction using engineer units of the opposing side to the affected side is not allowed during the scenario since the destruction of bridges by that side is controlled entirely by the auto destruction feature.
Hex-side bridges that are wired are displayed as "Wired" under the alternate display of the Terrain Box (via right-click and hold in the Terrain Box).
When the Auto Wired Bridge Demolition feature is in effect, then a test is done using the given probabilities
when the test is invoked by a unit of the given side. If the test succeeds, then the bridge is damaged. If the test fails, then the Wired status of the bridge is removed and the test is never performed again. That is, the test is one-time only and triggered by the movement of units of the specified side.
For More Information on Engineers
The following contain more information on features of the Main Program that are related to Engineers:
• The Engineer Menu of the Main Program lists operations that apply to Engineers.
• The Engineers item of the Highlight submenu of the View Menu can be used to highlight Engineer units on the map.
59

Panzer Battles User Manual
Air Power
Air units are of two types: combat and recon. Recon units are flagged with the word RECON when they are listedin the Air Mission Dialog in the Main Program or in the Air Support Dialog in the Scenario Editor. All other air units are combat units.
Air Strikes
To perform an air strike against an enemy position, click on the enemy locationto make it the current Hot Spot hex and then click on the Air Mission button
in the Toolbar (or invoke the Air Mission command in the Command Menu). This will display the Air Mission Dialog so that the air unit can be selected. Select any non-RECON air unit in the list. The target hex must be Spotted and contain enemy units and the current visibility must exceed 1 hex. (In Dawn or Dusk turns where the nominal visibility is 2, but the effective visibility is 1, air missions are still possible.)
There is a one turn delay associated with all air missions. When the air mission is initiated, an airplane icon will appearon the map showing that the mission has been called. At the beginning of the next turn for that side, the air mission will be resolved. If the target hex is empty in the case of an air strike, then the air mission will automatically change to an
adjacent hex if there are enemy units in that hex that can be targeted. If not, then the air strike does not occur.
Before the air strike is performed, all enemy units capable of firing Anti-Aircraft fire on the target hex are given the chance to do so. The distance from the firing unit to the target hex must be within the AA range for that unit, but there are no Line-of-Sight limitations. Range effects are applied to the fire with fire at range 0 being normal, fire at range 1 being 1/3, and in general, fire at range R being 1 / (2 * R + 1). Units which are Disrupted, have Low Ammo, or are in Travel Mode fire AA at half value. Standard Combat Results are applied to theair unit.
60

Panzer Battles User Manual
Anti-aircraft units consist of regular AA units and Heavy AA units. High flying air units such as Recon and Heavy Bomber air units are only affected by fire from Heavy AA units.
If there is more than one target in the target hex, then the target unit is automatically determined. Depending on the type of target unit, either the Hard or Soft attack value of the air unit is used for the strike. The attack value of the air unit is doubled and then standard Combat Results are applied to the target unit. If the target hex is Village, Town, City, or Industrial, then it is possible for the air strike to create Rubble in the target hex (based on Parameter Data. See the Parameter Data Dialog in the Main Program).
Carpet Bombing
Air strikes from Heavy Bomber air units affect all units in the target hex and no target unit selection occurs in this case. Such bombing is considered to be "Carpet Bombing" and has an increased effect on causing Disruption in the target hex. Such air units are flagged with the word CARPET in the Air Mission Dialog . Carpet Bombing does not require that the target hex be spotted by a friendly unit. When a Carpet Bombing air strike is called, the program will randomly scatter the designated target hex up to 2 hexes away. This may result in the air strike hitting friendly units. Also note that Heavy Bombers are often designated as Single Use units and when this is the case, they will only be available for a single mission.
Air Unit Availability
After being used in an air strike, air units must become available before they can be used in another air strike. The time required for an air unit to become available is variable and depends on Parameter Data (see the Parameter DataDialog in the Main Program). In addition, if the AA fire associated with the air strike caused the air unit to become Disrupted or Broken, then this represents partial damage to the air unit associated with the strike and this must be recovered from before the air unit becomes available again. Normal Fatigue accumulation and recovery effects apply to air units and although these do not affect the availability of the air unit, they do affect the effectiveness of the air strike.
61
Panzer Battles User Manual
Example: with an Air Availability value of 20%, an air unit that has carried out amission will have a 20% chance of being available on the next turn. If it were to fail the availability check, it remains unavailable and rechecks for availablity at the start of each turn until it returns to available status. With a 20% Air Availability value you might expect an air unit to be available on average for 2 air missions per day (assuming 1 day = 10 turns), not counting other combat effects like Disruption and Broken.
Low Visibility Air Effects
This is an Optional Rule that causes conditions of low visibility to result in reductions in air unit availability. The exact reductions are determined by parameter data. See the Parameter Data Dialog to determine the exact valuesthat apply to a given scenario.
Air Recon
To perform an Air Recon mission, select the target hex for the mission, invoke the Air Mission command, and select a RECON air unit from the list of available air units. Note: the target hex can be any hex on the map. Since Air Recon missions are considered to take place at a higher altitude than an Air Strike, Air Recon units are only vulnerable to AA fire from Heavy AA units.
The recon mission will then randomly provide spotting information on enemy units within the current Visibility range of the target hex. There are two types of spotting results: the enemy unit may be spotted in detail, or it may simply be spotted as an Unknown unit. An Unknown unit is marked with question mark graphics. An Unknown unit may be targeted for Indirect Fire and Air Strikes, but the combat results will not be known.
The probability that an enemy unit within the visibility range of the Recon Mission target hex will be spotted is based on several factors.
• Range: The Range from Mission Target Hex to location of enemy unit being checked for spotting is based on formula 1 / (R + 1) where R = the range from the Mission target hex to the enemy unit.
• Terrain: Any terrain modifier associated with the hex modifies the Spotting probability. That is, when the terrain modifier is M%, then the spotting probability is multiplied by (100% + M).
62

Panzer Battles User Manual
• Strength: the probability depends on the strength S of the air unit as defined in the formula S / (S + 5) where S = number of Aircraft.
• Unit Status: If the air unit is Disrupted, the probability is 1/2 and if the air unit is Broken, the probability is 0.
• Given the combined probability, there is a half chance that the enemy hex will be spotted in detail and a half chance that the enemy hex will spotted as Unknown.
In addition, the following modifier is applied to the spotting probability based onthe Quality of the air unit.
• Quality A units have a modifier of 150%.
• Quality B units have a modifier of 125%.
• Quality D units have a modifier of 80%.
• Quality E units have a modifier of 60%.
• Quality F units have a modifier of 40%.
Air Interdiction
As units move on the map in Travel or Rail Mode, there is a chance that their movement will be Interdicted by enemy air units. This probability is based on Parameter data per side (see the Parameter Data Dialog in the Main Program).The probability is based on the total number of units in Travel or Rail Mode in the hex being moved into. The probability is modified by any terrain modifier ofthe hex being moved into. The probability is half during Dawn and Dusk turns. If Interdiction occurs, then an Air Strike occurs against a unit in the target hex using an air unit that is representative of the type of air unit available to the enemy side. However, this air strike does not count against the air units available by the enemy. Note in addition, that movement by units in Deployed Mode into hexes occupied by units in Travel or Rail Mode can also trigger an interdiction attack against the units in Travel or Rail Mode.
The probability that an Air Interdiction attack will Disrupt the unit being attackedis double that of a normal attack and in addition, there is the chance that the unit being attacked can lose some of its movement points up to a maximum of half its movement allowance.
63

Panzer Battles User Manual
Air Interception
Each side in a scenario has an Air Interception probability determined by the Parameter Data for that scenario. This AirInterception value determines the probability that an air mission against that side will be Intercepted. An Intercepted air mission results in no affect against the targeted side, but does require that the air
units involved go through the process of becoming Available before being usedfor another air mission. Both combat and air recon missions are subject to Interception. If the Air Interception probability for a given side is 0 in a scenario, then no air missions against that side will be Intercepted.
It is possible for air units to be classified as Jet Aircraft in the Order of Battle file. The probability of Air Interception against air missions of Jet Aircraft air units is half that of the normal air interception probability in the Panzer Battles games.
Air Ownership
Depending on the structure of the Order-of-Battle file for a particular scenario, certain air units may be classified as being owned by a particular ground organization. When this occurs, air combat missions by those units can only be performed against hexes that are spotted by the owning organization. The units doing the spotting cannot be Broken. If only Detached units are availablefor spotting, the air strike is at half value.
Air Strike Hex Limitation
If the Air Strike Hex Limit Parameter Data value is nonzero, then the number ofair strikes that are allowed in any one hex per player turn is limited. Once the total number of airplanes committed to an air strike in a given hex reaches the Air Strike Hex Limit value, then no further air strikes are possible in that hex in the same player turn.
The Air Strike Hex Limitation restriction does not apply to Carpet Bombing or Air Recon.
64
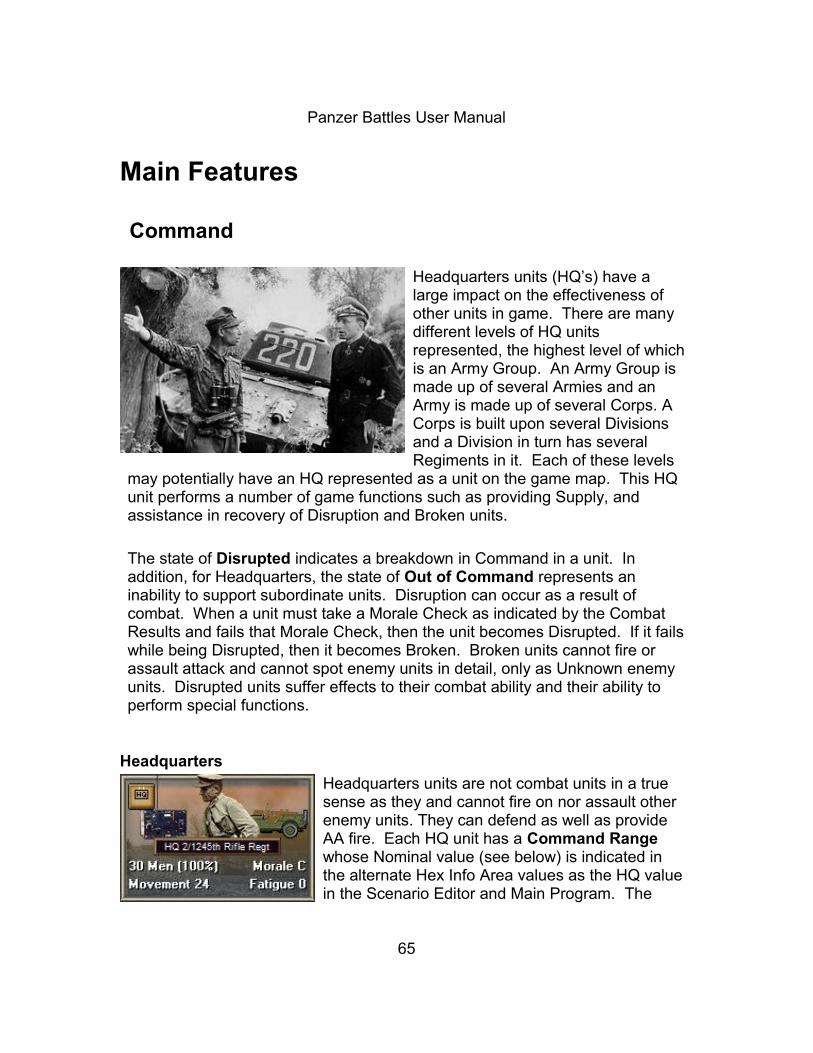
Panzer Battles User Manual
Main Features
Command
Headquarters units (HQ’s) have a large impact on the effectiveness of other units in game. There are many different levels of HQ units represented, the highest level of whichis an Army Group. An Army Group is made up of several Armies and an Army is made up of several Corps. A Corps is built upon several Divisions and a Division in turn has several Regiments in it. Each of these levels
may potentially have an HQ represented as a unit on the game map. This HQ unit performs a number of game functions such as providing Supply, and assistance in recovery of Disruption and Broken units.
The state of Disrupted indicates a breakdown in Command in a unit. In addition, for Headquarters, the state of Out of Command represents an inability to support subordinate units. Disruption can occur as a result of combat. When a unit must take a Morale Check as indicated by the Combat Results and fails that Morale Check, then the unit becomes Disrupted. If it failswhile being Disrupted, then it becomes Broken. Broken units cannot fire or assault attack and cannot spot enemy units in detail, only as Unknown enemy units. Disrupted units suffer effects to their combat ability and their ability to perform special functions.
Headquarters
Headquarters units are not combat units in a true sense as they and cannot fire on nor assault other enemy units. They can defend as well as provide AA fire. Each HQ unit has a Command Range whose Nominal value (see below) is indicated in the alternate Hex Info Area values as the HQ valuein the Scenario Editor and Main Program. The
65

Panzer Battles User Manual
Command Range of a unit will vary depending upon the Nation, the HQ Level (example: Army, Corps or Division) as set in the Order of Battle Editor by the Scenario Designer. For example, an Army will usually have a larger CommandRange than HQs under its control, but the Command range itself can vary from10 hexes to 25 hexes. A Corps HQ will have a range of usually 10 to 15 hexesand a Division HQ is normally in the order of 5 to 10 hexes.
Nominal Command Range
The Command Range of an HQ unit as given in the Order of Battle is modified by the Quality of the unit to give the Nominal Command Range of that unit:
• HQ’s of Quality A have 2 added to their Command Range.
• HQ’s of Quality B have 1 added to their Command Range.
• HQ’s of Quality D have 1 subtracted from their Command Range.
• HQ’s of Quality E have 2 subtracted from their Command Range.
• HQ’s of Quality F have 3 subtracted from their Command Range.The Nominal Command Range is the value displayed in the alternate Hex Info Area as the HQ value.
Modified Command Range
The Nominal Command Range is modified according to certain conditions:
• Disrupted HQ’s have a 1/2 Command Range.
• Broken HQ’s have a Command Range of 0.
• HQ’s in Travel Mode have a 3/4 Command Range.This modified value is then used in the determination of command and recovery as explained below.
Note: there is no other penalty or automatic loss command status for moving an HQ unit. An HQ unit that moved in the previous turn is treated no differently than one that has not moved, subjected to range modifications above such as HQs in Travel Mode.
66

Panzer Battles User Manual
Detached Units
When a unit is beyond the Nominal Command Range of its HQ unit, or that HQ does not exist, then the unit is considered Detached. Units that are Detached have their unit name shown in Yellow. In addition, the Detached option of the Highlight menu can be used to identify those units currently Detached. When only Detached units are
available to spot for indirect fire or air strikes, then the attacks are half value.
The Command Test
At the beginning of a player’s turn, a Command Test is performed for all HQ units for that side. The Command Test begins with the highest level HQ units for that side and for that scenario. Given a Global Supply Value of X% for the HQ side, the HQ will be in command if a randomly generated percentage is less than this Supply value.
Example: suppose that the highest level HQ for the German command is a Panzer Corps and that the Supply Value is 80%. There is thus an 80% chancethat this HQ will be In Command in any given turn.
The highest level HQ units are marked as Out of Command if they fail this test. The Command Test then proceeds down the chain to the next level of HQ units. For these HQ units and all others in the test, the HQ has two chances to pass the Command Test. The first chance is based on the Supply test previously mentioned. If the HQ
fails that test, then it is given a second chance provided that its superior HQ is not Out of Command. If the range from the HQ being tested to the superior HQ is R hexes, and if the superior HQ has a Modified Command Range of C, then the HQ unit passes the second test provided that a randomly generated number between 0 and 1 is less than C / (R + C). The Command Test proceeds from higher level HQ’s down to the next level until all HQ units have been tested.
67

Panzer Battles User Manual
Example: We will continue with our example from above where that Panzer Corps passed its Command test. Suppose the process moves down to the HQof the 3rd Panzer Division where that Division HQ fails the Command Test based on the Global Supply value (which was set at 80% in the above example). Since the Corps HQ is In Command, then a second test is performed. Suppose that the range from the HQ of the 3rd Panzer Division to the 24th Panzer Corps HQ is 10 and that the Command Range of the Panzer Corps HQ is 15. Then there is a 15/(10+15) or 15/25 = 3/5 chance that the 3rd Panzer Division HQ unit will pass this test and thus be In Command.
Disruption Recovery
At the beginning of each player turn, there is a test to determine if Disrupted and Broken units on that side recover. Broken units at Maximum Fatigue cannot recover. The closer a disrupted or broken unit is to its HQ and the higher its morale, the better its chances of recovery are.
For all other units, a preliminary range test is performed for the unit. If the unit has an HQ with a Modified Command Range C that is In Command at a range of R from the unit, then the range test is passed if a randomly generated number between 0 and 1 is less than C / (C + R).
Example: Suppose you have a Disrupted unit at a distance of 12 hexes from itsDivisional HQ. This HQ is In Command (not Out of Command) and it has a Command Range of 8. The range test for this unit would be based on the probability 8/ (8+12) or 8/20=2/5.
You can see from the above formula, that if the Disrupted unit was at the limit of the HQ Command range it would have a 50% chance of recovery as if the Command Range were 8 ( C=8 ) and the Range in hexes was 8 ( R = 8 )
C / (C + R)8 / (8 + 8 ) = 8/16 or 50 %
If the unit passes its range test, it moves to the next test based on Morale. If the unit fails its range test, then 50% of the time it too moves to the morale testand 50% of the time the test ends at this point in failure and no change of unit status.
68
Panzer Battles User Manual
Otherwise, the current Morale value of the unit is determined based on its Quality and all applicable modifiers. This is converted into a value between 1 and 6 using the mapping A=6, B=5, …, F=1. The unit will pass the test and be recovered from Disrupted or Broken, if a random die roll from 1 to 6 is less than or equal to the Morale value. When Broken units recover, they become Disrupted.
Example: Continuing from our example above, If the range test were to fail, then based on another random determination, 50% of the time the test would fail at this point. Otherwise, if it were to succeed, the test would then move on to the Morale value of the unit. Let us say this unit has a morale of A. Since A=6 in this test, this test would succeed and the unit would be recovered from Disruption. But if the Morale of the unit were a D, and D=3, than there word only be a 50% chance of Disruption recovery.
If a Disrupted units HQ is Out-of-Command or eliminated and not in play, then the unit may still recover, based on ½ the probably of the recovery based solely on the Unit Morale check.
HQ Recovery
Headquarters units that have been eliminated are eligible to be restored on a subsequent turn. This is automatically determined at the beginning of the player turn and reported in the Command Dialog of the Main Program. The probability that an HQ will be restored is based on the Quality of the unit with higher Quality units having a higher probability. An HQ unit that has been eliminated is eligible to be restored on each player turn following its elimination. However, the HQ does not perform its functions on the first turn it is restored. The HQ unit is restored with a randomly determined strength and is Disrupted on the first turn it is restored.
Corps Attachments
It is possible in both the Scenario Editor and Main Program to make changes in the Corps assignment of units. The Corps Attachment rules allow a player the opportunity to change which Corps a Division or other unit is subordinate to.
The distance a Division HQ is from its Corps HQ has a large effect in the Command Test as described above. During game play, Corps Attachments
69

Panzer Battles User Manual
can only occur during the turn at midnight (or if no midnight turn, during the firstturn thereafter). The purpose of changing a Corps Attachment is to streamline the Command structure so that a Division HQ can receive support from the closest Corps HQ in its sector.
For a unit to be reassigned, it must exist in the Order of Battle within a Corps-level organization. The reassignment must assign it to another Corps-level organization in the Order of Battle. Corps Attachments are also possible in theScenario Editor when creating a scenario.
Note: for the Russian forces starting in 1942, the Corps Attachment feature applies to their Armies, not their Corps. That is, starting in 1942, it is possible to reassign units and organizations attached to Russian Armies to other Armies, but the Russian Corps are not changeable.
For More Information on Command
The following contain more information on features of the Main Program that are related to Command:
• The Show Organization item of the View Menu can be used to highlight specific organizations on the map.
• The Divisional Markings item of the View Menu can be used to color units according to their division or other controlling organization.
• The Command Range item of the Shade submenu of the View Menu can be used to show the Modified Command Range of a selected HQ unit on the map.
• The Headquarters item of the Highlight submenu of the View Menu can be used to highlight HQ units on the map.
• The Detached Units item of the Highlight submenu of the View Menu can be used to highlight units on the map that are outside of the command radius of their commanding HQ.
• The Organization item of the Highlight submenu of the View Menu can be used to highlight units in the same organization as the selected unit.
• The Corps Attachments item of the Units menu of the Scenario Editor or Main Program can be used to view and change Corps Attachments.
70

Panzer Battles User Manual
Morale
Morale is used to determine effects like Disruption and Broken. Quality isthe basis for Morale. Each unit has a Quality rating from A (best) to F (worst). A descriptive way of referring to units by their Quality rating is to saythat:
• A units are the Elite units• B units are the Superior units• C units are the Average units
• D units are the Below Average units• E units are the Inferior units• F units are the Abysmal units.
When a calculation requires a numeric value, these letters are mapped to numbers according to A=6, …, F=1. Quality has effects on the Morale of the unit and on its performance in combat or, for HQ’s, on its command abilities.
Morale Calculation
The nominal Morale of a unit will be the same as its Quality. The following modifiers apply to the Morale value:
• Units with Medium Fatigue have 1 subtracted from their Morale.
• Units with High Fatigue have 2 subtracted from their Morale.
• Units with Maximum Fatigue have 4 subtracted from their Morale.
• Units Low on Ammo or Fuel have 1 subtracted from their Morale.
• Units that are Disrupted or Broken have 1 subtracted from their Morale (Note: Morale F units do not have this modifier when they are attempting to recover from being Disrupted or Broken.)
• Units that are Isolated have 1 subtracted from their Morale.A unit whose resulting Morale value is 0 or less is said to have No Morale.
Morale Check
When units suffer losses due to Combat Results, they may have to undergo a Morale Check. A random die roll from 1 to 6 is generated and compared with the unit’s current Morale value. If the die roll is less than or equal to the Morale
71

Panzer Battles User Manual
value, then the unit passes the Morale Check. A unit which fails a Morale Check becomes Disrupted, and if already Disrupted and at Maximum Fatigue,becomes Broken.
For More Information on Morale
The following contain more information on features of the Main Program that are related to Command:
• The Disrupted or Broken item of the Highlight submenu of the View Menu can be used to highlight units on the map that are Disrupted or Broken.
72

Panzer Battles User Manual
Fatigue
The most important thing to know about Fatigue in the Panzer Battles games is that it refers to Combat Fatigue, not simple physical fatigue. Physical fatigue refers to the simple physical state of being winded, tired, or sleepy. As such, physical fatigue can accumulate quickly through
exertion, but is relieved through rest and sleep, normally in a matter of hours.
Combat Fatigue refers to a much more persistent state that accumulates through combat. Combat Fatigue reduces the fighting ability of the unit until it reaches the point where its will to fight has been lost. As such, Combat Fatigue is not relieved through short periods of rest, but rather takes much longer periods to recover from. In addition, for units involving vehicles, Fatiguealso represents effects of wear and attrition with respect to the vehicles. Against, this is an accumulative factor that has a detrimental effect on the fighting ability of the unit. It includes things like tread wear, turret malfunctions,broken sights, and things like this that require parts and repair to restore to good working order.
Fatigue Levels
Fatigue values range from 0 (none) to 150 (maximum). In addition, these values are broken down into five special cases:
• No Fatigue – Fatigue 0.• Low Fatigue - Fatigue from 1 to 49.• Medium Fatigue - Fatigue from 50 to 99.• High Fatigue – Fatigue from 100 to 149.• Maximum Fatigue – Fatigue 150.
In general, Fatigue affects do not start to occur until the unit has reached Medium Fatigue. And in general, units at Maximum Fatigue have almost no combat abilities left.
73

Panzer Battles User Manual
Fatigue Accumulation
Fatigue is gained from losses in combat. The factor used to determine Fatigueaccumulation depends on the size of the unit.
• For Companies, the Fatigue accumulation factor is 2.
• For Platoons and Squads, the Fatigue accumulation factor is 6 (When 2 Platoons are Combined, the factor is 4 and when 3 or more Platoons are Combined, the factor is 2).
Losses taken from fire and from defending in assault range randomly from 0 upto the factor times the loss value, in men equivalent. Fatigue taken from attacking in assault is double normal values. For example, an infantry company that takes a loss of 15 men from fire will gain Fatigue from 0 to 30. Likewise, an infantry platoon that takes a loss of 15 men will gain fatigue from 0 to 90. Fatigue is applied against the nominal loss before it is converted to vehicles or guns. This means that a tank company that has a nominal loss of 20, resulting in a tank loss of 2 vehicles, will gain Fatigue from 0 to 40. It also means that a unit based on vehicles or guns can gain Fatigue without sufferinga loss.
Fatigue Recovery
In order for a unit to be eligible for Fatigue recovery, the unit must not move, fire, assault, be fired upon, or be assaulted for a complete game turn. It must also not be Digging-In, building a bridge, or be in a minefield. There is a nominal rest value determined by Parameter Data (see the Parameter Data Dialog in the Main Program). During night turns, this value is doubled. Furthermodifiers may apply to this value based on Optional Rules described in the Main Program. The Fatigue recovery a unit receives is then calculated as a random value between 0 and twice the rest value. The number of units that recovery Fatigue are reported in the Command Dialog of the Main Program. Nominal Fatigue recovery also applies to air units.
For More Information on Fatigue
The following contain more information on features of the Main Program that are related to Fatigue:
• The High Fatigue Units item of the Highlight submenu of the View Menucan be used to highlight units on the map that are have High or MaximumFatigue.
74

Panzer Battles User Manual
• The Non Full Strength Units item of the Highlight submenu of the View Menu can be used to highlight units on the map that are not at full strength.
75

Panzer Battles User Manual
Supply
Supply is a critical element in the effectiveness of any army, and so it is no different in armies you control in the Panzer Battles Series. There are two main functions of Supply. The first is how it influences the ability of HQ units to support their subordinate units. This point is explained and illustrated in the Command Section under the Command Test heading.
The second function Supply serves is to simulate the problem units in combat will encounter with becoming Low on Ammo or Fuel. When a unit fires during a turn, there is a chance that it will either run Low on Ammo or, in the case of artillery units, become Unavailable in the next turn for that side. Likewise, when a unit moves or assaults, there is a chance that it will become Low on Fuel at the end of the day. These chances are based on the Supply Value foreach side as displayed in the Terrain Info box of the Hex Info Area. Refer to the Main Program. This default Supply Value will apply to all units for that side unless the given scenario has Supply Source markers in use.
Global Supply Values
In each scenario, two Supply Values called the Global Supply Values are defined. These values, displayed in the Terrain Info Box as shown in the illustration, determine the default Supply Values for the Allied and Axis sides respectively. These values may vary, basedon the calculation of Supply Variation and they may be
superseded on the map by Supply Sources, both of which are described below.
Supply Sources
A Supply Source is a specific location that is capable ofproviding supply to units of the associated side. Supply Sources are also displayed on the map. With
76

Panzer Battles User Manual
the Hot Spot on the Supply Source hex you can see in the Terrain Info box the owning side and value of the Supply Source.
In scenarios where Supply Sources are used, these values take precedence over that side’s Global Supply Value for non-naval units on the map. Where more than one Supply Source marker is present, units automatically use the highest Supply Source available to them. In the absence of Supply Sources, any map edge ground hex is essentially a Supply Source with that side’s Global Supply Value.
Supply Sources cannot be destroyed or used by the other side. Capturing an enemy Supply Source denies its use to the owning player while it is occupied.
Supply Determination
When supply issues are being resolved for a unit in a given hex, the supply value that applies to that hex is used. If there are no Supply Sources in the scenario for that side, then the Global Supply Value is used for this purpose. Otherwise, the Supply Source of highest value affecting that hex is used. If theunit is Isolated, then the supply value in the hex is 0. Otherwise, the unit must trace a line of communication (a line of hexes free of enemy units and their Zone-of-Control crossing rivers only using bridges or ferries) to any Supply Source hex or map edge ground hex when Supply Sources do not exist. In theabsence of Supply Sources, any map edge ground hex is essentially a Supply Source with that side’s Global Supply Value. If there are Supply Sources usedfor that side in the scenario, then the unit must trace a line of communication toa Supply Source rather than ground edge hexes. When determining this line ofcommunication, the presence of friendly units negates enemy Zones of Control.
Engineer Ferry Operations
When an engineer capable of ferrying units across a river exists, then supply can be traced across a river one hex if necessary to supply units that would otherwise be Isolated on the other side. The supply resulting from this only extends a distance of one hex from the engineer unit across the river hexside.
77

Panzer Battles User Manual
Isolated Units
Units that begin the turn Isolated have their morale reduced by one level. This morale effect is in addition to other morale reductions for such things as Low Ammo. Artillery Units that fire while isolated become Unavailable. Units eligible for Low Fuel status that move while Isolated will automatically become Low Fuel on the following midnight turn. Furthermore, as long as the units
remain Isolated, they will not recover from the Low Ammo, Unavailable, or LowFuel effects.
Ammo Supply Problems
As stated above, when a unit fires during a turn, it becomes a candidate for either running Low On Ammo or, in the case of artillery units, becoming Unavailable in the next turn for that side. If a normal unit fires, then at the beginning of the next turn for that side a check is made to determine if the unit becomes Low On Ammo. Isolated artillery
units automatically become Unavailable. Otherwise, a test is performed and a random value is generated and compared to the supply value. If the random number is less than the supply value, the unit passes the test and does not become Low On Ammo
If the unit fails the above test, a range test is made with respect to the unit and its controlling HQ unit. The HQ unit must not be Out of Command or the test will fail. Given that the HQ unit has a Command Range of C and that the range from the unit being tested to the HQ unit is R hexes, then the probability that the unit will not become Low On Ammo is C / (C + R).
The net effect of the above formula is that if a unit being checked for supply is at the limit of the Command Range, its probability of re-supply is 50%. For example, if an HQ unit has a command range of 7 and the unit under command of that HQ is 7 hexes away when the supply check is performed, then C=7 and R=7 and the formula would resolve that:
C / (C + R) = 7 / (7 + 7) = 7 / 14 = 50%.
78

Panzer Battles User Manual
Once a unit becomes Low On Ammo, then a determination is made for each turn for that side if the unit becomes re-supplied. For re-supply, only the rangetest described previously is used. Thus to be re-supplied, the unit must have an HQ unit that is not Out of Command.
For artillery units, the supply determination is different in that the range test does not apply. Artillery units become Unavailable based on the supply value of the hex they occupy. A random percentage value is generated and compared with the supply value in the hex. If the random value is less than thesupply value the unit either does not become Unavailable, or if Unavailable already, loses that effect.
For naval units, half the default Global Supply Value for that side applies. Otherwise, the supply rules for naval units are the same as for artillery units.
Fuel Supply Problems
All non-Headquarters units other than Foot, Ski, Bicycle, Horse, Naval, and Rail units are subject to running Low On Fuel if they move or assault (for this purpose, changing Travel Mode or moving by Rail Mode is not considered movement). Once a day, at the beginning of the midnight turn, a Refueling Test is performed on every applicable unit that has moved or assaulted since the last time
the test was performed. The test uses the supply rules that are used to determine Low On Ammo for units that fire with one exception. That is, Isolated units automatically become Low On Fuel, while units in supply first perform the supply test using their supply value, and a second test using a modified range test relative to their HQ unit. The distance traveled by the unit does not effect the outcome of the test. Failing the Refueling Test and becoming Low On Fuel represents a failure of the unit to obtain a refuel and thus being in a position of having to conserve available fuel until another refueling attempt can be made.
The range test to determine if a unit becomes Low On Fuel is passed provided:
• The HQ of the unit is not Out of Command, and
• The distance from the unit to the HQ is within the Command Radius of the HQ.
79

Panzer Battles User Manual
Once a unit becomes Low On Fuel, then two effects occur:
• The movement allowance of the unit is cut in half. This represents the conservation efforts of the unit while under this condition.
• The defense value of the unit is cut in half. This represents the reduced mobility of the unit due to the low fuel condition, making it more vulnerable in combat situations.
Note: when a Low On Fuel motorized or mechanized infantry is dismounted, it retains its default defense value and its default foot movement allowance.
Units that become Low On Fuel are eligible to regain their normal fuel status intwo ways:
• At the beginning of the next midnight turn another Refueling Test is performed. If the unit passes this test, then the unit is restored to normal fuel status.
• At the beginning of each turn other than the midnight turn, a Refueling Test is performed, but with only a percentage chance of passing compared with a normal Refueling Test. The percentage used is the Refuel Percentage value determined by Parameter Data.
The first test represents the normally scheduled refueling that occurs each day,while the second test represents a refueling which occurs later because of a delay in the normal refueling. The supply test a unit uses to return to normal fuel status is a modified version of the test performed for units Low On Ammo. That is, the modified range test relative to the unit’s HQ is performed to determine if the unit is restored and the HQ unit must not be Out Of Command.
Artillery Setup
When using the Artillery Setup Optional Rule, Allied and Axis Artillery availability depends upon the Artillery Setup value in the Parameter Data. Anartillery unit capable of Indirect fire may not be available after it has moved. This represents that the artillery unit will have to setup the guns, bring up ammunition and re-establish communication
links with the forward observers before it is ready for a fire mission. The length of time the artillery unit will be required to setup will vary depending on the Artillery Setup value in the Parameter Data. At the beginning of each turn for that side, for each artillery unit setting up, a random percentage value is generated and compared with the Artillery Setup value. If the random value is less than or equal to the setup value, then the artillery unit becomes available.
80

Panzer Battles User Manual
If the side has the Parameter set to 100%, then there is no setup effect for any artillery unit. If the Parameter value is at least 90%, then Self-Propelled artillery units are not affected by setup. Units can move, unlimber and be available to fire on the next turn or even the current turn if sufficient movement points remain.
If the side has the Parameter value less than 100%, then, as soon as an Artillery unit moves, it is labeled Setup Required. When the unit stops moving, there is a minimum one-turn delay. At the beginning of the next turn after a unit does not move or fire, there is a chance that the Artillery unit will beavailable, based on the Artillery Setup availability value. If the unit is not available on that turn, it will check again at the start of the next turn and each turn thereafter until it is available.
An Artillery Unit that is setting up can still engage enemy units using Direct Fire. In this way, artillery may move and still provide direct fire support. For example, if your artillery is setting up and enemy units break through your frontlines, your Artillery units can still engage them by direct fire.
Artillery Setup does not affect Anti-tank guns and Anti-aircraft guns. Artillery units that start the game in Travel or Rail Mode and artillery units that arrive as reinforcements are deemed to have moved and will need to be setup before becoming available. Towed Artillery that is labeled Setup Required cannot become Setup while it is in Travel Mode.
Stockpiled Artillery
Stockpiled is a type of Artillery unit status that represents a battery in position with ample ammo at hand and effective communications in place. Therefore, such stockpiled units are deemed to be more effective.
Stockpiling can one occur when Artillery units are in a stockpiled state at the beginning of a game.
81

Panzer Battles User Manual
An artillery unit that is Stockpiled will be able to fire for longer periods of time,and perhaps with increased effectiveness, without suffering supply problems. In particular,
• A Stockpiled artillery unit fires at an effectiveness modified by the Stockpiled Fire Parameter Data modifier. For example, if this modifier is 100%, then the fire value of Stockpiled units is not modified, but if the modifier is 200%, then the fire value of Stockpiled units is doubled.
• When a Stockpiled artillery unit suffers its first supply test failure, it remains available, but loses its Stockpiled status at that point. Note: while Stockpiled, the supply test applied to a unit uses a supply value that is 75% of normal. For example, if the normal supply value is 80%, then the supply test applied to a Stockpiled unit uses 75% of 80%, equal to 60%, as the supply value for the test.
Supply Examples
Example 1: Command Test.Suppose we have a Corps HQ with a command range of 12, a Divisional HQ, and that the base Supply Value is 70%.
2 hex range calculation: If the Div HQ is 2 hexes from the Corps HQ, then the probability that the Div HQ will be in command is:
0.70 + 0.30 * (12/14 * 0.70) = 88%
12 hex range calculation: If the Div HQ is 12 hexes from the Corps HQ, then the probability that the Div HQ will be in command is:
0.70 + 0.30 * (12/24 * 0.70) = 80%
Conclusion: In this case, an increase in the distance of the Div HQ from the Corps HQ by 10 hexes resulted in a decrease of its command probability from 88% to 80%.
Example 2: Refueling Test - High ValueSuppose that we have a Div HQ with a command range of 6 and a unit from this division that is Low On Fuel. Suppose that the base Supply Value is 80% and that the Refuel Percentage is 30%.
4 hex range calculation: If the unit is 8 hexes from its HQ, then the per-turn refuel probability is 0 since the unit is out of the command range of its HQ.
82
Panzer Battles User Manual
0 hex range calculation: If the unit is 4 hexes from its HQ, then the per-turn refuel probability is:
0.30 * 0.80 = 24%
Conclusion: You should move Low On Fuel units within the command range of their HQ for them to become refueled.
Example 3: Refueling Test - Low ValueSuppose that the situation is as before, but now that the base Supply Value is 25%.
If the unit is 4 hexes from its HQ, then the per-turn refuel probability is:0.30 * 0.25 = 7.5%
Conclusion: Lower Supply Values mean less chance of refueling, in this case from 24% to 7.5% per turn.
Example 4: Refueling Test - Range ExampleSuppose that we have the Corps HQ with command range of 12, the Div HQ with a command range of 6, a unit from the division that is Low On Fuel, and a base Supply Value of 60%.
4 hex and 12 hex range calculation: If the unit is 4 hexes from its Div HQ and the Div HQ is 12 hexes from its Corps HQ, then the per-turn refuel probability is:
0.30 * 0.80 = 24%
4 hex and 2 hex range calculation: If the unit is 4 hexes from its Div HQ and the Div HQ is 2 hexes from its Corps HQ, then the per-turn refuel probability is:
0.30 * 0.88 = 26.4%
Conclusion: Reducing ranges from units to their HQ and from HQ's to their higher HQ's improves the probability of refueling, in this case from 24% to 26.4%.
83

Panzer Battles User Manual
Summary
Here are some player tips for helping you understand the supply system better and to help you be more successful at playing the game.
• Your HQ units and your base Supply Value (and Supply Sources depending on the scenario) will determine your supply state. Be sure in each scenario that you are aware of your base Supply Value and any Supply Sources on the map and their values. Understand which HQ units are strong or weak based on their command range and their quality rating. Understand your command hierarchy and which units are subordinate to which organizations.
• Make sure you keep your units in the vicinity of their HQ (within the command radius of the HQ if possible). Likewise, pay attention to the distance between each HQ and its superior HQ as that will effect the ability of the superior HQ to provide support.
• Be careful about leaving your HQ units in Travel Mode. This cuts their command range by 1/4. Consider taking HQ units out of Travel Mode as soon as you have established a position.
• Be careful to avoid exposing your HQ units to enemy fire as a Disrupted HQ has its command range cut in half while a Broken HQ has no command range.
• When you are in combat, Low Ammo problems will become more likely. When you are performing a breakthrough or racing to the defense of a position, expect to have more Low Fuel problems.
• Consider regrouping at night and establishing a position with your units inproximity to their HQ and the HQ out of Travel Mode. This will give you the best chance of avoiding refueling problems during the midnight turn.
• When Low Fuel problems develop, consider taking action that works towards solving the problems. This includes getting your HQ unit out of Travel Mode and returning your Low On Fuel units to within the command range of their HQ. You may also have to decide to withdraw an organization with severe supply problems so as to increase the support you get from the superior HQ.
• Pressing on after Low On Fuel problems have developed during a breakthrough is a risky decision and combined with potential Low On Ammo problems that may arise after you make contact puts your forces at risk.
• With Fog-Of-War in effect, you will not be able to explicitly see which enemy units have ammo or fuel problems, but if you understand what situations are likely to lead to such problems, you can use this to
84

Panzer Battles User Manual
conclude good opportunities to try and take advantage of enemy supply problems.
For More Information on Supply
The following contain more information on features of the Main Program that are related to Supply:
• The Supply Sources item of the Info Menu can be used to view a list of Supply Sources in the current battle.
• The Supply Sources item of the View Menu can be used to toggle the display of Supply Sources on the map.
• The Low On Ammo and Fuel item of the Highlight submenu of the View Menu can be used to highlight units on the map that are Low on Ammo or Fuel.
• The Isolated Units item of the Highlight submenu of the View Menu can be used to highlight units on the map that are Isolated.
85

Panzer Battles User Manual
Environment
The Environment consists of the current Visibility and the current ground Conditions. Each scenario has the values of these plus the possible ranges set in the Header Dialog of the Scenario Editor.
Visibility
The Visibility is the maximum number of hexes that enemy units can be Spotted. Usually, Visibility ranges from 1 to 5 hexes during daylight turns. During Dusk and Dawn turns, Visibility is half its normal value (fractions rounded down). During Night turns, Visibility is one hex.
The possible range of Visibility in a scenario is determined by data associated with the scenario. At the beginning of each turn, the Main Program determinesif there is a change in Visibility. Once Visibility starts to change, it will tend to continue changing for multiple turns within the range determined for that scenario. The Command Dialog in the Main Program will report to each playerwhen the Visibility has changed for that turn.
Ground Conditions
There are five possible ground Conditions: Normal, Soft, Mud, Snow, and Frozen. Normal Conditions represent dry ground and moderate temperatures. Soft Conditions represent wet ground with moderate temperatures. Mud Conditions represent muddy ground with moderate temperatures. Snow Conditions represent snow-covered ground with cold temperatures. And Frozen Conditions represent snow-covered ground with cold temperatures sufficient to freeze streams and rivers. At the start of each day, the Conditions for that day are determined by the Main Program within the range specified for that scenario.
Associated with each Condition and each movement class, there are movement cost modifiers that apply when a unit of the given class moves under the given Conditions. These modifiers are specified in the Parameter Data and can be viewed using the Parameter Data Dialog. These modifiers are used to adjust the nominal movement cost of the unit with one exception.
86

Panzer Battles User Manual
When a unit moves in Travel Mode along a Primary Road using Road Movement, then the Condition modifier is not applied and normal movement costs as used.
Frozen Terrain
Under Snow conditions, Field, Marsh, and Swamp terrain is considered frozen. Field and Marsh terrain is treated as Clear and Swamp terrain is treated as Forest when frozen. When this occurs, the terrain description is modified by showing the normal terrain insquare brackets ([]). This alerts the player to the fact
that the normal terrain condition may be restored if the condition should change.
Storms
Storms can occur under any conditions. Depending on the conditions, they represent rain storms, snow storms, or even sand storms. When a Storm occurs, it will last the entire day and possibly additional days. During a Storm, the following effects occur:
• Movement costs are doubled.
• Visibility is reduced to one hex.
• All attack and assault values are reduced by 1/2.
• All air missions are prohibited.
• Amphibious, airborne, and glider reinforcements are prohibited.If a Storm is occurring, it will be indicated in the Status Bar following the condition value. Storms can only occur when using the Programmed Weather Optional Rule (see below) or when specified as occurring at the beginning of the scenario (see the Header Dialog in the Scenario Editor).
Programmed Weather
This is an Optional Rule that uses a predetermined range of weather conditions on a daily basis rather than varying the weather randomly within the specified range. For Programmed Weather to be in effect, two things must be true:
• The user must select the Programmed Weather Optional Rule.
87

Panzer Battles User Manual
• A file Weather.dat must exist in the game folder that specifies the daily weather conditions.
The Weather.dat file consists of a number of lines. On each line, there are:
• 3 numbers that specify a date in the form day, month, and year. This date is the earliest date for which the weather specification applies.
• 5 numbers that specify the percentage chance of the possible conditions Normal, Soft, Mud, Snow, and Frozen.
• 2 numbers that specify the minimum and maximum visibility range.
• Optionally, a value indicating the percentage chance of a Storm on each day.
Example of Weather.dat:
16 12 1944 0 100 0 0 0 2 3 018 12 1944 0 80 0 20 0 3 4 3025 12 1944 0 20 20 60 0 3 5 8030 12 1944 10 40 20 30 0 4 5 10
This specifies that starting 16 Dec, 1944, there is a 100 percent chance of Soft conditions. On 18 Dec, 1944, this changes to an 80 percent chance of Soft conditions and a 20 percent chance of Snow. Likewise, on 16 Dec, 1944, the visibility can range from 2 to 3 hexes. On the 18th, this changes to a possible range from 3 to 4 hexes. Finally, there is a 30% chance of a Storm starting the18 Dec, 1944, changing to 80% on 25 Dec, 1944, and then to 10% on 30 Dec 1944. NOTE: none of the numbers in this file can have leading zeros. Thus numbers like 02 should be written simply as 2.
Frozen Penalty
Depending on the game and the scenario, it is possible for one side or the other to be given a Frozen Penalty from 0 to 100%, defined by Parameter Data. When this penalty value is nonzero, then the following effects apply to the specified side during Frozen turns only:
• The defense value of units in non-Urban (Village, Town, City, and Industrial) hexes is reduced by the Frozen Penalty.
• The defense value of units in Urban (Village, Town, City, and Industrial) hexes is reduced by half the Frozen Penalty.
88

Panzer Battles User Manual
• The attack value and assault value of units is reduced by half the Frozen Penalty.
• The movement allowance of vehicle units is reduced by twice the Frozen Penalty.
89

Panzer Battles User Manual
Combat Results
A common combat results calculation is used for both fire and assault results. The combat results calculation is based on fourparameters: a combat value, a modifier, a Low Combat Value (LCV) and a High Combat Value (HCV). For fire combat, the combat value is the adjusted fire value of the firing units. For assault combat, the combat value is the adjusted strength of
the opposing side. The given modifiers are applied to the given combat value to arrive at the effective combat value. The Low Combat Value and High Combat Value are the extreme possible casualties resulting from a base-line combat value of 1000. The effective combat value is used to scale these accordingly resulting in low and high possible casualties. Finally a random value is selected between the low and high casualty values to arrive at the finalcombat result.
For example, given a combat value of 40, a modifier of 25%, a Low Combat Value of 50 and a High Combat Value of 250, the effective combat value wouldbe 50 (= 40 + 25%). This would be 5% of the base-line combat value of 1000. Thus the low casualty value would be 2.5 (= 50 * 5%) and the high casualty value would be 12.5 (= 250 * 5%). The resulting casualty value would be randomly generated between 2.5 and 12.5 for this combat. Finally, based on the fractional part of the casualty value, it is randomly rounded up or down. For example, if the casualty value was calculated to be 3.7, then 30% of the time this is rounded down to 3 and 70% of the time is rounded up to 4.
Vehicle and gun losses resulting from enemy fire is calculated on the basis of 1vehicle or gun = 10 men. Combat losses less than 10 men result in a probability of a 1 vehicle or gun loss proportional to the value. Thus a combat loss of 5 men applied to a tank unit would result in a probability of 5/10 = 50% that a one tank loss would occur.
Fatigue results are calculated as random values between the casualty value and a fatigue factor times the casualty value. The fatigue factor depends on the size of the unit and is:
• 6 for squad and uncombined platoon units.
90
Panzer Battles User Manual
• 4 for combined platoon units consisting of 2 subunits.
• 2 for companies and combined platoon units consisting of 3 or more subunits.
When Morale Checks are applicable, they are determined based on a probability using the given loss as:
loss / (loss + base-value)where the base-value depends on the size of the unit and is:
• 5 for squad and uncombined platoon units.
• 10 for combined platoon units consisting of 2 subunits.
• 15 for companies and combined platoon units consisting of 3 or more subunits.
Thus a platoon unit that takes a loss of 15 men has a 50% chance of requiring a morale check and a platoon unit that takes a loss of 60 men has about an 80% chance of requiring a morale check.
When the optional rule Alternative Calculation of combat results is chosen forfire or melee results (see the Main Program Help File ), then the resulting casualty value is based on the average of two default casualty calculations. This produces values which are more likely to be in the midrange of the casualty interval rather than uniformly distributed.
Finishing Off
When a unit that consists of men is reduced below a strength of 10 as a result of combat, then there is a calculation performed by the main program to determine if the unit survives or is considered "finished off" as a result of having lost unit cohesion. The calculation is based on a probability of 10% survival per man remaining. Thus a unit that has been reduced to 6 men as a result of combat has a 60% chance of surviving the calculation.
91

Panzer Battles User Manual
Additional Features
Network Play
This section describes the details associated with multi-player Network Play. Microsoft’s Direct Play is used for this purpose. The TCP/IP protocol is used toconnect the computers being used. If you are using a firewall to connect to theInternet, you must configure it before you can connect using Direct Play. Information on how to do this can be found in this Microsoft technical article: DirectX: Ports Required to Play on a Network.
The Player Dialog is displayed so that each player can specify their name and tospecify if they want to be on the same side as the Host player or the opposing side.
The Caller will be prompted to enter the IPAddress of the Host computer. The Host playermust determine their IP Address andcommunicate this to the other players.
One way for the Host player to determine their IP Address is to perform the following steps:
• Click on Start, then Run, and enter cmd.• In the window that opens, enter ipconfig.
92

Panzer Battles User Manual
Once a connection has been established, the Comm Dialog will appear and allow both players to communicate with each other. You can type messages in the area at the bottom of the Comm Dialog and press Return to send them. All messages are displayed in the top area of the Comm Dialog prefaced by the name of the player sending the message. In Multi-Player Network Play games, you can limit the
sending of the message to players of your side, by selecting the option at the bottom of the Comm Dialog.
If you are the first Caller of the opposing side, you will be prompted to specify an Encryption Key to be used to encrypt the battle file on the Host computer. This encryption will prevent your opponent from trying to access the battle file in your absence. Be sure to remember your Encryption Key and specify it exactly the
next time you open an existing battle or else a read error will occur. If you trustyour opponent, it is OK to leave the Encryption Key blank.
Multi-Player
In general, both sides of a Network game can have more than one person assigned to them. The Host player and the first player to connect playing the opposing side, will be the Commander for their respective sides. By default, the Commanders control all units for their side. Additional players on each side can be assigned commands by the Commander. Each player can only move and fire units under their command. The Multi-Player Dialog described in the Main Program Help File describes the actions used to assign commandsto players and to manage Multi-Player features.
93

Play By E-Mail
This section describes the details associated with Play-By-E-Mail (PBEM). PBEM is initiated either from the Campaign front-end or through the Play-By-E-Mail option of the Mode Menu (see the Main Program Help File ).
When a game is started under the PBEM option, the player starting the battle will be prompted with the New Scenario Dialog (see the Main Program Help File ) to select the side they wish to play, the Fog of War option, any change to the Advantage value, and Optional
Rules. When control of the game passes to the opposing player, the main program will save the PBEM game in a file with extension bte and notify the player that the file can now be E-mailed to their opponent. The player should send the bte file either Zipped up or as an attachment in an E-mail.
When the other player receives the E-mail, it is essential that they copy the bte file into the appropriate game folder. By default, this game folder is based on the name of the game such as "C:\John Tiller Software\Kharkov '43", but this can be changed during installation. Once the bte is copied, the player can start PBEM mode either from the File Selection Dialog (see the Main Program Help File ), or through the PBEM option of the Mode Menu (see the Main Program Help File ).
When the player opens the PBEM file, they will be prompted to view the battle replay. If they notice that the replay is not for the opposing side, they have opened their own PBEM file in error and should immediately select Cancel.Otherwise, they can select Yes or
No to either view the replay or advance directly to their turn. Pressing the Escape (Esc) key during the replay will terminate the replay.
94

When a PBEM battle is saved with the PBEMEncryption Option enabled (see the SettingsMenu in the Main Program Help File ) or if thefile has already been encrypted by the opposingplayer, then the player will be prompted for anEncryption Key. On subsequent turns, theidentical key must be entered by the player inorder to read the file. Note that a PBEM battle can be encrypted even after play has begun, but once encrypted, it cannot be converted back into an un-encrypted form.
95

Deception Units
Deception Units only exist in a few games depending on the historical situation. They represent specialized units trained to operate behind enemy lines and to cause disruption of the movement and activities of the enemy.
Deception Units are identified as such in the Order of Battle. They can be identified in the game by right clicking on the unit picture and seeing the designation DECEPTION.
Deploying Deception Units
Deception Units can be deployed on any turn but only redeployed on the first turn on or immediately after midnight. To deploy a Deception Unit, you determine which Deception Unit you wish to deploy and what location you wishto deploy the unit to. You should click on the location you wish the Deception Unit to be deployed so it becomes the Hot Spot hex. There are two requirements before you can deploy a Deception Unit:
• The Deception Unit must not have moved or otherwise used Movement Points in the current turn.
• The distance from the Deception Unit to the location you wish the Deception Unit to be deployed to must be within three times the Deception Range for that side or twice the Deception Range for units being redeployed. The Deception Range value can be found from the Parameter Data Dialog.
Next, you select the Deception Unit option of the Units Menu in the main program. This will display the Deception Unit Dialog.
The Deception Dialog displays both Deception Units that are available and those that have been deployed. Units with an ‘X’ before their name have either moved that turn or have been deployed that turn.
Selecting a Deception Unit entry and clicking on the Deploy button, or double-clicking on the Deception Unit entry will close the dialog and deploy
96

the unit provided the deployment conditions are met. Once a Deception Unit isdeployed, the regular counter is removed from the map and the location of the deployed Deception Unit is marked on the map using a special marker.
Once a Deception Unit is deployed, it may be redeployed on the next opportunity to another hex within the distance of twice the Deception Range.
Deception Unit Effects
Once deployed, Deception Units have two effects on enemy units within the Deception Radius defined for their side. These effects are also caused by Partisan units without requiring deployment or being subject to detection.
• Enemy units moving in Travel Mode are subject to possible Disruption and loss of remaining Movement Points. The probability of this happening is determined on a hex by hex basis using the Deception Effect probability.
• Enemy engineer units attempting to blow bridges or otherwise cause damage are subject to possible failure of this action. The probability of this happening is determined by the Deception Damage probability.
Detecting Deception Units
Under Fog-Of-War, the locations of deployed Deception Units are not visible tothe other player. However, at the beginning of each turn, deployed enemy Deception Units are vulnerable to detection and removal from the map. The probability of any one deployed Deception Unit being detected in each turn is given by the Deception Detect probability for the side of that unit. For a Deception Unit to be detected, it must be within the Deception Radius of its side of one or more enemy units.
Recalling Deception Units
If a deployed Deception Unit is found to be in the same hex as a friendly regular unit at the beginning of a player turn, then that Deception Unit is automatically recalled and restored to its normal counter status. The player may move the Deception Unit normally at that point and may redeploy the Deception Unit to another location.
97

Tactics
Here are some hints about game play that may help you enjoy your games more and perhaps enable you to do better against your opponents as well.
Mind Your DistanceIf you are used to playing Panzer Campaigns, you will think in terms of moving adjacent to the enemy to attack. In Panzer Battles and its ranged fire feature, this can be deadly.The effectiveness of ranged fire
increases dramatically as range decreases and in general you need to keep your distance from the enemy before moving in for an assault. Use ranged fireto disrupt the enemy units before advancing.
Don’t Attack In Travel-ModeThere are several penalties associated with units in Travel Mode, both having to do with their ability to defend as well as attack. In general, you should only use Travel-Mode to advance on the enemy position while using Road Movement, but then change to Deployed mode as soon as you encounter the enemy.
Disrupt Your AttackersDisrupted units not only fire at a disadvantage, but they are also prohibited from assault attacking. The biggest effect you can have on an attacker is to disrupt his units. That will prevent him from assaulting your defensive positions and allow you to withstand the attack much better. You should consider the greatest value your artillery has against attacking armor is to disrupt the armor, not necessarily eliminate it. In this way, you can compel the attackers to break off the attack even though they still have strength.
Watch Out For the Combined Arms PenaltyNormally, any Combined Arms Penalty is reported to you when you add units to an assault attack. However, if Fog-of-War is in effect, then you will not be told when this penalty is in effect. So be careful. If you have vehicles assault attacking into non-Clear terrain against enemy infantry, make sure you have committed sufficient supporting infantry to protect your attacking vehicles.
98

Make Sure You Use Your ArtilleryIt may seem like an obvious fact, but firing your artillery into enemy positions issomething you should consider as the first step in an attack. Often, when you are advancing on an enemy position, it is easy to forget that you have artillery available to support the attack and you try to just "blitz" the defending position. Think of your artillery first, not last, in your turn.
Attack SystematicallyThis has to do with the tempo of your attack. It’s easy to get excited about taking an enemy position and lose track of the fact that you are taking excessive casualties in the attack. Take your time. Plan your attack. Use your artillery and air support. Coordinate your efforts and you will end up losing much less that if you just attack piecemeal.
Watch Your Unit’s Battle Fatigue LevelsThe fastest way to make a fighting unit ineffective is to push its Fatigue level tothe point that it will take a long time to recover. When a unit takes losses from combat it also accumulates Fatigue Points. You'll see this as the fatigue level values change in color from green in the Low range, to yellow for Medium and to orange for High Fatigue. Units that move or fire have no chance of recovering from the effects of Fatigue.
Managing Your UnitsRotate your units to rest the heaviest engaged before they become too Fatigued. As a unit’s fatigue level approaches the top of the Medium Fatigue range, consider pulling it out of the fight for a rest. Units in the High Fatigue range will not stand up in battle and could quickly Disrupt and then become Broken causing an crisis in your lines.
Aiding your Unit’s Recovery from Disruption (and Broken) StatusAs carefully as you may watch Fatigue or manage your units, some will still Disrupt as a result of combat and if they continue to be fired upon they may become Broken. When this occurs, there are a number of things you can do that will assist in the successful recovery of these units. Keep HQ's within range of their parent HQ's thereby increasing their chance to remain "in Command". The closer a unit is to its HQ the better the chance of recovery. As recovery is based on current unit Morale and factors such as amount of Fatigue, place units that are out of action in locations where they will not be fired upon, so as to lower their Fatigue.
99

Unit Symbols
The following symbols are used in the game to indicate the unit type on counters in the 2D normal view unless the Graphical Icons setting is on.
Headquarters – this is the basic Headquarters icon. The notation at the top of the icon indicates the organization: I for company, II for battalion, III for regiment, X for brigade, XX for division, XXX for corps, and XXXX for army andarmy group.
Infantry – this is the basic infantry icon. There are variations of this depending on the movement capabilities of the unit. For example, two dots under the icon indicate Motorized Infantry and an oval inside the icon indicates Mechanized Infantry.
Heavy Weapons – this is the icon for a Heavy Weapons unit which may contain machine guns and mortars.
Armor – this is the icon used for tanks of all types.
Artillery – this is the basic icon used for artillery. Variations of this are useddepending on the movement type of the unit. For example, two dots under the icon indicate Motorized Artillery, one dot and a short line under the icon indicate artillery in Halftracks, and an oval inside the icon indicates Armored Artillery.
Heavy Artillery/Siege Guns – this is the basic icon for Heavy Artillery and Siege Guns. Variations of this are the same as for normal Artillery.
Infantry Artillery – this is the icon for Artillery units that lack an Indirect Firecapability and thus are used in a support role.
Rockets – this is the basic icon for Rockets. Variations of this are the sameas for Artillery based on the movement capabilities of the unit.
Anti-Tank – this is the basic icon for Anti-Tank weapons. Variations of this are the same as for Artillery based on the movement capabilities of the unit and if it is armored.
Engineer – this is the basic icon for Engineers. When an oval occurs insidethe icon, it indicates Armored Engineers.
Cavalry – this is the icon for Cavalry.
Recon – this is the basic icon for Recon and differs from the Cavalry symbol by the addition of the two dots underneath. When there are three dots underneath the icon, it indicates an Armored Car unit.
Anti-Aircraft – this is the basic icon for Anti-Aircraft units. Variations of thisare the same as for Artillery to indicate the movement capabilities of the unit.
100

Heavy Anti-Aircraft – this is the icon for Heavy Anti-Aircraft units. While these units have reduced effectiveness against low-flying air units, they have the ability to attack other air units such as air recon and carpet bombers.
Airborne – this is the icon for Airborne units and can include both Parachute and Glider units.
Commando – this is the icon for Commando and Ranger units.
Ski Infantry – this is the icon for Infantry with skis.
Bicycle Infantry – this is the icon for Infantry with bicycles.
Motorcycle Infantry – this is the icon for infantry with motorcycles.
Naval – this is the icon for all ships.
Rail Mode – this icon indicates a unit in Rail Mode and supercedes the normal icon for that unit while in Rail Mode.
Supply Unit – this is the icon for Supply Units, which are only used under the Explicit Supply Optional Rule.
101

Credits
Developer: John Tiller
Artist: Joe Amoral
Additional Programming: Dr. John Rushing, University of Alabama-Huntsville
Contact and Support Information: http://www.JohnTillerSoftware.com
Battles of Kursk – Southern Flank
Project Coordinator: David FreerScenario Design: David Freer, Mike AvanziniOrder of Battle: Mike Avanzini, David FreerPlanning Maps: Mike AvanziniGame Maps: David FreerUnit Graphics: Joe Amoral, David FreerGame Documentation: David Freer, Mike AvanziniPlay Testing: Eric Baker, Brian ‘Dogsoldier’ Bedford, Gary ‘Tide’ Christian, David Duncan, Stephen Duncan, David Freer, César ‘Indragnir’ Librán Moreno, Mark Middleton, Phil Niven, Dave Ross
102