portable data collection terminal
TRANSCRIPT

PORTABLE DATA
COLLECTION TERMINAL
WINDOWS
TRANSFER UTILITY
HELP FILES
BETA EDITION
Compsee, Inc.
A Subsidiary of McRae Industries, Inc.

2

3
Welcome
Thank you for using the Apex III Windows Transfer Utility Software from Compsee, Inc. You have received this program in conjunction with the purchase of your Apex III Portable Data Collection Terminal (PDT) or the Apex III Program Generator application. The Apex III Windows Transfer Utility application is designed to help you easily perform file transfers between a PC (or other serial device capable of running Windows®) and your Apex III PDT. The application program works in conjunction with the Apex III PDT preloaded [dx.exe] File Transfer Utility. Before utilizing this application you should be familiar with the Apex III PDT and the communications techniques outlined in the Apex III PDT Technical Reference Manual. The Windows Transfer Utility application is configured to run on a PC or similar device, which meets the following requirements:
System Requirements
Windows® 95/98/NT operating system 100 MHz Pentium® or better 16 Mb RAM for Windows® 95/98, 32 Mb RAM for Windows® NT 2 Mb of free Hard Disk space A CD-ROM drive
If you have any questions about the use of this program, after reviewing the HELP files, you can contact Compsee, Inc at the following number:
1 (800) 768-5248
Copyright Acknowledgements:
Windows® is a registered Trademark of the Microsoft Corporation.
Pentium® is a registered trademark of the Intel Corporation.
Apex III and Compsee® are registered trademarks of McRae Industries

4
The Apex III Windows Transfer Utility Environment
The Apex III Windows Transfer Utility utilizes the Windows® Environment and is compatible with Windows® 95/98 and NT 4.0, or later. Within this context, various Windows are used to display information about the utility and/or allow input from the user. The Window titles listed below comprise the major components of the system.
The Apex III Windows Transfer Utility Main Window The Receive Files From The Apex III Window The Send Files To The Apex III WIndow
In addition to these major windows, various secondary windows allow the user to customize each transfer operation to their communication specifications. The Secondary Apex III Windows Transfer Utility windows are accessed from within the major application windows or from the various application Menus located at the top of the Main Window.

5
Basic Windows Techniques
Before using the Apex III Windows Transfer Utility Application, you should already be familiar with basic windows techniques and know how to navigate around in a Windows based environment. We have included a Windows Basics section (booklet) in the Apex III Windows Transfer Utility Help files located on the Contents tab under the Apex III Windows Transfer Utility Components heading. Should you require a more detailed description of how to navigate within the Windows environment, refer to the Windows Help Menu of your Windows Operating System or an appropriate Windows User manual.

6
Apex III Windows Transfer Utility Menus
The Apex III Windows Transfer Utility Main Window contains the following Menu options: File Menu Communications Menu Setup Menu Help Menu
Select the Menu Title with the left mouse button to open the sub-menu options. Alternately you can press and hold down the Alt Key and then press the underlined letter in the Menu Title (ALT + Underlined Menu Title Letter) to open the menu. e.g. File Menu = ALT + F.

7
Starting (Opening) The Apex III Windows Transfer Utility
Starting (Opening) the Apex III Windows Transfer Application by clicking on the Apex III Windows Transfer Utility application in your Windows Start/Programs menu.
The Apex III Windows Transfer Utility Main Window will open automatically with the program ready for you to commence a communications operation. Application parameters and secondary program windows that allow you to perform communication operations are accessed through the Menu Bar.
See also: Apex III Windows Transfer Utility Menus
8
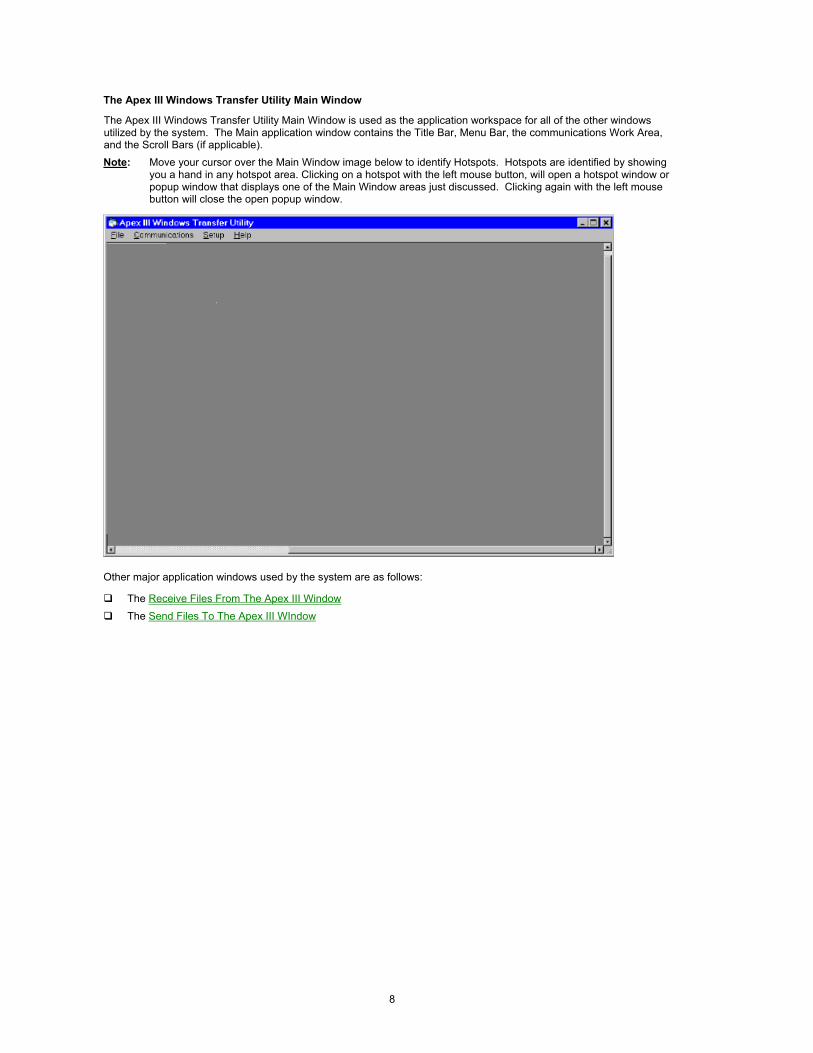
The Apex III Windows Transfer Utility Main Window
The Apex III Windows Transfer Utility Main Window is used as the application workspace for all of the other windows utilized by the system. The Main application window contains the Title Bar, Menu Bar, the communications Work Area, and the Scroll Bars (if applicable). Note: Move your cursor over the Main Window image below to identify Hotspots. Hotspots are identified by showing
you a hand in any hotspot area. Clicking on a hotspot with the left mouse button, will open a hotspot window or popup window that displays one of the Main Window areas just discussed. Clicking again with the left mouse button will close the open popup window.
Other major application windows used by the system are as follows:
The Receive Files From The Apex III Window The Send Files To The Apex III WIndow

9
Receive Files From The Apex III Window
The Receive files from the Apex III Window opens when you choose the Retrieve Files sub-menu option from the Communications Menu. The window allows you to specify files that are to be received from the Apex III, what operation is to be performed for each file (Overwrite, Append, Rename), compile file lists, open file lists, edit file lists, and receive the designated files from the Apex III PDT. When the window opens it is automatically configured to begin a new file list.
To list files to be received from the Apex III PDT you can use the Select PC File Name button (preferred method) or simply type the name into an empty line in the List File Name/Apex File field. You can select an unlimited number of files to complete your listing for a specific receive operation.
To include files using the Select PC File Name button, left click on the button with your mouse. The Add A File Window will open allowing you to choose the location (path/folder) and filename for the received file. Note that you can type in a non-existing file name and extension into the File Name field to receive the file under a new name or one which doesn’t already exist in the location selected. Once you have performed this operation, the filename and path will be automatically appended to the List File Name field in the Receive Files From The Apex III Window. To type in the file name of a file you wish to receive, left click on the first open List File Name/Apex File field and type the filename.extension. You should note that when using this method you must also left click on the respective New PC File field in the same line and enter the path to the location where you want the file to be placed upon receipt (see below example).
To delete a file from the list, simply click on the Apex File name and select the Delete File From List button. All fields on the same line will automatically be deleted from the list. Once you have chosen a file or files you must select the appropriate operation to perform upon receipt. Click on the Down Arrow button in the right side of the respective files Operation field to choose the Overwrite(default), Append, or Rename operation.
Overwrite: Upon receipt of the file from the Apex III PDT, the received file will automatically overwrite the new filename in the location (path/folder) chosen.
Append: Adds the received file information at the end of the selected new filename in the location chosen.
Rename: Places the received file in the selected new filename in the location chosen.

10
Note: If the new filename already exists, then a filename is automatically generated using the following format; New filename path + New filename + Number + New Filename Extension. The number portion of the filename is automatically incremented until a non-existing filename is created.
To start a new file list, click on the New File List button. Clicking on the New File List button, clears the present file listing if the file list has been previously saved. If the list has not been saved, a Save File Dialog Box will appear prompting you to either choose Yes, No, or Cancel. Choosing “Yes” opens the Save Receive File List Window allowing you to specify a name and location in which to save the list. Choosing “No” clears the existing list without saving to begin a new list. Choosing “Cancel”, cancels the operation.
To open an existing file list click on the Open File List button. If an existing list was still displayed which had not been saved the Save File Dialog Box will open prompting you to determine the fate of the list (see above). If any previous listing had already been saved, the old listing will be cleared from the Receive Files From The Apex III Window and the Open Receive File List Window will appear.
To save the displayed File List click on the Save File List button. The Save Receive File List Window will appear.
Clicking on the Receive Files button, initiates the receive operation of the displayed file list from the Apex III PDT using the communications parameters you have previously set in the Setup Menu (Port and Speed submenus). A YMODEM protocol transfer will be initiated and if no preferences have been set, communications parameters will defaults to the COM1 and 115,200 baud). For a more detailed discussion on Apex III communications process refer to the Apex III PDT Technical Reference Manual. At the completion of the transfer, a Transfer Status Report will be displayed in the Communications Status box (the status of each individual file transfer is depicted unless the entire transfer was a failure). Close the Receive Files To The Apex III Window when you have completed all of the receive operations. Selecting the Show Comm. Status Window checkbox displays a status window during the transfer operation showing you the status of the file transfer. Selecting the Close Window When Complete checkbox, closes the Receive Files From The Apex III Window automatically upon completion of the receiving operation.

11
Add A File Window
Upon opening, the Add A File Window displays the files listed within the Windows Transfer Utility’ home directory (by default).
Note: When opening this window from the Send Files To The Apex III Window the .exe File Type (Apex III Generated Program) will be automatically chosen in the “Files of type” field. When opening the window from the Receive Files From The Apex III Window the All Files (*.*) File Type will be automatically chosen. In each case, the subsequent type will be displayed within the Open Directory field.
Select the file you wish to add to the Send Files To The Apex III Window/List File Name area and left click the OK button. The selected filename and path will appear in the List File Name field within the Send Files To The Apex III Window. If the file you wish to send is on another drive or in another directory, migrate to the correct drive/directory by using the directory down arrow or the up one Level button in the Open Apex Template Window.
Once the file is located, click on the OK button.
If you wish to send a different type of file, click on the down arrow button to the left of the “Files of Type:” field and select the appropriate file type option.
Return to the Send Files To The Apex III Window Return to the Receive Files From The Apex III Window

12
Save File Dialog Box

13
Save Receive File List Window
The Save Receive File List Window allows you to save a Receive File List. This is especially useful if you have a list of files which require periodic downloading/updating.
Type the name you wish to save the file listing under in the File Name field. Note that the .RFL extension will automatically be added to the filename (see “Files of Type” field). Choose the location where you wish to save the file (drive/folder/subfolder etc.) and click on the save button.
Return to the Receive Files From The Apex III WIndow
14
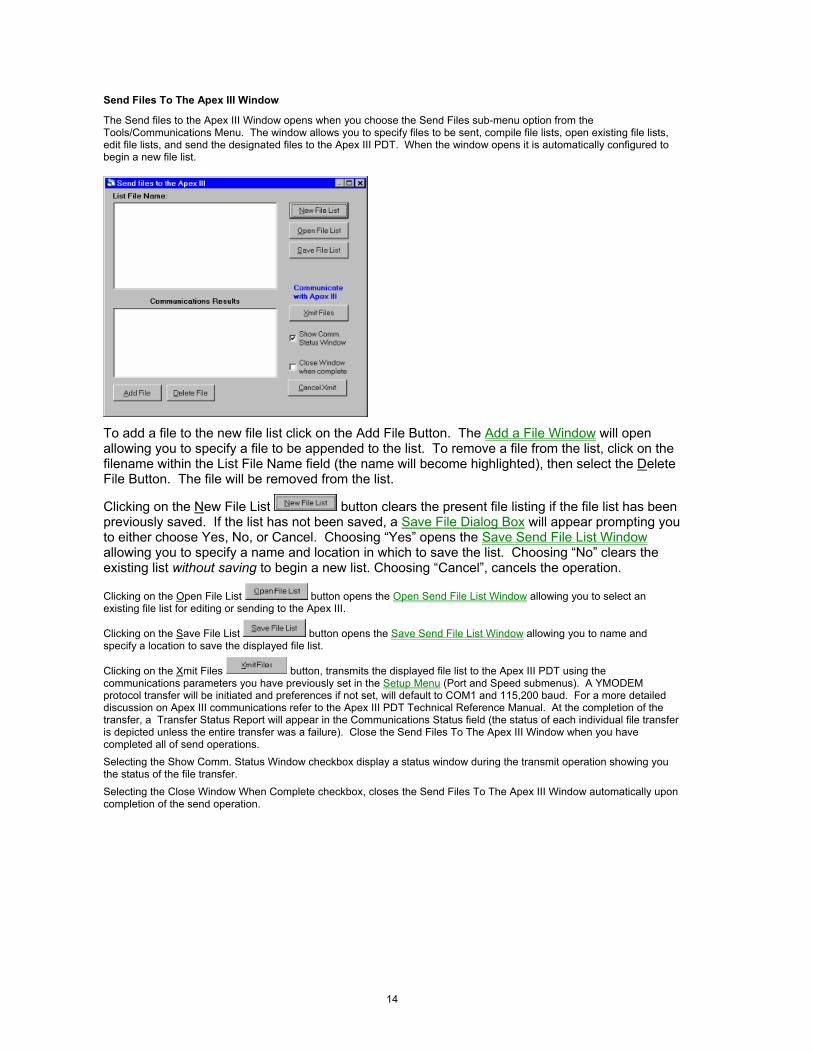
Send Files To The Apex III Window
The Send files to the Apex III Window opens when you choose the Send Files sub-menu option from the Tools/Communications Menu. The window allows you to specify files to be sent, compile file lists, open existing file lists, edit file lists, and send the designated files to the Apex III PDT. When the window opens it is automatically configured to begin a new file list.
To add a file to the new file list click on the Add File Button. The Add a File Window will open allowing you to specify a file to be appended to the list. To remove a file from the list, click on the filename within the List File Name field (the name will become highlighted), then select the Delete File Button. The file will be removed from the list.
Clicking on the New File List button clears the present file listing if the file list has been previously saved. If the list has not been saved, a Save File Dialog Box will appear prompting you to either choose Yes, No, or Cancel. Choosing “Yes” opens the Save Send File List Window allowing you to specify a name and location in which to save the list. Choosing “No” clears the existing list without saving to begin a new list. Choosing “Cancel”, cancels the operation.
Clicking on the Open File List button opens the Open Send File List Window allowing you to select an existing file list for editing or sending to the Apex III.
Clicking on the Save File List button opens the Save Send File List Window allowing you to name and specify a location to save the displayed file list.
Clicking on the Xmit Files button, transmits the displayed file list to the Apex III PDT using the communications parameters you have previously set in the Setup Menu (Port and Speed submenus). A YMODEM protocol transfer will be initiated and preferences if not set, will default to COM1 and 115,200 baud. For a more detailed discussion on Apex III communications refer to the Apex III PDT Technical Reference Manual. At the completion of the transfer, a Transfer Status Report will appear in the Communications Status field (the status of each individual file transfer is depicted unless the entire transfer was a failure). Close the Send Files To The Apex III Window when you have completed all of send operations. Selecting the Show Comm. Status Window checkbox display a status window during the transmit operation showing you the status of the file transfer. Selecting the Close Window When Complete checkbox, closes the Send Files To The Apex III Window automatically upon completion of the send operation.
15
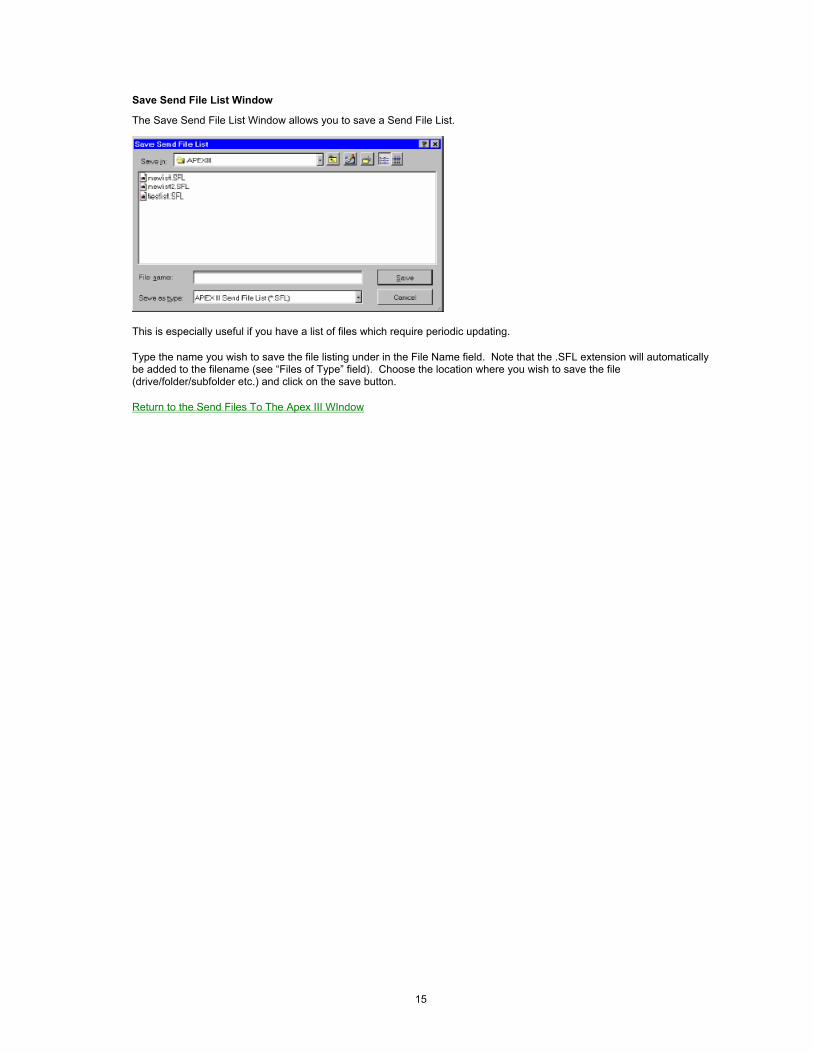
Save Send File List Window
The Save Send File List Window allows you to save a Send File List.
This is especially useful if you have a list of files which require periodic updating.
Type the name you wish to save the file listing under in the File Name field. Note that the .SFL extension will automatically be added to the filename (see “Files of Type” field). Choose the location where you wish to save the file (drive/folder/subfolder etc.) and click on the save button.
Return to the Send Files To The Apex III WIndow

16
Open Send File List Window
Select the drive/folder and name of the file list you wish to open (by default the window will automatically open to the folder containing the Apex III Windows Transfer Utility application). If the file list you wish to open is in another directory (folder) or on another drive use the Down Arrow or the Tree buttons to migrate to the correct location. Click on the file list name you wish to open (note the name will appear in the File Name field), then click on the Open button.
The names of the files contained within the file list will appear within the List File Name field of the Send Files To The Apex III Window. Note that the path and file list name appears above the List File Name area. Modify the listing as necessary by utilizing the features available within the Send Files To The Apex III Window. Return to the Send Files To The Apex III Window
17
About The Apex III Windows Transfer Utility HELP Files
The Apex III Windows Transfer Utility Application Help Files are designed to assist you in learning and using the full capabilities of the Apex III Windows Transfer Utility. Use of these files will greatly enhance the speed in which you learn to use the application and begin your first Apex III PDT communications.
Context Sensitive Help (help for the Windows Transfer Utility area where the cursor is located or the active window) can be obtained by pressing the F1 key on your keyboard.
Use the Help File Contents Tab to navigate your way through the various Help files much the way you would use My Computer or Windows Explorer.
Use the Help File Index Tab to find keywords located in the Help File Titles index and areas with which you require assistance.
Use the Help File Find Tab to identify Help file areas containing a keyword or words for which you need assistance. Apex III Windows Transfer Utility Help Files created by Docu-Write, Mooresville, NC. 28115 exclusively for Compsee, Inc. All Rights Reserved 2001.

18
Title Bar
Displays the Window Title at the top of the Window area.

19
Menu Bar
Display the Apex III Windows Transfer Utility application Menus. If a menu is active the Menu Title appears in black. If a menu is inactive (cannot be used during a specific operation), the Menu Title will be grayed out. The Apex III Windows Transfer Utility Main Menu items are the File Menu, Communications Menu, Setup Menu, and the Help Menu

20
Work Area
The Work Area is the main area within the Windows Transfer Utility Main Window where the communication work is conducted. The Apex III Windows Transfer Utility secondary application windows are loaded within this area allowing the user to interface with the program and the Apex III PDT.
21
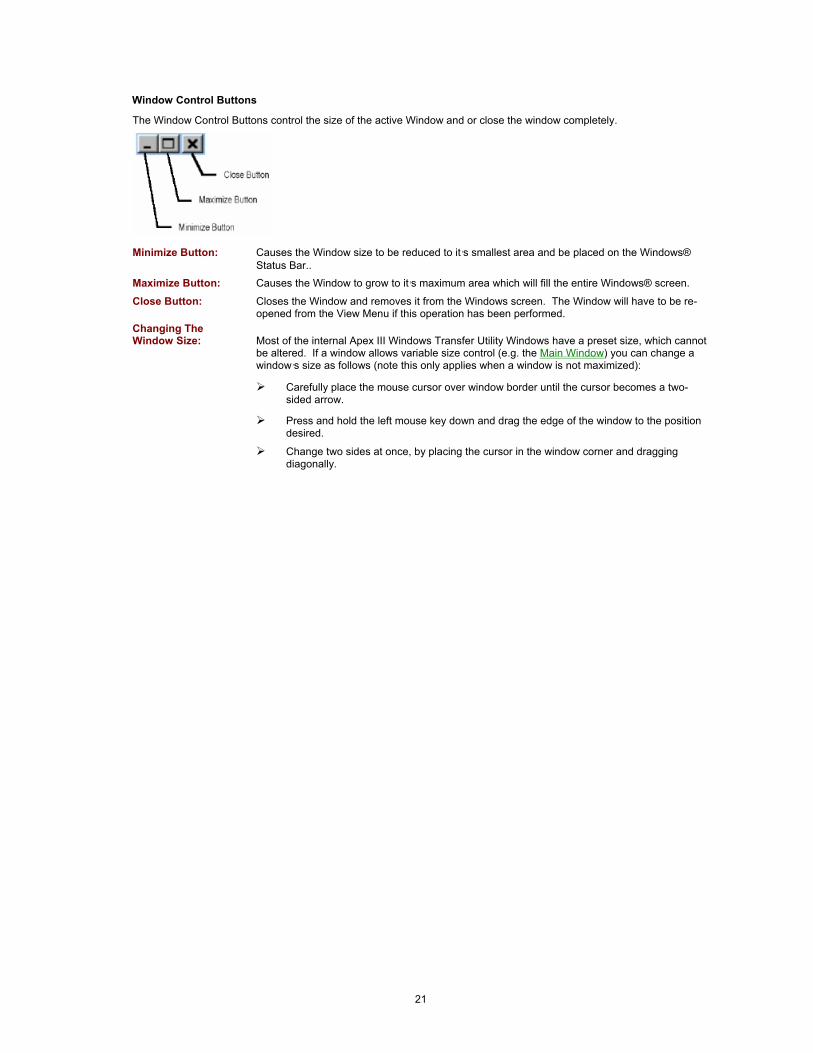
Window Control Buttons
The Window Control Buttons control the size of the active Window and or close the window completely.
Minimize Button: Causes the Window size to be reduced to it’s smallest area and be placed on the Windows® Status Bar..
Maximize Button: Causes the Window to grow to it’s maximum area which will fill the entire Windows® screen.
Close Button: Closes the Window and removes it from the Windows screen. The Window will have to be re-opened from the View Menu if this operation has been performed.
Changing The Window Size: Most of the internal Apex III Windows Transfer Utility Windows have a preset size, which cannot
be altered. If a window allows variable size control (e.g. the Main Window) you can change a window’s size as follows (note this only applies when a window is not maximized):
Carefully place the mouse cursor over window border until the cursor becomes a two-sided arrow.
Press and hold the left mouse key down and drag the edge of the window to the position desired.
Change two sides at once, by placing the cursor in the window corner and dragging diagonally.
22
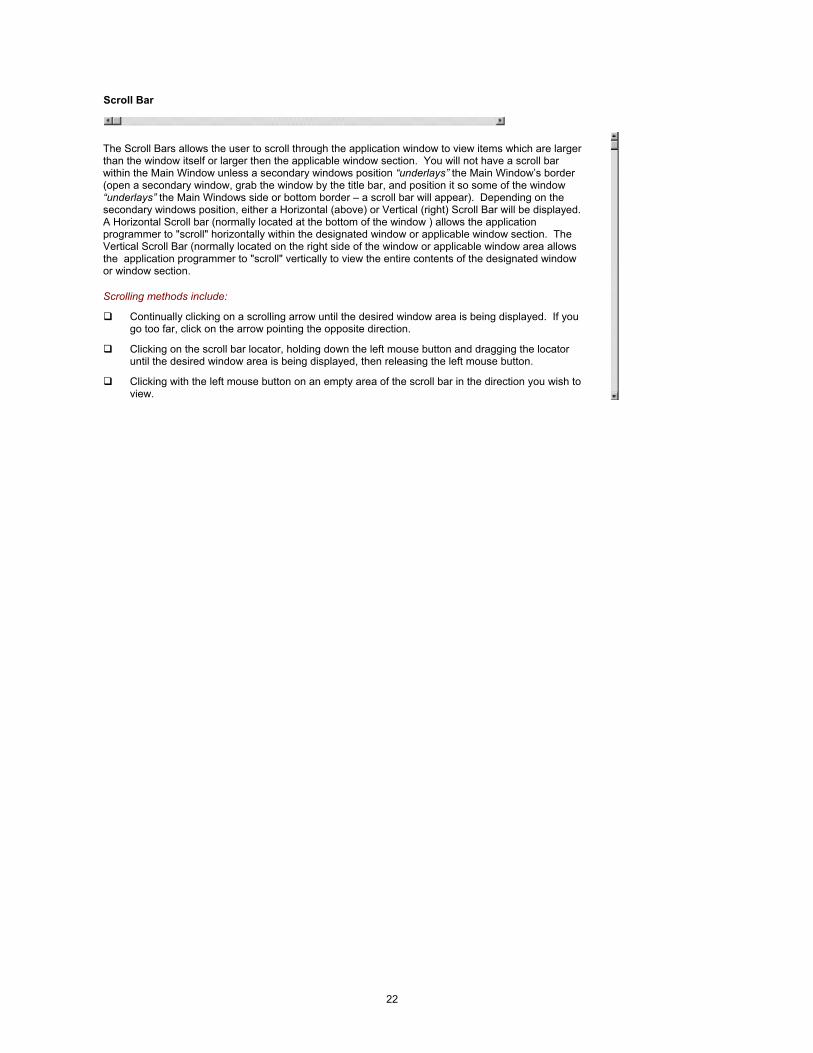
Scroll Bar
The Scroll Bars allows the user to scroll through the application window to view items which are larger than the window itself or larger then the applicable window section. You will not have a scroll bar within the Main Window unless a secondary windows position “underlays” the Main Window’s border (open a secondary window, grab the window by the title bar, and position it so some of the window “underlays” the Main Windows side or bottom border – a scroll bar will appear). Depending on the secondary windows position, either a Horizontal (above) or Vertical (right) Scroll Bar will be displayed. A Horizontal Scroll bar (normally located at the bottom of the window ) allows the application programmer to "scroll" horizontally within the designated window or applicable window section. The Vertical Scroll Bar (normally located on the right side of the window or applicable window area allows the application programmer to "scroll" vertically to view the entire contents of the designated window or window section.
Scrolling methods include:
Continually clicking on a scrolling arrow until the desired window area is being displayed. If you go too far, click on the arrow pointing the opposite direction.
Clicking on the scroll bar locator, holding down the left mouse button and dragging the locator until the desired window area is being displayed, then releasing the left mouse button.
Clicking with the left mouse button on an empty area of the scroll bar in the direction you wish to view.

23
File Menu
The File Menu is the first menu on the Apex III Windows Transfer Utility Menu Bar. Clicking on the File Menu allows the user to choose the Exit option, closing the Apex III Windows Transfer Utility Application and returning you to the Windows Desktop. This operation is normally performed when you have completed all of your required communications tasks.

24
Communications Menu
The Communications Menu is available to the user from the Main Window Menu Bar. By left clicking on the Communications Menu, the user can choose from two available sub-menus options:
Retrieve Files: Choosing the Retrieve Files option, opens the Receive Files From The Apex III Window.
Xmit Files: Choosing the Xmit Files option opens the Send Files To The Apex III Window.
25
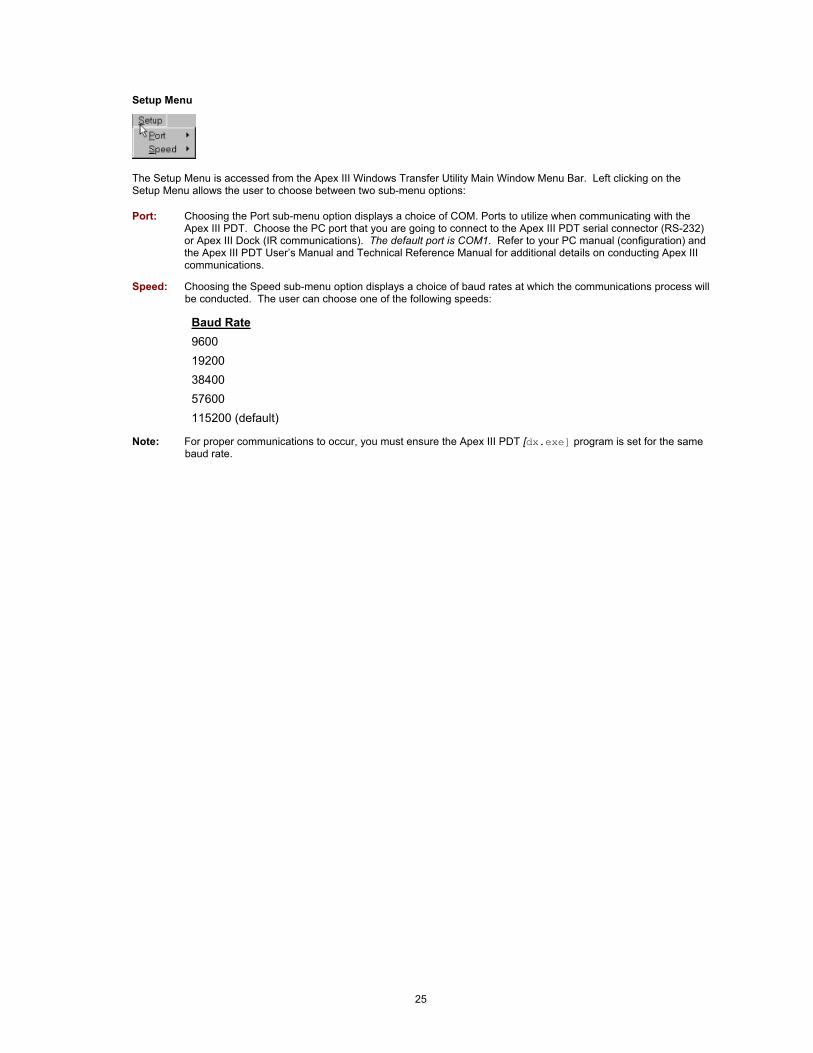
Setup Menu
The Setup Menu is accessed from the Apex III Windows Transfer Utility Main Window Menu Bar. Left clicking on the Setup Menu allows the user to choose between two sub-menu options:
Port: Choosing the Port sub-menu option displays a choice of COM. Ports to utilize when communicating with the Apex III PDT. Choose the PC port that you are going to connect to the Apex III PDT serial connector (RS-232) or Apex III Dock (IR communications). The default port is COM1. Refer to your PC manual (configuration) and the Apex III PDT User’s Manual and Technical Reference Manual for additional details on conducting Apex III communications.
Speed: Choosing the Speed sub-menu option displays a choice of baud rates at which the communications process will be conducted. The user can choose one of the following speeds:
Baud Rate 9600 19200 38400 57600 115200 (default)
Note: For proper communications to occur, you must ensure the Apex III PDT [dx.exe] program is set for the same baud rate.

26
Help Menu
The Help Menu displays the various Help options available for the Apex III Windows Transfer Utility Application. Left click on the option which you wish to utilize and the appropriate item will open. Also refer to About the Apex III Windows Transfer Utility HELP Files for additional information.
27
Conducting Communications With The Apex III PDT
Notes:
1. Normally the PC serial RS-232 port is used to conduct communications with the Apex III PDT (using cable PN 0227001). Other PC ports can be used depending on your PC’s configuration. Contact Compsee, Inc. for available cable information.
2. If conducting Apex III communications using the Apex III Dock, the Apex III IR port must be enabled (refer to the Apex III PDT Technical Reference Manual for additional information).
3. The Apex III PDT’s [dx.exe] utility implementation of the YMODEM protocol includes the file time and date parameter. Like all YMODEM utilities that implement the time/date parameter, the time/date is sent as Greenwich Mean Time (GMT). Transmitting or receiving a file from a system utilizing a different time zone will result in a received file time different than the original transmitted file time. e.g. The Apex III will receive a file from a PC set for the Eastern Standard Time zone with a time stamp of the original EST + 5 hours. Sending a file from the Apex III to the PC will result in a time stamp of the original EST - 5 hours. Note that if you are in a different time zone, the difference will vary by the amount of time difference between your time zone and GMT.
Communications Guidelines
A. With the PC turned-off connect the Apex III approved cable to the PC port to be utilized (generally the serial port).
B. If using the Apex III PDT internal serial port or Serial End Cap, power down the Apex III PDT and connect the other end of the cable to the unit.
C. Boot the PC and the Apex III PDT.
D. Open the Apex III Windows Transfer Utility application on your PC.
E. Choose the communications operation you wish to perform by selecting either the Communications/Retrieve Files menu (receiving files from the Apex III) or the Communications/Xmit Files menu (sending files to the Apex III).
F. Configure the secondary application window (either the Send Files To… or the Receive Files From…) in the prescribed manner for the operation you wish to perform.
Receive Files From The Apex III Window
Send Files To the Apex III Window
G. Prepare the Apex III PDT for a file transfer by using the [dx.exe] utility (pre-installed on the Apex III at the factory). Refer to the Apex III PDT Technical Reference Manual for details on the [dx.exe] utilities use and configuration and for communication operation information in general. Note that the Apex III PDT IR port MUST be enabled for communications using the Apex III Dock.
H. Use the Save File List button to save any Receive File Lists or Send File Lists that may be used on a routine basis to configure your Apex III PDT.
I. Perform the transfer (communication process) by choosing the Receive Files button (Receive Files From …Window) or the Xmit Files button (Send Files
To…Window).
J. Verify the communication process was successful.
K. Close the Apex III Windows Transfer Utility application.
28
Closing (Exiting) The Apex III Windows Transfer Utility
Note: It is recommended that you save any File List before closing (exiting) the program.
There are several ways to Exit the Apex III Windows Transfer Utility Application.
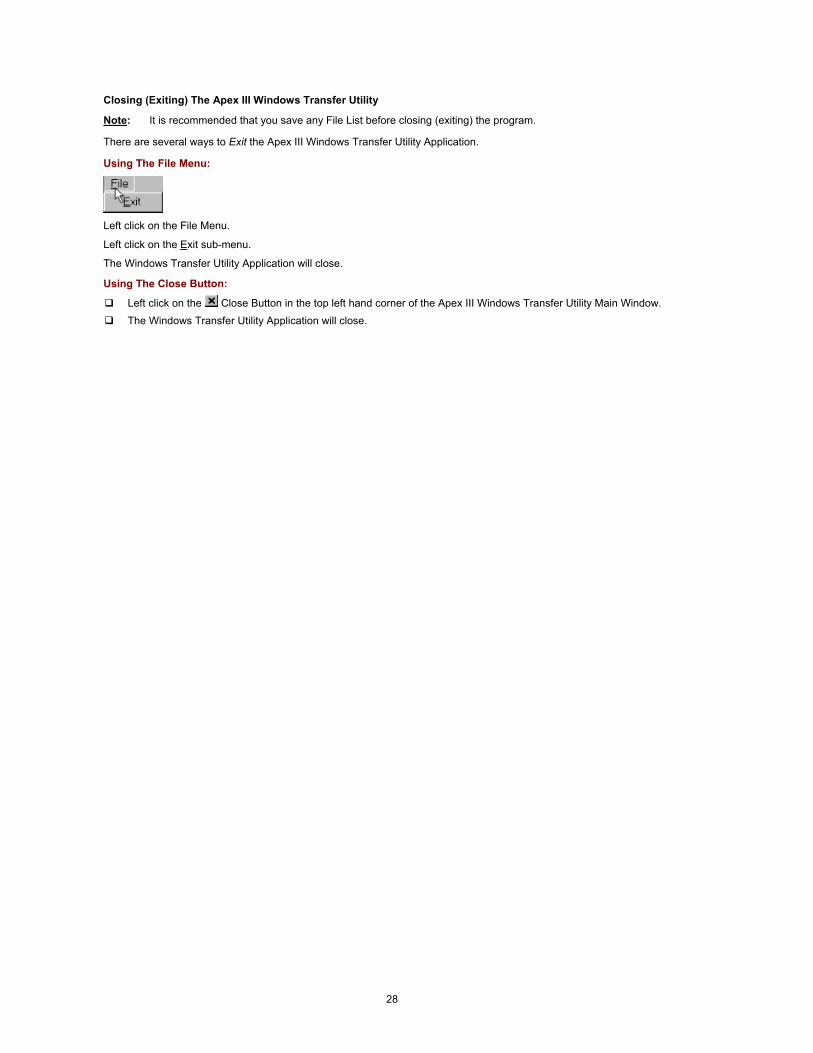
Using The File Menu:
Left click on the File Menu.
Left click on the Exit sub-menu.
The Windows Transfer Utility Application will close.
Using The Close Button:
Left click on the Close Button in the top left hand corner of the Apex III Windows Transfer Utility Main Window. The Windows Transfer Utility Application will close.

29
Technical Support
Technical Support for the Apex III Windows Transfer Utility and the Apex III PDT are available from Compsee, Inc. through the following methods:
Through our Website: "http://www.compsee.com/" By phone: (800) 768-5248 Via E-mail: [email protected]
Before calling please follow these guidelines: Refer to the appropriate sections of this HELP Files to ensure you have correctly performed the operation or function in question. Have the Apex III Windows Transfer Utility Version Number in-hand.
Have your PC’s information handy (System information, Operating System type, etc.), a complete description of the problem as well as when it occurs.

30
This Page Intentionally Left Blank

31
32
Compsee, Inc. Contact Information
www.compsee.com
1 (800) 628-3888