product information manager pim - aafes.com how to create - edit... · pim . applied views 2 when...
TRANSCRIPT
How To Create Or Edit Applied Views
Product Information Manager PIM

Applied Views
2
When looking at the Table View in a workflow, you are presented with a defaulted view of predetermined attributes. Creating an Applied View will allow you to.
Customize the table view to show you information that is important to you, and your specific category. View and enrich information in fields on multiple items at one time.
Users can create multiple views that allow them to work through all the different workflow screens that they have privileges. Example A is the defaulted table view in POD Review. Example B1 – B2 is the table view using an Applied View. The Applied View displays the defaulted columns as well as all of the added columns the user included in their new view they created.

Applied Views
3
A. This is the default view
B1. This the Applied view that shows the defaulted columns and the added columns
B2. Continuing to show additional columns that the users added to their new view.

Applied Views
4
To create your new applied view. Open your Table View Click on the Applied View icon A and a window will open. The box that opens will say “Recent Views” on the top left, on the top right round green circle with a + sign in the center. Click the circle icon.
A
A
Applied Views
5
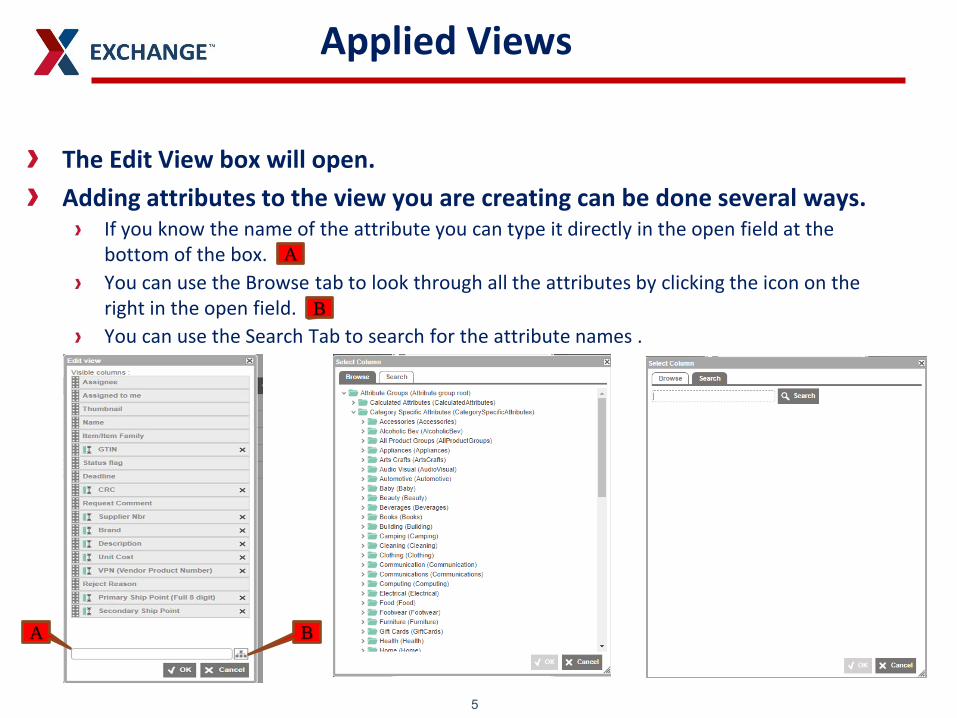
The Edit View box will open. Adding attributes to the view you are creating can be done several ways.
If you know the name of the attribute you can type it directly in the open field at the bottom of the box. You can use the Browse tab to look through all the attributes by clicking the icon on the right in the open field. You can use the Search Tab to search for the attribute names .
A
A B
B
Applied Views
6
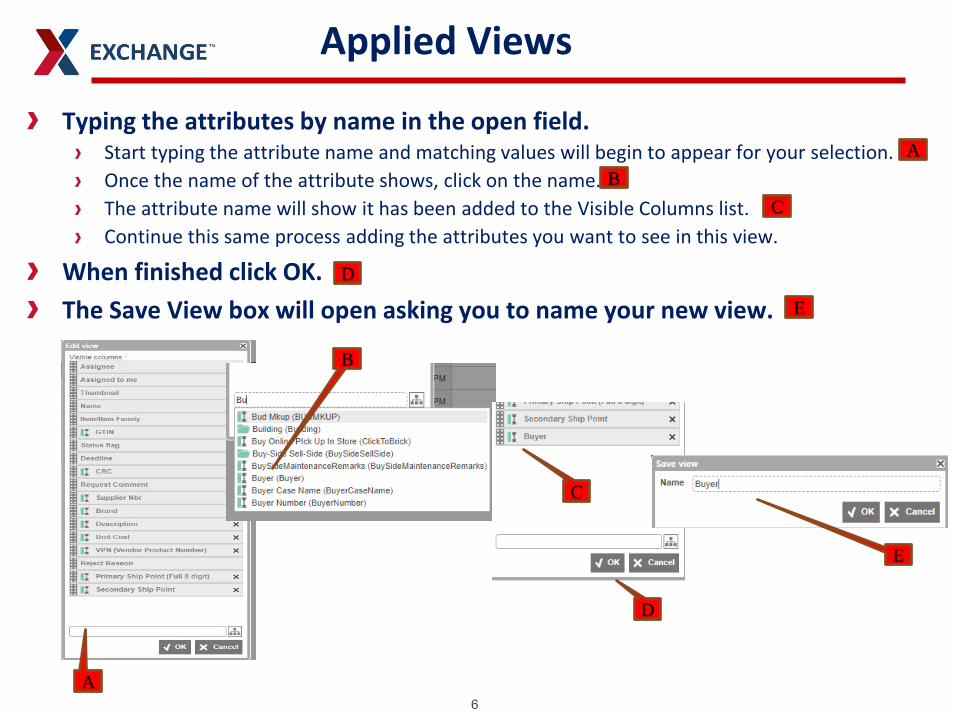
Typing the attributes by name in the open field. Start typing the attribute name and matching values will begin to appear for your selection. Once the name of the attribute shows, click on the name. The attribute name will show it has been added to the Visible Columns list. Continue this same process adding the attributes you want to see in this view.
When finished click OK. The Save View box will open asking you to name your new view.
A B
E
C
B
C
D
E
D
A

Applied Views
7
Using the Browse & Search tabs to add attributes to your applied view. Click the icon on the right side of the open field. The Select Column box will open, and you click down until you find the attribute you want to add, and click on the attribute. Click OK. The attribute name will show it has been added to the Visible Columns list. Continue this same process adding the attributes you want to see in this view.
When finished click OK. The Save View box will open asking you to name your new view.
A
B
E
C
D
E
A
B
C
D
Applied Views
8
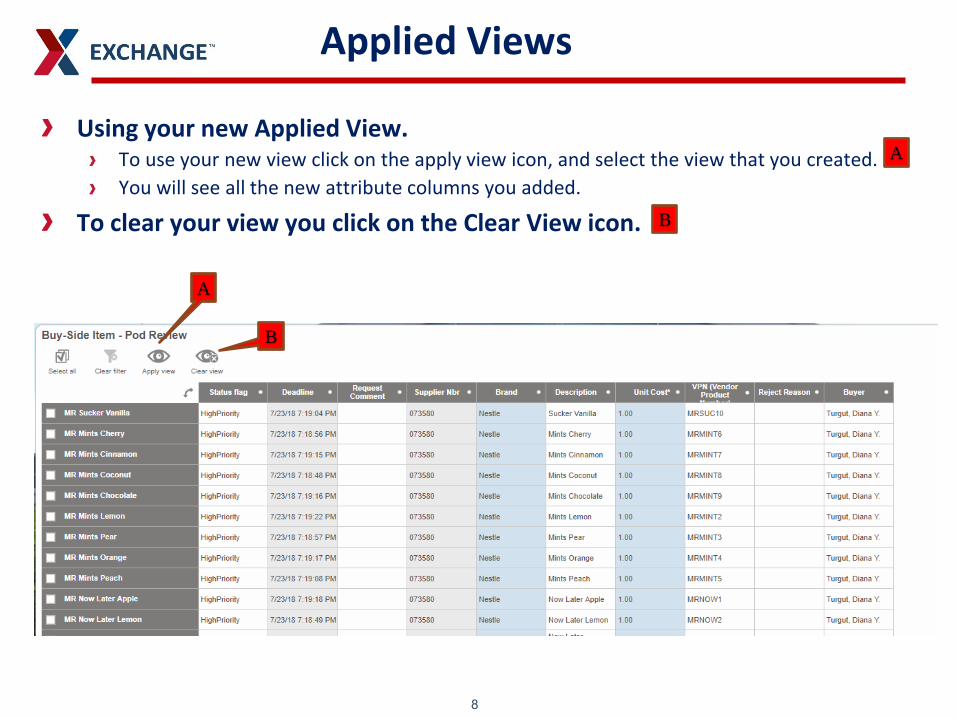
Using your new Applied View. To use your new view click on the apply view icon, and select the view that you created. You will see all the new attribute columns you added.
To clear your view you click on the Clear View icon.
A
B
A
B

Applied Views
9
How to Edit an existing Applied View. To edit your new view click on the apply view icon. The applied views screen will open, click on the small round icon to the right of the existing view that you want to edit. You will add the new attribute column name. You can remove attribute columns that you don’t use, click the X on the attribute that you want to remove from your view.
When you have finished making your changes click OK. You are overwriting the previously set up view with new information, click OK,
A
B
A
B

Applied Views
10
Columns in the Table view can be filtered to narrow items down that you want to work.
Click on the column header that you want to filter. The filter icon will show in the header of any columns you have filters engaged. You can type in all or part of the information that you are looking to filter on. You can filter on multiple columns.
To clear your Filters. You can click on the header of the column and click the Select All box. You can refresh/reload the page. You can click the to go back to your Home Page.
A
A
Applied Views
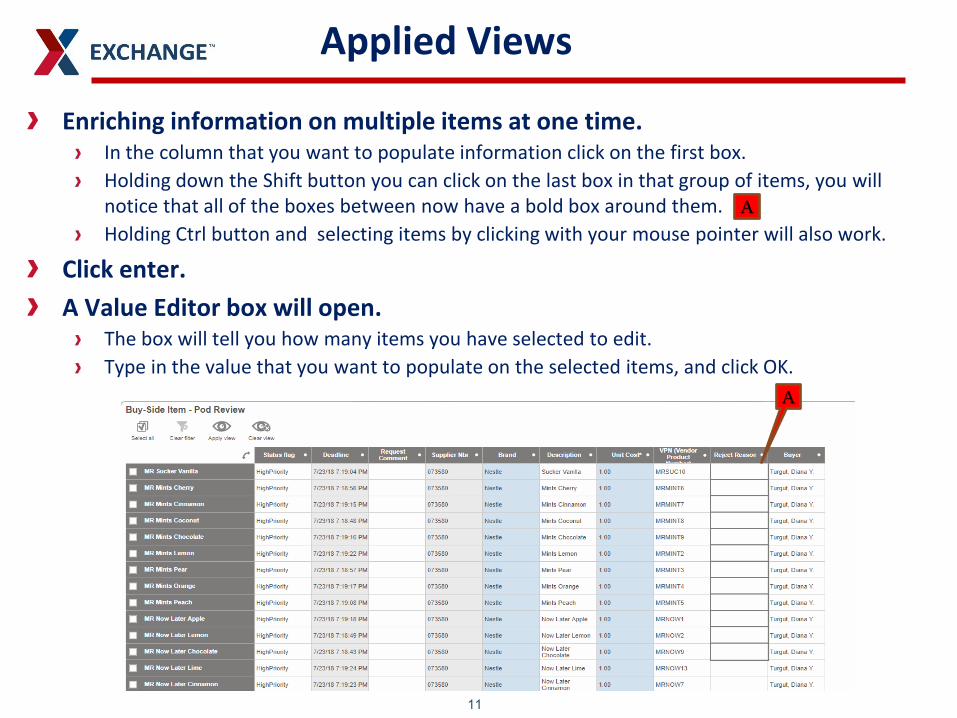
11
Enriching information on multiple items at one time. In the column that you want to populate information click on the first box. Holding down the Shift button you can click on the last box in that group of items, you will notice that all of the boxes between now have a bold box around them. Holding Ctrl button and selecting items by clicking with your mouse pointer will also work.
Click enter. A Value Editor box will open.
The box will tell you how many items you have selected to edit. Type in the value that you want to populate on the selected items, and click OK.
A
A
Applied Views
12
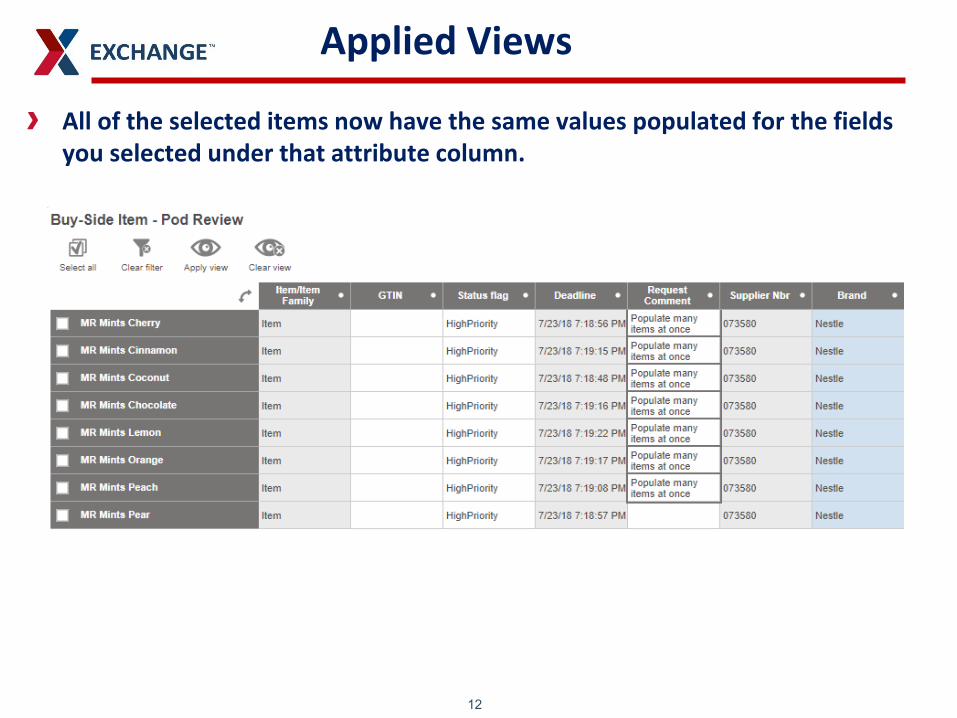
All of the selected items now have the same values populated for the fields you selected under that attribute column.
Applied Views
13
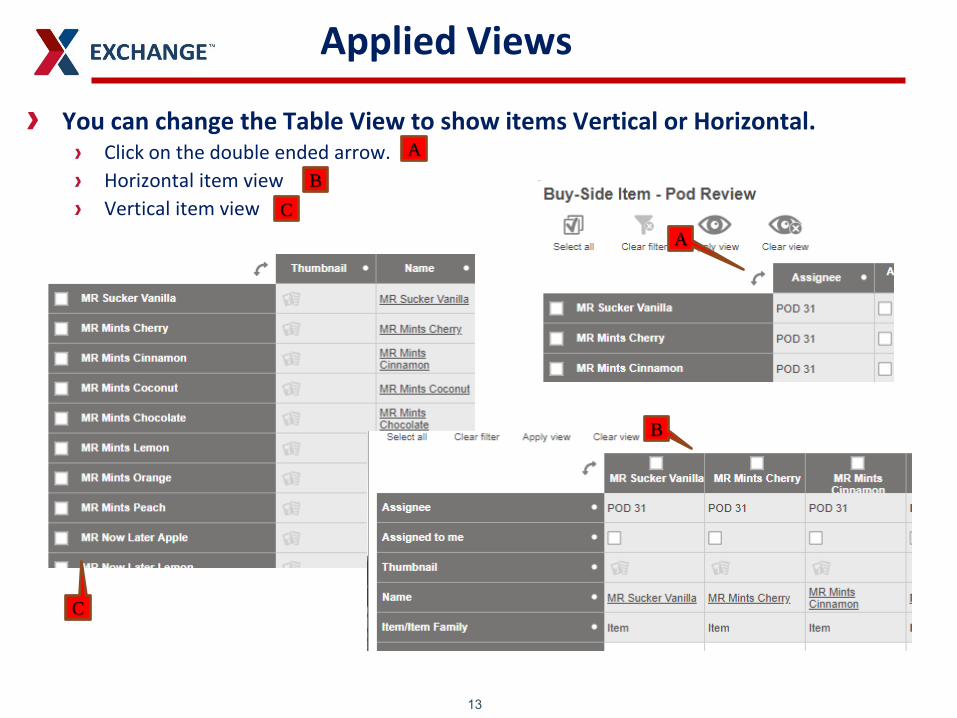
You can change the Table View to show items Vertical or Horizontal. Click on the double ended arrow. Horizontal item view Vertical item view
C
C B
B
A
A

Applied Views-Getting Started
14
Apply views to get you started
POD Review Search for Mandatory Item Review Add this view Provides much of the basic item data needed to review and approve supplier data
POD Enrich Search for POD, Modify Provides values that must be enriched by POD User


Thank You!