recruit training guide module 2: creating and ...1. r ecruit training guide module 2: creating and...
TRANSCRIPT

1.
RECRUIT TRAINING Guide Module 2:
Creating and Managing Recruitments and Applicants INTRODUCTION TO TRAINING MODULE 2 When Recruitments are created for online applicant management, this means your applicants can apply via the Recruit Web site and upload their required documents. The search committee will conveniently have access to review them online too. These types of recruitments fall into the Senate faculty or Health Sciences Clinical Professor series. THE FACULTY RECRUITMENT PROCESS Letʼs say that a TENURED recruitment with a specified salary control number has been authorized. A search plan is developed. The hiring department determines what documents must be submitted and what, if any, letters of recommendations are required for the recruitment. The search plan is submitted with ad text, and is approved. Next, the personnel Analyst will establish the position in Recruit. This manual will show you how this is done. For ads, link your applicants to Recruitʼs main apply page at —https://recruit.ap.uci.edu/apply OBJECTIVES OF MODULE 2 In this module you will learn: • how to set up a position in Recruit and configure it for online applications • how to set up the search committee • how to review and manage applications • how to run the report on the diversity surveys • how to archive the recruitment

2.
CONTENTS
LESSON 1 - GETTING STARTED IN RECRUIT
Log into Recruit.................................. 3
Create the Recruitment...................... 4 - 7
Set up and Manage the Search Committee .................. 7-8
LESSON 2 - WORKING WITH THE POOL OF APPLICANTS
Finalize/Unfinalize................................. 9
Hide/Unhide................................. 9
Using Filters................................. 10
Search by Date................................. 10
Column Options................................. 10
Download Applicant Data....................10-11
LESSON 3 - REVIEWING AN APPLICANTʼS FILE
Review an Applicantʼs File.................................11-12
Using Mark-as-Read and Personal Notes....................12
LESSON 4 - MANAGING AN APPLICANTʼS FILE
Upload Applicantʼs Documents................................12
Comments & Flags............................... 13
Schedule a Visit............................... 13
Update Status............................... 14
Shortlist Applicants………………..14
LESSON 5 - MANAGING THE SURVEYS ON DIVERSITY
Survey Reports............................... 14-15
LESSON 6 - WHAT TO DO WHEN THE SEARCH IS COMPLETE
Make Recruitment Inactive........................ 15
Re-activate Recruitment. …….16

3.
LESSON 1 - GETTING STARTED IN RECRUIT LOG INTO THE RECRUIT TRAINING WEBSITE You will be using Recruitʼs training site for this exercise so the positions you create will not be available to the general public.
1. Navigate to the Recruit TRAINING website located at http://recruit.ap.uci.edu/training/
2. Click on “UCIrvine Faculty & Administrators. 3. Enter your UCInetID and password.
4.
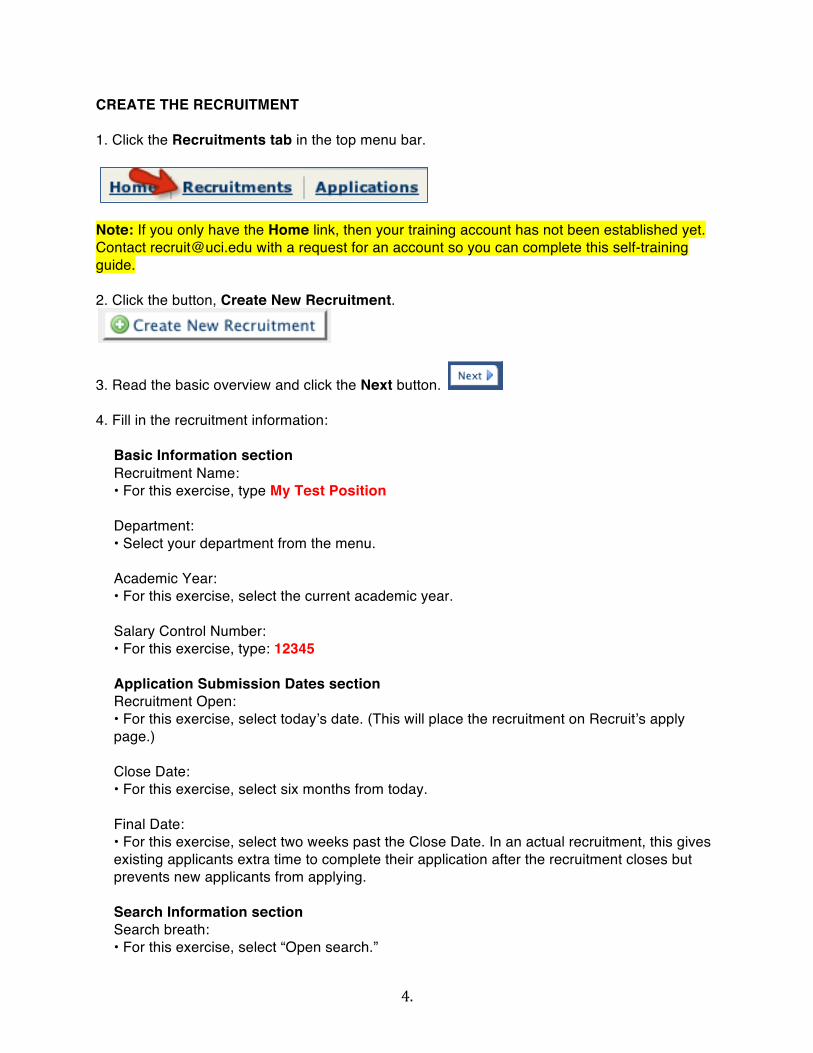
CREATE THE RECRUITMENT 1. Click the Recruitments tab in the top menu bar.
Note: If you only have the Home link, then your training account has not been established yet. Contact [email protected] with a request for an account so you can complete this self-training guide. 2. Click the button, Create New Recruitment.
3. Read the basic overview and click the Next button. 4. Fill in the recruitment information:
Basic Information section Recruitment Name: • For this exercise, type My Test Position Department: • Select your department from the menu. Academic Year: • For this exercise, select the current academic year. Salary Control Number: • For this exercise, type: 12345 Application Submission Dates section Recruitment Open: • For this exercise, select todayʼs date. (This will place the recruitment on Recruitʼs apply page.) Close Date: • For this exercise, select six months from today. Final Date: • For this exercise, select two weeks past the Close Date. In an actual recruitment, this gives existing applicants extra time to complete their application after the recruitment closes but prevents new applicants from applying. Search Information section Search breath: • For this exercise, select “Open search.”

5.
Initial search allocation: • For this exercise, select “Newly allocated.” Optional Information Link section Information URL: • Type the URL of your departmentʼs employment opportunities web page. If you donʼt know what that is, type http://www.mydept.uci.edu/facultyjobs
• Click the Next button. Specialties & Title Codes Screen
Title Codes section • Enter up to 10 Title Codes in the box provided. For this exercise, type 1300, 1310, and 1330. • Add them one at a time or all at once, separated by commas. • Click the button, Add Title Codes. Hiring Type: Tenured/SOE section • There is nothing to input in this section. Hiring type will be automatically derived from the title codes you have input. Specialties section • Choose either Campus or Health Sciences. • Make your selection from the drop-down menu. • Click the button, Add Specialty. You may add up to 5 specialties.
• Click the Next button.
Contact and Notes Screen
Recruitment Contact Email section Contact Name and Contact Email: • Type in your name and email here if it is not already filled in for you. Department Mailing Address section • Type in your departmentʼs address. This is the mailing address that Recruit provides to the applicant. Internal Notes section • Use this as you would a sticky note inside a file to remind you about something. For this exercise, type: job corresponds to OEOD-1020.
• Click the Next button.
The Review Recruitment Screen • Look over the information for accuracy. • Put a check in the confirmation box. • Click the Save & Done button.

6.
CONFIGURE FOR ONLINE APPLICANT MANAGEMENT 1. Click the button, Yes, Configure for Online Applicant Management.
Hint: If you select the button, No, Done for Now, you may return and configure the recruitment at a later date.
2. Read the overview screen for instructions and hints and click the Next button.
Documents and References Screen Note: Fill in the Documents & References requirements carefully! In an actual recruitment, the requirements you establish cannot be changed once your first applicant applies. Hint: If you are not sure what the requirements are, find out before you work on this section. Edit the OPEN DATE to a future date so that the recruitment is not available for applicants. Verify the requirements and then return to this section. Once you have entered in all documents and reference requirements, edit the OPEN DATE once again. The Documents section For this exercise, you will be deleting one of the default-required documents, renaming another, and adding one additional, optional document.
Add • Click the “Add” link to add a new requirement. • Name the new document Extra Materials. • Mark this document “optional.” In an actual recruitment, we recommend you add one or two additional, optional documents for the applicant to use if needed. Reorder • Click the Reorder link. • Using your mouse, pick up the document name and switch around the order of the documents. This will be the order the applicant will see in the list of requirements when they apply. Edit • In the Curriculum Vitae row, click the “Edit” link. • In the Description field, type “Required for final consideration” • Click the Update button.

7.
Delete • Delete the Statement of Teaching by clicking the Delete link.
The References Section This section is to define reference requirements.
Type: • If no letters will be required, select None. But for this exercise, select “Letters of Recommendation” from the drop-down menu. Number: • Select “1 to 5” from the drop-down menu. This means your applicants will need to define at least 1 reference and request a letter in order for their application to be complete.
Search Committee Reference Viewing Rights • You may restrict reference viewing to certain members of the search committee. But for this exercise, keep the default setting.
• Click the Next button. Email Settings Screen
Help Email address for Applicants section • Type in the address to receive questions from applicants. (This address will not be visible to the applicant.)
“Thank You” Email Sent to References section • This is a fully customizable email that is automatically sent to References once their letters of recommendation have been uploaded into Recruit. For this exercise, add your name to the signature line of the letter.
• Click the Next button. Review and Confirm Screen
• Confirm the information is correct before saving. • Click the Save & Done button.
SET UP AND MANAGE THE SEARCH COMMITTEE Once the recruitment is created, you will designate the search committee chair and reviewers that were listed on UCI's AP-80a form. At this time, an editor may also be designated. An editor is useful because this person may act as the assistant to the analyst.

8.
Any other individuals that you would like to include in the search committee but were not listed on UCI's AP-80a form should be marked as Additional Chairs, Additional Editors, or Additional Reviewers. 1. Click the Recruitments tab in the top menu bar. 2. Find the position you just created and click the link, “Manage Search Committee.”
3. For this exercise, add a few names of faculty or staff who are familiar to you.
• Use the Quick Add box if you already know the personʼs UCInetID. • or click Add members for an extended search for names.
- Select the School, then the Department, then select name from the drop-menu. - Click the Go button.
4. With either method, use the drop-down selector to assign a role on the committee.
Note: ALL Reviewers have the ability to view and sort the applicant list, review files, write comments, set flags, and view the visit & seminar information. All Chairs and Editors have more permissions than Reviewers.
5. Click the Add or Save & Done button, depending on the method you used to add the names. You may return at any time and manage and edit your search committee.
This Completes Lesson One! Your position has been created, the position has been configured for online applicant management, and the search committee has been assigned. In the following lessons we have created a recruitment for you with applicants already in place for the position, Super Best Job.
LESSON 2 - WORKING WITH THE POOL OF APPLICANTS 1. Click the Applications tab in the top menu bar.

9.
2. Locate the recruitment, Super Best Job and click the List Applicants link in the Action column. Note: If you do not see Super Best Job, contact us so we can set up your access rights. Send us e-mail us at [email protected] Finalize / Unfinalize an applicant When an applicant submits all required materials into RECRUIT, their application is complete and the program automatically finalizes the applicant — this is the point at which applications become visible to the Reviewers. If an application is not complete, Analysts, Chairs, and Editors have the option to manually finalize a candidate if this is in the best interest of the search. This exercise shows you this process. 1. Show all unfinalized applicants using the finder on the right side of the screen.
2. Check the “Unfinalized” box and click “Go.” 3. Choose any applicant marked “Applied” in the Status column. 4. In the Actions column, click “Finalize”. This applicant will now be visible to the Committee Reviewers even though s/he has not completed the application. 5. Click “Unfinalize” to undo this action. Hide / Unhide an applicant Recruit does not delete applications but you may hide any applicant from the committeeʼs view. This is useful when an applicant has applied to the wrong position. Analysts, Chairs, and Editors have the ability to hide / unhide applicants. 1. Choose any applicantʼs name. 2. In the Actions column, click “Hide”. The Search Committee will no longer see this applicant. 3. To “Unhide,” use the finder. Check the “Hidden” box and click “Go.”
4. Click the link, “Unhide” to undo this action. This applicant is once again visible to the Committee.
10.
Using Filters 1. Click the button, Show Filters. 2. Type in a designator in the box above the desired column. For this exercise, type University in the box above the Affiliation column. 3. In the Action column, click the Filter button. 4. Click the Clear button to restore the list of applications to its original state. Search by Date 1. Click the link, “Search by date.” This field will expand. 2. In the first drop-down menu, select Last Updated. 3. For the date range, select “before”. 4. Type todayʼs date in the date field. 5. Click the Search button. 6. Click the Clear button to restore the applicant list to its original state. Using Column Options 1. Click the button, Change Columns. 2. Check a few extra categories that you want to see. 3. Click the Save Columns button. 4. Click the Change Columns button once more and notice your changes. 5. Click the Default button to restore the original columns. Download Applicant Data This is an optional but useful tool if you want to create lists of applicant names, addresses, and other column criteria to take to a meeting. This feature is available to all users, including Analysts, Editors, Chairs, and Reviewers. RECRUIT will build a “comma-delimited” file for you, named “recruit_export.csv” consisting of the applications list and the data fields you have selected from the column options that you select. 1. In the recruitmentʼs applicant list, change your column options and check the boxes that you want to appear with your data.
11.
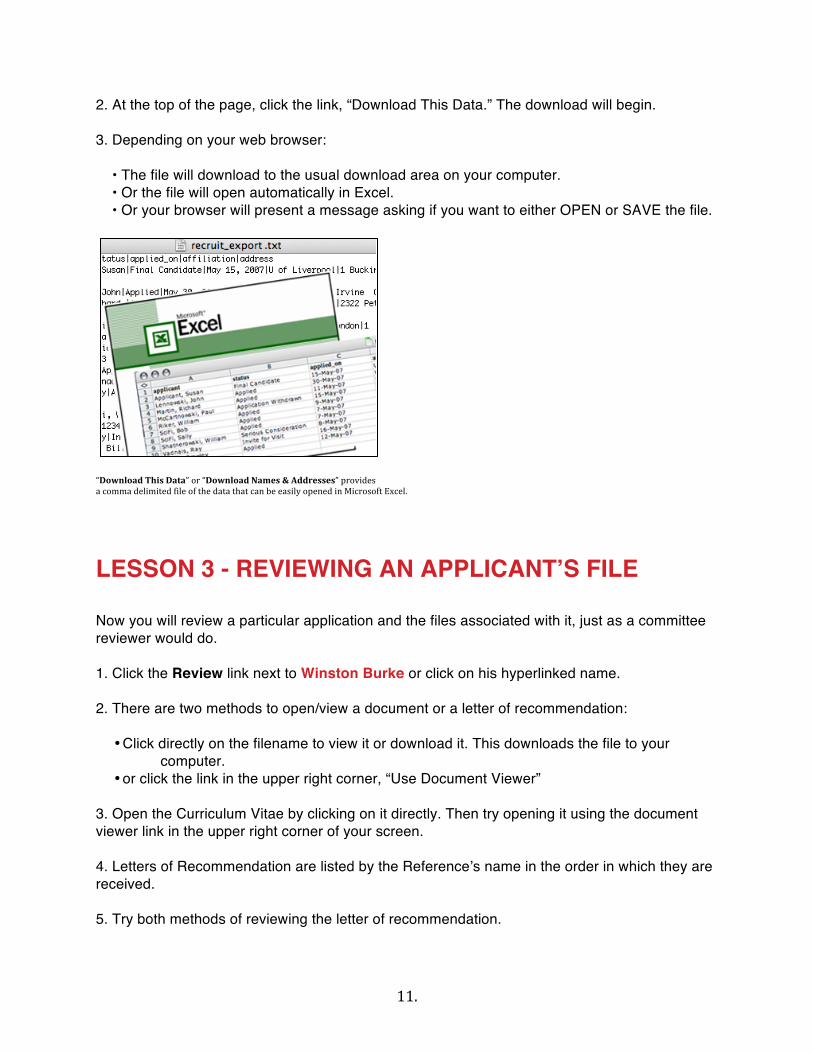
2. At the top of the page, click the link, “Download This Data.” The download will begin. 3. Depending on your web browser: • The file will download to the usual download area on your computer. • Or the file will open automatically in Excel. • Or your browser will present a message asking if you want to either OPEN or SAVE the file.
“Download This Data” or “Download Names & Addresses” provides a comma delimited file of the data that can be easily opened in Microsoft Excel.
LESSON 3 - REVIEWING AN APPLICANTʼS FILE Now you will review a particular application and the files associated with it, just as a committee reviewer would do. 1. Click the Review link next to Winston Burke or click on his hyperlinked name. 2. There are two methods to open/view a document or a letter of recommendation:
• Click directly on the filename to view it or download it. This downloads the file to your computer.
• or click the link in the upper right corner, “Use Document Viewer” 3. Open the Curriculum Vitae by clicking on it directly. Then try opening it using the document viewer link in the upper right corner of your screen. 4. Letters of Recommendation are listed by the Referenceʼs name in the order in which they are received. 5. Try both methods of reviewing the letter of recommendation.
12.
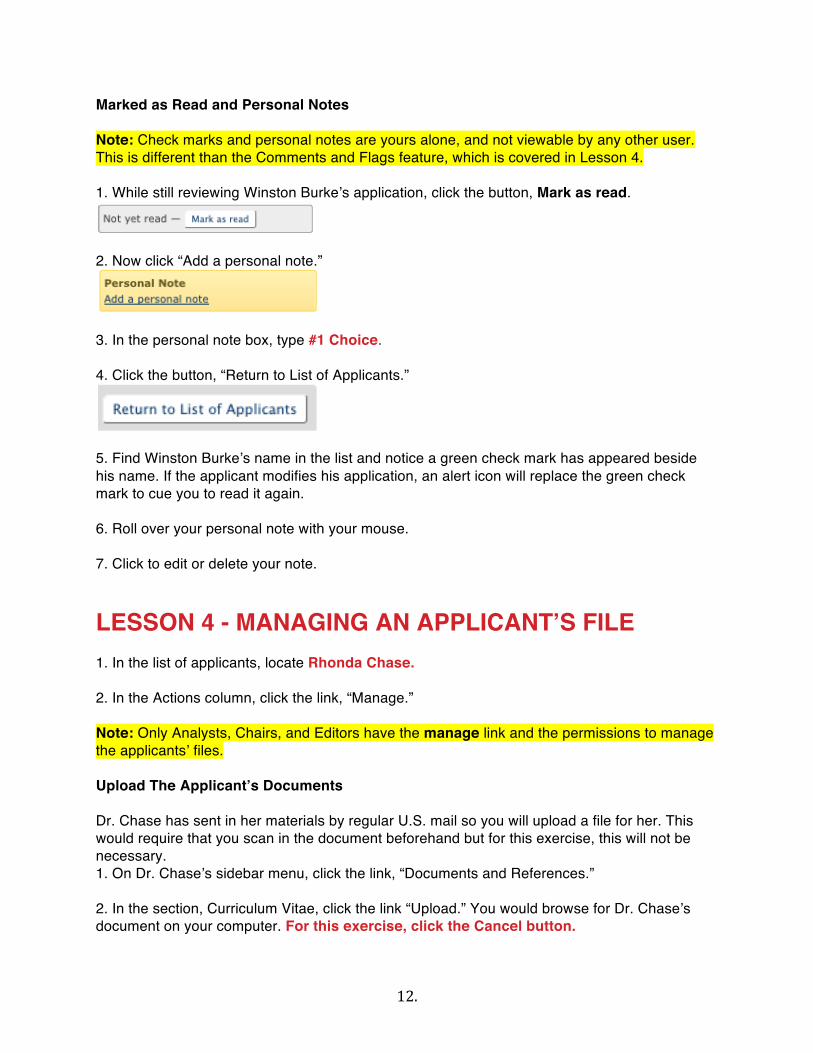
Marked as Read and Personal Notes Note: Check marks and personal notes are yours alone, and not viewable by any other user. This is different than the Comments and Flags feature, which is covered in Lesson 4. 1. While still reviewing Winston Burkeʼs application, click the button, Mark as read.
2. Now click “Add a personal note.”
3. In the personal note box, type #1 Choice. 4. Click the button, “Return to List of Applicants.”
5. Find Winston Burkeʼs name in the list and notice a green check mark has appeared beside his name. If the applicant modifies his application, an alert icon will replace the green check mark to cue you to read it again. 6. Roll over your personal note with your mouse. 7. Click to edit or delete your note.
LESSON 4 - MANAGING AN APPLICANTʼS FILE 1. In the list of applicants, locate Rhonda Chase. 2. In the Actions column, click the link, “Manage.” Note: Only Analysts, Chairs, and Editors have the manage link and the permissions to manage the applicantsʼ files. Upload The Applicantʼs Documents Dr. Chase has sent in her materials by regular U.S. mail so you will upload a file for her. This would require that you scan in the document beforehand but for this exercise, this will not be necessary. 1. On Dr. Chaseʼs sidebar menu, click the link, “Documents and References.” 2. In the section, Curriculum Vitae, click the link “Upload.” You would browse for Dr. Chaseʼs document on your computer. For this exercise, click the Cancel button.
13.
Comments & Flags Flag and Comment on Dr. Chaseʼs applicant to draw the search committeeʼs attention to her. 1. On Dr. Chaseʼs sidebar menu, click the link, “Comments & Flags.” Flags Section New Flag: • For this exercise, type Well-published • Keep the checkmark in the box, “Show this flag to reviewers” • Click the button, “Add Flag.” Comments Section My Comment: • Write a comment about Dr. Chase for the search committee. For this exercise, type: Additional materials have been mailed and have been uploaded. • Click the button, “Save Comment.” Note: Comments are always viewable by the search committee. Schedule a Visit The search committee wants to meet applicant Margaret Mead. You will schedule the visit and the committee reviewers will be able to see the details of this visit. 1. Choose Margaret Mead in the list of applicants. 2. In the Actions column, click the link, “Manage.” 3. On Dr. Meadʼs sidebar menu, click the link, “Visit/Seminar.” 4. Click the link, “Schedule a visit/seminar” and enter the following information:
Title: Meet Margaret Mead Summary: Job interview Bio: Her research was at the Center for Ethnography Main Event Date: For this exercise, type in any future date.
5. Click the “Next” button. 6. Set up the Event Schedule
Date: Select a date Start Time: Select a Start Time Event description field: Type Lunch. Location: Type: “University Club”
7. Click the button, Save and Done.

14.
Update Applicant Status Joe Applicant is no longer interested in the position. You canʼt remove his application but by updating the status, the search committee wonʼt waste time looking at it. 1. Choose Joe Applicant in the list. 2. On Joeʼs sidebar menu in the status section, click the link “Update”. 3. Select either “No Longer Interested” or “Application Withdrawn”. Short-listing applicants Short listing trims the pool so reviewers can focus on certain applicants. But there is a second reason for short listing: UCIʼs Office of Equal Opportunity and Diversity (OEOD) requires that departments submit short list diversity information in confidential reports. Shortlisting is an irreversible change: in other words, you can change the status at any time, but the applicantʼs diversity data will remain a part of the short list report.
For this exercise, we will not be short-listing any applicants.
LESSON 5 - MANAGING THE SURVEYS ON DIVERSITY Survey Reports The Diversity Survey is automatically created when you created the recruitment. Your online applicants are automatically directed to take the Survey on Diversity during the application process. Analysts may run the survey reports at any time, or multiple times throughout or after the search period. 1. Click the Recruitments tab in the top menu bar.

15.
2. Find Super Best Job in the Recruitments list. 3. Click the link, “ Manage Diversity Reports”. 4. On the Diversity Reports page for Super Best Job, click the button, ʻCreate New Reportʼ.
5. The Create New Report screen will look similar to the image below. (#ʼs of online applicants and #ʼs of shortlisted applicants may vary from this screenshot, but otherwise, your screen will look the same.) Your report will be generated when you click the button, “Create Report”.
6. You will be returned to the Diversity Reports page. Click the link, “Download” to look at the report. 7. This opens a PDF showing the aggregated results of the Survey on Diversity for this particular recruitment . 8. Close your PDF, return to the browser window and click “Done.”
LESSON 6 - WHAT TO DO WHEN THE SEARCH IS COMPLETE Make Recruitment Inactive The search is complete when a candidate has formally accepted the offer. At this point, Analysts may archive the recruitment, which is accomplished by inactivating it. This effectively hides the entire recruitment and applicant pool from all reviewers. Donʼt worry, you can always re-activate. 1. Click the Recruitments tab in the top menu bar.

16.
2. In the list of recruitments, find the position you created at the beginning of this training manual, “Assistant Professor”. 3. Click the link, “Make inactive” in the Actions column. Re-activate Recruitment 1. To undo this action, you must use the List view. Click the List link.
2. Put a check in the Inactive box in the Show View and click the Apply button beside it.
3. Locate the recruitment in the list. 4. Click the link, “Make active” in the Actions column.
Congratulations!
Youʼve completed the training and we have a short quiz for you. https://eee.uci.edu/quiz/wi37L2ma93
Contact [email protected] and your Recruit account will be updated.