right on replicas step-by-step review 20140203* · the door panel detail is crisp. ... removing...
TRANSCRIPT

Right On Replicas, LLC ©2014 All rights reserved. *All registered trademarks are the property of their respective brands.
Right On Replicas Step-by-Step Review 20140203* 1966 Chevelle Station Wagon 1:25 Scale Revell Model Kit #85-4054 Review
The Chevrolet Chevelle was a mid-sized automobile produced by the Chevrolet division of General Motors in three generations for the 1964 through 1977 model years. Part of the GM A-Body platform, the Chevelle was one of Chevrolet's most successful nameplates. Body styles include coupes, sedans, convertibles and station wagons. Super Sport versions were produced through the 1973 model year and the Laguna from 1973 through 1976. After a three-year absence, the El Camino was re-introduced as part of the new Chevelle lineup. The Chevelle also provided the platform for the Monte Carlo introduced in 1970. The Malibu, the top of the line model through 1972, replaced the Chevelle nameplate for the redesigned, downsized 1978 models. For the Modeler: This is a “Muscle” Series ’66 Chevelle Station Wagon 1:25 Scale Revell Model Kit #85-4054 Review. It is a Skill Level 2 kit for the intermediate builder. The kit contains 125 parts molded in White, Clear, Chrome with vinyl tires. This is a re-release (Re-Pop) of the Revell California Wheels ‘66 Station Wagon. As with the previous version the Stock parts are missing, this is a Custom Only build. The motor is nicely detailed; it is the same 396 Big Block as seen in the ’65 SS Chevelle kits. The chassis is molded in multiple parts and is a well detailed unit. Four Wheel Disc Brakes and oversized tires are the only options, no stock parts supplied. The interior is nicely detailed and has dash details and seat details as decals. The door panel detail is crisp. The body is one piece with separate hood and is straight and well defined but only has the SS options which were not offered on the wagons. The chrome trim is not molded on the body and applied as add-ons which I consider a plus. There are very few mold lines on the body and are light and easy to sand off. Revell fills a muscle car void with this kit but it would be nice to supply some stock stuff for us “Old School” builders. Finished dimensions are; Length: 7.875", Width: 3", Height: 2.5". Covered in this Review: If you want to perfect your build; basic construction; decal preparation and application; detailed engine construction notes; detailed frame and suspension construction and detailing; detailing the coil springs; using Sharpies for fine detailing; dashboard detailing and decal identification map; interior paint and detailing instructions; how to make custom license plates and floor mats; parting line identification and repair; version considerations; foil application and methods for trim; clear coating foil is discussed; installing the windows; altered assembly sequences for ease of construction and paint protection; adhesive selection and applications; how to make and add black washes for authentic looking trim/grill; automotive vs. hobby spray paints; directional tire identification and construction; identifying and removing molding trademarks, are all fully examined in this pictorial 20 page, full-color Step-by-Step review in PDF format.
Right On Replicas, LLC ©2014 All rights reserved. *All registered trademarks are the property of their respective brands.
Some Construction Caveats: An organized and dedicated building space is best setup for construction. But even without dedicated space, organization and a place to leave your build as you work, is important for quality builds. Being able to lay out your parts in assembly order or just in some organized fashion helps the build as you are not digging for parts in the box possibly losing or damaging them. One of the major benefits of using automotive paint is it fast drying time. Automotive paint is cured in less than an hour and clear about 6 hours. You can certainly use spray cans and get good results but they will take much longer to dry. Also do not use a cheap airbrush, the Lacquer Thinner and paints will destroy it QUICKLY! I prefer to use automotive type paint products sprayed with an airbrush. ****NOTE**** Throughout the review you will find OPTIONAL IDEAS that I suggest. These are completely your choice. Not doing these steps will in no way affect the build, they are just ways to offer some personal and custom touches to your builds. Those OPTIONS will be noted.
Pic 1 shows the box art for this kit as released in the Revell Muscle packaging. Pic 2 shows the parts as they come from the box. Adhesives used in the construction consists of Testors Tube Glue (Orange Tube), Standard Superglue and Testors Clear Parts Cement. Paints consist of Testors Enamel bottle paints and Wal Mart or Krylon Brand spray cans. The body is finished using 1:1 automotive use paint products shot with an airbrush. **Note: Assembly paint colors may vary from instructions as I use simplified colors that most model builders should have on hand. Before beginning your build soak and wash your parts with a mild detergent like DAWN to remove any mold release agents and help with paint adhesion.
Pic 3 is the decal sheet that comes with this kit version. They are a new release and are crisp and sharp. The decals have interior details, exterior details and custom wood siding with ghost flames or stripes. Only 2 license plate versions are included. Note on the decals, they seem to float after about a minute of water contact and set easily. The decals seem thicker than usual but they lay smooth and they do not rip when aligning the bigger decals.
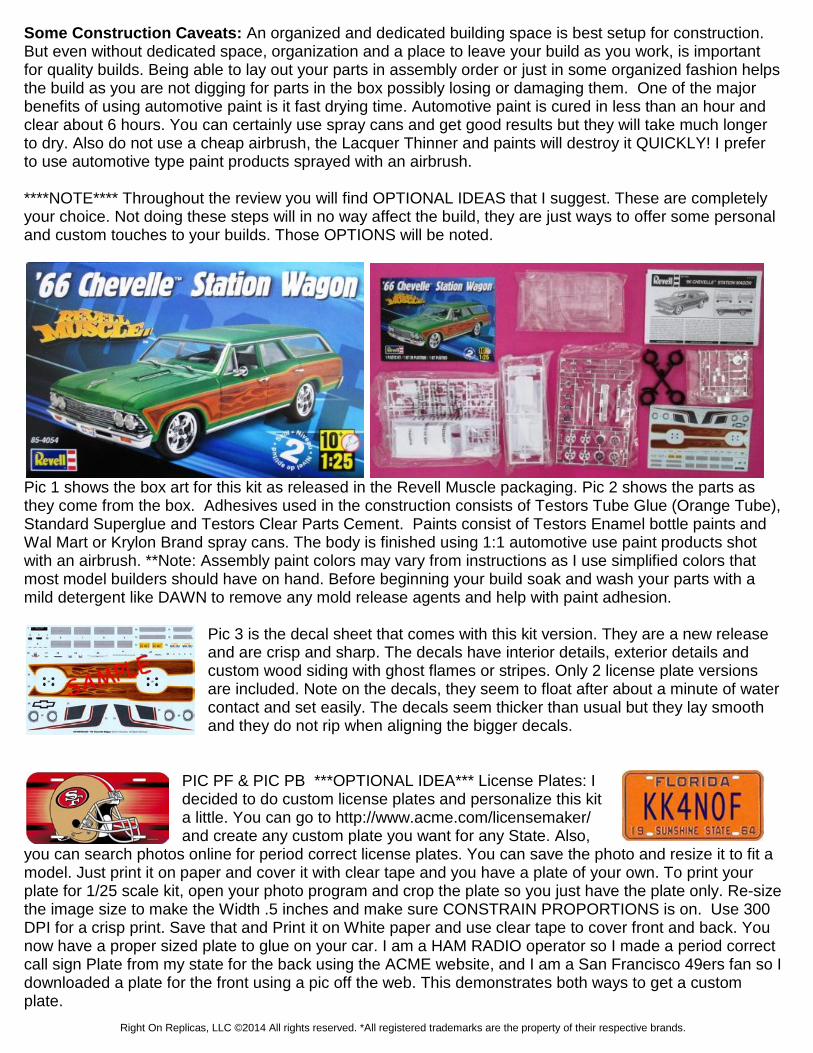
PIC PF & PIC PB ***OPTIONAL IDEA*** License Plates: I decided to do custom license plates and personalize this kit a little. You can go to http://www.acme.com/licensemaker/ and create any custom plate you want for any State. Also,
you can search photos online for period correct license plates. You can save the photo and resize it to fit a model. Just print it on paper and cover it with clear tape and you have a plate of your own. To print your plate for 1/25 scale kit, open your photo program and crop the plate so you just have the plate only. Re-size the image size to make the Width .5 inches and make sure CONSTRAIN PROPORTIONS is on. Use 300 DPI for a crisp print. Save that and Print it on White paper and use clear tape to cover front and back. You now have a proper sized plate to glue on your car. I am a HAM RADIO operator so I made a period correct call sign Plate from my state for the back using the ACME website, and I am a San Francisco 49ers fan so I downloaded a plate for the front using a pic off the web. This demonstrates both ways to get a custom plate.

Right On Replicas, LLC ©2014 All rights reserved. *All registered trademarks are the property of their respective brands.
NOTE: The instruction sheet has you build the car in stages where you will be attaching the chassis and interior to the body and then assembling suspension and other parts on to that. I find this is a very good way to damage the paint job so I will detour from the instructions and assemble the car differently. I will assemble in subassemblies of chassis, interior and body, mating them all at the last possible point so as to limit handling of the painted body and lessening the chance of damage that can be caused.
Pic 4 shows the motor parts needed to assemble the motor.

Right On Replicas, LLC ©2014 All rights reserved. *All registered trademarks are the property of their respective brands.
Pic 5 is the left side of the motor. Painting: Most of the motor is one color so I will assemble it and paint it as a unit. Glue the 2 block halves together. Add the heads to the top. Add the intake to the top between the heads. Add the oil pan to the bottom. Paint the motor assembly Orange with a Silver transmission. Paint the carb Gold. Paint the starter Black with a Gold solenoid. Paint the water pump Steel. Paint the oil filter Blue. Paint the exhaust Steel. Paint the fuel pump Silver. Paint the fan belts Flat Black with a Silver alternator gear. Paint the fan Black and the fan clutch Aluminum. Paint the alternator Silver. Paint the coil Black. Paint the distributor cap Tan with a Steel base. Paint the air snorkel Black.
Pic 6 is the right side of the motor. Assembly: On the assembled motor add the carb to the intake. Add the valve covers to the heads, on the left valve cover add decal #17. On the left side add the starter to the transmission back. Add the water pump to the front of the motor. Add the oil filter to the right side of the motor. Add the distributor to the back of the intake. Add the coil beside the distributor. Attach the air cleaner lid to the snorkel and add that to the carb. Attach decal #16 to the top of the air cleaner lid. Add the fuel pump to the left front side of the motor. Add the exhaust to the heads. On the fan belt add the alternator to the back and the fan to the front with the fan clutch. Attach that to the front of the motor.

Right On Replicas, LLC ©2014 All rights reserved. *All registered trademarks are the property of their respective brands.
PIC 7 PIC 8 (Left) is a shot of the wheels and tires ready to assemble. As seen in Pic 8 the tires are DIRECTIONAL, so care must be taken when installing the rims and when installing them on the suspension. The tread should run forward with the rim facing OUT.
Pic 9 is a finished shot of the wheel assembly. Painting: To give the wheels a road worn look roll them on a sheet of 220 grit sandpaper pressing the tread into the sandpaper as you roll it. I decided to paint the inner section of the rims Body Color for a custom look. Since I painted the center of the rims I did the wheel studs Steel. This is an optional idea to paint the rims or leave them chrome. Assembly: Insert the rim backs into the back of the tire. Glue the rim fronts to the rim backs from the front of the tire. ** REMEMBER DIRECTION ** Take care to line up the rims so the front and back spokes are aligned. You can choose between a Chevy Logo cap decal and American Racing cap decal. Attach your choice as the center cap.

Right On Replicas, LLC ©2014 All rights reserved. *All registered trademarks are the property of their respective brands.
Pic 10 shows the parts for the chassis. The sub assembly will be done in 2 steps, the front suspension and motor and the rear suspension. The point is to simplify the build and do as much work as possible prior to assembly of the body.
PIC 11 & PIC 12 Prior to any chassis work the mold markings and trademark rights need to be removed from the parts. Pic 11 shows the rear right chassis pan with the Revell trademarks. Pic 12 shows the area of the rear suspension valley that has the GM trademarks. Remove the type by shaving it off with a razor blade and sand the area smooth.

Right On Replicas, LLC ©2014 All rights reserved. *All registered trademarks are the property of their respective brands.
PIC 13 Chassis painting is as follows: On the chassis pan paint the whole thing Flat Black. Paint the frame rails on the underside Black and the gas tank Aluminum. Paint the upper A-Arms Black and the spare tire well Flat Black. Paint the exhaust pipes Steel with Silver mufflers. On the front suspension unit paint the A-Arms Black, the frame support Flat Black, the tie rods Flat Black and the stabilizer bar Steel. Assemble the rear suspension, differential, cover and lower link bars and paint that as a unit Black. Paint the 4 springs Flat Black with Steel coils (See Pic 13). Paint the driveshaft Gray. Paint the shocks Yellow. Paint the rear stabilizer Steel. On the brakes paint the calipers
Gold, Black or Red depending on what brand you want to depict. Install Decals 29 and 30 to the brake disc faces.
Pic 14 depicts the finished front suspension. Attach the upper A-Arms to the frame top side. On the front suspension slide the brakes into place over the kingpin; the directions show installing the calipers to the front but I did them to the rear. Make sure to check tire rotation and install a tire on to each kingpin, they easily snap right on. Attach the 2 small springs to the frame front. Attach the suspension unit in place.
Pic 16 shows the rear suspension in place. With the exhaust in place and dried you can slide the driveshaft into the transmission. On the rear suspension unit slide the brakes into place over the pin with the calipers to the front. Make sure to check tire rotation and install a tire on to each pin, they easily snap right on. Attach the long springs to the rear suspension unit and
slide that into place. Put the driveshaft into the differential and glue the suspension in to the frame. Attach the shocks to the pins on the rear suspension and they go into the notches in the frame.

Right On Replicas, LLC ©2014 All rights reserved. *All registered trademarks are the property of their respective brands.
PIC 15 At this point; install the motor assembly. See Pic 15. You will also need to flip the chassis over when the motor is set and dried in place and attach the exhaust.
Pic 17 shows the completed chassis.
Pic 18 is a rolling shot of the ride height of the chassis. This completes the major chassis assembly. Set it aside for now.

Right On Replicas, LLC ©2014 All rights reserved. *All registered trademarks are the property of their respective brands.
Pic 19 shows the parts to assemble the interior. Prior to painting I assembled some parts to make it simple to paint and to hide joint lines. Assemble the front seat and seat back. Assemble the rear seat and seat back. Assemble the dash and dash top. Painting: The interior color is your option as to fit your build. My build is a White and Black interior. On the floor pan paint the underside Flat Black as it shows on the chassis. Paint the floor pan top your interior color. The mat in the rear is usually Flat Black or a darker shade of the interior color. Paint the seats, door panels, rear panel and dash interior color. Paint the shifter boot and knob Black. Paint the steering column interior color and the steering wheel spokes interior color with a Brown wheel. The indicator stalk is Silver. (SEAT DECALS ARE OPTIONAL) Decals 8 go on the rear seat back. Decals 9 go on the rear seat base. Decals 6 go on the front seat back and decals 7 on the front seat base. Part # 14 is not on the instructions but it is a Tach. If you use it paint it Silver.
PIC 20 Door panel details can be painted Silver; the handle, window crank, trim strip at the top of the panel, at the middle of the panel and bottom of the panel. OPTIONAL Decals 10,11,12,13 go on the door kick panels decal 5 goes in the center trim strip. SEE PIC 20

Right On Replicas, LLC ©2014 All rights reserved. *All registered trademarks are the property of their respective brands.
Pic 21 is the dash prior to details.
Pic 22 shows the dash and decal placement. Painting: The strip at the top of the dash inside Flat Black with Silver knobs. The instrument panel is Flat Black with decal 1. The radio panel is interior color with decal 2 and Black knobs. The face panel is Flat Black with Silver lock and name plate. The top panel and the center panels have Silver trim around them. Decal 3 is the AC controls. Paint the pedals Black with Silver arms.
PIC 23 PIC 24 ***OPTIONAL IDEA*** As people buy custom floor mats for their real cars why not have ones for their models? This idea is FREE to do and easy. Search the internet for car floor mats; use the pictures of the flat mat display as in PIC 23 and save it. In your photo program resize the front mat to a height of ¾ inches tall. The rear floor mat will be sized as to the available space in your model mine were roughly ¼ inches tall. Print them at 300 DPI on
plain paper. Glue the paper to Black card stock and cut out the mat. A dab of White Glue on the floor will hold them in place see Pic 24. I did a search and found tons of usable images from all kind of sites. GOOGLE can be your friend!

Right On Replicas, LLC ©2014 All rights reserved. *All registered trademarks are the property of their respective brands.
Pic 25 is the completed interior. Assembly: Attach the rear seat in place. Attach the front seat in place. Attach the shifter in place. Attach the door panels to the assembly and attach the rear panel to the side panels. On the dash if you used the tach install it where you see fit as it is optional. Attach the steering wheel to the column, on the wheel attach the horn ring and use decal 4 in the horn center. Now attach that assembly to the dash and install the dash into the door panels. This completes your interior subassembly. Set it aside for now.
Pic 26 is a shot of the body parts that need painting. Attach the hood hinges to the hood before painting as it makes it easier later. There are a few things that need attention before you can finish the body. The body and hood need to be completely wet sanded with 1000 grit paper before Primer and again before Color.
PIC 27 & PIC 28 Pic 27 (left) shows the rear door emblem. Remove this as you will replace it with a decal later. Pic 28 shows a mold line on the rear roof pillar that is on both sides, sand this smooth.

Right On Replicas, LLC ©2014 All rights reserved. *All registered trademarks are the property of their respective brands.
PIC 29 PIC 30 Remove the Malibu scripts off the rear quarters (Pic 29) and the locks off the front doors (Pic 30). You will replace these with decals later.
PIC 31 After you spray the body parts with your choice of Primer you can now see any blemishes and final work that you need to fix before the Base Color. This car looks good with just a good sanding, no hidden molding lines popped up. Water sand the Primer to 1000 grit and let it dry well. See Pic 31.
Pic 32 shows the car in Base Color. Body Decaling and Finishing: After you have your base coat on the car you are ready to decal it. Remember decals lay better on a GLOSS surface and will not adhere properly on a FLAT surface. If you decal a flat surface you get what is called SILVERING of the decals, or the look that they are not adhered, as air is trapped under the decal. Clean your work area good so no dust or grunge from building and sanding gets under your decals. Pick the decals you want to work with and plan out how the best way to lay them out without handling previously laid decals will be. I try either a Front to Back or Top to Bottom approach doing one side at a time then the front and rear of the car in steps giving the decals time to set and dry in place before handling it again. Once you have a plan of action cut your first decal as close to the edge of the outermost color as possible. Once trimmed place the decal into warm water and let it get soft until it “Floats” loosely on the carrier paper. Put a little water on the spot of the car you want to transfer the decal on to and carefully float the decal off the carrier paper onto the car. Using tweezers and a Q-tip position the decal in to place where it will be located when finished. Now with a small part of paper towel carefully extract the water from the area by lightly dabbing around the decal and then on top of the decal. Using a moist paper towel and or moist Q-tip you can smooth out and air bubbles and wrinkles from the center of the decal out to the edges. Now continue this process until all the decals for that area are done, wait for them to set and continue the rest of the car.

Right On Replicas, LLC ©2014 All rights reserved. *All registered trademarks are the property of their respective brands.
Pic 33 shows the decals in place. Lay out the wood panel first then the Malibu Script, lock and front logo go on top of the wood. Do this on both sides. There is a Chevelle script for the rear door. If you used the stripes instead, apply as directed.
***OPTIONAL IDEA*** Pic 34 shows the supplies needed to Bare Metal Foil a car. If you want more accurate looking chrome trim work the application of Bare Metal foil is the simplest way. Bare Metal Foil Application is a little on the tricky side if not done slowly. Here is a method I use: It is VERY IMPORTANT that you use a BRAND NEW #11 blade in your hobby knife, and keep a few extras handy as all you are using is the very
end of the tip point. From the foil sheet cut a strip twice the width and about ¼ inch longer than the detail you intend to cover using a sharp set of regular scissors. I then peel the foil off of the backer sheet and lightly lay it on the detail area. Using my finger I will slowly slide along the detail area smoothing the foil lightly, then a second time more firmly to press it into place. Using a Q-Tip I burnish the foil onto the detail area only. I then use a toothpick that has been tapped on the table to dull the tip and run that along the outside edge of the details I intend to cut the foil around. After the detail area is defined and the foil is smooth and burnished on I slowly cut around the edge with the hobby knife. If you feel the knife snag or grab the foil CHANGE THE BLADE, it will rip your foil very easily. Now you can strip all excess foil away. You can peel the excess loose leaving just your detailed part covered. I then burnish it again with a Q-Tip. You can do foil work in sections as it is thin enough that when burnished it will mold itself into looking like one piece. Most people Bare Metal Foil AFTER clear coating the car, I prefer to clear coat over the foil so it will never move as my cars tend to get handled.
Pic 35 shows the Bare Metal Foil in place. The Chrome trim can be painted Silver if you do not wish to follow this step.

Right On Replicas, LLC ©2014 All rights reserved. *All registered trademarks are the property of their respective brands.
Pic 36 shows the interior glass ready to install. Painting: After the body is cured paint the interior roof area Interior Color. Paint the Battery on the inner fender well Black with Steel posts and Red caps. Paint the visors on the windshield Interior Color. Paint the heater core unit Black. Assembly: Mount the rear view mirror in the tab between the visors. Attach the overhead light in the inner roof. Mount the heater core to the outer firewall. For the glass use a little dab of the Clear Parts Cement on the corners of the windows to hold the glass. Run a bead of the Clear Parts Cement around the glass to attach it in place. Do one window at a time and let it cure so as not to disturb it working on the others. When dry and cured you can use a toothpick to remove any cement on the glass.
Pic 37 is the glass installed. ***NOTE*** The body, interior and chassis can now be mated. With the body upside-down slide the interior tub into place all the way to the back of the car. It will fit right in place. Carefully line up the chassis into place and slowly slide it into the body from the back to the front. It will fit snug and tight with no glue. Just “Shoehorn” the chassis into the body easily.

Right On Replicas, LLC ©2014 All rights reserved. *All registered trademarks are the property of their respective brands.
PIC 38 In this kit you get a choice of a Master Cylinder with either a Power Booster on it or without it.
Pic 39 (left) shows the assembled Power Brake unit in place. Pic 40 shows the Master Cylinder only in place. It is your option of how you wish your build to look. As this kit has upgraded brakes, I used the Power Brakes.
Pic 41 shows the parts to complete the engine bay assembly.

Right On Replicas, LLC ©2014 All rights reserved. *All registered trademarks are the property of their respective brands.
Pic 42 is the completed engine bay. Painting: Paint the steering gear and shaft Flat Black. Paint the radiator wall and fan shroud Flat Black and the radiator Aluminum. Paint the upper and lower hoses Flat Black with Silver ends. Paint the heater hoses Red. Paint the cap on the clear bottle Black. Paint the master cylinder you choose to use Steel with a Gold top (Power Booster is Black). Assembly: Attach the steering box to the frame and the lower hole in the firewall. Attach the master cylinder to the firewall. On the radiator wall add the fan shroud and clear bottle. Attach the heater hoses to the firewall and motor. Attach the upper and lower radiator hoses in place.
Pic 43 shows the parts to assemble the front end.

Right On Replicas, LLC ©2014 All rights reserved. *All registered trademarks are the property of their respective brands.
Pic 44 is a finished shot of the front end. Painting: Use a wash of 2:1 Thinner and Flat Black and paint the grille area. Paint the signal lamps Turn Signal Yellow. Paint the hood latch Black. Assembly: On the hood inside attach the air grilles and on the front edge the trim strip. On the radiator wall attach the hood latch. On the grille attach the headlights and turn signals. Cut your tag to fit and glue it in place. There is a Chrome plate included if you use the decals, apply the decal to the plate and glue that in place. Attach the assembled grill to the body.
Pic 45 are the rear end parts.

Right On Replicas, LLC ©2014 All rights reserved. *All registered trademarks are the property of their respective brands.
Pic 46 shows the finished rear end. Painting: on the clear tail lights paint the top 2 portions on both lenses Stop Light Red. Assembly: Attach the door handle in place. Attach the trim strip in place. Attach the lens housings on both sides and glue the lenses Red part UP in both housings. . Cut your tag to fit and glue it in place on the rear bumper. There is a Chrome plate included if you use the decals, apply the decal to the plate and glue that in place. Attach the rear bumper to the body. Pic 47 shows the final trim to be installed.

Right On Replicas, LLC ©2014 All rights reserved. *All registered trademarks are the property of their respective brands.
Pic 48 is the trim in place. On the windshield cowl attach the wipers, both point to the passenger’s side. On each side of the car attach the door handles, push knob to the rear. Attach the trip to the bottom of both sides. Assemble the mirror and attach it to the driver’s door. Your car is now assembled. PIC XX Depending on HOW you did your assembly compared to this review here are the remaining parts that were left over.

Right On Replicas, LLC ©2014 All rights reserved. *All registered trademarks are the property of their respective brands.
999 Overall Impressions: Revell has a nice kit with the ’66 Wagon. The subject matter does not enjoy a big following or have lots of kit choices so it is nice to see. I would personally like to have some more stock items like rims and tires and a smaller stock motor. That being said I really like the look of the finished build. The car is cool for a “Grocery Getter”! Parts assembly is straight forward and everything fits right without a fuss. I would like to rewrite the complete instruction sheet to make assembly more builder friendly. I think a lesser experienced builder can very easily damage the finished paint job the way it assembles now. Overall the parts fit well and the detail is crisp and nice. The car builds easy and there are no construction issues to speak of. Even following the instruction sheet you can build this properly and end up with a nice car. Is this a repeat builder kit? Yes, I actually have built this kit a few times in different ways. A trip to some of the many online aftermarket parts suppliers will net you an awesome build as this kit begs to be customized. On a scale of 1 to 10, I give this kit a 7 mostly because no stock parts and the instructions issues previously stated.