scan. watch. learn. - sephora€¦ · scan. watch. learn. ... sephora by opi gelshine ... direct...
TRANSCRIPT
Scan. Watch. Learn.
GEL GUIDEEasy steps to long-lasting gel colour!
™
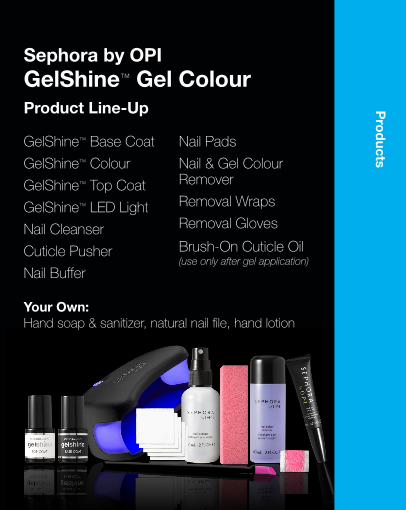
Sephora by OPIGelShine™ Gel ColourProduct Line-Up
GelShine™ Base Coat
GelShine™ Colour
GelShine™ Top Coat
GelShine™ LED Light
Nail Cleanser
Cuticle Pusher
Nail Buffer
Nail Pads
Nail & Gel Colour Remover
Removal Wraps
Removal Gloves
Brush-On Cuticle Oil (use only after gel application)
Your Own: Hand soap & sanitizer, natural nail file, hand lotion
Pro
ducts
•Lastsupto2weeks!•Nodrytime!30-secondLEDtechnology‘cures’ colour instantly •Nosmudges,streaksorchips• Intenseshinethatlasts•Do-it-yourselfremovalin20minutes
•WatchhowtodotheGelShine™ mani and read all instructions.•Finishsteps1-5ononehandbeforestartingotherhand.Don’t
trytodoall10nailsatonce,doonehandfirst,thentheother.•ShakeallGelShine™bottlesvigorously1minutebeforeuse.
Note:gelisthickerthanpolish-shaking‘feels’different.• Ensure the right amount of gel on brush:Spinbrushstem
aroundinsideneckofbottleandwipeeachsideofbrush againstneckwhenremovingfrombottle.
•Keepnailsflatandlevelduringapplicationand‘curing.’•Brushonallgelsinthincoats-thincoatslookandperformbest!•Sealallnailedgeswithgelbefore‘curing.’
Tip:aftersealingedges,lightlybrushdownovernailtoremove any excess gel at edge.
•Removeexcessgelfromcuticlesorsurroundingskinbefore‘curing.’•Removegelresiduefromnailsonlyafterfinal‘curing’ofTopCoat.
Never use cotton balls for any step; use only lint-free Nail Pads
Important Tips BEFORE you begin …
Sephora by OPIGelShine™ properly applied...
P.S. GelShine™ is great for toes too!
Tip
s
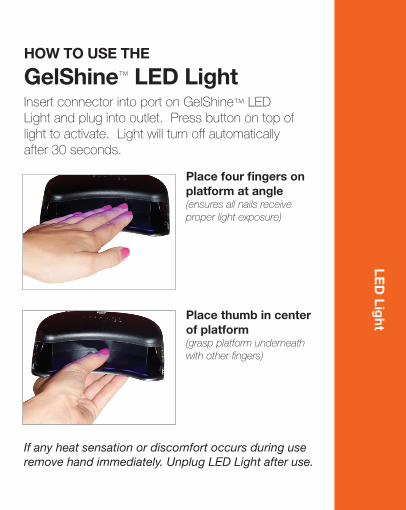
HOW TO USE THE
GelShine™ LED LightInsertconnectorintoportonGelShine™ LED Lightandplugintooutlet.Pressbuttonontopof lighttoactivate.Lightwillturnoffautomatically after30seconds.
Place four fingers on platform at angle(ensures all nails receive proper light exposure)
If any heat sensation or discomfort occurs during use remove hand immediately. Unplug LED Light after use.
Place thumb in center of platform(grasp platform underneath with other fingers)
LED
Light
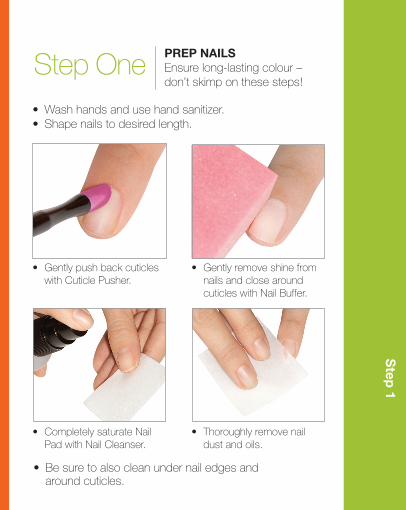
• Washhandsandusehandsanitizer.• Shapenailstodesiredlength.
• GentlypushbackcuticleswithCuticlePusher.
• Gentlyremoveshinefromnails and close around cuticleswithNailBuffer.
• CompletelysaturateNailPadwithNailCleanser.
• Thoroughlyremovenaildust and oils.
• Besuretoalsocleanundernailedgesand around cuticles.
Step
1
Step OnePREP NAILS Ensure long-lasting colour – don’tskimponthesesteps!
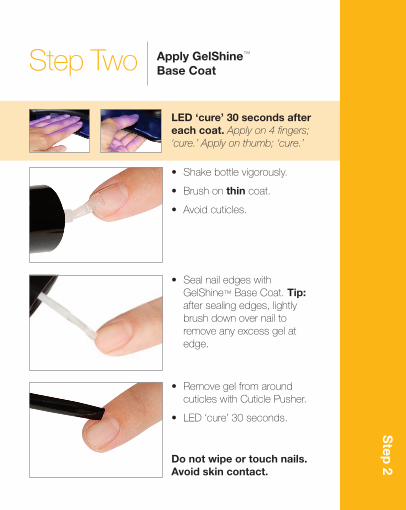
LED ‘cure’ 30 seconds after each coat. Apply on 4 fingers; ‘cure.’ Apply on thumb; ‘cure.’
• Shakebottlevigorously.
• Brushonthin coat.
• Avoidcuticles.
• RemovegelfromaroundcuticleswithCuticlePusher.
• LED‘cure’30seconds.
• SealnailedgeswithGelShine™ Base Coat. Tip: after sealing edges, lightly brushdownovernailtoremove any excess gel at edge.
Step
2
StepTwo Apply GelShine™ Base Coat
Do not wipe or touch nails.Avoid skin contact.
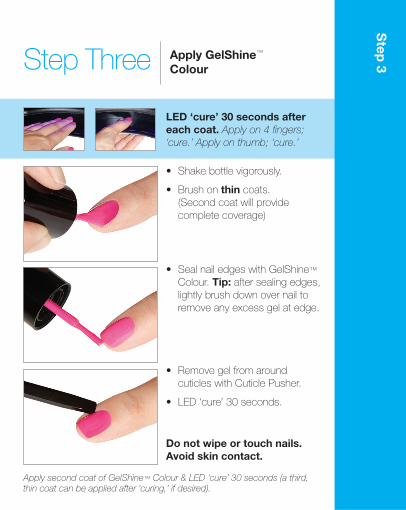
LED ‘cure’ 30 seconds after each coat. Apply on 4 fingers; ‘cure.’ Apply on thumb; ‘cure.’
• Shakebottlevigorously.
• Brushonthin coats. (Secondcoatwillprovidecomplete coverage)
• RemovegelfromaroundcuticleswithCuticlePusher.
• LED‘cure’30seconds.
• SealnailedgeswithGelShine™ Colour. Tip: after sealing edges, lightlybrushdownovernailtoremove any excess gel at edge.
Apply second coat of GelShine™ Colour & LED ‘cure’ 30 seconds (a third, thin coat can be applied after ‘curing,’ if desired).
Step
3Step Three Apply GelShine™ Colour
Do not wipe or touch nails.Avoid skin contact.
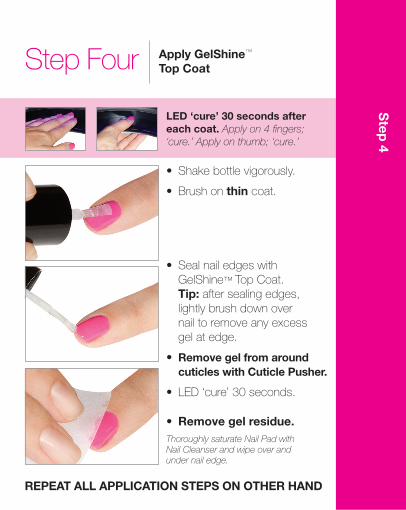
• Shakebottlevigorously.
• Brushonthin coat.
• SealnailedgeswithGelShine™ Top Coat. Tip: after sealing edges, lightlybrushdownover nail to remove any excess gel at edge.
• Remove gel from around cuticles with Cuticle Pusher.
• LED‘cure’30seconds.
• Remove gel residue.Thoroughly saturate Nail Pad with Nail Cleanser and wipe over and under nail edge.
REPEAT ALL APPLICATION STEPS ON OTHER HAND
Step
4
LED ‘cure’ 30 seconds after each coat. Apply on 4 fingers; ‘cure.’ Apply on thumb; ‘cure.’
StepFour Apply GelShine™ Top Coat

• Washhandswithsoapandwater.
• ApplySephorabyOPIBrush-onCuticleOilandmassageintocuticles.Useregularlytokeepcuticlessoft&beautiful.
Finish!
StepFive Finish!
Rem
oval
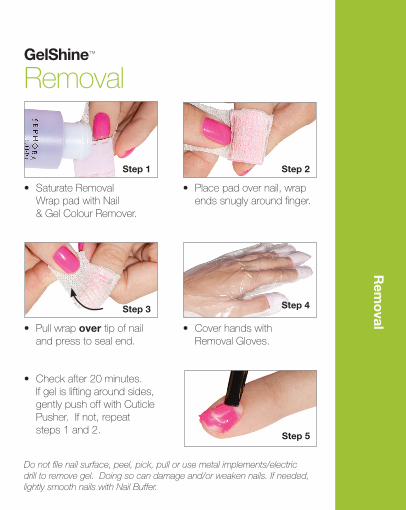
Do not file nail surface, peel, pick, pull or use metal implements/electric drill to remove gel. Doing so can damage and/or weaken nails. If needed, lightly smooth nails with Nail Buffer.
• SaturateRemoval WrappadwithNail & Gel Colour Remover.
• Placepadovernail,wrapends snugly around finger.
• Pullwrapover tip of nail and press to seal end.
• Coverhandswith Removal Gloves.
• Checkafter20minutes. Ifgelisliftingaroundsides,gentlypushoffwithCuticlePusher.Ifnot,repeat steps1and2.
GelShine™
Removal
Step 1 Step 2
Step 3 Step 4
Step 5
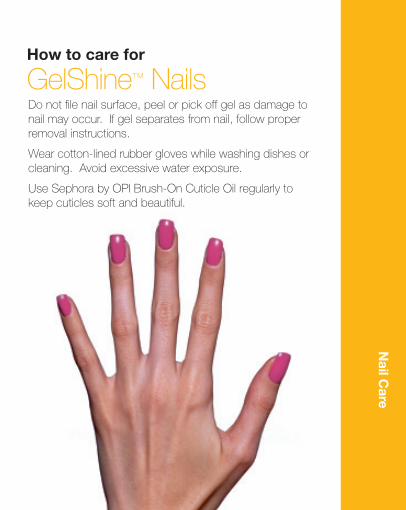
How to care for
GelShine™ Nails
Nail C
are
Donotfilenailsurface,peelorpickoffgelasdamagetonailmayoccur.Ifgelseparatesfromnail,followproperremoval instructions.
Wearcotton-linedrubbergloveswhilewashingdishesorcleaning.Avoidexcessivewaterexposure.
UseSephorabyOPIBrush-OnCuticleOilregularlytokeepcuticlessoftandbeautiful.

Info
AdditionalInformation• Discontinueuseifsensitizationordiscomfortoccurs.
Avoidskincontactduetosensitizingpotential.
• Productisnotrecommendedforuseonthin,weak,damaged or infected nails.
• Ifirritationoccurs,consultaphysician.Ifswallowed,seekmedicalattention.
• KEEPOUTOFREACHOFCHILDREN.
• GelShine™ Base Coat and Nail Cleanser: FLAMMABLE.Keepawayfromheatandflame.
• Forexternaluseonly.
GelShine™ Product Storage• AlwayswipeneckofbottlewithNailPadsaturated
withNailCleanserbeforerecapping.
• Productislightsensitive.Storebottlesindarkplaceordrawer.
• Keepanduseatroomtemperature.Donotapplyindirect sunlight.
Forcustomersupport,FAQ’s,andvideodemonstration, visitwww.sephora.com