sequence alignment - archer · 2017-11-29 · introduction in this exercise you will run the...
TRANSCRIPT

1
Sequence Alignment
Practical Introduction to HPC Exercise

2
Aims The aims of this exercise are to get you used to logging on to an HPC machine, using the command line in a terminal window and an editor to manipulate files, compiling software, using the batch submission system, running jobs in serial and in parallel, and exploring parallel performance of an application. We will be using ARCHER for this exercise. ARCHER is the UK national HPC service, and is a Cray XC30 system with a total of 118,010 cores (4920 nodes). You can find more details on ARCHER and how to use it in the User Guide at:
http://www.archer.ac.uk/documentation/user-guide/
Introduction In this exercise you will run the sequence alignment application HMMER in serial and parallel to search a protein database for potential matches to a given protein sequence. Using your provided guest account, you will:
1. log on to ARCHER by connecting to the frontend login nodes; 2. download the HMMER source code to ARCHER; 3. unpack the source code archive; 4. compile the source code to produce HMMER executables; 5. download protein sequence data to ARCHER; 6. run HMMER in serial on a login node; 7. run HMMER in serial on a compute node by submitting a job to the batch system; 8. run HMMER in parallel on a compute node by submitting a job to the batch system; 9. run HMMER in parallel using an increasing number of cores on a single compute node
and examine the performance improvement; 10. run HMMER in parallel using an increasing number of cores on multiple compute nodes
and examine the performance improvement; Please do ask questions in the tutorials if you do not understand anything in the instructions.
Instructions
Log on to ARCHER frontend
You should use your ARCHER guest user name and password to log on to the ARCHER frontend, following the instructions relevant to your setup given below.
Procedure for Mac and Linux users Open a command line Terminal and enter the following command:
user@laptop:~> ssh -X [email protected]
Password:
you should be prompted to enter your password.
Procedure for Windows users Windows does not generally have SSH installed by default so some extra work is required. You will need to download and install an SSH client application - PuTTY is a good choice: http://www.chiark.greenend.org.uk/~sgtatham/putty/

3
When you start PuTTY you should be able to enter the ARCHER login address (login.archer.ac.uk). When you connect you will be prompted for your username and password. You can follow the instructions for setting up PuTTY by watching the introductory video here:
• https://www.youtube.com/watch?v=oVFQg1qFjKQ By default, PuTTY does not send graphics back to your local machine. You may need this later to view plotted data, so you should “Enable X11 Forwarding” which is an option in the “Category” menu under “Connection -> SSH -> X11”. You will need to do this each time before you log in with PuTTy.
Running commands
If you are already comfortable working from the command line in the Linux terminal you may wish to proceed directly to the next section, otherwise it may be useful to review this section on using the command line as well as the following reference sheet of commands: http://www.archer.ac.uk/documentation/user-guide/Quick-Reference-Sheet.pdf The command pwd (print working directory) will tell you the current directory you are in:
user@archer:~> pwd
/home/y14/y14/user/
When you log on to ARCHER or any other HPC system you start in the home directory associated with your account. You can list the directories and files in the current working directory using the ls (list) command:
user@archer:~> ls
bin work
Note: until you move any files into your home directory or create some there will be nothing there, so ls will return with an empty line. You can modify the behaviour of commands by adding options. Options, also known as flags, are usually letters or words preceded by a single dash (‘-’) or a double dash (‘--’). For example, to see more details of the files and directories available you can add the ‘-l’ (l for long) option to ls:
user@archer:~> ls -l
total 8
drwxr-sr-x 2 user z01 4096 Nov 13 14:47 bin
drwxr-sr-x 2 user z01 4096 Nov 13 14:47 work
If you want a description of a particular command and options available to use with it you can usually use the man (manual) command. For example, to show more information on ls:
user@archer:~> man ls
Man: find all matching manual pages
* ls (1)

4
ls (1p)
Man: What manual page do you want?
Man: <press Enter to select the default entry>
Use the spacebar to move a page down, ‘u’ to move a page up, up and down arrow keys for line-by-line scrolling, and ‘q’ to quit to the command line. To search for a particular term in the manual type ‘/’ followed by your search term, then press enter. Search results starting from the first occurrence on or after the currently viewed page will be highlighted; move through them by pressing ‘n’ for next and ‘p’ for previous. You can usually get a shorter summary of a command and its available options by running the command with the option ‘--help’.
Download and extract the HMMER source code
Visit the download page of the HMMER website (http://www.hmmer.org/download.html) and copy the link to the compressed archive file hmmer-3.1b2.tar.gz, which contains the source code of HMMER. Note this is not the same as the Download link that appears directly on the front page of the HMMER website (hmmer.org), that contains readymade executables that will not run optimally or even at all on ARCHER or on any other HPC system. To download the source code directly to ARCHER, use the wget command:
user@archer:~> wget http://eddylab.org/software/hmmer3/3.1b2/hmmer-3.1b2.tar.gz
--2017-11-25 19:26:10-- http://eddylab.org/software/hmmer3/3.1b2/hmmer-3.1b2.tar.gz
Resolving eddylab.org... 96.126.110.11, 2600:3c03::f03c:91ff:fec8:383c
Connecting to eddylab.org|96.126.110.11|:80... connected.
HTTP request sent, awaiting response... 200 OK
Length: 5965253 (5.7M) [application/x-gzip]
Saving to: `hmmer-3.1b2.tar.gz'
100%[=======================================================================
=================================================================>]
5,965,253 3.91M/s in 1.5s
2017-11-25 19:26:12 (3.91 MB/s) - `hmmer-3.1b2.tar.gz' saved [5965253/5965253]
Then unpack the archive:
user@archer:~> tar -xzvf hmmer-3.1b2.tar.gz
hmmer-3.1b2/
hmmer-3.1b2/install-sh
hmmer-3.1b2/documentation/
hmmer-3.1b2/documentation/.dropbox.attr
hmmer-3.1b2/documentation/Makefile.in

5
hmmer-3.1b2/documentation/man/
hmmer-3.1b2/documentation/man/hmmbuild.man
hmmer-3.1b2/documentation/man/boilerplate-tail
hmmer-3.1b2/documentation/man/hmmer.man
.
.
<more output>
.
.
hmmer-3.1b2/tutorial/fn3.out
hmmer-3.1b2/tutorial/MADE1.out
hmmer-3.1b2/tutorial/minifam.h3m
hmmer-3.1b2/tutorial/dna_target.fa
hmmer-3.1b2/tutorial/globins4.hmm
and enter the directory that was created:
user@archer:~> cd hmmer-3.1b2
Useful commands for examining files
There are a few commands that are useful for displaying plain text files on the command line that you can use to examine the contents of a file. Two such commands are cat and less. cat simply prints the contents of the file to the terminal window and returns to the command line. For example:
user@archer:~> cat README
HMMER - profile hidden Markov models for biological sequence analysis
.
<more output>
.
user@archer:~>
This is fine for small files where the text fits in a single terminal window. For longer files you can use the less command, which gives you the ability to scroll up and down in the specified file For example:
user@archer:~> less INSTALL
Just as when viewing manual pages, once in less you can use the spacebar to move a page down, ‘u’ to move a page up, up and down arrow keys for line-by-line scrolling, and ‘q’ to quit to the command line. To search for a particular term type ‘/’ followed by your search term, then press enter. Move through search results by pressing ‘n’ for next and ‘p’ for previous. When you have finished examining the file you can use ‘q’ to exit less and return to the command line.
6
If you want to edit a file you will need to open it in a text editor, as described later in this document.
Compile the source code to produce HMMER executables
Before we can use HMMER we will need to compile the source code we downloaded. The process of compiling and making the resulting executables available to use is also generally known as “building” an application, and is something you may need to know how to do if an application you want to use on an HPC system is not already installed by the HPC service, or if you have modified existing software or created your own programs. Start by running the following commands:
user@archer:~> module switch PrgEnv-cray PrgEnv-gnu
user@archer:~> module unload xalt
These commands are specific to ARCHER. The first command sets up your environment to use a particular compiler known as gcc (Gnu Compiler Collection). The build process itself will consist of three stages: configure, make, and install. First, run the following configure command (although it is shown stretched over two lines here it should be issued in one go):
user@archer:~> ./configure CC=cc MPICC=cc --enable-threads --enable-mpi --enable-sse --
prefix=/home/y14/y14/user/hmmer/3.1b2
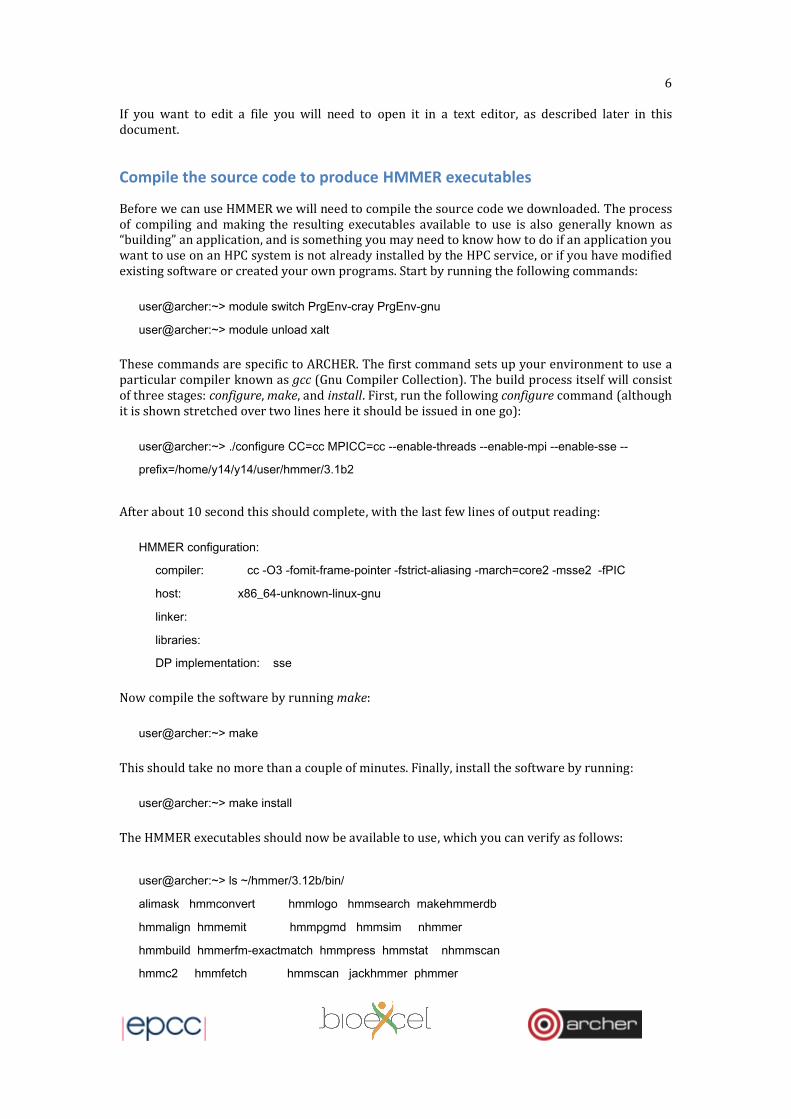
After about 10 second this should complete, with the last few lines of output reading:
HMMER configuration:
compiler: cc -O3 -fomit-frame-pointer -fstrict-aliasing -march=core2 -msse2 -fPIC
host: x86_64-unknown-linux-gnu
linker:
libraries:
DP implementation: sse
Now compile the software by running make:
user@archer:~> make
This should take no more than a couple of minutes. Finally, install the software by running:
user@archer:~> make install
The HMMER executables should now be available to use, which you can verify as follows:
user@archer:~> ls ~/hmmer/3.12b/bin/
alimask hmmconvert hmmlogo hmmsearch makehmmerdb
hmmalign hmmemit hmmpgmd hmmsim nhmmer
hmmbuild hmmerfm-exactmatch hmmpress hmmstat nhmmscan
hmmc2 hmmfetch hmmscan jackhmmer phmmer
7
Note: the tilde sign (‘~’) can be used in place of the full path to your home directory, which is /home/y14/y14/user.
Download protein sequence data
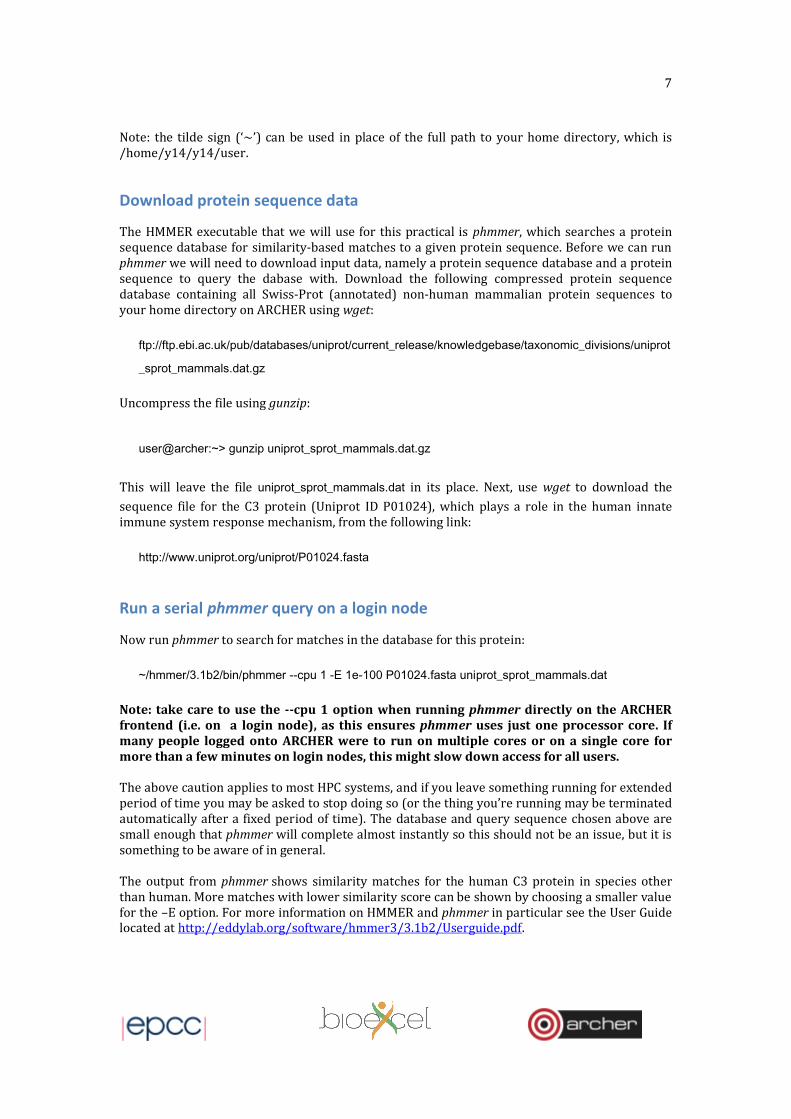
The HMMER executable that we will use for this practical is phmmer, which searches a protein sequence database for similarity-based matches to a given protein sequence. Before we can run phmmer we will need to download input data, namely a protein sequence database and a protein sequence to query the dabase with. Download the following compressed protein sequence database containing all Swiss-Prot (annotated) non-human mammalian protein sequences to your home directory on ARCHER using wget:
ftp://ftp.ebi.ac.uk/pub/databases/uniprot/current_release/knowledgebase/taxonomic_divisions/uniprot
_sprot_mammals.dat.gz
Uncompress the file using gunzip:
user@archer:~> gunzip uniprot_sprot_mammals.dat.gz
This will leave the file uniprot_sprot_mammals.dat in its place. Next, use wget to download the
sequence file for the C3 protein (Uniprot ID P01024), which plays a role in the human innate immune system response mechanism, from the following link:
http://www.uniprot.org/uniprot/P01024.fasta
Run a serial phmmer query on a login node
Now run phmmer to search for matches in the database for this protein:
~/hmmer/3.1b2/bin/phmmer --cpu 1 -E 1e-100 P01024.fasta uniprot_sprot_mammals.dat
Note: take care to use the --cpu 1 option when running phmmer directly on the ARCHER frontend (i.e. on a login node), as this ensures phmmer uses just one processor core. If many people logged onto ARCHER were to run on multiple cores or on a single core for more than a few minutes on login nodes, this might slow down access for all users. The above caution applies to most HPC systems, and if you leave something running for extended period of time you may be asked to stop doing so (or the thing you’re running may be terminated automatically after a fixed period of time). The database and query sequence chosen above are small enough that phmmer will complete almost instantly so this should not be an issue, but it is something to be aware of in general. The output from phmmer shows similarity matches for the human C3 protein in species other than human. More matches with lower similarity score can be shown by choosing a smaller value for the –E option. For more information on HMMER and phmmer in particular see the User Guide located at http://eddylab.org/software/hmmer3/3.1b2/Userguide.pdf.

8
Running on compute nodes
First, change directory to make sure you are on the “/work” file system on ARCHER, where you also have a personal directory associated with your account:
user@archer:~> cd /work/y14/y14/user
/work is a high-performance file system optimized for parallel computing that can be accessed by both the ARCHER frontend (login nodes) and backend (compute nodes). The /home file system on the other hand can not be read from or written to by applications running on compute nodes. This is common, though on some HPC systems there is only one file system. All compute jobs on ARCHER should therefore be run from the /work file system. Any jobs attempting to use /home will fail with the following error:
[NID 01653] 2017-11-25 18:07:22 Exec /bin/hostname failed:
chdir /home1/y14/y14/user No such file or directory
As with other HPC systems, use of the compute nodes on ARCHER is mediated by a batch system, also referred to as a job submission system or a job scheduler. This is used to ensure that all users get access to their fair share of resources, to make sure that the machine is used as efficiently as possible and to allow users to run jobs without having to be physically logged in. The batch system on ARCHER is called PBS. It is possible to run compute jobs interactively on ARCHER and many other HPC machines, i.e. to launch an application to run on compute nodes directly from the command line and to receive output and errors directly to the terminal in real time. This can be useful for experimenting with the setup of simulations, calculations or analyses, and for software development and debugging. However this is not ideal for running long and/or large numbers of production jobs as you need to continually be interacting with the system. In all but the simplest cases this is not feasible as you can predict in advance when compute nodes will become available for you to use. The solution to this, and the method that users generally use to run jobs on systems like ARCHER, is to run in batch mode. In this case you put the commands you wish to run in a file (called a job script) and the system executes the commands in sequence for you with no need for you to be interacting. In order to do this you need to be able to edit text files.
Using the Emacs text editor
Certain text editors are available on almost all HPC systems including on ARCHER, namely Emacs, Vim, and nano. This section describes how to use Emacs, but you should feel free to use whichever editor you prefer. Running interactive graphical applications on ARCHER can be slow. It is therefore best to use Emacs in in-terminal mode. In this mode you can edit the file as usual but you must use keyboard shortcuts to run operations such as “save file” (remember, there are no menus that can be accessed using a mouse). Start Emacs with the command emacs –nw and the name of the existing file you wish to edit or a new file you wish to create. For example:
user@archer:~> emacs -nw job.pbs

9
The option ‘nw’ stands for “no window” and suppresses the graphical interface that would otherwise appear if you are connected with X11 forwarding turned on (try leaving out ‘-nw’ if you like). The terminal will change to show that you are now inside the Emacs text editor:
Typing will insert text as you would expect and backspace will delete text. You use special key sequences (involving the Ctrl and Alt buttons) to save files, exit Emacs and so on. Files can be saved using the sequence “Ctrl-x Ctrl-s” (usually abbreviated in Emacs documentation to “C-x C-s”). You should see the following briefly appear in the line at the bottom of the window (the minibuffer in Emacs-speak):
Wrote ./job.pbs
To exit Emacs and return to the command line use the sequence “C-x C-c”. If you have changes in the file that have not yet been saved Emacs will prompt you to ask if you want to save the changes or not. Although you could edit files on your local laptop or desktop machine using whichever text editor you prefer, it is useful to know enough to be able to use an in-terminal editor as it is much more convenient to perform a quick edit on an HPC machine without needing to go through the hassle of downloading the file to your machine, editing, and re-uploading it.
Using PBS job scripts We will begin by running the same phmmer query in serial on the compute nodes. Copy the protein sequence data from your home directory to your space on /work. Download the following job script to your directory on /work and examine its contents:
http://www.archer.ac.uk/training/course-material/2017/11/intro-epcc/phmmer.pbs
The first line specifies which shell to use to interpret the commands we include in the script. Normally we use bash, which is the default shell on most modern systems including on ARCHER, and is what you have been using so far interactively in this practical since logging on.

10
The lines starting with #PBS provide options that allow you to specify to the job submission system what resources you want for your job. The -l select=[nodes] option is used to request the total number of compute nodes required for your job (1 in the example above). The minimum job size on ARCHER is 1 node, which makes all 24 cores on that node available to use. This amounts to “exclusive” node usage. In contrast, on smaller HPC systems multiple jobs from different users may share cores on a node. The option “-l walltime=00:05:00” sets the maximum job duration to 5 minutes; “-A y14” sets the budget to charge the job to “y14” (this corresponds to the ARCHER budget reserved for training purposes); “-N phmmer” sets the job name to “phmmer” – this can be anything you like but is restricted in length. Everything else in a job script, i.e. all lines not starting with #PBS or just #, which indicates a comment, are the commands to be executed in the job. In phmmer.pbs we see a directory change to $PBS_O_WORKDIR (an environment variable that stores the directory the job was submitted from), the setting of the PATH environment variable to include the location of your HMMER installation (this is so you can use the phmmer command without specifying the full path to it), and the aprun command. The aprun command is essential - it tells the system to run the application specified on the compute nodes available to the job, instead of on the frontend login nodes or intermediate “job launcher” nodes, both of which are shared between users and not intended for prolonged computation. Aprun is known as a parallel application launcher command and it is somewhat specific to Cray systems – on other machines you will encounter the roughly equivalent mpirun or mpiexec commands. The intermediate job launcher nodes are a specific feature of ARCHER and other Cray machines – on many HPC systems all commands contained in the job script will execute on compute nodes associated with your job, but on ARCHER only commands preceded by aprun actually execute on compute nodes. The following line in the job script executes phmmer serially on one core:
aprun -n 1 phmmer --cpu 1 --noali -E 1e-100 -o P01024_mammals.out P01024.fasta
uniprot_sprot_mammals.dat
Note we have added the --noali (“no alignments”) option to print less output, and the –o option to output results to a named file rather than to stdout (“standard out”). When an application is run interactively stdout corresponds to the terminal window. In a PBS batch job output to stdout would end up in a file labelled phmmer.o######, but only after the job terminates. Outputting to a named file allows us to track progress while the job is running. In general the output to stdout from any command / application can be done redirected to a named file using the > symbol, as follows:
command -[options] [optional_input_file(s)] > named_output_file
For more information, see http://www.tldp.org/LDP/abs/html/io-redirection.html
Submitting scripts to PBS To submit your job, simply use the qsub command:
user@archer:~> qsub –q RXXXXXX phmmer.pbs
4937753.sdb
You will be given the number of the reserved course queue (RXXXXXXX) to use for the –q option. The jobID returned from the qsub command is used as part of the names of the output files discussed below and also when you want to delete the job (for example, you have submitted the job by mistake).

11
Monitoring/deleting your batch job The PBS command qstat can be used to examine the batch queues and see if your job is queued, running or complete. qstat on its own will list all the jobs on ARCHER (usually hundreds) so you can use the “-u $USER” option to only show your jobs:
user@archer:~> qstat -u $USER
sdb:
Req’d Req’d Elap
Job ID Username Queue Jobname SessID NDS TSK Memory Time S Time
--------------- -------- -------- ---------- ------ --- --- ------ ----- - ----
4937753.sdb user standard phmmer -- 1 24 -- 00:05 Q --
“Q” means the job is queued, “R” that it is running and “E” that it has recently completed; if you do not see your job, it usually means that it has completed. If you want to delete a job, you can use the qdel command with the jobID. For example:
user@archer:~> qdel 4937753.sdb
Job output and error files The job submission system places any output from your job that you have not explicitly directed into a named file into a file labelled <job name>.o<jobID>. Errors typically appear in a second file labelled <job name>.e<jobID>. Both these files only appear on completion of the job. Batch systems other than PBS do this too, though the precise naming convention may differ.
Consider this… The aprun option “–n 1” tells the system to run one instance of phmmer. You could try changing this number, which will cause multiple instances of phmmer to run in parallel. What do you think will happen? To see better what is going on you should remove the “-o” option to phmmer and observe the job’s output file after the job finishes. What do you see, and does this confirm what you thought would happen? Suppose your original sequence aligment query takes a long time to complete, would running it this way help? Discuss with your fellow attendees or a helper.
Run a parallel phmmer query on compute nodes
Matching the C3 protein against the mammals protein database with default sensitivity takes just a second or two even on one core. Now try adding the phmmer option “--max" in your job. This increases sensitivity to potential matches but you will find your job takes much longer to finish. Now try running phmmer in parallel on multiple cores by changing the number of the “--cpu" option, thereby causing phmmer to run with multiple threads. To use all 24 cores on an ARCHER compute node, modify your aprun statement as follows:
aprun –n 1 –d 24 phmmer --cpu 24 --max --noali -E 1e-100 -o P01024_mammals_cpu24.out
P01024.fasta uniprot_sprot_mammals.dat
Note: the aprun option “-d” is important and should be set equal to the number of threads spawned by phmmer, i.e. equal to the --cpu value. This ensures each thread actually runs on a different core. If this is left out all threads will run on the same core, leaving the other 23 cores unused and giving no performance benefit. On some HPC machines this may be controlled in a different way, on others it will require no special intervention.

12
Parallel Performance If you examine the phmmer output file you will see that at the end it contains the following line with timing information:
# CPU time: 103.91u 0.11s 00:01:44.02 Elapsed: 00:01:44.09
The final value (00:01:44.09 in the above) gives the elapsed wallclock time, that is, how long phmmer ran for. CPU time is a distinct concept and can be thought of as “core-seconds”, in the same way that human work can be measured in “person-hours” for a job done by potentially more than one person, in that it measures the cumulative amount of time used by all cores that run an application. In the above example a single core runs the application for ~104 seconds, which is therefore roughly equal to the elapsed wallclock time. The timing for 4 threads however gives:
# CPU time: 113.48u 0.16s 00:01:53.64 Elapsed: 00:00:29.86
Here 4 cores accumulate a total CPU time of ~113 seconds (more than when the application was run on a single core), or an average of ~28 seconds per core, but because they are all working in parallel phmmer finishes in just under 30 seconds, less than in the single core case. Our goal now is to find out systematically how the performance of phmmer varies as increasing numbers of cores are used. You should run a number of jobs with different core counts and fill in Table 1 on the last page of these instructions (or keep track in file on ARCHER) based on the reported elapsed time. Once you have completed Table 1 you should have the information required to complete Table 2 to compute the speedups of the multithreaded runs. Remember that the speedup is the ratio of runtime on 1 core compared to the runtime on N cores. Plot these speedups using the instructions in the following section. So far we have used phmmer in parallel by allowing it to spawn multiple threads. However because of the nature of threads this only ever allows us to use the cores on a single node on ARCHER. If we want to solve a more complex sequence alignment problem in the same or less time we will need to use all the cores on many nodes in parallel. This can be accomplished using the MPI-parallelised functionality of phmmer. For example, to match the same C3 protein query against the entire Swiss-Prot database (not just mammals) using all the 192 cores on 8 nodes:
aprun –n 192 phmmer --mpi --max --noali -E 1e-100 P01024.fasta uniprot_sprot.fasta
Notice that as opposed to the multithreaded case where we always used “-n 1”, we are now asking aprun to launch 192 separate but concurrently running instances of phmmer – these are 192 separate processes (as opposed to threads). These processes communicate with each other using the Message Passing Interface (MPI) to distribute the sequence alignment work. In general applications can combine various implementations of parallelism, including threads and separately running processes that communicate using MPI, however as it happens phmmer forces us to choose either the one or the other. Note: you will not be able to run phmmer with a single MPI process (aprun –n 1) as the developers have not provided for this and your run will sit in the queue indefinitely. Download the entire Swiss_Prot database from ftp://ftp.ebi.ac.uk/pub/databases/uniprot/current_release/knowledgebase/complete/uniprot_s

13
prot.fasta.gz and modify your job script to match C3 against this database by running on multiple nodes. Explore the parallel scaling performance by gathering data for Table 3 and Table 4 and plotting speedups.
Plotting the speedups
You should also produce a speedup plot with number of cores (on the x-axis) versus speedup (on the y-axis). Feel free to use whatever plotting method you are comfortable with. To aid you with plotting graphs we provide a small Python plotting utility, plotxy.py that you can download from the ARCHER website with:
wget http://www.archer.ac.uk/training/courses/2016/PracIntroHPC/util/plotxy.py
If you put your data in CSV (comma-separated value) form in a file then it will plot them for you. For example, to plot the speedup data you would create a file with three values per line: the number of cores followed by the ideal and observed speedup values for that core count:
<cores>, <ideal>, <observed>
You could create this file using Emacs:
emacs –nw speedup.csv
and the first couple of lines may look like:
1, 1.000, 1.000
2, 2.000, 1.93
Once you have the data in a CSV format you can plot it with the commands:
module load anaconda
python plotxy.py speedup.csv speedup.png
(The Anaconda packagecontains many useful Python libraries, including those that can be used for plotting data: matplotlib). The utility will save a PNG image containing the plot in the second file name you specify on the command line. You can view the plot using the “display” command as you used for the image:
display speedup.png
This is a very simple plot to allow you to quickly preview results – if you were plotting for including in a report or paper you would produce something more elaborate (including axis labels, proper series labels,etc.).

14
Tables # Cores Elapsed run time
1 2 4 8 16 24 Table 1: Times taken by multithreaded parallel phmmer protein search # Cores Ideal Speedup Observed speedup
1 2 4 8 16 24 Table 2: Speedups for multithreaded parallel phmmer protein search # Nodes # Cores Elapsed run time
1 1 n/a 1 2 1 4 1 8 1 16 1 24 2 48 4 96 8 192 Table 3: Times taken by MPI-parallel phmmer protein search # Nodes # Cores Ideal Speedup Observed speedup
1 1 n/a n/a 1 2 2 1* 1 4 1 8 1 16 1 24 2 48 4 96 8 192 Table 4: Speedups for MPI-parallel phmmer protein search *To calculate speedups for MPI-parallel runs, divide the elapsed time for a given run by the runtime for 2 processes. This also allows a fair comparison with speedups for the threaded runs if you choose to run the same sequence query in both cases.