teacher resource quest 1: viking roles...12 1: viking roles teacher resource teacher tasks set...
TRANSCRIPT
© CCEA 2018
Skills and Capabilities These activities offer opportunities for pupils to develop the following Cross-Curricular Skills,
Thinking Skills and Personal Capabilities:
Being Creative By working together to research, design and create new village buildings children should have the opportunity to:
make ideas real by experimenting with different designs, actions, and outcomes.
Working with others
By working in small groups to mine collectively for resources children should have the opportunity to:
listen actively and share opinions;
suggest ways of improving their approach to working collaboratively; and
take personal responsibility for work with others and evaluate their own contribution to the group.
Using ICT By taking a snap shot of their work at the end of each activity and discussing it, children should have the opportunity to:
manage and present their stored work and showcase their learning across the curriculum, using ICT safely and responsibly.
Teacher Resource
Quest 1: Viking Roles
These 4 activities complement classroom work on
the topic of Viking Roles. They can be used
independently or together:
The Village;
Mining;
Farmland; and
Chicken Farming.
1
Quest 1: Viking Roles
Teacher Resource
New words and phrases
Crafting grid Crafting table Till Farmland Garden hoe Dirt block Grass block Smelting Furnace Cobblestone block Stick Hydrated
You may find it useful to introduce pupils to new words and phrases. The amount of detail you use when explaining these terms will depend on the age and prior knowledge of the children.
This document references this other CCEA Minecraft STEM resources:
Approximate times are given for each step throughout the resource.
MinecraftEdu Recipes resource – document and videos.
Save the multiplayer world Remember to save the multiplayer world from the server tool every 30 minutes. See page 5 of the MinecraftEdu Teacher tools resource.
Teacher tool description
If you are sharing your STEM in Minecraft
activities through social media remember
to tweet it to us!
@CCEA_info
#minecraft
2
Quest 1: Viking Roles
Teacher Resource
Teacher tasks
Set multiplayer gamemode to survival
The steps in this resource are designed for a combination of survival and creative
multiplayer gamemode.
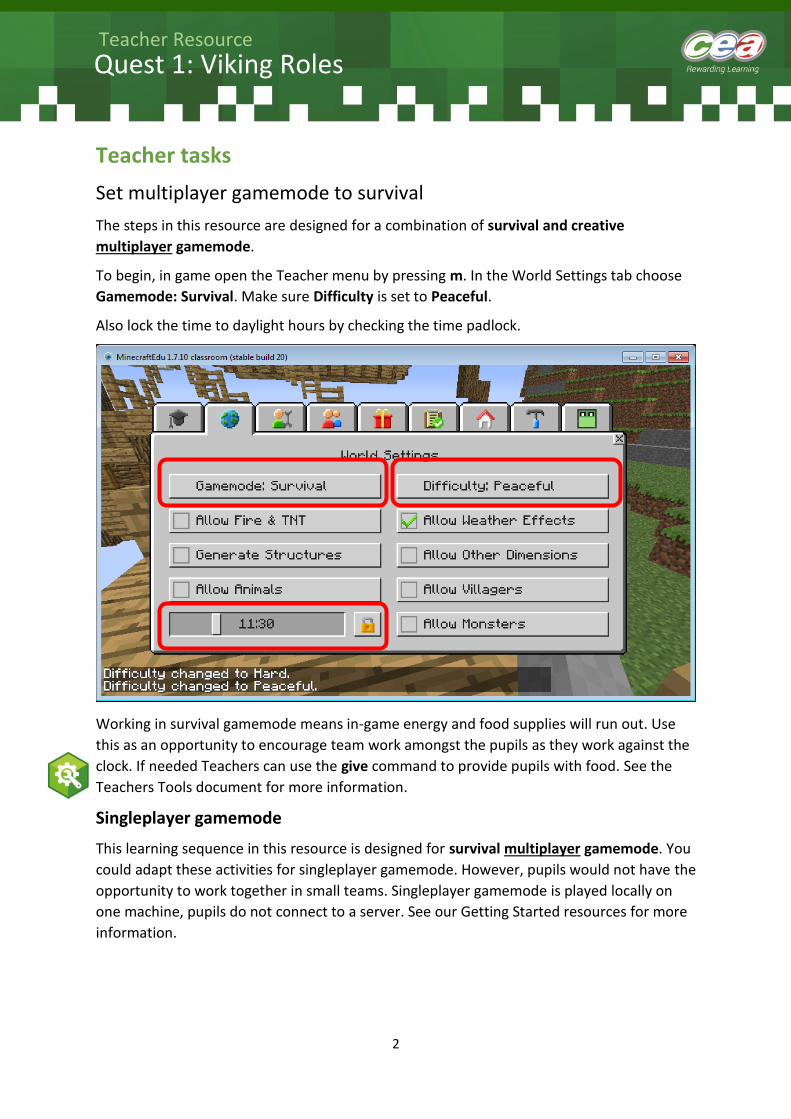
To begin, in game open the Teacher menu by pressing m. In the World Settings tab choose
Gamemode: Survival. Make sure Difficulty is set to Peaceful.
Also lock the time to daylight hours by checking the time padlock.
Working in survival gamemode means in-game energy and food supplies will run out. Use
this as an opportunity to encourage team work amongst the pupils as they work against the
clock. If needed Teachers can use the give command to provide pupils with food. See the
Teachers Tools document for more information.
Singleplayer gamemode
This learning sequence in this resource is designed for survival multiplayer gamemode. You
could adapt these activities for singleplayer gamemode. However, pupils would not have the
opportunity to work together in small teams. Singleplayer gamemode is played locally on
one machine, pupils do not connect to a server. See our Getting Started resources for more
information.
3
Quest 1: Viking Roles
Teacher Resource
Navigating the map
Spawn area
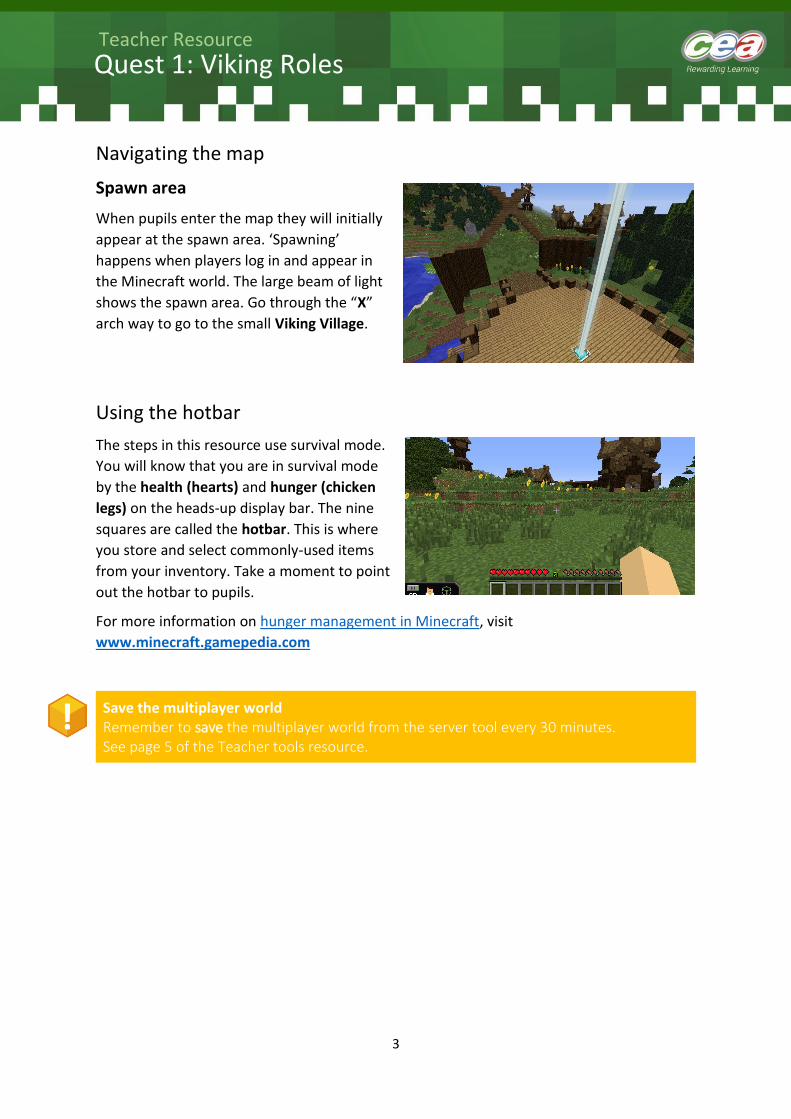
When pupils enter the map they will initially
appear at the spawn area. ‘Spawning’
happens when players log in and appear in
the Minecraft world. The large beam of light
shows the spawn area. Go through the “X”
arch way to go to the small Viking Village.
Using the hotbar
The steps in this resource use survival mode.
You will know that you are in survival mode
by the health (hearts) and hunger (chicken
legs) on the heads-up display bar. The nine
squares are called the hotbar. This is where
you store and select commonly-used items
from your inventory. Take a moment to point
out the hotbar to pupils.
For more information on hunger management in Minecraft, visit
www.minecraft.gamepedia.com
Save the multiplayer world Remember to save the multiplayer world from the server tool every 30 minutes. See page 5 of the Teacher tools resource.
4
Quest 1: Viking Roles
Teacher Resource
The Village activity
These steps explore Viking roles and show you how to create a crafting table, create wood
planks, build a chest and build Viking buildings.
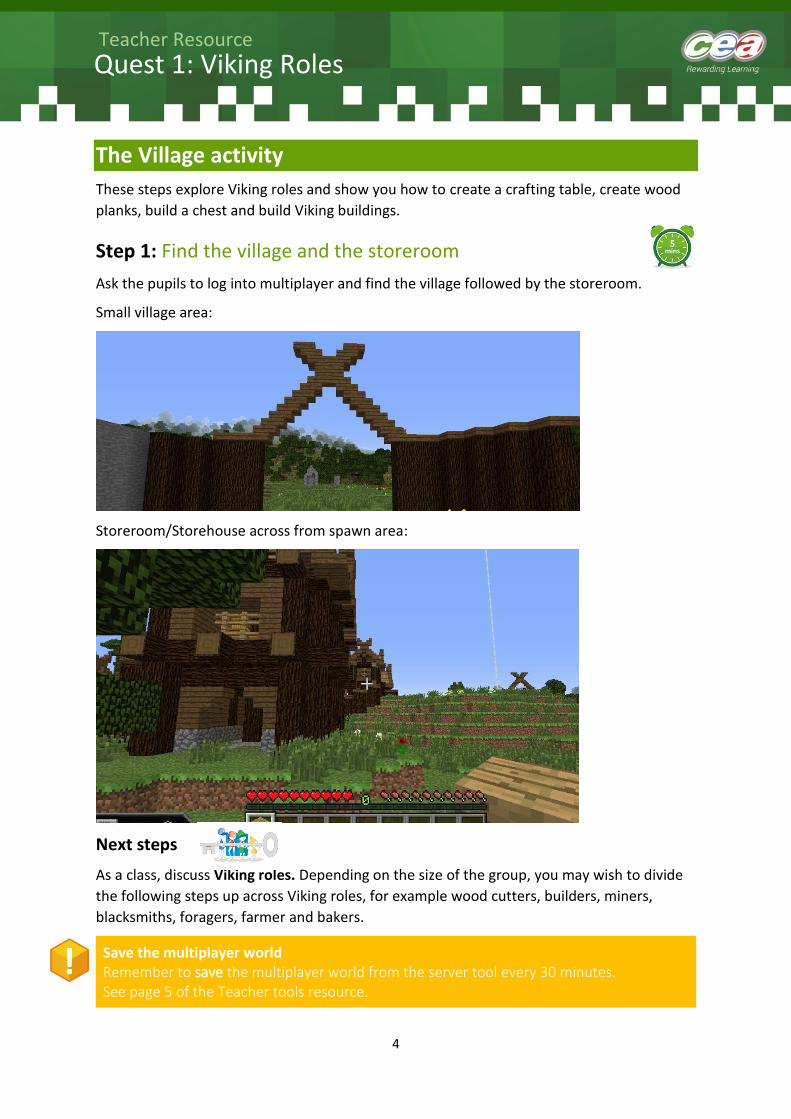
Step 1: Find the village and the storeroom
Ask the pupils to log into multiplayer and find the village followed by the storeroom.
Small village area:
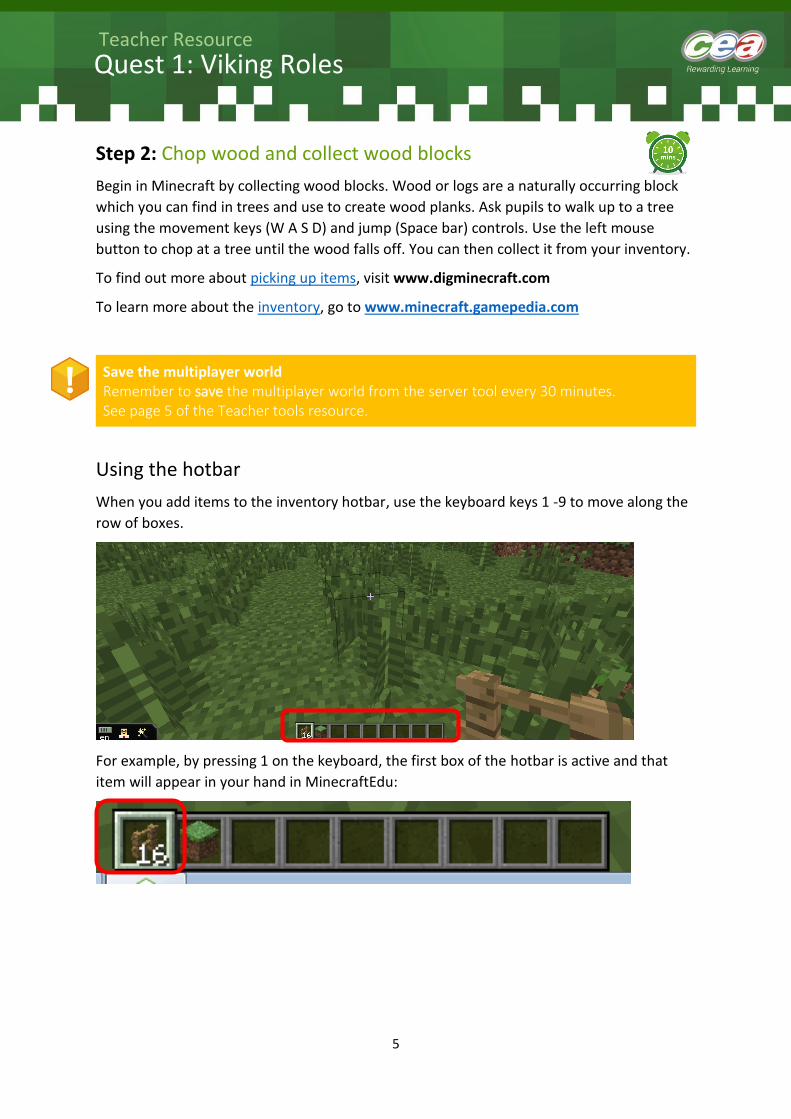
Storeroom/Storehouse across from spawn area:
Next steps
As a class, discuss Viking roles. Depending on the size of the group, you may wish to divide
the following steps up across Viking roles, for example wood cutters, builders, miners,
blacksmiths, foragers, farmer and bakers.
Save the multiplayer world Remember to save the multiplayer world from the server tool every 30 minutes. See page 5 of the Teacher tools resource.
5
Quest 1: Viking Roles
Teacher Resource
Step 2: Chop wood and collect wood blocks
Begin in Minecraft by collecting wood blocks. Wood or logs are a naturally occurring block
which you can find in trees and use to create wood planks. Ask pupils to walk up to a tree
using the movement keys (W A S D) and jump (Space bar) controls. Use the left mouse
button to chop at a tree until the wood falls off. You can then collect it from your inventory.
To find out more about picking up items, visit www.digminecraft.com
To learn more about the inventory, go to www.minecraft.gamepedia.com
Save the multiplayer world Remember to save the multiplayer world from the server tool every 30 minutes. See page 5 of the Teacher tools resource.
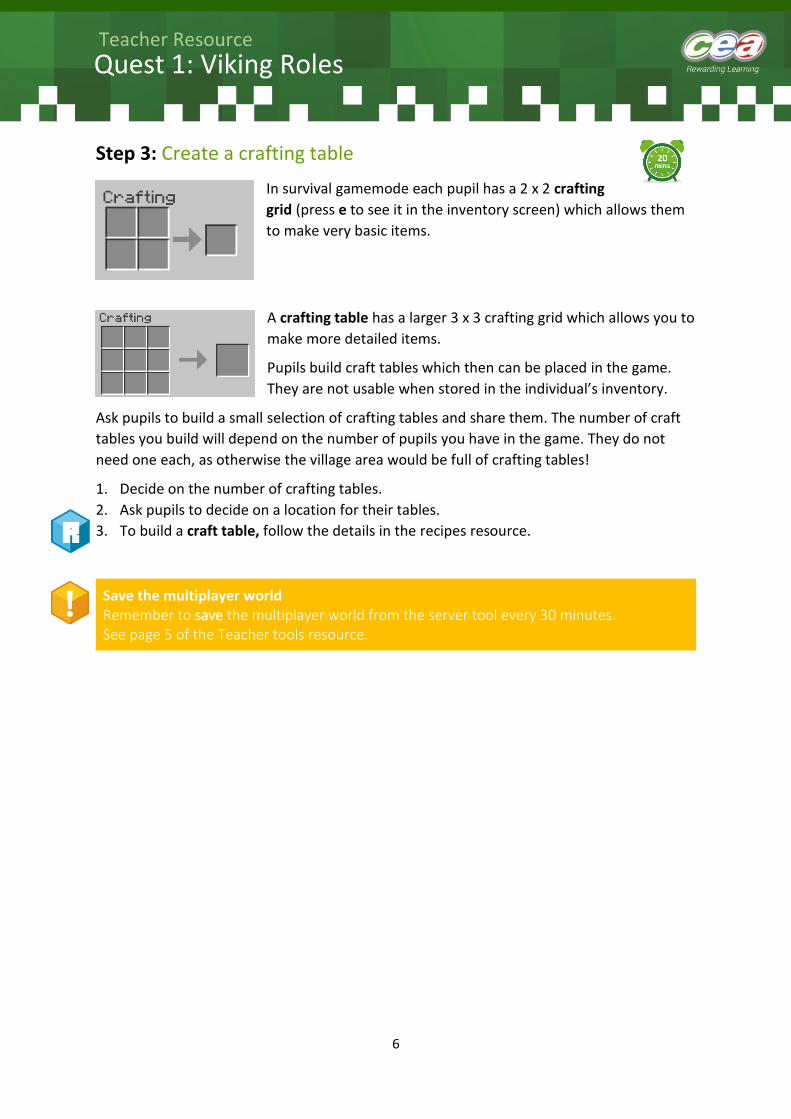
Using the hotbar
When you add items to the inventory hotbar, use the keyboard keys 1 -9 to move along the
row of boxes.
For example, by pressing 1 on the keyboard, the first box of the hotbar is active and that
item will appear in your hand in MinecraftEdu:
6
Quest 1: Viking Roles
Teacher Resource
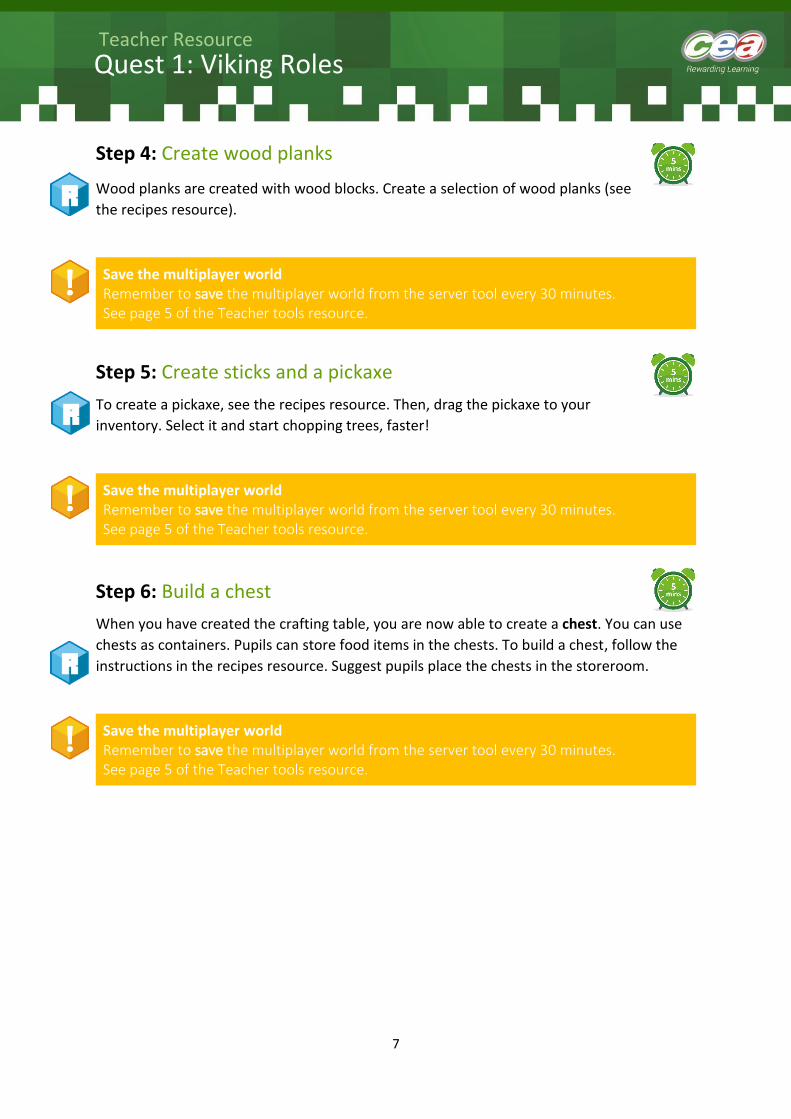
Step 3: Create a crafting table
In survival gamemode each pupil has a 2 x 2 crafting
grid (press e to see it in the inventory screen) which allows them
to make very basic items.
A crafting table has a larger 3 x 3 crafting grid which allows you to
make more detailed items.
Pupils build craft tables which then can be placed in the game.
They are not usable when stored in the individual’s inventory.
Ask pupils to build a small selection of crafting tables and share them. The number of craft
tables you build will depend on the number of pupils you have in the game. They do not
need one each, as otherwise the village area would be full of crafting tables!
1. Decide on the number of crafting tables.
2. Ask pupils to decide on a location for their tables.
3. To build a craft table, follow the details in the recipes resource.
Save the multiplayer world Remember to save the multiplayer world from the server tool every 30 minutes. See page 5 of the Teacher tools resource.
7
Quest 1: Viking Roles
Teacher Resource
Step 4: Create wood planks
Wood planks are created with wood blocks. Create a selection of wood planks (see
the recipes resource).
Save the multiplayer world Remember to save the multiplayer world from the server tool every 30 minutes. See page 5 of the Teacher tools resource.
Step 5: Create sticks and a pickaxe
To create a pickaxe, see the recipes resource. Then, drag the pickaxe to your
inventory. Select it and start chopping trees, faster!
Save the multiplayer world Remember to save the multiplayer world from the server tool every 30 minutes. See page 5 of the Teacher tools resource.
Step 6: Build a chest
When you have created the crafting table, you are now able to create a chest. You can use
chests as containers. Pupils can store food items in the chests. To build a chest, follow the
instructions in the recipes resource. Suggest pupils place the chests in the storeroom.
Save the multiplayer world Remember to save the multiplayer world from the server tool every 30 minutes. See page 5 of the Teacher tools resource.
8
Quest 1: Viking Roles
Teacher Resource
Teacher tasks
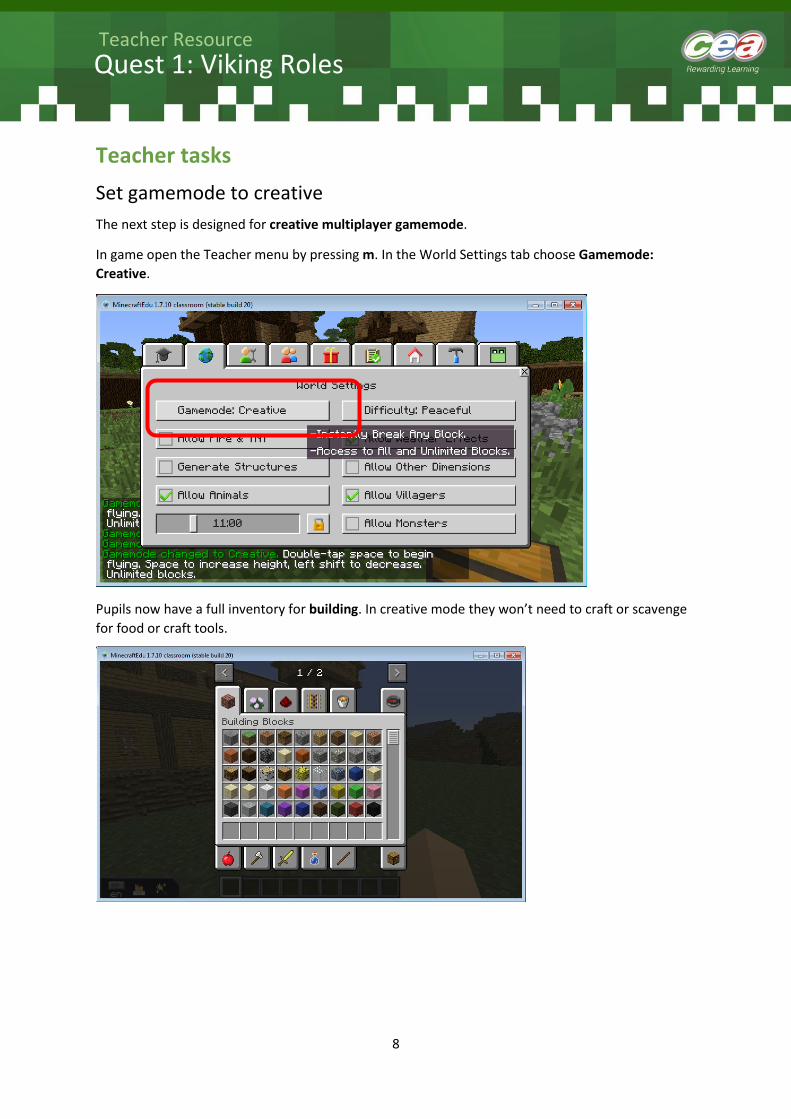
Set gamemode to creative
The next step is designed for creative multiplayer gamemode.
In game open the Teacher menu by pressing m. In the World Settings tab choose Gamemode:
Creative.
Pupils now have a full inventory for building. In creative mode they won’t need to craft or scavenge
for food or craft tools.
9
Quest 1: Viking Roles
Teacher Resource
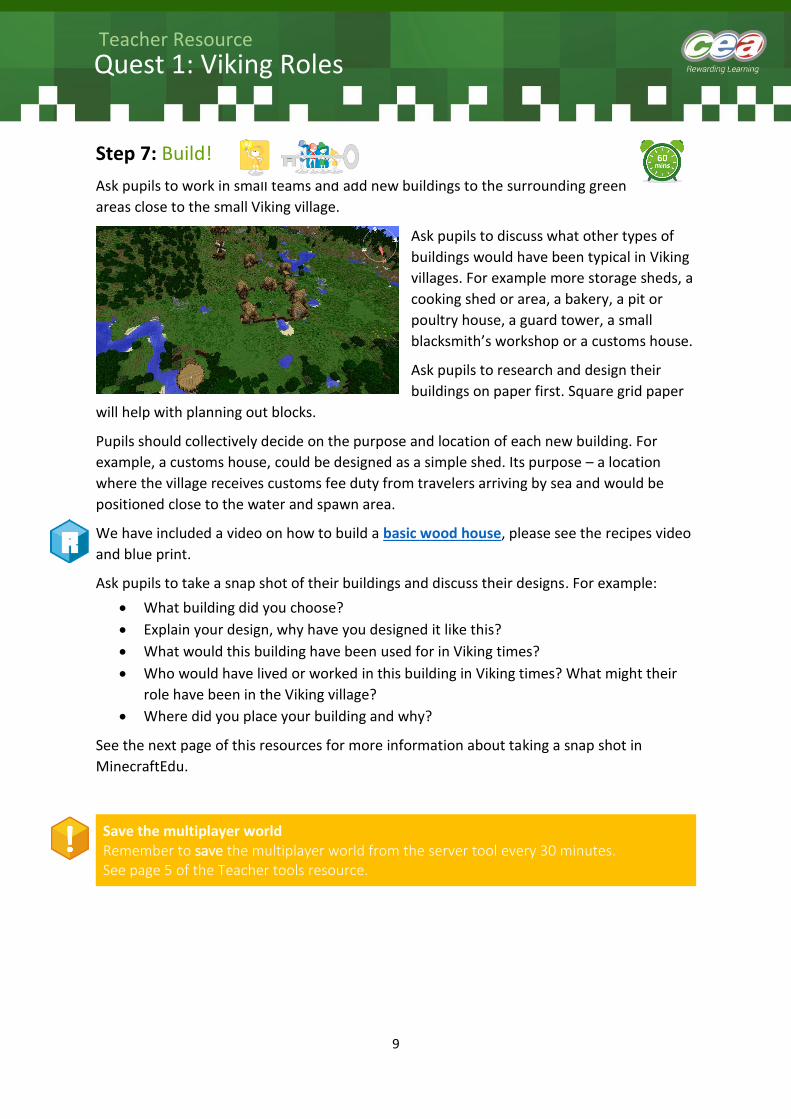
Step 7: Build!
Ask pupils to work in small teams and add new buildings to the surrounding green
areas close to the small Viking village.
Ask pupils to discuss what other types of
buildings would have been typical in Viking
villages. For example more storage sheds, a
cooking shed or area, a bakery, a pit or
poultry house, a guard tower, a small
blacksmith’s workshop or a customs house.
Ask pupils to research and design their
buildings on paper first. Square grid paper
will help with planning out blocks.
Pupils should collectively decide on the purpose and location of each new building. For
example, a customs house, could be designed as a simple shed. Its purpose – a location
where the village receives customs fee duty from travelers arriving by sea and would be
positioned close to the water and spawn area.
We have included a video on how to build a basic wood house, please see the recipes video
and blue print.
Ask pupils to take a snap shot of their buildings and discuss their designs. For example:
What building did you choose?
Explain your design, why have you designed it like this?
What would this building have been used for in Viking times?
Who would have lived or worked in this building in Viking times? What might their
role have been in the Viking village?
Where did you place your building and why?
See the next page of this resources for more information about taking a snap shot in
MinecraftEdu.
Save the multiplayer world Remember to save the multiplayer world from the server tool every 30 minutes. See page 5 of the Teacher tools resource.
10
Quest 1: Viking Roles
Teacher Resource
Take a snapshot
At the end of each activity ask pupils to take a series of photos (snapshots) from their Viking
roles activities.
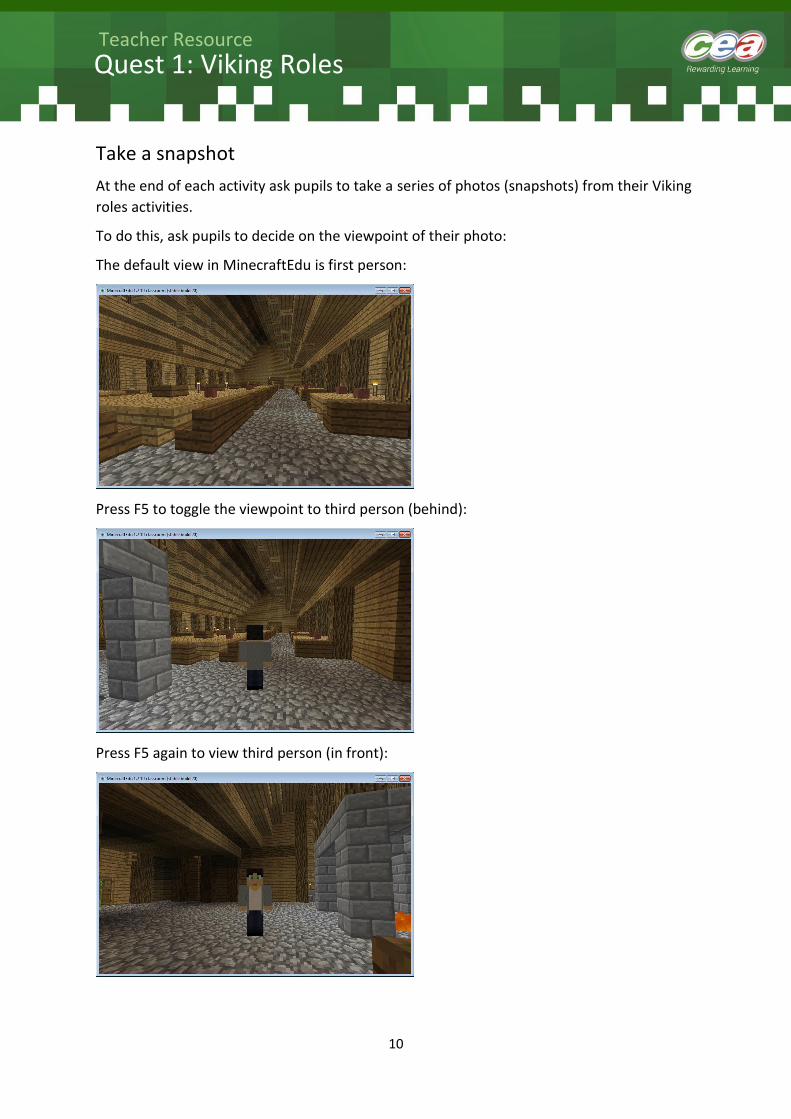
To do this, ask pupils to decide on the viewpoint of their photo:
The default view in MinecraftEdu is first person:
Press F5 to toggle the viewpoint to third person (behind):
Press F5 again to view third person (in front):
11
Quest 1: Viking Roles
Teacher Resource
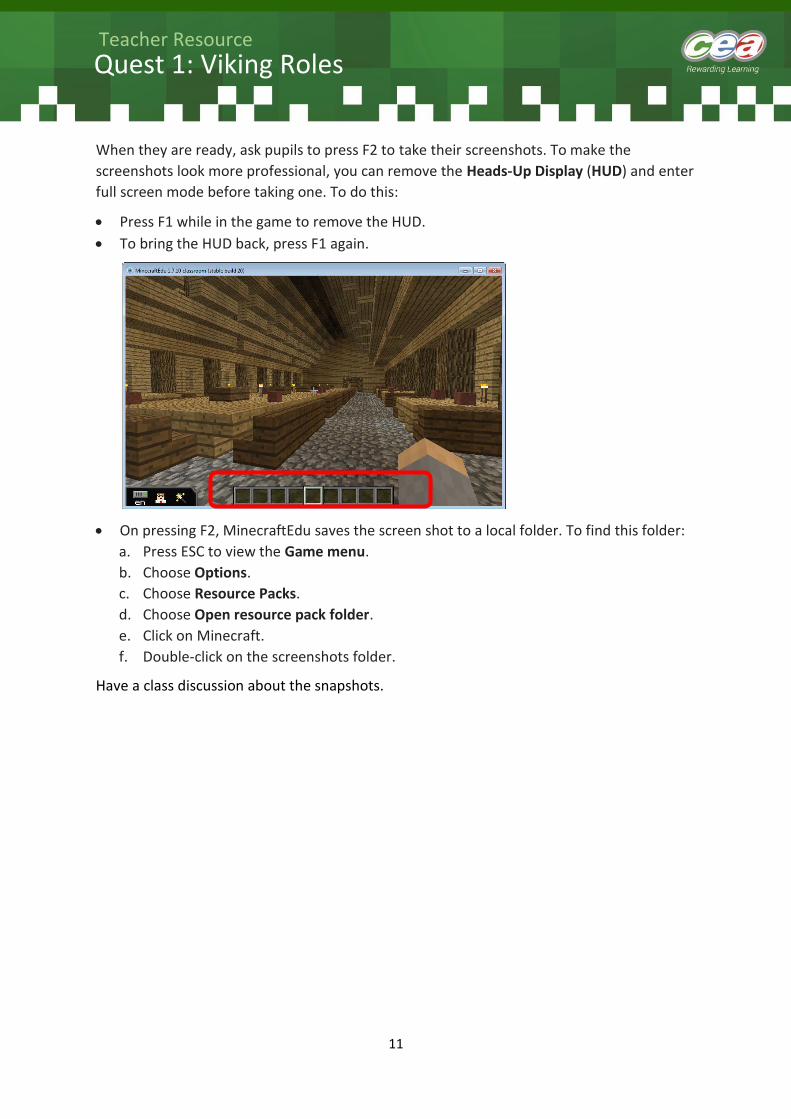
When they are ready, ask pupils to press F2 to take their screenshots. To make the
screenshots look more professional, you can remove the Heads-Up Display (HUD) and enter
full screen mode before taking one. To do this:
Press F1 while in the game to remove the HUD.
To bring the HUD back, press F1 again.
On pressing F2, MinecraftEdu saves the screen shot to a local folder. To find this folder:
a. Press ESC to view the Game menu.
b. Choose Options.
c. Choose Resource Packs.
d. Choose Open resource pack folder.
e. Click on Minecraft.
f. Double-click on the screenshots folder.
Have a class discussion about the snapshots.
12
Quest 1: Viking Roles
Teacher Resource
Teacher tasks
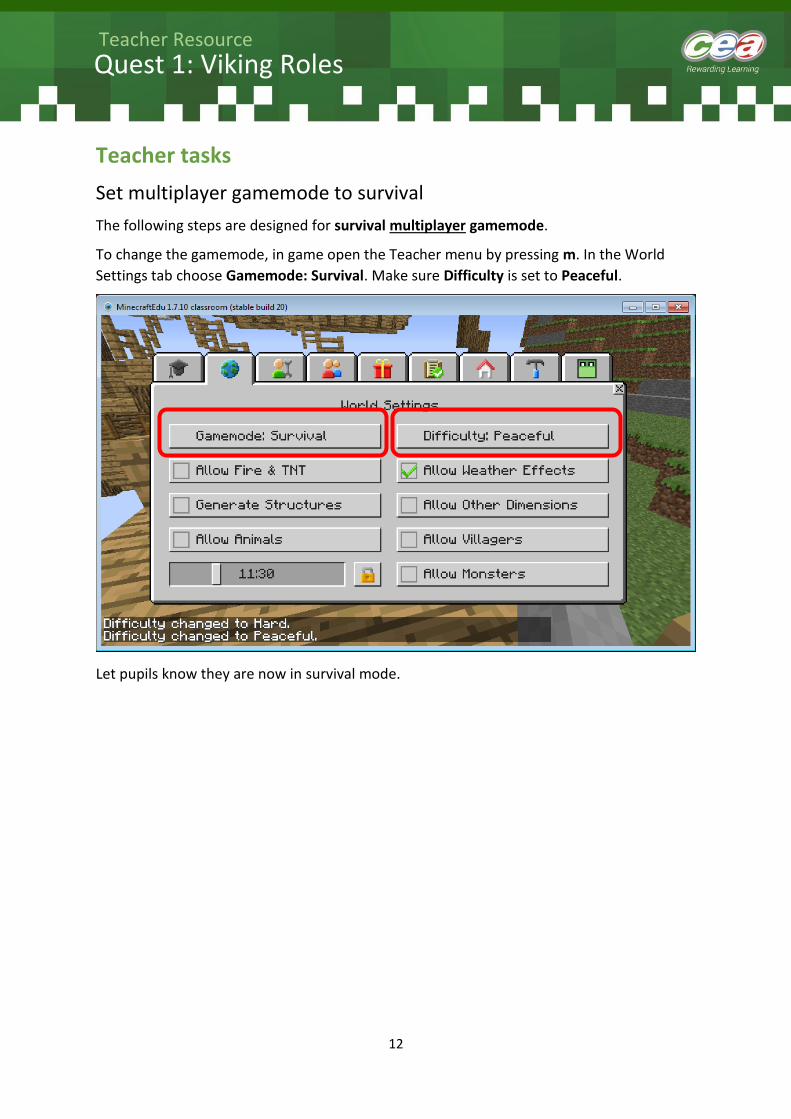
Set multiplayer gamemode to survival
The following steps are designed for survival multiplayer gamemode.
To change the gamemode, in game open the Teacher menu by pressing m. In the World
Settings tab choose Gamemode: Survival. Make sure Difficulty is set to Peaceful.
Let pupils know they are now in survival mode.
13
Quest 1: Viking Roles
Teacher Resource
Mining activity
These steps show you how to mine and create a bucket. Pupils will mine for cobblestone,
coal and iron ore, smelt using the furnace, and finally craft a bucket which can be used in
the last farmland activity.
Depending on the size of your group, consider asking specific groups to mine for each of the
three items (cobblestone, coal and iron ore). Pupils may wish to store the mined resources
and then share them amongst the group.
Step 1: Mine cobblestone and coal
Let's begin with mining cobblestone.
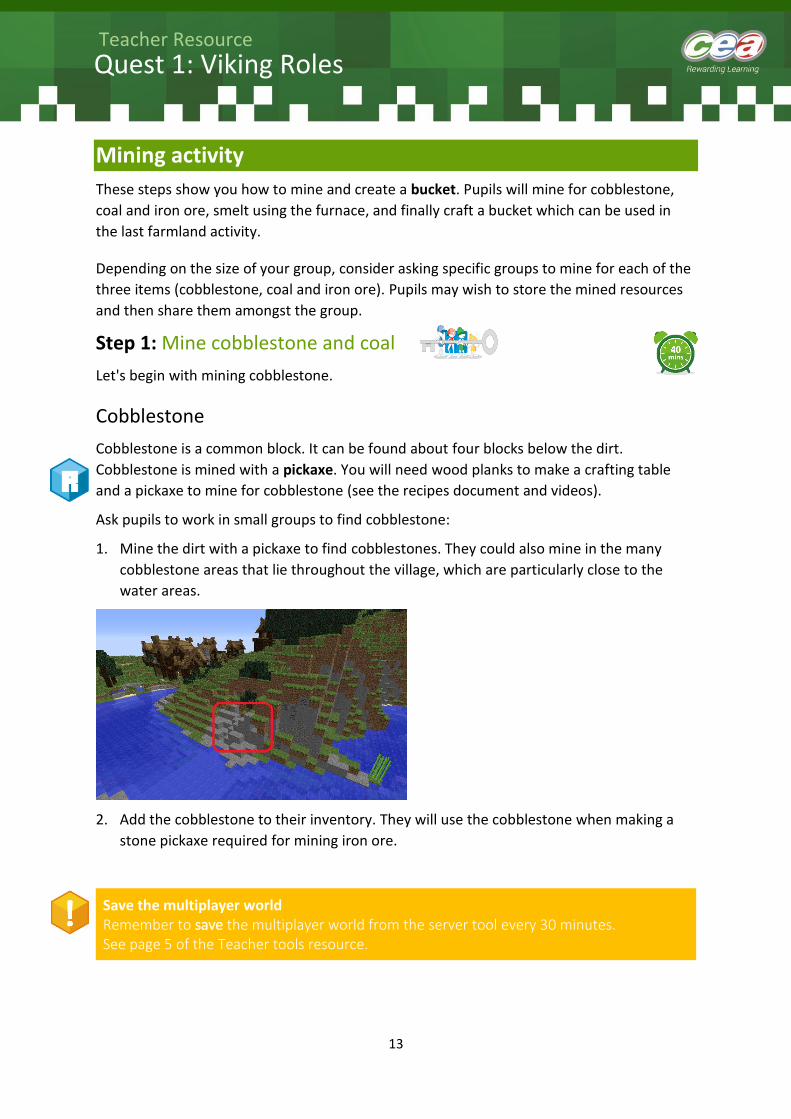
Cobblestone
Cobblestone is a common block. It can be found about four blocks below the dirt.
Cobblestone is mined with a pickaxe. You will need wood planks to make a crafting table
and a pickaxe to mine for cobblestone (see the recipes document and videos).
Ask pupils to work in small groups to find cobblestone:
1. Mine the dirt with a pickaxe to find cobblestones. They could also mine in the many
cobblestone areas that lie throughout the village, which are particularly close to the
water areas.
2. Add the cobblestone to their inventory. They will use the cobblestone when making a
stone pickaxe required for mining iron ore.
Save the multiplayer world Remember to save the multiplayer world from the server tool every 30 minutes. See page 5 of the Teacher tools resource.

14
Quest 1: Viking Roles
Teacher Resource
Coal
Working in small groups ask pupils to look for coal:
Carry out the recipes for stone pickaxe and torches. They will need coal for the torches. Ask
them to take an initial look at the recipe details in the recipes resources, then look for coal.
They can find coal in the areas beside the village houses and water ways, and in the
mountain area. Coal has a mottled appearance, seen here amongst cobblestone – it has a
distinctive black pattern. Here, pupils have the opportunity to mine cobblestone and coal at
the same time.
Save the multiplayer world Remember to save the multiplayer world from the server tool every 30 minutes. See page 5 of the Teacher tools resource.
15
Quest 1: Viking Roles
Teacher Resource
Step 2: Mine iron ore
Iron ore is a mineral block found underground. It is the most common mineral
that can be used to make tools and armor. In in the following steps, pupils will smelt iron
ingots to make a bucket.
In Minecraft, iron ore will only drop as an item if you mine it using either a stone pickaxe or
a stronger tool. If you mine with a weaker tool, it will drop nothing. Pupils will need to use a
stone pickaxe and torches.
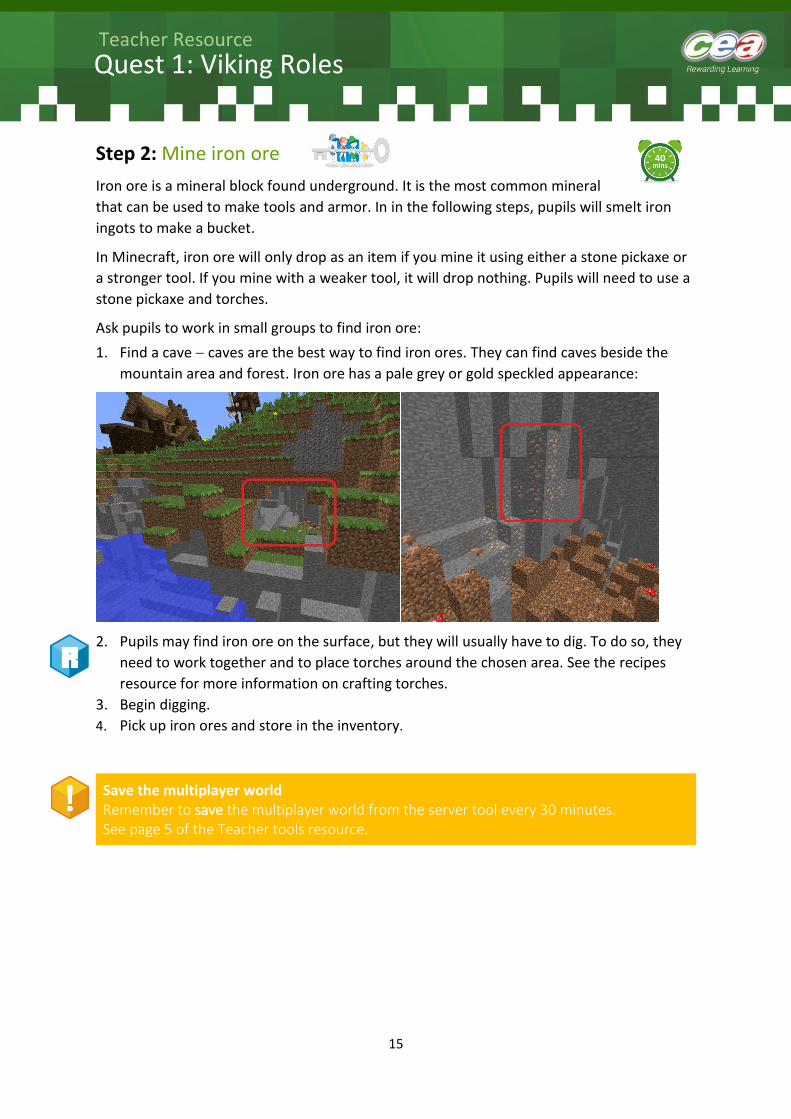
Ask pupils to work in small groups to find iron ore:
1. Find a cave caves are the best way to find iron ores. They can find caves beside the
mountain area and forest. Iron ore has a pale grey or gold speckled appearance:
2. Pupils may find iron ore on the surface, but they will usually have to dig. To do so, they
need to work together and to place torches around the chosen area. See the recipes
resource for more information on crafting torches.
3. Begin digging.
4. Pick up iron ores and store in the inventory.
Save the multiplayer world Remember to save the multiplayer world from the server tool every 30 minutes. See page 5 of the Teacher tools resource.

16
Quest 1: Viking Roles
Teacher Resource
Step 3: Create a furnace
Pupils will need a furnace to smelt the iron ore into ingots (see the recipes
resource). For further information about the furnace in minecraft visit
www.minecraft.gamepedia.com
Save the multiplayer world Remember to save the multiplayer world from the server tool every 30 minutes. See page 5 of the Teacher tools resource.
Step 4: Smelt iron ingots and make a bucket
Iron ingots are versatile metal crafting ingredients. You can make them by smelting
iron ore (see the recipes resource). For further information about smelting, visit
www.minecraft.gamedpedia.com
Ask pupils to use a crafting table to craft a bucket. See the recipes doc and video.
Save the multiplayer world Remember to save the multiplayer world from the server tool every 30 minutes. See page 5 of the Teacher tools resource.
17
Quest 1: Viking Roles
Teacher Resource
Farmland activity
These steps show you how to find water and wheat seeds, prepare farmland and grow
wheat to make bread.
Step 1: Find water
1. Ask pupils to locate a water source. There are several scattered around the
small Viking village.
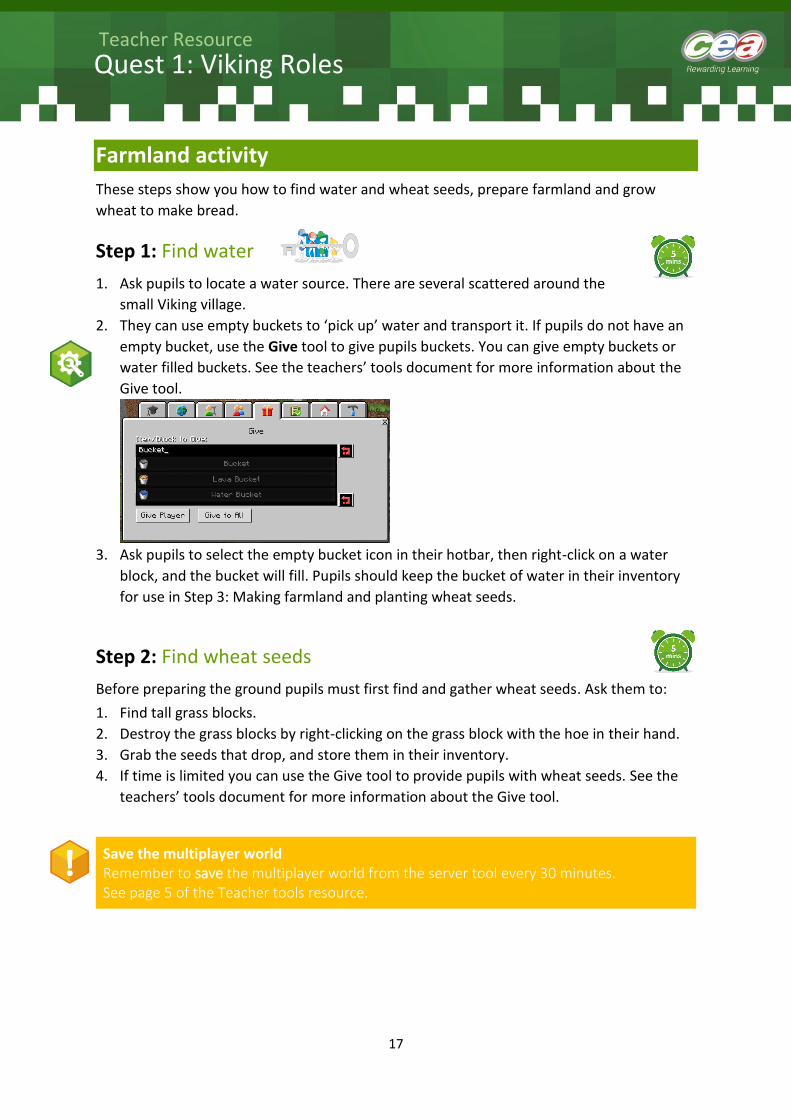
2. They can use empty buckets to ‘pick up’ water and transport it. If pupils do not have an
empty bucket, use the Give tool to give pupils buckets. You can give empty buckets or
water filled buckets. See the teachers’ tools document for more information about the
Give tool.
3. Ask pupils to select the empty bucket icon in their hotbar, then right-click on a water
block, and the bucket will fill. Pupils should keep the bucket of water in their inventory
for use in Step 3: Making farmland and planting wheat seeds.
Step 2: Find wheat seeds
Before preparing the ground pupils must first find and gather wheat seeds. Ask them to: 1. Find tall grass blocks.
2. Destroy the grass blocks by right-clicking on the grass block with the hoe in their hand.
3. Grab the seeds that drop, and store them in their inventory.
4. If time is limited you can use the Give tool to provide pupils with wheat seeds. See the
teachers’ tools document for more information about the Give tool.
Save the multiplayer world Remember to save the multiplayer world from the server tool every 30 minutes. See page 5 of the Teacher tools resource.
18
Quest 1: Viking Roles
Teacher Resource
Step 3: Making farmland and planting wheat seeds
You can use a garden hoe to till dirt blocks into farmland. To craft a garden hoe
see the recipes resource.
In farming, you can create farmlands when you till dirt or grass with a hoe. A farmland tile
will become ‘hydrated’ if it has the following conditions:
It is within four blocks of water.
It is either on the same plane, or one level below water.
Farmland tiles can become damaged if anything walks normally on them. You can sneak
over your farmland and crops by holding shift as you move. Creatures can also harm crops
by walking on them.
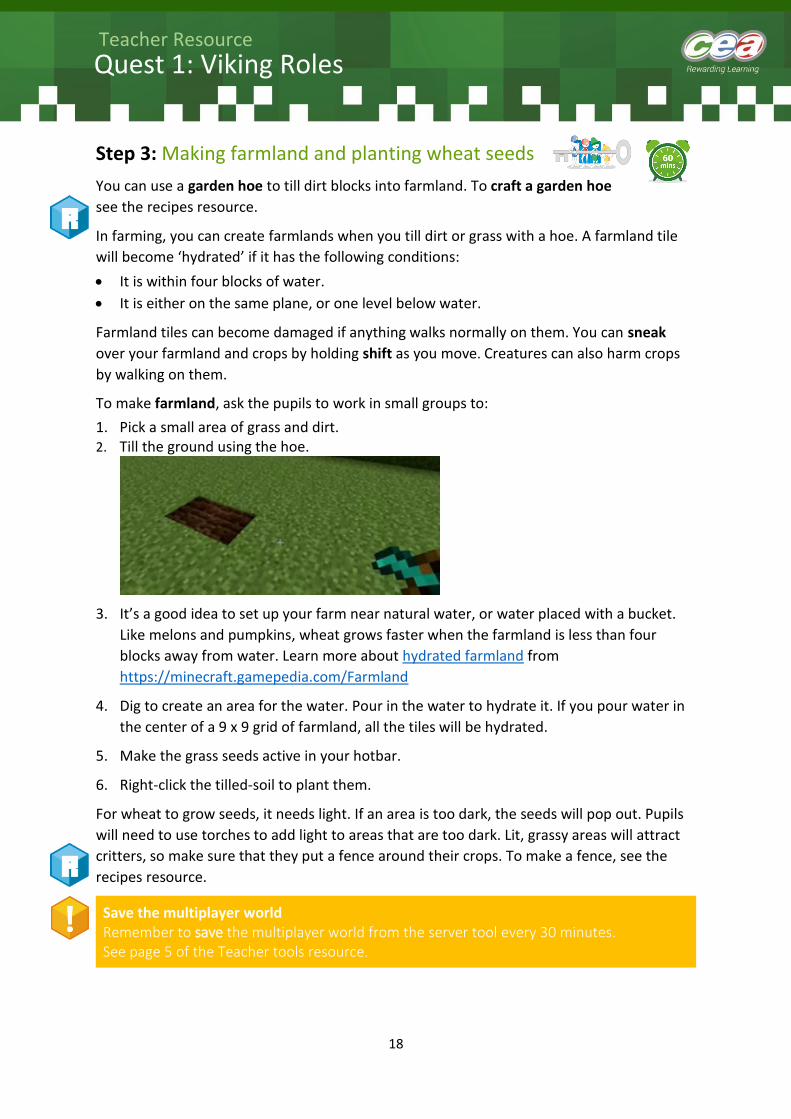
To make farmland, ask the pupils to work in small groups to:
1. Pick a small area of grass and dirt. 2. Till the ground using the hoe.
3. It’s a good idea to set up your farm near natural water, or water placed with a bucket.
Like melons and pumpkins, wheat grows faster when the farmland is less than four
blocks away from water. Learn more about hydrated farmland from
https://minecraft.gamepedia.com/Farmland
4. Dig to create an area for the water. Pour in the water to hydrate it. If you pour water in
the center of a 9 x 9 grid of farmland, all the tiles will be hydrated.
5. Make the grass seeds active in your hotbar.
6. Right-click the tilled-soil to plant them.
For wheat to grow seeds, it needs light. If an area is too dark, the seeds will pop out. Pupils
will need to use torches to add light to areas that are too dark. Lit, grassy areas will attract
critters, so make sure that they put a fence around their crops. To make a fence, see the
recipes resource.
Save the multiplayer world Remember to save the multiplayer world from the server tool every 30 minutes. See page 5 of the Teacher tools resource.

19
Quest 1: Viking Roles
Teacher Resource
Step 4: Harvesting seeds
Wheat goes through eight stages of growth.
The beginning stages are green and will have no yield. Wait until they are somewhat brown:
that means that they are fully grown. When the wheat is ready, ask the pupils to harvest
crops by left-clicking them with any tool they have selected.
Once harvested, they will drop between 0 and 3 seeds, and 1 wheat. Pupils can then add
wheat to their inventory. Empty farmland blocks can be replanted with seeds.
Save the multiplayer world Remember to save the multiplayer world from the server tool every 30 minutes. See page 5 of the Teacher tools resource.
Step 5: Make bread
Bread is one of the easiest staple food sources in Minecraft.
You make bread by placing 3 pieces of wheat side by side on the crafting table. Bread
restores 3 hunger slots. Bread is also stackable. To make bread, see the recipes resource.
Save the multiplayer world Remember to save the multiplayer world from the server tool every 30 minutes. See page 5 of the Teacher tools resource.
20
Quest 1: Viking Roles
Teacher Resource
Chicken farming activity
These steps show you how to build a chicken pen and collect eggs.
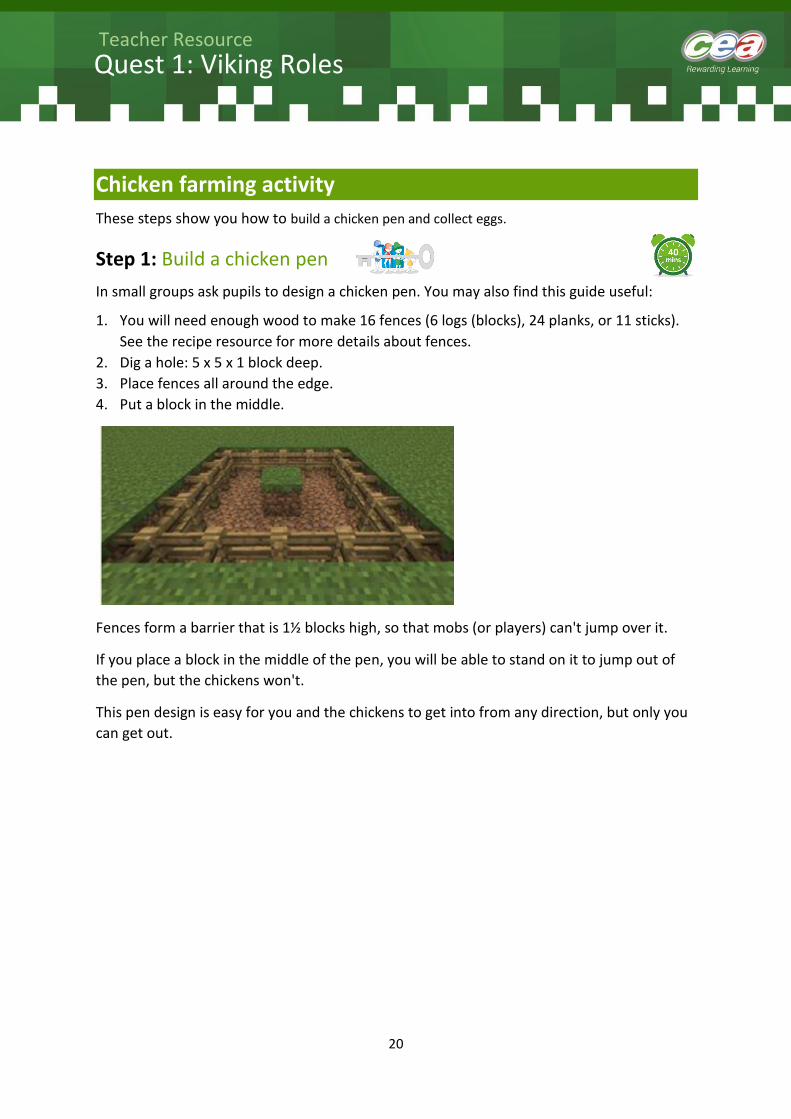
Step 1: Build a chicken pen
In small groups ask pupils to design a chicken pen. You may also find this guide useful:
1. You will need enough wood to make 16 fences (6 logs (blocks), 24 planks, or 11 sticks).
See the recipe resource for more details about fences.
2. Dig a hole: 5 x 5 x 1 block deep.
3. Place fences all around the edge.
4. Put a block in the middle.
Fences form a barrier that is 1½ blocks high, so that mobs (or players) can't jump over it.
If you place a block in the middle of the pen, you will be able to stand on it to jump out of
the pen, but the chickens won't.
This pen design is easy for you and the chickens to get into from any direction, but only you
can get out.
21
Quest 1: Viking Roles
Teacher Resource
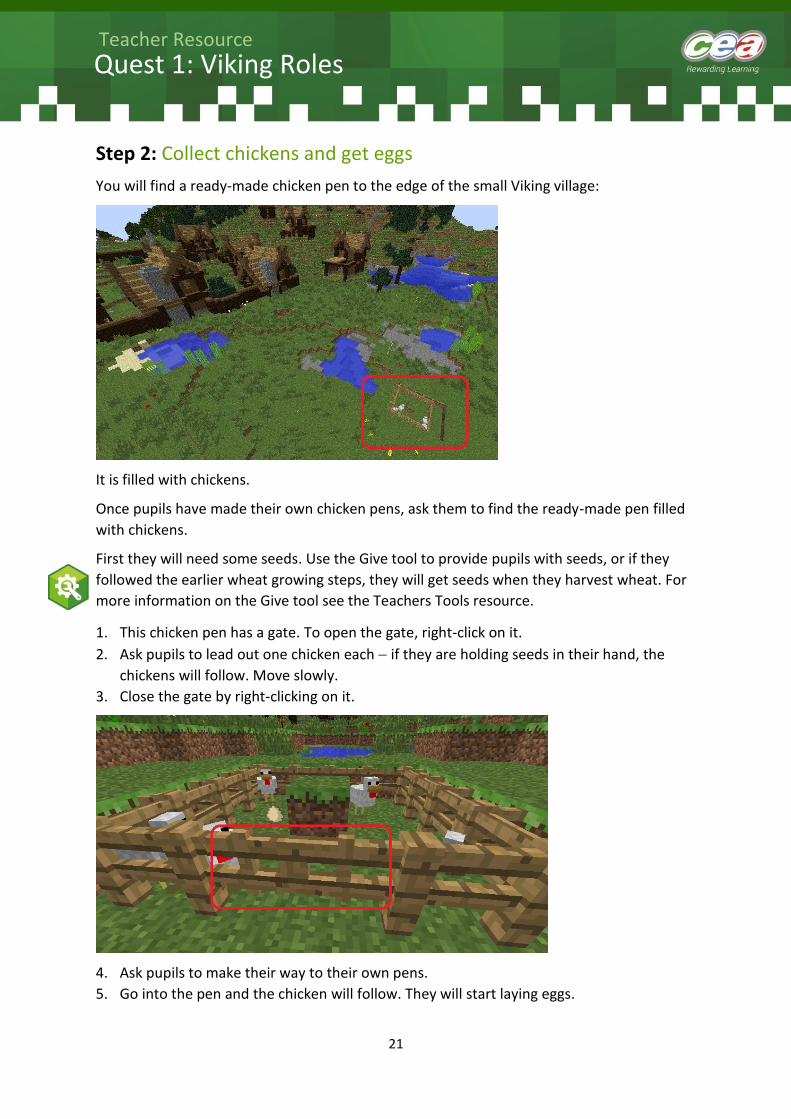
Step 2: Collect chickens and get eggs
You will find a ready-made chicken pen to the edge of the small Viking village:
It is filled with chickens.
Once pupils have made their own chicken pens, ask them to find the ready-made pen filled
with chickens.
First they will need some seeds. Use the Give tool to provide pupils with seeds, or if they
followed the earlier wheat growing steps, they will get seeds when they harvest wheat. For
more information on the Give tool see the Teachers Tools resource.
1. This chicken pen has a gate. To open the gate, right-click on it.
2. Ask pupils to lead out one chicken each if they are holding seeds in their hand, the
chickens will follow. Move slowly.
3. Close the gate by right-clicking on it.
4. Ask pupils to make their way to their own pens.
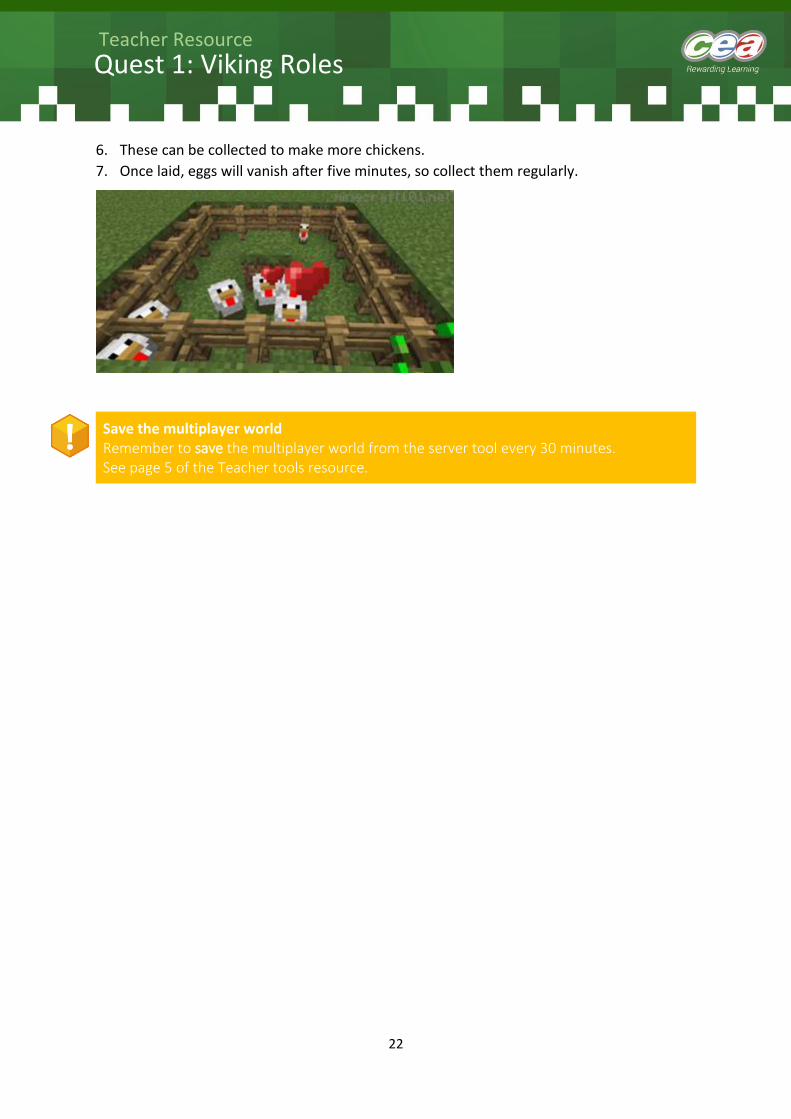
5. Go into the pen and the chicken will follow. They will start laying eggs.
22
Quest 1: Viking Roles
Teacher Resource
6. These can be collected to make more chickens.
7. Once laid, eggs will vanish after five minutes, so collect them regularly.
Save the multiplayer world Remember to save the multiplayer world from the server tool every 30 minutes. See page 5 of the Teacher tools resource.