v100 instructions
DESCRIPTION
Iron directionsTRANSCRIPT
The Digital Velocity V100 Home Ironing System
INSTRUCTION MANUALGUIDE D’UTILISATIONMANUAL DE INSTRUCCIONES

ENGLISH 01FRANÇAIS 12ESPAÑOL 23

01
THE DIGITAL VELOCITy™ V100 HOME IRONING SySTEMINSTRUCTION MANUALENGLISH
02
CONGRATULATIONS
We would like to thank you and congratulate you for purchasing the Digital Velocity home ironing system from Reliable Corporation. With its unique Compact Vapor Generator it will allow you to obtain the benefits of professional pressing combined with the advantages of traditional ironing.
For your safety and to fully enjoy the advantages of this product, please take a few minutes to read all the important safe-guards and care instructions. Keep this manual handy and review the product warranty card for your reference.
03
IMPORTANT SAFETy INSTRUCTIONSREAD ALL INSTRUCTIONS BEFORE USE
When using your new iron, basic safety precautions should always be followed, including the following:
1. Use iron only for its intended use.
2. To protect against a risk of electric shock, do not immerse the iron in water or other liquids.
3. The iron should always be turned to «Off» before plugging or unplugging from an outlet. Never yank the cord to disconnect from the outlet. Instead, grasp the plug and pull to disconnect.
4. Do not allow the cord to touch hot surfaces. Let the iron cool completely before putting away. Loop cord loosely around the iron when storing.
5. It is always recommended to disconnect the iron from the electrical outlet when filling with water or emptying. It should also be disconnected when not in use.
6. Do not operate the iron with a damaged cord or if the iron has been dropped or damaged. To avoid the risk of an electric shock, do not disassemble the iron. Take it to a qualified service depot for examination and repair. Incorrect reassembly can cause a risk of electric shock when the iron is used.
7. Close supervision is necessary for any appliance being used by or near children. Do not leave the iron unattended while connected or on an ironing board.
8. Burns can occur from touching hot metal parts, hot water, or steam. Use caution when you turn a steam iron upside down – there may be hot water in the reservoir.
SPECIAL INSTRUCTIONS 1. To avoid a circuit overload, do not operate another high wattage appliance
on the same circuit.
2. If an extension cord is absolutely necessary, a 15-amp cord should be used. Cords rated for less amperage may overheat. Care should be taken to arrange the cord so that it cannot be pulled or tripped over.
SAVE THESE INSTRUCTIONS IN A SAFE PLACE FOR FUTURE REFERENCE
04
ATTENTION • BeforeusingyourDigitalVelocityiron,removeallpaperorplasticbags,plastic
sheets, cards and possible stickers that may be on the outside or inside of the appliance that acted as handling protection or sales promotion material.
• Readtheseinstructionsbeforefirstusingtheiron.
• Donotplugitinwithoutcheckingthatthevoltageoftheironisthesame as your home power.
• Takecarethattheironcorddoesnottouchthehotpartsoftheiron.
• Ifyouaregoingtoironwithsteam,refertothesection“BeforeStartingToIron”to extend the life of the independent steam chamber.
• Tofilltheironorrefillitduringironing,followtheinstructionssetoutin thesection“BeforeStartingToIron,”unpluggingitfromthemainpowerand using the accompanying water jug.
• Donotworryiftheirongivesoffalittlesmokeduringfirstuse.Itwill soon disappear.
• Donotspray“vertical”steamonagarmenthanginginthewardrobeor on a person. Vertical ironing (steaming) must be done with the garment on a hanger and away from people or animals.
• Keeptheironinanuprightpositionduringstorage,leaningonitsheelpart,set on a stable surface.
• Whenyoufinishironing,alwaysemptythewaterfromthetank.Ifyouwant to drain it while ironing, always unplug the appliance from the main outlet first.
• Todisconnecttheiron,neverpullonthepowercord,takeouttheplug.
• Ifthepowercordisdamaged;topreventrisks,haveitreplacedatanAfterSaleServiceauthorizedbyReliable,asspecialtoolsareneeded.
• Theironshouldnotbeusedifithasbeendroppedorhasacrackorleak in the water tank. If you observe any of these problems, take the iron to ReliableCorporationoranauthorizedservicedepot.
• Donotleavetheapplianceinoperationunattended.Keepitoutofthe reach of children.
• Thisironisnotforusebypersons(includingchildren)whosephysical,senso-rial or mental capacities are impaired, or who lack sufficient experience or knowledge, unless they have been supervised or instructed in the use of the appliance by a person responsible for their safety.
IMPORTANT: When you want to dispose of the appliance, NEVER throw it in the garbage. Instead, go to your closest recycling station or waste collection centre for subsequent treatment. In this way, you will be contributing to looking after the environment.
05
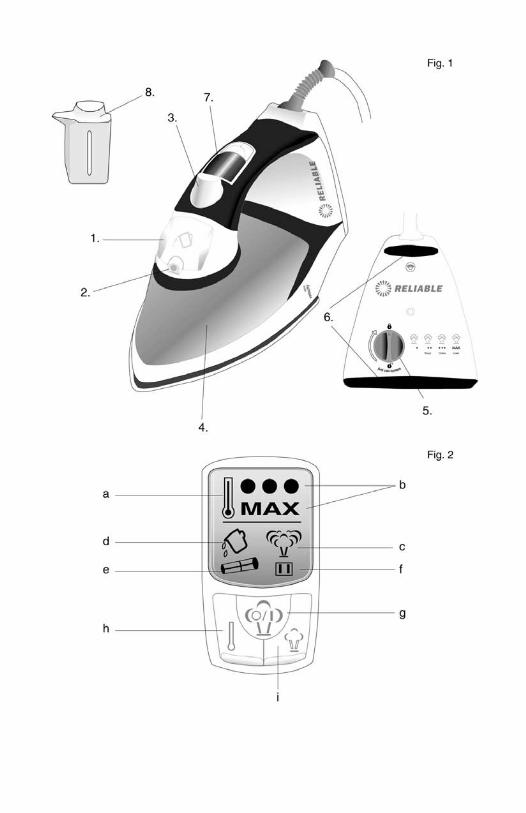
MAIN COMPONENTS AND ACCESSORIES (FIG 1) 1. Water filler hole cap 2. Spray outlet 3. Spray button 4. Water tank 5. Removableanti-scalefilter6. Non-slip legs 7. LCD display (Fig 2)
a) Temperature change indicator b) Temperature selected c) Steam selected d) Water filling indicator e) Anti-scalefiltericon f) AutomaticAuto-Pauseicon g) Steam On/Off switch h) PowerOn/Off(hold2secondstoturnironoff)
& temperature selector button. i) Steamvolumeselectorbutton&SteamReady™
feature (hold 5 seconds to activate)8. Water jug
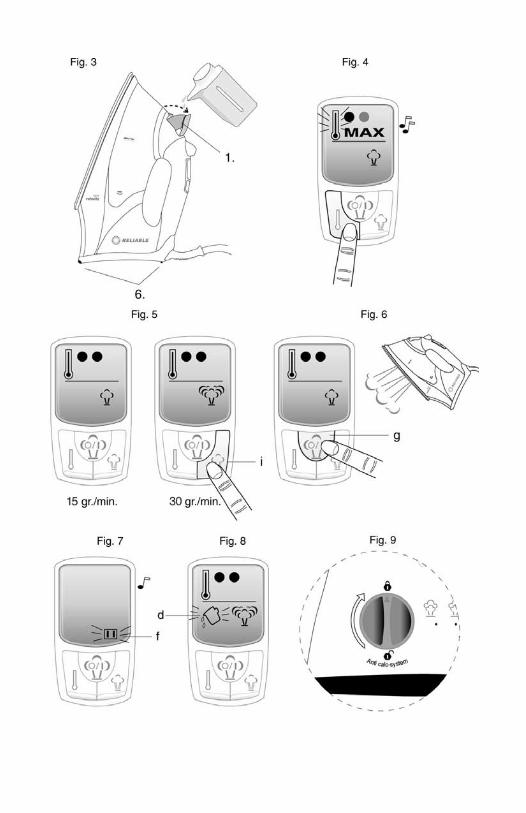
BEFORE STARTING TO IRON • WithyourDigitalVelocityironunpluggedfromthemainoutlet,openthefiller
hole cap Fig 3 (1) by turning it backwards (see arrow).
• Duetothehighlevelofwaterhardnessinmostareas,Reliablerecommendsthat you always use distilled or demineralized water for ironing. You will thus guarantee that your iron stays in perfect condition for as long as possible. If you cannot find distilled water for any reason, be sure to use water that is low in minerals (soft).
• ThefollowingisalistofthebestwaterforyourVelocityironinorder of preference:
° Distilled water ° Softened water (from a household water softener) ° Filtered water with low mineral content (counter top unit or store bought) ° Tap water (if your tap water is hard, this is the least recommended).
• Fillthetank,withoutexceedingthemaximumlevel,withthewaterjugsup-plied Fig 1 (8), keeping the iron in the vertical position, resting on the non-slip rear cover legs Fig 3 (6). When the tank is full, close the cap.
• Weadviseyoutofillthetankuptothemaximumlevelmarkedonitasthisappliance generates a substantial flow of steam, otherwise you will need to fill the water tank more often.
• Checkwhetherthegarmentyouaregoingtoironhasalabelindicatingtheironing temperature. We recommend that you to classify the garments according to their required ironing temperature and to begin with the garments thatareironedwiththelowesttemperature(•).
ATTENTION: Ironing delicate garments with a temperature higher than necessary is harmful for the fabric and causes burnt residue to get stuck to the soleplate.
OPERATION Plugtheironintothemainoutlet.Abuzzerwillsound;thedisplaywilllightupautomatically and the thermometer symbol will appear (blinking) alongside the temperatureposition1(•)andthemediumsteampositionFig5.Inaddition, an icon will appear with the scale-preventing cartridge, for 30 sec, indicating that your iron has a scale-prevention system Fig 2 (e). To replace it, follow the instructionsinthesection“Anti-scaleSystem.”Bydefault,whenswitchedon,theiron marks these positions. TEMPERATURE SELECTION
With your Compact Vapor Generator you will easily know when it reaches the selected temperature and is ready for ironing. On the communication display the thermometer icon will cease to blink and at the same time a buzzer will sound Fig 2.
The V100 has four temperature positions for you to choose between by pressing the temperature selector button Fig 2 (h). If you press once, another dot will appearalongsidetheonealreadythere(••),indicatingthatitisattemperaturelevel 2. The thermometer icon will blink again until the selected temperature is reached. When it has reached it, the warning buzzer will sound and the thermo- meterwillceasetoblinkFig4.Temperaturelevels3andMAXareselectedin the same way.
FromtheMAXtemperatureposition,ifyoupressthebuttonagain,theironwillreverttotheinitialpositionwithonetemperaturedot,andsoon.Pressthetem-perature button for two seconds to disconnect the iron. To restart it, simply press the button again.
06
SILK,SYNTHETICFIBRES:minimumtemperature(•)WOOL:mediumtemperature(••)COTTON:hightemperature(•••)LINEN:hightemperature(MAX)
07
STEAM SELECTION
The Compact Vapor Generator has two steam positions, medium steam (15 gr/min) and maximum steam (30 gr/min). The medium value always appears by default when the iron is switched on.
To obtain maximum steam, simply press the steam selector button once Fig 2 (i), and the steam icon will appear in the display at its highest flow Fig 5. To revert to medium flow, you just have to press the selector button again. Fig 2 (i).
When you have chosen the appropriate temperature and steam flow for the garment, press the steam On/Off switch Fig 6 (g) once and you may start to iron. It is not necessary to be pushing the steam button continually, just press once and the steam will issue without interruption. To cut off steam output, press the steam On/Off switch Fig 2 (g) again and it will cease to steam automatically.
ECO-INTELLIGENT™TheDigitalVelocityV100includesouruniqueECO-INTELLIGENTfeatureforstopping the iron from producing steam after 3 seconds of not detecting any movement. This ensures lower power consumption as well as a reduction in the use of water, and the need to refill the iron.
The steam function switches back on automatically when the slightest movement of the iron is detected or when any of the steam outlet buttons are pressed.
If you require continuous steam with little or no movement of the iron, hold the steam button down and release when finished. AUTOMATIC SHUT OFF: AUTO-PAUSE
The Digital Velocity V100 has an automatic shut-off system. It is shut-off auto-matically eight minutes after the last time it was used. This means that once the shut-offdeviceisactuated,itceasestoheatandbeginstocooldown.Atthatmoment a buzzer will sound and the icon Fig 2 (f) will appear (blinking) for five seconds on the illuminated display. It will continue blinking afterwards on the display, even though the display is not lit up, indicating that the iron has been switched off. To switch it back on, just move it slightly (vertically) or else press any of the three control buttons Fig 2 (g, h, i). The iron will revert to the tempera-tureandsteampositionithadbeforebeingswitchedoff.Rememberthattheperiod between being switched off and switched back on again will affect the time that the iron may need to regain the temperature selected previously.
STEAM READy™ FEATUREFor those who want to leave their iron on for periods longer than 8 minutes at a time (without the automatic shut off system activating) the Digital Velocity V100 has aSTEAMREADY™featurethatallowstheirontostayonindefinitely.
08
To activate this feature, simply keep the steam selector button Fig 2 (i) held for 5 seconds.
Ifyoudothis,theAuto-Pausesymbolonthedisplaywillblinkfor10secondstowarn you.
For safety reasons, every time you manually turn the iron off or unplug the iron, when the iron is turned back on or plugged back in, it will go back to its default set-ting (auto shut off activated after 8 minutes). DO NOT LEAVE yOUR IRON UNATTENDED WHILE THE STEAM READy™ FEATURE IS ACTIVATED.
IRONING RECOMMENDATIONS Since the working of this model is similar to an ironing station (with separate boiler) and due to its strong flow of steam at max. 30 gr/min, we recommend that you iron with medium steam at temperature positions 1 and 2, and maximum steamfortemperaturepositions3andMAX.Wealsorecommendthatyouironfirstwith steam (the level appropriate to the garment you are going to iron) and go over the clothes dry to remove the moisture and obtain results comparable with professional pressing.
• Toironwithoutsteam,simplydoNOTpressthesteamOn/OffswitchFig2(g).• ItisNOTnecessarytodrainthewatertankwhendryironing.
STEAM IRONING This model enables you to iron with steam at a temperature setting as low as position1(•).Ithastwosteamvolumerates,med.15gr/mandmax.30gr/m.Formoreinformationonthesteamvolumerates,refertothesection“IroningRecommendations.”
VERTICAL IRONING• Keepthesteambuttonpressedtoobtainsteamduringverticalironing.
• Itenablesyoutoremovecreasesfromdelicategarmentswithouthavingto lay them on the ironing board: jackets, coats, curtains, synthetics, etc.
• Placethegarmentonahanger,awayfromothergarments(&persons).
• Setthetemperatureselectoratposition(••),(•••)or(MAX),placetheironintheverticalpositionandpressthebutton.Atposition(••)youwillobtain amorehumid“white”steam,whichwillbemorevisible,whereasatsetting(•••)and(MAX)thesteamisdrierand,althoughthesamesteamvolume is maintained, it will be harder for you to see.
09
SPRAy• Withwaterinthetank,youmayspraywateroverthegarmentbypressing
the button Fig 1 (3).
FILLING WITH WATERIf the water is running out, after approximately 30 seconds the waterfilling icon will blink to indicate the water tank must be refilled Fig 2 (d). If the tank is not filled, the pump will stop automatically within one minute to prevent damage to it.
Unplug the iron and fill the tank with the water jug that is supplied Fig 1 (8), in the vertical position as shown in figure Fig 3.
When the tank is full, the icon does not disappear from the display until you press the steam On/Off switch and start ironing again.
If the iron were to run out of water completely, you will hear a strange noise from the micro-pump. In this case, press the steam switch Fig 2 (g) off, then press the powerbuttonoffFig2(h),unplugtheapplianceandfillthetankwithwater.Plug in the iron, when you press the temperature (On/Off) switch again, this noise will disappear and you can begin to iron again.
ANTI-SCALE SySTEMThe Digital Velocity V100 is fitted with a replaceable anti-scale system consist- ing of a resin filter, which retains the mineral substances in the water, preventing these from reaching the steam chamber in the soleplate and thereby extending the life of your iron. If you so wish, on this model you may replace the filter so that the iron is kept in optimum condition. If you want to replace the filter we recom-mend you to do it every six to twelve months (depending on the type of water you are using). Changing the filter does not mean that you may overlook the advice aboutwaterhardnessgiveninthesection“BeforeStartingToIron.”
In the event of not changing the filter of this iron, it will be subject to the effects of scale just like other irons. For replacement and before removing it, make sure there is no water in the tank.
Turn the part, situated in the rear of the iron, in an anticlockwise direction as far as it will go, and the arrow lines up with the open padlock (approx. 180°) and pull it back.
To replace it, line up the arrow with the open padlock and turn it in a clockwise direction, following the directions in the drawing, pressing the part inwards at the same time, until reaching the padlock closed position Fig 9.
Whenthefilterisinplace,makesurethatitDOESNOTSTANDOUToftheback of the iron, otherwise you will not have fitted it properly and water will leak from the tank.
10
CLEANING A) Sole-plate
• Toremovestarch,scorch,soilandotherforeignresidue,werecommendusingEZ-OFFironcleaner.Pleasefollowtheinstructionsonthepackage.
B) Outer casing
• Tocleantheoutsideofyouriron,useaclothmoistenedinsoapywater.
• Donotcleanwithabrasivechemicalproductsorsolventsasitmayattackcertain plastic parts and/or remove some of the marks and/or indications.
• Storeyourironintheverticalposition,windthecordroundtheheelandsecure it with the clip.
• Althoughthepowercordisfittedwitha360°rotationalelbow,NEVERFORCEthiscordwhenwindingitaroundtheirononthefirstturn.
TIPS FOR DISPOSING OF THE USED IRON Before disposing of your used iron, you should make it visibly unserviceable and haveitdisposedofaccordingtocurrentnationallegislation.AskyourDistributor,TownCouncilorLocalAuthorityfordetailedinformation.
WARRANTy CONDITIONS ReliableCorporationacceptsnoliabilityforfaultsinyourironintheeventofnon-compliance with the specifications of the warranty conditions or failure to follow the operating or maintenance directions included in instruction book.
The warranty card may be found separately.
We remind you that the damage caused by the effects of scale is not covered by the warranty.
11
LIMITED 1 YEAR WARRANTY
For a period of one year from date of purchase we will, free of charge, repair defects in material or workmanship which appear in the mechanical or electrical parts of all Reliable™brandproductsexcludingallwearandtearcomponents.
Wear & Tear Component List:
• SteamEquipment:presspadandcover,Teflon® seals, Teflon® shoe, steam-electric hoses
• SewingEquipment:hooks,loopers,stitchplates,feeddogs,needles, motor clutch disc, brushes
• ClothCuttingEquipment:blades,stones,sharpeningbands,shoe
LIMITED 90-DAY WARRANTY
For a period of 90 days from date of purchase we will, free of charge, provide required adjustmentsandrepairstoyourReliable™product.
Warranty service is available by returning the product with this warranty document and proof of purchase to your nearest authorized Reliable™ service center.
This limited warranty is in effect provided that your machine is used for normal purposes for which it was intended, and is given reasonable good care and maintenance in accordance with the instructions contained in the instruction booklet.
Yourauthorizeddealer(orReliableCorporation)willnotbeheldresponsiblefordamage if the machine has been repaired by an unauthorized dealer.
These warranties give you specific legal rights and you may have other rights, which vary from province/state to province/state.
If you have any questions regarding these warranties, you may write to:
ReliableCorporation 100WingoldAvenue,Unit5 Toronto, Ontario CanadaM6B4K7 www.reliablecorporation.com
RELIABLEPRODUCTSWARRANTYRELIABLE PRODUCTS WARRANTY
LIMITED 1 YEAR WARRANTY
For a period of one year from date of purchase we will, free of charge, repair defects in material or workmanshipwhich appear in the mechanical or electrical parts of all Reliable™ brand products excluding all wear and tear com-ponents.
Wear and Tear Component List: • Steam Equipment: Press pad and cover, Teflon® seals, Teflon® shoe, steam-electric hoses• Sewing Equipment: Hooks, loopers, stitch plates, feed dogs, needles, motor clutch disc, brushes, fuse• Cloth Cutting Equipment: Blades, stones, sharpening bands, shoe• Halogen Lights: Bulbs
LIMITED 90-DAY WARRANTY ON ALL PARTS AND ADJUSTMENTS
For a period of 90 days from date of purchase we will, free of charge, pro-vide required adjustments and repairs toyour Reliable™ product.
Warranty service is available by returning the product with this warranty document and proof of purchase to yournearest authorized Reliable™ service center.
This limited warranty is in effect provided that your machine is used for normal purposes for which it was intended, and is given reasonable good care and maintenance in accordance with the instructions contained in the instruction booklet.
Your authorized dealer (or Reliable Corporation) will not be held responsible for damage if the machine has beenrepaired by an unauthorized dealer.
These warranties give you specific legal rights and you may have other rights, which vary from province/state to province/state.
If you have any questions regarding these warranties, you may write to:Reliable Corporation100 Wingold Avenue, Unit 5Toronto, OntarioCanada M6B 4K7www.reliablecorporation.com

12
DIGITAL VELOCITyMC V100SySTèME DE FER à REPASSER POUR LA MAISON MANUEL D’INSTRUCTIONS FRANÇAIS

13
FÉLICITATIONS
Nous aimerions vous remercier et vous féliciter pour l’achat du système de fer à repasser pour la maison Digital Velocity de Reliable Corporation. Avec ces générateurs de vapeur compacts uniques, il vous permettra d’obtenir les avantages du repassage professionnel combinés avec les avantages du repassage traditionnel.
Pour votre sécurité et afin de profiter pleinement des avantages de ce produit, veuillez prendre quelques minutes pour lire toutes les mesures de sécurité importantes et les instructions d’entretien. Gardez ce manuel à portée de la main et révisez la carte de garantie du produit pour votre référence.
14
IMPORTANTES MESURES DE SÉCURITÉLISEZ TOUTES LES CONSIGNES DE SÉCURITÉ AVANT L’ UTILISATION
Lorsque vous utilisez votre nouveau fer à repasser, vous devez toujours suivre les consignes de sécurité suivantes :
1. N’utilisez le fer que pour l’usage prévu.
2. Afind’éviterleschocsélectriques,n’immergezpasleferdansl’eauoudanstout autre liquide.
3. Le fer doit toujours être à la position «arrêt» avant de le brancher ou de le débrancher. Ne tirez jamais sur le cordon pour le débrancher. Tirez plutôt sur la fiche.
4. Évitez que le cordon n’entre en contact avec des surfaces chaudes. Laissez leferrefroidircomplètementavantdeleranger.Enroulezlibrementlecordonautour du fer pour le ranger.
5. Débranchez toujours le fer pour remplir d’eau son réservoir, le vider ou lorsque vous ne l’utilisez pas.
6. N’utilisez pas le fer s’il est tombé, a été endommagé ou si son cordon est abîmé.Afind’éviterleschocsélectriques,nedémontezpaslefer.Apportez-le à un centre de service agréé aux fins d’examen et de réparation. Le remon- tage inexact du fer peut causer des chocs électriques lorsque vous l’utilisez.
7. Redoublezdeprudencelorsqu’unenfantutiliseleferouquevousl’utilisez près d’un enfant. Ne laissez pas le fer sans surveillance lorsqu’il est branché ou sur la planche à repasser.
8. Vous pouvez vous brûler en touchant les parties métalliques chaudes du fer ou avec l’eau chaude et la vapeur. Faites preuve de prudence quand vous retournez le fer à l’envers, car il pourrait y avoir de l’eau chaude dans le réservoir.
CONSIGNES PARTICULIèRES 1. Pouréviterunesurcharge,n’utilisezpasunautreappareildepuissance
élevée sur le même circuit.
2. Si une rallonge est absolument nécessaire, utilisez-en une de 15 ampères. Une rallonge d’ampérage inférieur pourrait surchauffer. Disposez-la minutieuse- ment afin d’éviter de la tirer ou de trébucher.
CONSERVEZ CES INSTRUCTIONS DANS UN ENDROIT SÉCURITAIRE POUR POUVOIR VOUS y REPORTER ULTÉRIEUREMENT
15
PRÉCAUTIONS • Avantd’utiliservotreferàrepasserDigitalVelocity,retireztouslessacsen
papier ou en plastique, les feuilles en plastique, les cartons et les autocollants qui servaient à en faire la promotion ou à le protéger lors de son transport.
• Lisezcesinstructionsavantd’utiliserleferpourlapremièrefois.
• Nelebranchezpassansavoirvérifiésilatensiondel’appareilcorrespondàcelle de votre alimentation électrique.
• Évitezquelecordonduferentreencontactavecsespartieschaudes.
• Sivousrepassezàlavapeur,reportez-vousàlarubrique“AvantdeCommenceràRepasser”pourprolongerladuréedelachambredevapeur.
• Pouremplirleferouleremplirpendantlerepassage,veuillezsuivrelesinstructionsdelarubrique“AvantdeCommenceràRepasser,”débranchez-leet utilisez le récipient fourni avec l’appareil.
• Nevousinquiétezpassil’appareildégageunpeudefuméelorsdesapre-mière utilisation. Cela devrait cesser rapidement.
• Rangeztoujoursleferàrepasserenpositionverticale,reposantsurson talon d’appui. On effectue le défroissage à la verticale lorsque le vêtement est sur un cintre, loin des gens ou des animaux.
• Gardezleferdensunepositionverticalependantl’entreposage,penchantsursa partie de talon, mettez sur une surface stable.
• Aprèslerepassage,videztoujoursl’eauduréservoir.Sivousvoulezlaviderpendant le repassage, débranchez toujours l’appareil au préalable.
• Netirezjamaissurlecordonpourdébrancherleferàrepasser,tirezplutôt sur la prise.
• Silecordonestendommagé,pourévitertoutrisque,faites-leremplacerdansuncentredeserviceaprès-venteagrééparRELIABLE,carcelaexigedes outils spécialisés.
• N’utilisezpasleferàrepassers’ilesttombéousileréservoirestfenduoufuit. Si vous constatez un de ces problèmes, apportez votre fer dans un centre RELIABLEouuncentredeserviceagréé.
• Nelaissezpasl’appareilfonctionnersanssurveillance.Gardez-lehorsde la portée des enfants.
• Amoinsd’avoirétésuperviséesoud’avoirreçulesinstructionsd’usagedelapersonne responsable de leur sécurité, les personnes (y compris des enfants) aux capacités physiques, sensorielles ou mentales réduites, ou manquant d’expérience ou de connaissance, ne doivent pas utiliser cet appareil.
ATTENTION!Lorsquevotreappareilserahorsd’usage,NELEJETEZPASàlapoubelle;confiez-leàunPOINTDERECYCLAGEouàladéchetterielaplusprocheafin qu’il soit traité correctement. Vous contribuerez ainsi à la préservation de l’environnement.
16
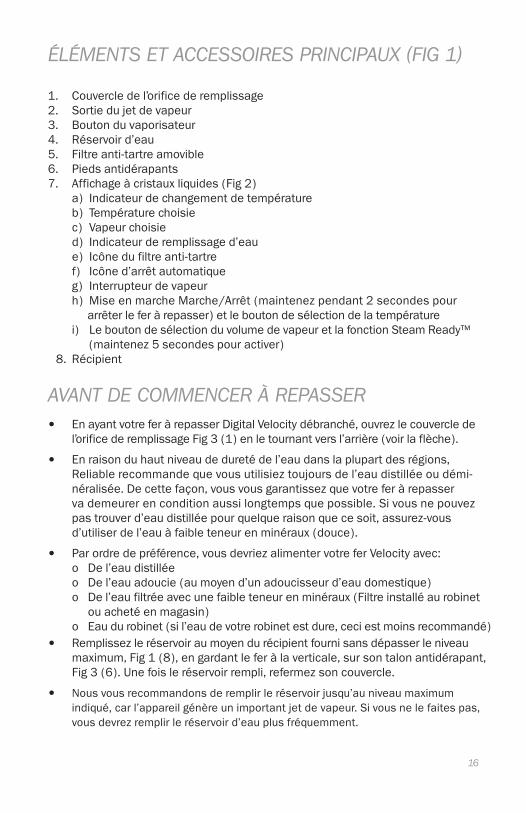
ÉLÉMENTS ET ACCESSOIRES PRINCIPAUX (FIG 1)
1. Couvercle de l’orifice de remplissage2. Sortie du jet de vapeur3. Bouton du vaporisateur4. Réservoird’eau5. Filtre anti-tartre amovible6. Piedsantidérapants7. Affichageàcristauxliquides(Fig2)
a) Indicateur de changement de température b) Température choisie c) Vapeur choisie d) Indicateur de remplissage d’eau e) Icône du filtre anti-tartre f) Icône d’arrêt automatique g) Interrupteur de vapeur h) MiseenmarcheMarche/Arrêt(maintenezpendant2secondespour arrêter le fer à repasser) et le bouton de sélection de la température i) LeboutondesélectionduvolumedevapeuretlafonctionSteamReady™ (maintenez 5 secondes pour activer)8. Récipient
AVANT DE COMMENCER à REPASSER • EnayantvotreferàrepasserDigitalVelocitydébranché,ouvrezlecouverclede
l’orifice de remplissage Fig 3 (1) en le tournant vers l’arrière (voir la flèche).
• Enraisonduhautniveaudeduretédel’eaudanslaplupartdesrégions,Reliablerecommandequevousutilisieztoujoursdel’eaudistilléeoudémi-néralisée.Decettefaçon,vousvousgarantissezquevotreferàrepasser va demeurer en condition aussi longtemps que possible. Si vous ne pouvez pas trouver d’eau distillée pour quelque raison que ce soit, assurez-vous d’utiliser de l’eau à faible teneur en minéraux (douce).
• Parordredepréférence,vousdevriezalimentervotreferVelocityavec: o De l’eau distillée o De l’eau adoucie (au moyen d’un adoucisseur d’eau domestique) o De l’eau filtrée avec une faible teneur en minéraux (Filtre installé au robinet
ou acheté en magasin) o Eaudurobinet(sil’eaudevotrerobinetestdure,ceciestmoinsrecommandé)
• Remplissezleréservoiraumoyen du récipient fourni sans dépasser le niveau maximum, Fig 1 (8), en gardant le fer à la verticale, sur son talon antidérapant, Fig 3 (6). Une fois le réservoir rempli, refermez son couvercle.
• Nous vous recommandons de remplir le réservoir jusqu’au niveau maximum indiqué, car l’appareil génère un important jet de vapeur. Si vous ne le faites pas, vous devrez remplir le réservoir d’eau plus fréquemment.
17
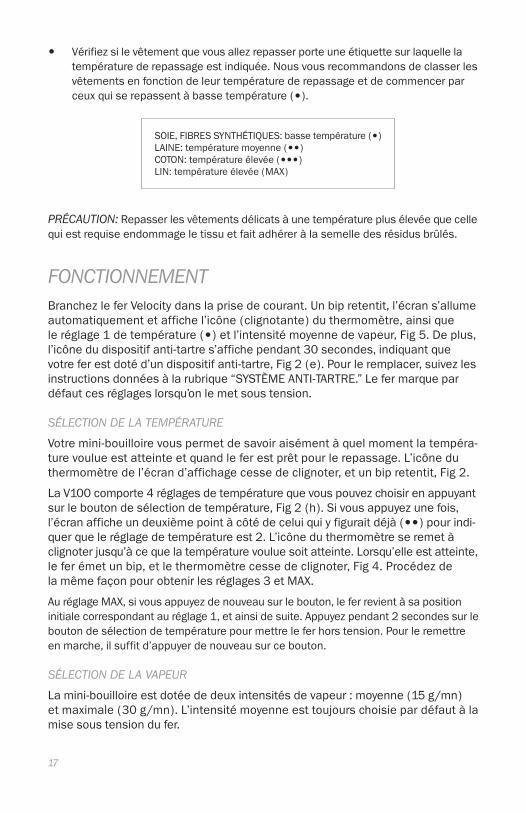
• Vérifiez si le vêtement que vous allez repasser porte une étiquette sur laquelle la température de repassage est indiquée. Nous vous recommandons de classer les vêtements en fonction de leur température de repassage et de commencer par ceuxquiserepassentàbassetempérature(•).
PRÉCAUTION:Repasserlesvêtementsdélicatsàunetempératureplusélevéequecellequi est requise endommage le tissu et fait adhérer à la semelle des résidus brûlés.
FONCTIONNEMENT Branchez le fer Velocity dans la prise de courant. Un bip retentit, l’écran s’allume automatiquement et affiche l’icône (clignotante) du thermomètre, ainsi que leréglage1detempérature(•)etl’intensitémoyennedevapeur,Fig5.Deplus,l’icône du dispositif anti-tartre s’affiche pendant 30 secondes, indiquant que votreferestdotéd’undispositifanti-tartre,Fig2(e).Pourleremplacer,suivezlesinstructionsdonnéesàlarubrique“SYSTÈMEANTI-TARTRE.”Lefermarquepardéfaut ces réglages lorsqu’on le met sous tension. SÉLECTION DE LA TEMPÉRATURE
Votre mini-bouilloire vous permet de savoir aisément à quel moment la tempéra-ture voulue est atteinte et quand le fer est prêt pour le repassage. L’icône du thermomètre de l’écran d’affichage cesse de clignoter, et un bip retentit, Fig 2.
La V100 comporte 4 réglages de température que vous pouvez choisir en appuyant sur le bouton de sélection de température, Fig 2 (h). Si vous appuyez une fois, l’écranafficheundeuxièmepointàcôtédeceluiquiyfiguraitdéjà(••)pourindi-quer que le réglage de température est 2. L’icône du thermomètre se remet à clignoter jusqu’à ce que la température voulue soit atteinte. Lorsqu’elle est atteinte, leferémetunbip,etlethermomètrecessedeclignoter,Fig4.Procédezde lamêmefaçonpourobtenirlesréglages3etMAX.
AuréglageMAX,sivousappuyezdenouveausurlebouton,leferrevientàsapositioninitialecorrespondantauréglage1,etainsidesuite.Appuyezpendant2secondessurleboutondesélectiondetempératurepourmettreleferhorstension.Pourleremettre en marche, il suffit d’appuyer de nouveau sur ce bouton. SÉLECTION DE LA VAPEUR
La mini-bouilloire est dotée de deux intensités de vapeur : moyenne (15 g/mn) et maximale (30 g/mn). L’intensité moyenne est toujours choisie par défaut à la mise sous tension du fer.
SOIE,FIBRESSYNTHÉTIQUES:bassetempérature(•)LAINE:températuremoyenne(••)COTON:températureélevée(•••)LIN:températureélevée(MAX)
18
Pourobtenirl’intensitémaximale,ilsuffitd’appuyerunefoissurleboutondesélection de vapeur, Fig 2 (i), et l’écran affiche l’icône de vapeur correspondant auplusgrosjetdevapeur,Fig5.Pourreveniràunjetmoyendevapeur,ilsuffitd’appuyer de nouveau sur le bouton de sélection de vapeur, Fig 2 (i).
Quandvousavezchoisilatempératureetl’intensitédevapeurcorrespondant au vêtement, appuyez une seule fois sur l’interrupteur de vapeur, Fig 6 (g), et vous pouvez commencer à repasser. Il n’est pas nécessaire d’appuyer constam- ment sur l’interrupteur de vapeur, il suffit d’appuyer une seule fois pour que le jetdevapeurs’échappecontinuellement.Pourinterromprelejetdevapeur,appuyez de nouveau sur l’interrupteur de vapeur, Fig 2 (g), et la vapeur cesse instantanément.
ECO-INTELLIGENTMC
LeDigitalVelocityV100comprendnotrecaractéristiqueuniqueECO-INTELLIGENTqui arrête le fer à repasser de produire de la vapeur après 3 secondes d’immobilité. Ceci assure une consommation d’énergie réduite en plus d’une réduction de la quantité d’eau utilisée et une réduction dans le nombre de fois à le remplir.
La fonction de vapeur commute en arrière sur automatiquement quand le plus léger mouvement du fer est détecté ou quand des boutons l’uns des de sortie de vapeur sont appuyés sur.
Si vous avez besoin de la vapeur continue avec peu ou pas de mouvement du fer, maintenez le bouton de vapeur et libérez une fois fini. AUTOMATIC SHUT OFF: AUTO-PAUSE
LeDigitalVelocityV100estdotéd’uninterrupteurautomatique.Aprèshuitminutes sans utilisation, il cesse automatiquement de fonctionner. Cela signifie qu’une fois le dispositif d’arrêt actionné, il cesse de chauffer, et il commence à refroidir. À ce moment-là, un bip retentit et l’icône Fig 2 (f) s’affiche en clignotant pendant 5 secondes sur l’écran éclairé. L’afficheur continuera à clignoter par la suite, bien que l’afficheur n’est pasallumé,indiquantqueleferàrepasseraétémishorsfonction.Pourleremettre en fonction, il suffit de soulever légèrement le fer ou d’appuyer sur n’importe lequel des trois boutons de contrôle, Fig 2 (g, h, i). Le fer à repasser revient aux réglages de température et d’intensité de vapeur qu’il indiquait avant sa mise hors tension. N’oubliez pas que le temps écoulé entre la mise hors tension du fer à repasser et sa remise sous tension détermine le temps nécessaire pour revenir à la température qui avait été choisie précédemment.N’oubliez pas que le temps écoulé entre la mise hors tension du fer et sa remise sous tension détermine le temps nécessaire pour revenir à la tem- pérature qui avait été choisie précédemment.
19
FONCTION STEAM READyMC Pourceuxquiveulentlaisserleurferàrepasserpourdespériodespluslongues que 8 minutes à la fois (sans que le système d’arrêt automatique soit activé) le DigitalVelocityV100possèdelafonctionSTEAMREADYMCquipermetauferàrepasserdedemeurerindéfinimentenmarche.Pouractivecettefonction,main-tenez simplement le bouton à la Fig 2 (i) enfoncé pendant 5 secondes.
Sivouseffectuezcetteopération,lesymboleAuto-Pausesurl’afficheurclignoterapendant 10 secondes afin de vous avertir.
Pourdesraisonsdesécurité,chaquefoisquevouséteignezoudébranchezmanuellement le fer à repasser, lorsque le fer à repasser est remis en marche ou rebranché, il retournera à ses réglages d’origine (la fonction d’arrêt automatique est activée après 8 minutes).
NE LAISSEZ PAS VOTRE FER à REPASSER SANS SURVEILLANCE LORSQUE LA FONCTION STEAM READyMC EST ACTIVÉE.
CONSEILS DE REPASSAGE Étant donné que ce fer fonctionne de la même manière qu’une station de repas-sage (à chaudière distincte), et en raison de son puissant jet de vapeur à l’intensité maximale de 30 g/mn, nous vous recommandons de repasser à vapeur moy- enne aux réglages de température 1 et 2, et à vapeur maximale aux réglages de température3etMAX.Nousvousconseillonségalementderepassertoutd’abord à la vapeur (en choisissant le jet approprié au vêtement à repasser), puis de repasser à sec afin d’assécher le vêtement et obtenir ainsi des résultats de qualité professionnelle.
• Pourrepasseràsec,ilvoussuffitdenePASappuyersurl’interrupteurdevapeur, Fig 2 (g).
• Iln’estPASnécessairedeviderleréservoirpourrepasseràsec.
REPASSAGE à LA VAPEUR Ce modèle vous permet de repasser à la vapeur avec le réglage de la température aussibasseque1(•).Ilestdotéde2intensitésdevapeur,uneintensitémoy-ennede15g/mnetuneintensitémaximalede30g/mn.Pourplusd’informationsur l’intensité du volume de la vapeur, veuillez consulter la rubrique « Conseils de repassage.
DÉFROISSAGE à LA VERTICALE• Gardezleboutondevapeurenfoncéafind’obtenirdelavapeurpendant
le repassage vertical.• Permetdedéfroisserdesarticlesdélicatssansdevoirlesdisposersur
la planche à repasser : vestes, manteaux, rideaux, tissus synthétiques, etc.
20
• Disposezlevêtementsuruncintre,loindesautresvêtements(etde toute personne).
• Réglezlatempératureà(••),(•••)ou(MAX),mettezleferàlapositionverticaleetappuyezsurl’interrupteurdevapeur.Leréglage(••)donneunevapeur plus humide et plus blanche facile à voir, alors que les réglages (•••)et(MAX)donnentunevapeurplussèchequi,bienqu’àlamêmeinten-sité du volume de la vapeur, est plus difficile à voir.
VAPORISATION• Lorsqu’ilyadel’eaudansleréservoir,vouspouvezpulvériseràfroiddel’eau
sur le vêtement en appuyant sur le bouton Fig 1 (3).
REMPLISSAGE D’EAUEnviron30secondesavantqueleréservoirnesoitvide,l’icônederemplissaged’eau se met à clignoter, Fig 2 (d). Si vous ne remplissez pas le réservoir, la pompe s’arrête automatiquement au bout d’une minute, pour éviter de s’endommager.
Débranchez le fer à repasser et remplissez-le à la verticale, comme indiqué sur la figure Fig 3, à l’aide du récipient fourni avec l’appareil, Fig 1 (8).
Une fois le réservoir rempli, l’icône ne disparaît de l’affichage que lorsque vous appuyez sur l’interrupteur de vapeur et que vous poursuivez votre repassage.
S’il arrivait que le fer à repasser manque complètement d’eau, vous entendriez unbruitinhabituelprovenantdelamicropompe.Arrêtezalorslavapeur,Fig2(g),puis mettez le fer à repasser hors tension, Fig 2 (h), débranchez-le et remplis- sez d’eau le réservoir. Branchez le fer à repasser. Lorsque vous appuierez de nou- veau sur l’interrupteur de vapeur, ce bruit disparaîtra et vous pourrez poursuivre votre repassage.
FILTRE ANTI-TARTRELeDigitalVelocityV100estdotéd’unfiltreanti-tartreremplaçableenrésine, qui retient les dépôts minéraux de l’eau afin d’éviter qu’ils n’atteignent la cham-bre de vapeur de la semelle, ce qui permet de prolonger la vie du fer Velocity. Ce modèle vous permet, si vous le désirez, de remplacer le filtre pour conserver votre fer en état optimal. Si vous désirez remplacer le filtre, nous vous recom- mandons de le faire tous les six à douze mois (selon le type d’eau que vous util-isez). Le changement du filtre en résine ne vous autorise pas à passer outre auxconsignessurladuretédel’eaumentionnéeàlarubrique«Avantdecom-mencer à repasser. »
Si vous ne changez pas le filtre, ce fer à repasser subira les effets du tartre comme tous les autres fers à repasser.
21
Dans le sens contraire des aiguilles d’une montre, jusqu’à ce que la flèche coïncide avec le cadenas ouvert (environ 180°), tournez jusqu’au bout le couvercle situé à l’arrière du fer et retirez-le.
Pourleremettreenplace,faitescoïnciderlaflècheaveclecadenasouvert,enfoncez-leettournez-le dans le sens des aiguilles d’une montre, en suivant les indications du dessin, jusqu’à ce que la flèche se trouve vis-à-vis du cadenas fermé, Fig 9.
Assurez-vousqu’unefoisinstallé,lefiltreNEFASSEPASSAILLIEàl’arrièredufer.Silefiltre n’est pas correctement installé, l’eau fuira du réservoir.
ENTRETIEN A) Semelle
• Afind’enleverl’empois,lacarbonisation,lessouilluresetautresrésidus,nousvousrecommandonsd’utiliserEZ-OFFironcleaner.Veuillezsuivrelesinstructions sur l’emballage.
B) Extérieur
• Pournettoyerl’extérieurdevotrefer,utilisezunchiffonimbibéd’eausavonneuse.
• N’utilisezpasdeproduitschimiquesabrasifs,nidesolvants,carilspourraient endommager certaines parties en plastique et/ou effacer les marques et/ou indications.
• Rangezvotreferenpositionverticale,enroulezlecordonautourdutalon et fixez-le à l’aide de la bride.
• Bienquelecordondisposed’uncoudederotationde360°,NELEFORCEZJAMAISenl’enroulanttropserréautourdel’appareilaupremiertour.
CONSEILS POUR VOUS DÉPARTIR DE L’APPAREILAvantdejetervotrefer,vousdevrezlerendrevisiblementinutilisableetrespecterlesrèglementsenvigueur.Renseignez-vousàcesujetauprèsdevotredistributeur,de votre municipalité ou de votre administration locale.
CONDITIONS DE GARANTIE ReliableCorporationneseraaucunementtenueresponsabledesdéfautsdevotre appareil en cas de non-respect des conditions de garantie ou d’inobservation des instructions de fonctionnement et d’entretien figurant dans le manuel d’instructions.
Vous trouverez une carte de garantie distincte.
Nous vous rappelons que tout dommage occasionné par le tartre n’est pas couvert par la garantie.
22
GARANTIE LIMITÉE D’UN AN
Pourunepérioded’unanàpartirdeladated’achat,nousréparerons,sansfrais,toutdéfaut de matériau ou de main-d’œuvre qui paraît dans les composants mécaniques ouélectriquesdetoutproduitdemarqueReliableMC, sauf dans les composants sujets à l’usure.
Liste des composants sujets à l’usure :
• Appareilsàvapeur:Tampondepresseetcouverture,jointsTeflon®, semelle Teflon®, boyaux à vapeur-électriques
• Machinesàcoudre:Crochets,boucleurs,plaquedecouture,griffesd’entraînement, aiguilles, disque d’embrayage du moteur, balais, fusible
• Coupeusesd’étoffes:Lames,pierres,bandesd’affûtage,semelle
GARANTIE LIMITÉE DE 90 JOURS SUR TOUTES LES PIÈCES ET LES RÉGLAGES
Pourunepériodede90jourssuivantladated’achat,nouseffectuerons,sansfrais,lesréglagesetréparationsrequissurvotreproduitReliableMC.
Le service en vertu de la garantie est offert en retournant votre produit, accompagné de ce document de garantie et de la preuve d’achat, à votre centre de service après-vente autorisé ReliableMC le plus proche.
Cette garantie limitée demeurera en vigueur pourvu que votre machine a été utilisée auxfinspourlesquelleselleaétéconçue,etpourvuqu’elleaitéténettoyéeetentretenue de manière appropriée et conformément aux instructions fournies dans le guide d’utilisation.
Votredétaillantautorisé(ouReliableCorporation)neserapasresponsabledes dommages si la machine a été réparée par un détaillant non autorisé.
Ces garanties vous confèrent certains droits spécifiques et vous pourriez avoir d’autres droits qui varient d’une province/état à l’autre.
Si vous avez des questions concernant ces garanties, veuillez nous écrire à :
ReliableCorporation 100WingoldAvenue,Unit5 Toronto, Ontario CanadaM6B4K7 www.reliablecorporation.com
GARANTIESURLESPRODUITSRELIABLERELIABLE PRODUCTS WARRANTY
LIMITED 1 YEAR WARRANTY
For a period of one year from date of purchase we will, free of charge, repair defects in material or workmanshipwhich appear in the mechanical or electrical parts of all Reliable™ brand products excluding all wear and tear com-ponents.
Wear and Tear Component List: • Steam Equipment: Press pad and cover, Teflon® seals, Teflon® shoe, steam-electric hoses• Sewing Equipment: Hooks, loopers, stitch plates, feed dogs, needles, motor clutch disc, brushes, fuse• Cloth Cutting Equipment: Blades, stones, sharpening bands, shoe• Halogen Lights: Bulbs
LIMITED 90-DAY WARRANTY ON ALL PARTS AND ADJUSTMENTS
For a period of 90 days from date of purchase we will, free of charge, pro-vide required adjustments and repairs toyour Reliable™ product.
Warranty service is available by returning the product with this warranty document and proof of purchase to yournearest authorized Reliable™ service center.
This limited warranty is in effect provided that your machine is used for normal purposes for which it was intended, and is given reasonable good care and maintenance in accordance with the instructions contained in the instruction booklet.
Your authorized dealer (or Reliable Corporation) will not be held responsible for damage if the machine has beenrepaired by an unauthorized dealer.
These warranties give you specific legal rights and you may have other rights, which vary from province/state to province/state.
If you have any questions regarding these warranties, you may write to:Reliable Corporation100 Wingold Avenue, Unit 5Toronto, OntarioCanada M6B 4K7www.reliablecorporation.com

23
DIGITAL VELOCITy™ V100SISTEMA DE PLANCHADO HOGAREÑOMANUAL DE INSTRUCCIONESESPAÑOL
24
FELICIDADES
Queremos felicitarlo y agradecerle por comprar el sistema de planchado hogareño Digital Velocity de Reliable Corporation. Con su original generador compacto de vapor, le permitirá obtener los beneficios del planchado profesional combinados con las ventajas del planchado tradicional.
Por su seguridad, y para poder disfrutar plenamente de las ventajas de este producto, tómese unos minutos para leer todas las recomendaciones de seguridad e instrucciones. Mantenga este manual a mano y lea la tarjeta de garantía como referencia.
25
NOTICIA IMPORTANTE PARA SU SEGURIDADLEA TODAS LAS INSTRUCCIONES ANTES DE PONER EN FUNCIONAMIENTO
CuandoutilicesuCentrodePlanchadoCompacto,deberáseguirsiempreunasmedidasbásicasdeseguridad,comolasindicadasenelsiguienteapartado:
1. UtilicesuCentrodePlanchadoCompactoparausodoméstico.2. Paraevitarriesgosdedescargaeléctrica,nodebesumergirsuCentrode
PlanchadoCompactoenaguauotroslíquidos.3. VerifiquequesuCentrodePlanchadoCompactoestáenposicióndeapagado
antesdeenchufaródesenchufardelaredsuproducto.Paradesconectar elCentrodePlanchadoCompactodelarednotiredelcabledealimentación,hágalodelaclavija.
4. Nopermitaqueelcabledeconexiónestéencontactoconsuperficies calientes.DejeenfriarsuCentrodePlanchadoCompactoantesdeguardarlo. EnrollesinapretarelcabledealimentaciónalrededordesuCentrodePlanchadoCompacto.
5. DesconectesiempresuCentrodePlanchadoCompactodelaredeléctrica alllenarovaciareldepósitodeaguaycuandonouseelproducto.
6. Sielcabledealimentaciónestádañado,paraevitarpeligros,debedesersustituidoenunS.A.T.(ServiciodeAsistenciaTécnica)autorizadopor el fabricante, ya que son necesarias herramientas especiales. No utilice su CentrodePlanchadoCompactosisehacaídoositienealgunarotura ofugaeneldepósitodelagua.SiobservaalgunodeestosproblemaslleveelCentrodePlanchadoCompactoaunS.A.T.autorizadoporelfabricante.Unareparaciónincorrectapuedesercausaderiesgodedescargaeléctricadurante el uso del producto.
7. MantengasuCentrodePlanchadoCompactofueradelalcancedelosniños. NodejesuCentrodePlanchadoCompactosinvigilanciamientrasestéconectadoalaredósobreunatabladeplanchar.
8. Quemaduraspuedenocurriraltocarpartesmetálicascalientes,aguacaliente ovapor.PresteatenciónalcolocarsuCentrodePlanchadoCompactoalrevés,puedehaberaguacalienteeneldepósito.
INSTRUCCIONES ESPECIALES 1. Paraevitaruncortocircuitoporsobrecargaenlared,noutiliceotroaparato
de potencia elevada en el mismo circuito.2. Sifueraabsolutamentenecesarioutilizarunaextensióndelcabledealiment-
ación,debeusaruncablede15amperios.Uncabledemenoramperaje puedesobrecalentarse.Coloquelaextensióndelcabledealimentacióndeforma que no pueda engancharse o tropezar.
GUARDE ESTAS INSTRUCCIONES EN LUGAR SEGURO PARA FUTURAS CONSULTAS
26
ATENCIÓN• AntesdeutilizarsuplanchaDigitalVelocity,retiretodaslasbolsasdepapel
oplástico,láminasplásticas,cartonesypegatinaseventualesqueseencuen-trandentroofueradelaparatoquesirvieroncomoproteccióndetransporteopromocióndeventa.
• Leaestasinstruccionesantesdeponersuaparatoenfuncionamiento.
• Noloconectesincomprobarqueelvoltajedelaparatoyeldesu casa coinciden.
• Tengacuidadodequeelcablenotoquelaspartescalientesdelaparato.
• Siudplanchaconvapor,remítasealapartado“AntesdeEmpezaraPlanchar”paraalargarlavidadelacámaradevaporautónoma.
• ParallenarsuCentrodePlanchadoCompacto(CPC)orellenarloduranteelplanchado,sigalasinstruccionesindicadasenelapartado“AntesdeEmpezaraPlanchar,”desconectándolodelaredyusandoelvasoqueloacompaña.
• Nosepreocupesielaparatodesprendeunpocodehumoduranteelprimeruso.Desaparecerárápidamente.
• Noproyecteelvapor“vertical”sobreunaprendacolgadaenelarmario opuestaenunapersona.Elplanchadoverticaldebehacerseconlaprendasobre un colgador y aislada de animales o personas.
• Mantengalaplanchaenposiciónverticalcuandolaguarde,apoyadasobre la talonera del mismo, sobre una superficie estable.
• Altérminodelplanchadovacíesiempreelaguadeldepósito.Ysideseavaciarlodurante el planchado, desconecte también previamente el aparato de la red.
• Paradesconectarsuplanchanotiredelcabledealimentación,hágalode la clavija.
• Sielcabledealimentaciónestádañado,paraevitarpeligros,debedeser sustituidoenunS.A.T.(ServiciodeAsistenciaTécnica)autorizadoporRELIABLE,ya que son necesarias herramientas especiales.
• Laplanchanodeberíaserusadasisehacaídoositienealgunaroturaofuga eneldepósitodelagua.Siobservaalgunodeestosproblemasllevesu planchaaunS.A.T.autorizadoporRELIABLE.
• Esteaparatonoestadestinadoparaserutilizadoporpersonas(incluidosniños)cuyascapacidadesfísicas,sensorialesomentalesestenreducidas, o carezcan de experiencia o conocimiento, salvo si han tenido supervision o instrucciones relativas al uso del aparato por una persona responsable de su seguridad.
ATENCIÓN!! Cuando desee desprenderse del aparato, NUNCA lo deposite en la basura, sino que acuda al LUGAR DE RECICLAGE o de recogida de residuos más cercáno a su domicilio, para su posterior tratamiento. De esta manera, está con-tribuyéndo al cuidado del medio ambiente.
27
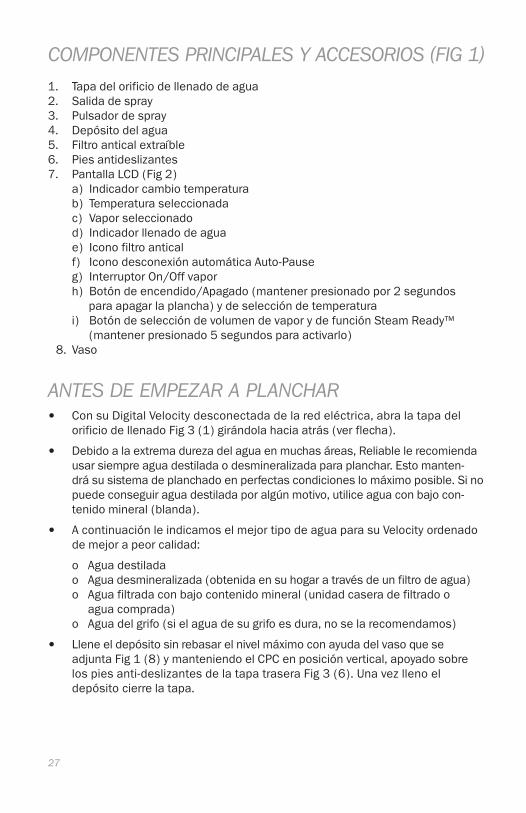
COMPONENTES PRINCIPALES y ACCESORIOS (FIG 1)
1. Tapa del orificio de llenado de agua2. Salida de spray3. Pulsadordespray4. Depósitodelagua5. Filtroanticalextraíble6. Piesantideslizantes7. PantallaLCD(Fig2)
a) Indicador cambio temperatura b) Temperatura seleccionada c) Vapor seleccionado d) Indicador llenado de agua e) Icono filtro antical f) IconodesconexiónautomáticaAuto-Pause g) Interruptor On/Off vapor h)Botóndeencendido/Apagado(mantenerpresionadopor2segundosparaapagarlaplancha)ydeseleccióndetemperatura i) BotóndeseleccióndevolumendevaporydefunciónSteamReady™ (mantener presionado 5 segundos para activarlo)8. Vaso
ANTES DE EMPEZAR A PLANCHAR• ConsuDigitalVelocitydesconectadadelaredeléctrica,abralatapadel
orificiodellenadoFig3(1)girándolahaciaatrás(verflecha).
• Debidoalaextremadurezadelaguaenmuchasáreas,Reliablelerecomiendausarsiempreaguadestiladaodesmineralizadaparaplanchar.Estomanten- drásusistemadeplanchadoenperfectascondicioneslomáximoposible.Sino puede conseguir agua destilada por algún motivo, utilice agua con bajo con-tenido mineral (blanda).
• AcontinuaciónleindicamoselmejortipodeaguaparasuVelocityordenadode mejor a peor calidad:
o Aguadestilada o Aguadesmineralizada(obtenidaensuhogaratravésdeunfiltrodeagua) o Aguafiltradaconbajocontenidomineral(unidadcaseradefiltradoo
agua comprada) o Aguadelgrifo(sielaguadesugrifoesdura,noselarecomendamos)
• Lleneeldepósitosinrebasarelnivelmáximoconayudadelvasoquese adjuntaFig1(8)ymanteniendoelCPCenposiciónvertical,apoyadosobrelos pies anti-deslizantes de la tapa trasera Fig 3 (6). Una vez lleno el depósitocierrelatapa.
• Leaconsejamosquelleneeldepósitohastaelnivelmáximoindicadoen el mismo debido a que este producto genera gran caudal de vapor y de lo contrariotendríaquerellenareldepósitodeaguaconmásfrecuencia.
• Compruebesilaprendaaplanchartienealgunaetiquetaconindicacióndelatemperaturadeplanchado.Recomendamosclasifiquelasprendasenfuncióndelatemperaturaquerequieranparasuplanchadoyempieceporlasprendasqueseplanchenconlatemperaturamásbaja(•).
NOTA: Planchar prendas delicadas con una temperatura superior a la necesaria, perjudica al tejido y provoca la adherencia de residuos quemados a la suela.
FUNCIONAMIENTO ConecteVelocityalared.Sonaráunpitido,lapantallaseencenderáautomática-menteyapareceráelsímbolodeltermómetroparpadeandojuntoconlaposición1detemperatura(•)ylaposiciónmediadevaporFig5.Adicionalmente,apare-ceráuniconoconelcartuchoantical,durante30seg,indicandoquesuplanchadisponedeunsistemaanticalFig2(e).Parareemplazarlosigalasinstruccionesdelapartado“SistemaAntical.”Pordefectolaplanchacuandoseenciende,marca estas posiciones. SELECCIÓN DE TEMPERATURA
ConsuCentrodePlanchadoCompactosabráfácilmenteenquémomentoalcanzalatemperaturaseleccionadayestálistoparaplanchar,yaqueenlapantalla decomunicacióneliconodeltermómetrodejarádeparpadearyalmismotiemposonaráunpitido(silbido),Fig2.
LaV100tiene4posicionesdetemperaturaentrelasquepodráseleccionaroprimiendoelbotóndeseleccióndetemperaturaFig2(h).Sipulsaunavez,enlapantallaapareceráunnuevopuntojuntoalqueyaexistíaantes(••),indi- candoqueseencuentraenelniveldetemperatura2.Eltermómetroparpadearáde nuevo hasta alcanzar la temperatura seleccionada. Cuando haya alcanzado avisaráconunpitidoyeltermómetrodejarádeparpadearFig4.Losniveles3yMAXdetemperaturaseseleccionandelamismamanera.
DesdelaposiciónMAXdetemperaturasipulsaunavezmás,laplanchavolverá alaposicióninicialconelpunto1detemperaturayasísucesivamente.Siman-tienepulsadoelbotóndetemperaturadurante2segundossedesconectarálaplancha.Paravolveraconectarlabastaráconvolverapulsarlo.
28
SEDA,FIBRASSINTÉTICAS:temperaturamínima(•)LANA:temperaturamedia(••)ALGODÓN:temperaturaalta(•••) LINO:temperaturaalta(MAX)
29
SELECCIÓN DE VAPOR
ElCentrodePlanchadoCompactotienedosposicionesdevapor;vapormedio(15gr/min)yvapormáximo(30gr/min).Elvalormedioaparecesiemprepordefecto al conectar la plancha.
ParaobtenervapormáximobastaconpulsarelbotóndeseleccióndevaporunavezFig2(i),yenlapantallaapareceráeliconodelvaporensumayorcaudal, Fig5.Paravolveralcaudalmediodevaporsólotienequepresionardenuevoelbotóndeselección,Fig2(i).
Unavezhayaelegidolatemperaturaasícomoelcaudaldevaporadecuadosala prenda, presione una vez el interruptor On/Off del vapor Fig 6 (g) y ya puede comenzar a planchar. No es necesario estar pulsando el interruptor del vapor de formacontinua,bastaconpresionarunasolavezyelvaporsaldrádeforma ininterrumpida.Paracortarlasalidadelvapor,presionedenuevoelinterruptorOn/OffdelvaporFig2(g)yéstedejarádesalirautomáticamente.
ECO-INTELLIGENT™EsteDigitalVelocityV100incluyenuestrafunciónexclusivaECO-INTELLIGENT para hacer que la plancha deje de producir vapor después de 3 segundos de no detectarmovimiento.Estoaseguraunconsumobajodeenergíaasícomo tambiénunareducciónenelusodeagua,yenlanecesidaddevolverallenar la plancha.
Lafuncióndevaporsevuelveaactivarautomáticamentealdetectarelmínimomovimiento de la plancha o al presionar cualquiera de los botones de salida de vapor.
Si usted requiere el vapor continuo con poco o nada de movimiento del hierro, sujeteelbotóndelvaporhaciaabajoylancecuandoestáacabado. DESCONEXIÓN AUTOMÁTICA: AUTO-PAUSE
LaDigitalVelocityV100poseeunsistemadedesconexiónautomático.Transcur- ridosochominutosdesdelaúltimavezqueseutilizó,éstesedesactivade formaautomática.Estosignificaqueunavezqueactúaelsistemadeapagado, suplanchadejadecalentarycomienzaaenfriarse.Enesemomentosonará unpitidoyapareceráeliconoFig2(f)parpadeandodurante5segundossobre lapantallailuminada.Continuaráparpadeandoenlapantalla,aunquelapan- tallanoestéiluminada,indicandoquelaplanchasehaapagado.Paravolverloa activar, basta con moverlo ligeramente con un movimiento vertical o bien pulsarcualquieradelostresbotonesdecontrolFig2(g,h,i).Laplanchavolverá alaposicióndetemperaturayvaporqueteníaantesdeladesconexión.
Téngaseencuentaqueelperíodotranscurridodesdeladesconexiónhastaque sevuelvaaactivarinfluiráeneltiempoquenecesitelaplanchaparavolvera recuperar la temperatura seleccionada anteriormente.
30
FUNCIÓN STEAM READy™Paraaquellosquedeseendejarsuplanchaencendidaporperíodosdemásde8minutos(sinqueseactiveelapagadoautomático)laDigitalVelocityV100tieneunafunciónllamadaSTEAMREADY™quepermitedejarlaplanchaencendidaindefini-damente.Paraactivarestafunción,simplementemantengapresionadoelbotóndeseleccióndevapordurante5segundos–Fig2(i).
Sihaceesto,elsímbolode“Auto-Pause”parpadearádurante10segundosenlapantalla para avisarle.
Porrazonesdeseguridad,cadavezqueapagamanualmentelaplanchaoladesenchufa,alvolveraencenderlaoenchufarlaretornaráasuconfiguracióninicial(apagadoautomáticoactivadodespuésde8minutos).
NO DEJE SU PLANCHA DESATENDIDA CON LA FUNCIÓN STEAM READy™ ACTIVADA.
RECOMENDACIONES DE PLANCHADO Dadoqueelfuncionamientodeestemodeloseasemejaaunaestacióndeplanchadoydebidoasufuertecaudaldevaporalmáx,30gr/min,lerecomen- damos planchar con vapor medio en las posiciones 1 y 2 de temperatura, y vapormáximoparalasposiciones3yMáx.detemperatura.Asimismolereco- mendamos primero planchar con vapor (el adecuado a la prenda que vaya a planchar) y repasar en seco para deshumedecer la ropa y obtener los resultados de un planchado profesional.
• Paraplancharsinvapor,bastaconNOaccionarelinterruptorOn/Offdel vapor Fig 2 (g)
• NOesnecesariovaciareldepósitodeagua
PLANCHADO CON VAPOR Estemodelolepermiteplancharconvaporaunatemperaturatanbajacomoen laposición1(•).Disponededoscaudalesdevapor,med15gr/mymáx30gr/m.Paramayorinformaciónrespectoalcaudaldelvapor,remítasealapartadode“RecomendacionesdePlanchado.”
PLANCHADO VERTICAL• Mantengapresionadoelbotóndevaporparaobtenervaporalplancharen
posiciónvertical.• Permiteeliminararrugasdeprendasdelicadassinnecesidaddeapoyarlas
en la tabla de planchado: chaquetas, abrigos, cortinas, prendas de ante, etc.• Coloquelaprendaenuncolgador,aisladadeotrasprendas,personas.
31
• Pongaelselectordetemperaturaenposición(••),(•••)ó(MAX),sitúelaplanchaenposiciónverticalyaccioneelpulsador.Enelpunto(••)obtendráunvapormáshúmedoyblancoquepercibirámejor,mientrasqueenelpunto(•••)y(MAX)elvaporesmássecoyaunquesiguemanteniendoelmismocaudaldevapor,leserámásdifícilverlo.
PULVERIZADOR• Conaguaeneldepósito,puedepulverizaraguasobrelaprendapresionando
el pulsador Fig 1 (3).
RELLENADO DE AGUASiduranteelplanchadoelaguadeldepósitoseestáacabando,enaproximada-mente30segundosapareceráeliconoFig2(d)indicandoquesehaderellenardeagua.Sinoserellenaeldepósito,labombasedesconectaráautomática-menteenelplazode1minutoparaevitarserdañada.
Desconectelaplanchayrelleneeldepósito,conelvasoquellevaincorporado Fig1(8),enposiciónverticalsegúnseindicaenlafiguraFig3.
Rellenadoeldepósito,elicononodesaparecedelapantallahastaquenopulseel interruptor On/Off y comience a planchar de nuevo.
Silaplanchasellegaseaquedarcompletamentesinagua,seoiríaunruido extrañoprocedentedelamicro-bomba.EnestecasopulseelinterruptorOn/OffFig2(g),desconecteelaparatoyrelleneeldepósitodeagua.Enchufela plancha.alpulsarnuevamenteelinterruptorOn/Off,dichoruidodesaparecerá.
SISTEMA ANTICALLa Digital Velocity V100 incorpora un innovador sistema antical recambiable consistenteenunfiltroderesinaqueretienelassustanciascalcáreasdelagua,evitandoqueéstaslleguenalacámaradevapordelasueladandocomo resultadounalargamientodelavidadesuplanchaVelocity.Estemodelopermite,en caso de desearlo, reemplazar el filtro por uno nuevo con el objeto de que laplanchasemantengasiempreenóptimoestado.Encasodedesearreemplazarel filtro, le recomendamos que lo haga cada 6-12 meses (dependiendo del tipodeaguaqueestéusando).Elcambiodelfiltronoimplicaquesepuedanevitar los consejos sobre la dureza del agua mencionadas en el apartado “AntesdeEmpezaraPlanchar.”
Pararemoveralmidón,quemaduras,manchasyotrosmaterialesextraños, lerecomendamosusarellimpiadordeplanchasEZ-OFF.Sigalasinstrucciones del paquete.
Situado en la talonera del aparato, gire la pieza en el sentido contrario de las agujas del reloj hasta que haga tope, y la flecha coincida con el candado abierto (aprox. 180°) ytirehaciaatrásdelmismo.

32
Paracolocarlodenuevo,hagacoincidirlaflechaconelcandadoabiertoygireen el sentido de las agujas del reloj, siguiendo las indicaciones del dibujo, presionando a su vez la pieza hacia el interior, hasta situarse en el candado cerrado, Fig 9.
Asegúresedequeunavezcolocadoelfiltro,ésteNOSOBRESALEdelapartetraseradelaplancha.Delocontrario,Ud.lohabrácolocadoincorrectamente yelaguasesaldrádeldepósito.
LIMPIEZA A) Suela
• Pararemoveralmidón,quemaduras,manchasyotrosmaterialesextra-ños,lerecomendamosusarellimpiadordeplanchasEZ-OFF.Sigalasinstrucciones del paquete.
B) Parteexterior
• Paralimpiarlaparteexteriordesuplancha,utiliceunpañohumedecidoconaguayjabón.
• Nololimpieconproductosquímicosabrasivos,nidisolventesyaquepuedeatacarciertaspartesplásticasy/oeliminaralgunasdelasmarcasy/o indicaciones.
• Guardesuplanchaenposiciónvertical,enrolleelcablealrededor de la talonera y fije el cable con la presilla.
• Apesardedisponerenelcabledealimentacióndeuncodode360°degiro,NUNCAFUERCEdichocablealenroscarloalrededordelproductoen la primera vuelta.
CONSEJOS PARA DESPRENDERSE DEL APARATO USADO Antesdedeshacersedesuaparatousadodeberáinutilizarlodemodovisible,encargándosedesuevacuacióndeconformidadalasleyesnacionalesvigentes.SoliciteinformacióndetalladaaesterespectoasuDistribuidor,Ayuntamiento oAdministraciónlocal.
CONDICIONES DE GARANTÍA CorporaciónReliablenoseresponsabilizadelasaveríasdesuaparatoencasoquenocumplalasespecificacionesdelascondicionesdegarantíaofaltadeseguimiento de las instrucciones de funcionamiento y mantenimiento que para cada aparato se incluyen en el folleto de instrucciones.
Lascondicionesdegarantíalaspuedeencontrardeformaseparada.
Lerecordamosquelosdañosproducidosporelefectodelacalnoestáncubiertosporlagarantía.
33
GARANTÍA LIMITADA DE 1 AÑO
GarantizamostodoslosproductosdelamarcaReliable™porunañoapartirde lafechadecompracontradefectosdematerialodefabricaciónacualquierpiezaque figureenlalistaderepuestosmecánicosoeléctricos,exceptoalassujetasa desgaste por el uso.
Lista de piezas sujetas a desgaste por el uso:
• Equiposdevapor:Empaquedepresiónytapa,sellosdeTeflón,® zapatadeTeflón,® mangueras de vapor y cordones eléctricos
• Equiposparacoser:Ganchos,lanzaderas,placasparapuntada, elementos alimentadores, agujas, disco de embrague del motor, escobillas de carbones, fusibles
• Equiposcortadoresdetelas:Cuchillas,piedras,bandas afiladoras, zapatas
GARANTÍA LIMITADA DE 90 DÍAS PARA TODAS LAS PIEZAS Y REGULACIONES
Duranteelperiodode90díasapartirdelafechadecompraharemoslasregulacionesnecesariasyreparacionesasuproductoReliable™sincosto.
El servicio de garantía está disponible remitiendo el producto con este documento de garantía y el comprobante de compra al servicentro más cercano autorizado por Reliable™.
Estagarantíaseaplicasihausadosumáquinaparalosfinesnormalesparalosqueestádiseñadayqueselehayadadouncuidadoymantenimientorazonablementebueno de acuerdo a su manual de instrucciones.
Sudistribuidorautorizado(oReliableCorp.)noseránresponsablespordaños niperjuiciossilamáquinahubiesesidoreparadaporundistribuidoroservicentro no autorizado.
Estasgarantíasleotorganderechosespecíficosyustedpodríatenerotrosderechosquevaríanentrelosdiferentesestadosoprovincias.
Sitienecualquierpreguntasobreestasgarantías,escríbanosa:
ReliableCorporation 100WingoldAvenue,Unit5 Toronto, Ontario CanadaM6B4K7 www.reliablecorporation.com
GARANTÍADELOSPRODUCTOSRELIABLERELIABLE PRODUCTS WARRANTY
LIMITED 1 YEAR WARRANTY
For a period of one year from date of purchase we will, free of charge, repair defects in material or workmanshipwhich appear in the mechanical or electrical parts of all Reliable™ brand products excluding all wear and tear com-ponents.
Wear and Tear Component List: • Steam Equipment: Press pad and cover, Teflon® seals, Teflon® shoe, steam-electric hoses• Sewing Equipment: Hooks, loopers, stitch plates, feed dogs, needles, motor clutch disc, brushes, fuse• Cloth Cutting Equipment: Blades, stones, sharpening bands, shoe• Halogen Lights: Bulbs
LIMITED 90-DAY WARRANTY ON ALL PARTS AND ADJUSTMENTS
For a period of 90 days from date of purchase we will, free of charge, pro-vide required adjustments and repairs toyour Reliable™ product.
Warranty service is available by returning the product with this warranty document and proof of purchase to yournearest authorized Reliable™ service center.
This limited warranty is in effect provided that your machine is used for normal purposes for which it was intended, and is given reasonable good care and maintenance in accordance with the instructions contained in the instruction booklet.
Your authorized dealer (or Reliable Corporation) will not be held responsible for damage if the machine has beenrepaired by an unauthorized dealer.
These warranties give you specific legal rights and you may have other rights, which vary from province/state to province/state.
If you have any questions regarding these warranties, you may write to:Reliable Corporation100 Wingold Avenue, Unit 5Toronto, OntarioCanada M6B 4K7www.reliablecorporation.com

1 800 268 1649www.reliablecorporation.com