catsig.files.wordpress.com · web viewusing word for lego stories once you have taken pictures of...
TRANSCRIPT
DIY TechSploration CLiC 2015 Grand Junction, Colorado P a g e | 1
Using Word for Lego stories
Once you have taken pictures of the child’s Lego creations (with a digital camera, smart phone, etc.):
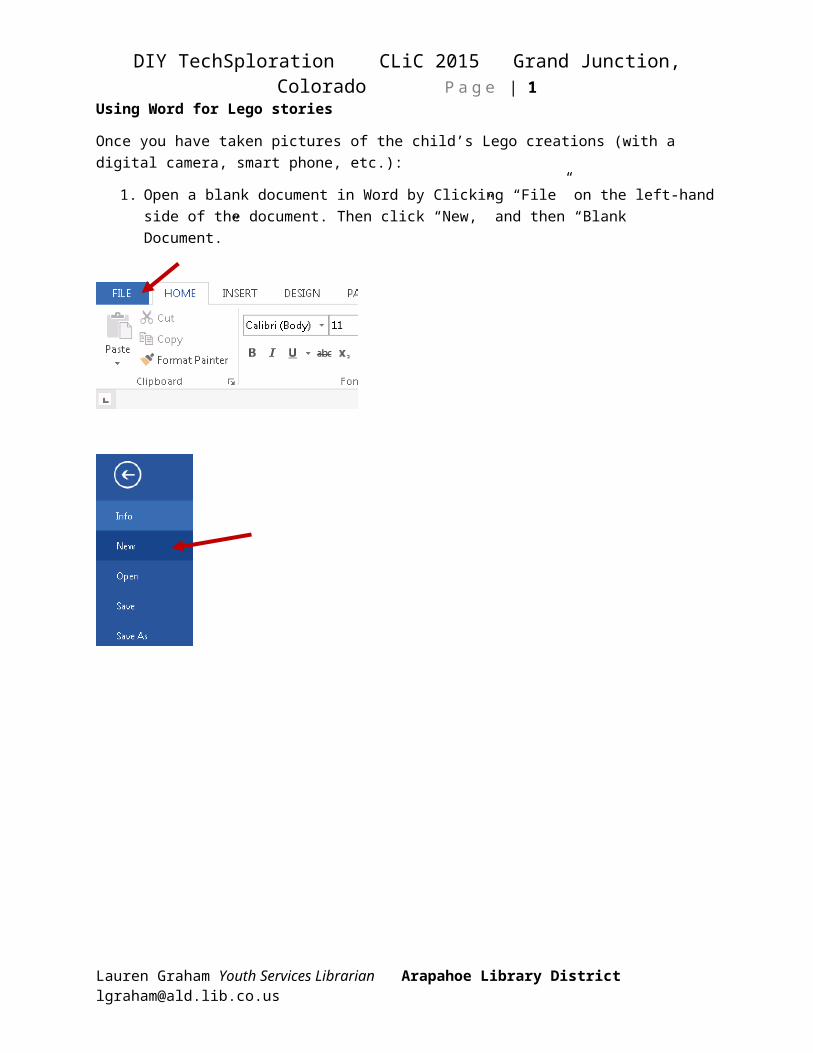
1. Open a blank document in Word by Clicking “File” on the left-hand side of the document. Then click “New,” and then “Blank Document.”
Lauren Graham Youth Services Librarian Arapahoe Library District [email protected]

DIY TechSploration CLiC 2015 Grand Junction, Colorado P a g e | 2
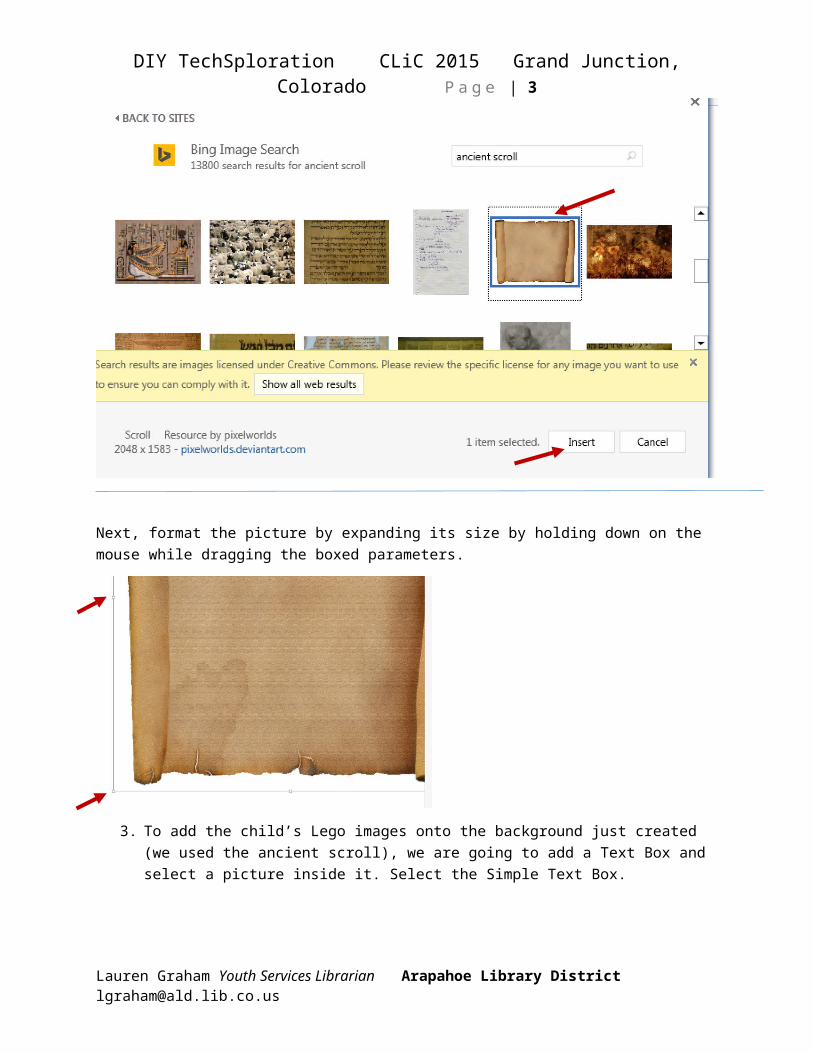
2. Help the child choose a background image for their story. You can use clipart or an image from an online resource. If using from clipart or the other “Online Pictures” feature, type in the background the child wants for a search. This example shows an ancient scroll for an old-century format. Choose the specific image the child wants, and click “Insert.”
Next, format the picture by expanding its size by holding down on the mouse while dragging the boxed parameters.
Lauren Graham Youth Services Librarian Arapahoe Library District [email protected]
DIY TechSploration CLiC 2015 Grand Junction, Colorado P a g e | 3
3. To add the child’s Lego images onto the background just created (we used the ancient scroll), we are going to add a Text Box and select a picture inside it. Select the Simple Text Box.
Select the “Text Box” button and click inside the text box to make the gray area disappear.
Lauren Graham Youth Services Librarian Arapahoe Library District [email protected]

DIY TechSploration CLiC 2015 Grand Junction, Colorado P a g e | 4
If you have already uploaded the child’s images from your device onto the computer, click the “Insert” tab, then click the “Pictures” button.
Find your image and click “Insert.” Your image should appear in the text box.
You’ll notice the image background is white (because the text box is white). To change the background, select the text box by clicking on the text box. Right click and select “Format Picture.”
Lauren Graham Youth Services Librarian Arapahoe Library District [email protected]

DIY TechSploration CLiC 2015 Grand Junction, Colorado P a g e | 5
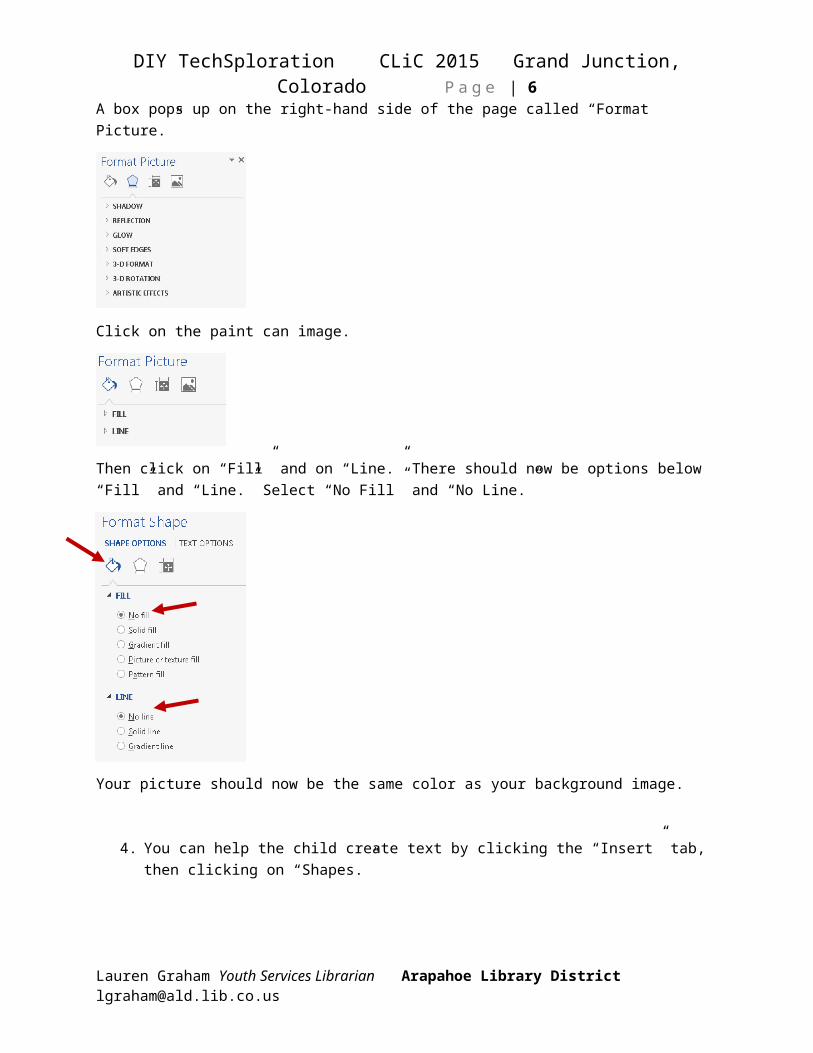
A box pops up on the right-hand side of the page called “Format Picture.”
Click on the paint can image.
Then click on “Fill” and on “Line.” There should now be options below “Fill” and “Line.” Select “No Fill” and “No Line.”
Lauren Graham Youth Services Librarian Arapahoe Library District [email protected]
DIY TechSploration CLiC 2015 Grand Junction, Colorado P a g e | 6
Your picture should now be the same color as your background image.
4. You can help the child create text by clicking the “Insert” tab, then clicking on “Shapes.”
Choose the type of shape the child wants, and resize the shape as small or large as the child wants. Click inside the shape to start typing. The child can now start creating their story!
5. Once the child is done editing, make sure to print the story so the child can leave with their own story!
Lauren Graham Youth Services Librarian Arapahoe Library District [email protected]