windows sql server
TRANSCRIPT

8/3/2019 Windows SQL Server
http://slidepdf.com/reader/full/windows-sql-server 1/34
Installation for Microsoft Windows 2003 and
Microsoft SQL Server 2005
r2 and r2.1
CA Business Intelligence
8/3/2019 Windows SQL Server
http://slidepdf.com/reader/full/windows-sql-server 2/34
Legal Notice
This publication is based on current information and resource allocations as of its date of publication and is subjectto change or withdrawal by CA at any time without notice. The information in this publication could include
typographical errors or technical inaccuracies. CA may make modifications to any CA product, software program,
method or procedure described in this publication at any time without notice.
Any reference in this publication to non-CA products and non-CA websites are provided for convenience only and
shall not serve as CA’s endorsement of such products or websites. Your use of such products, websites, and any
information regarding such products or any materials provided with such products or at such websites shall be at
your own risk.
Notwithstanding anything in this publication to the contrary, this publication shall not (i) constitute product
documentation or specifications under any existing or future written license agreement or services agreement
relating to any CA software product, or be subject to any warranty set forth in any such written agreement; (ii)
serve to affect the rights and/or obligations of CA or its licensees under any existing or future written license
agreement or services agreement relating to any CA software product; or (iii) serve to amend any product
documentation or specifications for any CA software product. The development, release and timing of any featuresor functionality described in this publication remain at CA’s sole discretion.
The information in this publication is based upon CA’s experiences with the referenced software products in a
variety of development and customer environments. Past performance of the software products in such
development and customer environments is not indicative of the future performance of such software products in
identical, similar or different environments. CA does not warrant that the software products will operate as
specifically set forth in this publication. CA will support only the referenced products in accordance with (i) the
documentation and specifications provided with the referenced product, and (ii) CA’s then-current maintenance and
support policy for the referenced product.
Certain information in this publication may outline CA’s general product direction. All information in this publication
is for your informational purposes only and may not be incorporated into any contract. CA assumes no
responsibility for the accuracy or completeness of the information. To the extent permitted by applicable law, CA
provides this document “AS IS” without warranty of any kind, including, without limitation, any implied warranties
of merchantability, fitness for a particular purpose, or non-infringement. In no event will CA be liable for any loss or
damage, direct or indirect, from the use of this document, including, without limitation, lost profits, lost investment,
business interruption, goodwill or lost data, even if CA is expressly advised of the possibility of such damages.
COPYRIGHT LICENSE AND NOTICE:
This publication may contain sample application programming code and/or language which illustrate programming
techniques on various operating systems. Notwithstanding anything to the contrary contained in this publication,
such sample code does not constitute licensed products or software under any CA license or services agreement.
You may copy, modify and use this sample code for the purposes of performing the installation methods and
routines described in this document. These samples have not been tested. CA does not make, and you may not
rely on, any promise, express or implied, of reliability, serviceability or function of the sample code.
Copyright © 2009 CA. All rights reserved. All trademarks, trade names, service marks and logos referenced herein
belong to their respective companies. Microsoft product screen shots reprinted with permission from MicrosoftCorporation.
8/3/2019 Windows SQL Server
http://slidepdf.com/reader/full/windows-sql-server 3/34
Contents 3
Contents
Chapter 1: Introduction 5 Chapter 2: Configure SQL Server for Use as the CA Business Intelligence
Database 7 Chapter 3: Set Up DSN for a CA Business Intelligence Connection 13 Chapter 4: CA Business Intelligence Installation 19

8/3/2019 Windows SQL Server
http://slidepdf.com/reader/full/windows-sql-server 4/34
8/3/2019 Windows SQL Server
http://slidepdf.com/reader/full/windows-sql-server 5/34
Chapter 1: Introduction 5
Chapter 1: Introduction
The following step-by-step instructions describe how to install CA Business
Intelligence (CA BI) using a non-default SQL Server 2005 database. High-level
information is provided at the start of each section with options and
information for each portion of the installation embedded within the steps.
System specifications for the installation platform include Microsoft Windows
2003 Server Enterprise Edition SP1.

8/3/2019 Windows SQL Server
http://slidepdf.com/reader/full/windows-sql-server 6/34
8/3/2019 Windows SQL Server
http://slidepdf.com/reader/full/windows-sql-server 7/34
Chapter 2: Configure SQL Server for Use as the CA Business Intelligence Database 7
Chapter 2: Configure SQL Server for Use
as the CA Business IntelligenceDatabase
BusinessObjects Enterprise XI requires a database to store information about
users and groups, security levels, BusinessObjects Enterprise XI content, and
servers. The primary database, which is maintained by the Central
Management Server, is known as the CMS database.
CA BI provides the option to install its own version of MySQL for the CMS, or
you can use an existing database as specified in the CA BI Installation Guide.
In this case, Microsoft SQL Server is configured as the CMS host.
Detailed steps follow, but from a basic perspective, to configure SQL Server for
CA BI, you create a database and a login that is configured as an owner of that
database with SQL Server authentication. This login will be used during the
DSN setup portion of the installation. Before you begin, ensure that your
database client and server are set up to use Unicode character encoding (such
as UTF-8) if the default has been changed.
The default Initial Size and Autogrowth settings for your database should be
appropriate, except in cases where a very large number of objects (reports,
users, etc.) is projected for an implementation. For estimating purposes, note
that a system with 10,000 objects is projected to require 33 MB of space (1.3
* number of rows * 2624).
8/3/2019 Windows SQL Server
http://slidepdf.com/reader/full/windows-sql-server 8/34
Error! No text of specified style in document.
8 Installation for Microsoft Windows 2003 and Microsoft SQL Server 2005
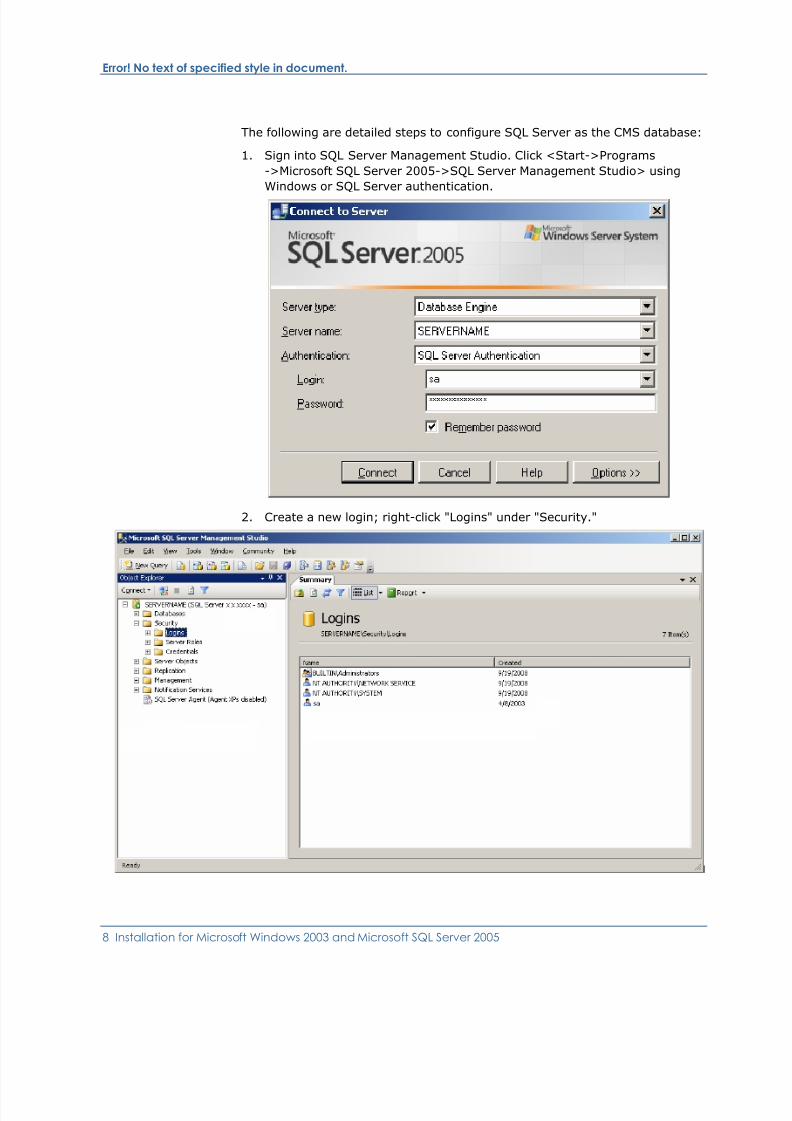
The following are detailed steps to configure SQL Server as the CMS database:
1. Sign into SQL Server Management Studio. Click <Start->Programs
->Microsoft SQL Server 2005->SQL Server Management Studio> using
Windows or SQL Server authentication.
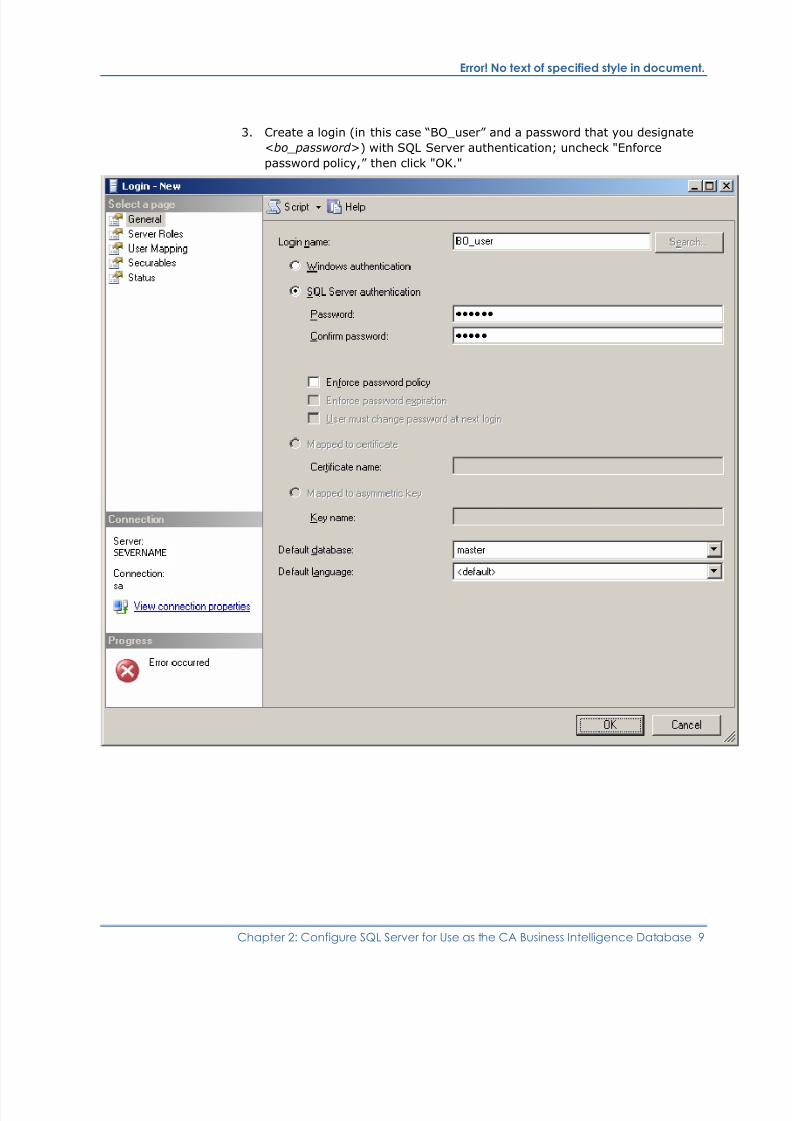
2. Create a new login; right-click "Logins" under "Security."
8/3/2019 Windows SQL Server
http://slidepdf.com/reader/full/windows-sql-server 9/34
Error! No text of specified style in document.
Chapter 2: Configure SQL Server for Use as the CA Business Intelligence Database 9
3. Create a login (in this case “BO_user” and a password that you designate
<bo_password >) with SQL Server authentication; uncheck "Enforce
password policy,” then click "OK."

8/3/2019 Windows SQL Server
http://slidepdf.com/reader/full/windows-sql-server 10/34
Error! No text of specified style in document.
10 Installation for Microsoft Windows 2003 and Microsoft SQL Server 2005
4. Create a New Database: right-click "Databases" and select “New
Database.”
8/3/2019 Windows SQL Server
http://slidepdf.com/reader/full/windows-sql-server 11/34
Error! No text of specified style in document.
Chapter 2: Configure SQL Server for Use as the CA Business Intelligence Database 11
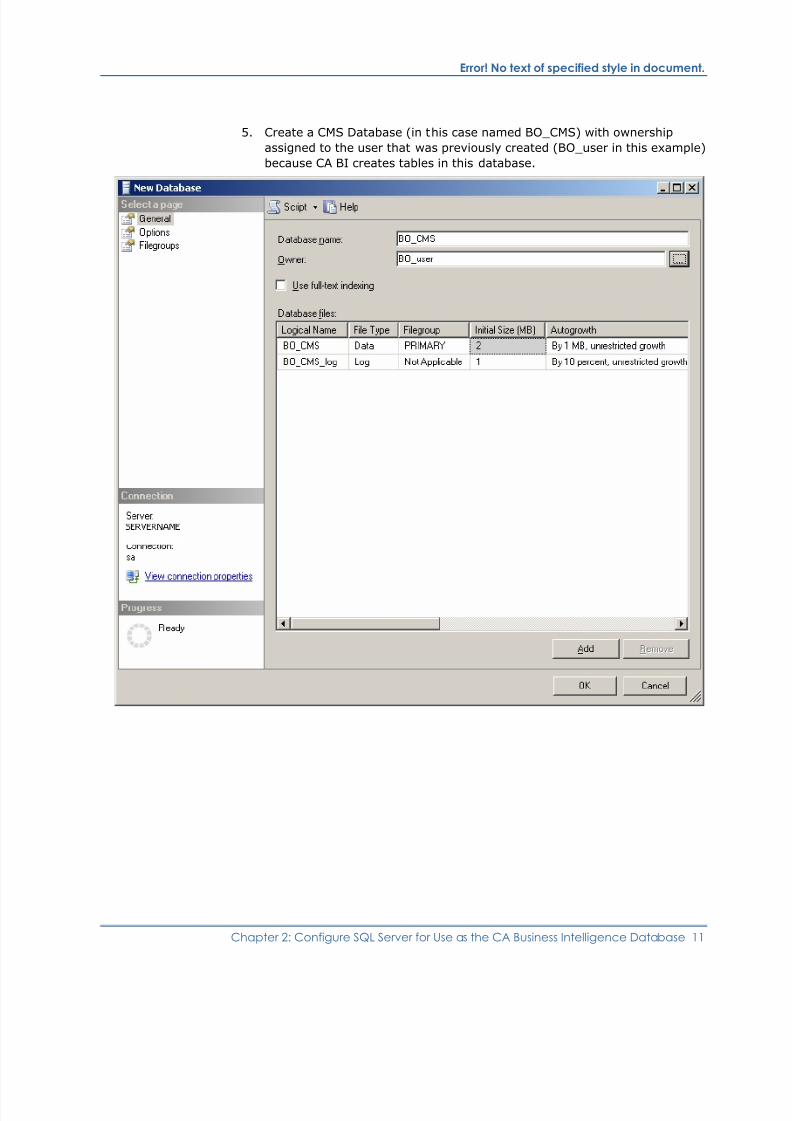
5. Create a CMS Database (in this case named BO_CMS) with ownership
assigned to the user that was previously created (BO_user in this example)
because CA BI creates tables in this database.
8/3/2019 Windows SQL Server
http://slidepdf.com/reader/full/windows-sql-server 12/34
Error! No text of specified style in document.
12 Installation for Microsoft Windows 2003 and Microsoft SQL Server 2005
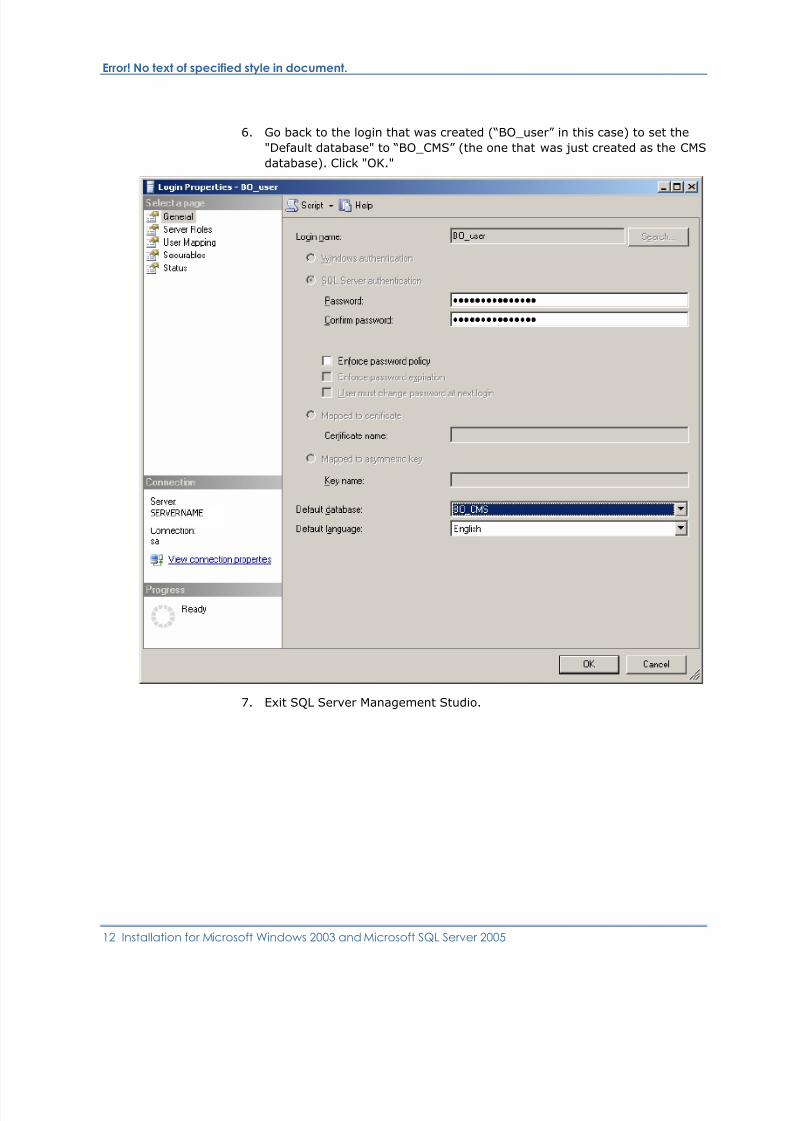
6. Go back to the login that was created (“BO_user” in this case) to set the
"Default database" to “BO_CMS” (the one that was just created as the CMS
database). Click "OK."
7. Exit SQL Server Management Studio.

8/3/2019 Windows SQL Server
http://slidepdf.com/reader/full/windows-sql-server 13/34
Chapter 3: Set Up DSN for a CA Business Intelligence Connection 13
Chapter 3: Set Up DSN for a CA Business
Intelligence ConnectionTo install CA BI using SQL Server as the CMS host, you need to configure an
ODBC connection to your database. These steps will require the database login
and name that were set in the previous section. Specific steps follow, but in
general, you will create a system DSN that connects to the SQL Server
database that you previously set up.
Note: CA BI 2.1 requires a 32-bit ODBC connection. If you are running on a
64-bit system, you may need to perform the following steps prior to
configuring your DSN:
1. Navigate to the following folder: C:\Windows\SysWow64
2. Run odbcad32.exe.
3. Create\configure the DSN.

8/3/2019 Windows SQL Server
http://slidepdf.com/reader/full/windows-sql-server 14/34
Error! No text of specified style in document.
14 Installation for Microsoft Windows 2003 and Microsoft SQL Server 2005
The following are detailed steps for configuring an ODBC connection to a SQL
Server database prior to installing CA BI:
1. Start ODBC Data Source Administrator: Click <Start->Programs
->Administrative Tools->Data Sources (ODBC)> and click the System DSN
tab.

8/3/2019 Windows SQL Server
http://slidepdf.com/reader/full/windows-sql-server 15/34
Error! No text of specified style in document.
Chapter 3: Set Up DSN for a CA Business Intelligence Connection 15
2. Click "Add..." to add a Data Source and select SQL Server, then click
Finish.
3. Provide a name and description for the DSN, select the SQL Server
instance that was configured previously, then click "Next."

8/3/2019 Windows SQL Server
http://slidepdf.com/reader/full/windows-sql-server 16/34
Error! No text of specified style in document.
16 Installation for Microsoft Windows 2003 and Microsoft SQL Server 2005
4. Select SQL Server authentication and enter the Login ID and Password
entered in the database configuration steps (“BO_User” and the
<bo_password> that you designated during the database configuration),
then click "Next."

8/3/2019 Windows SQL Server
http://slidepdf.com/reader/full/windows-sql-server 17/34
Error! No text of specified style in document.
Chapter 3: Set Up DSN for a CA Business Intelligence Connection 17
5. Leave the defaults on the following two screens and click "Next" and then
“Finish.”
6. Click "Test Data Source" to ensure that the connection is successful.

8/3/2019 Windows SQL Server
http://slidepdf.com/reader/full/windows-sql-server 18/34
Error! No text of specified style in document.
18 Installation for Microsoft Windows 2003 and Microsoft SQL Server 2005
7. Click "OK" twice to exit the ODBC Data Source Administrator.

8/3/2019 Windows SQL Server
http://slidepdf.com/reader/full/windows-sql-server 19/34
Chapter 4: CA Business Intelligence Installation 19
Chapter 4: CA Business Intelligence
InstallationCA BI installs BusinessObjects Enterprise XI as a stand-alone component. The
installer will require the Data Source Name that was configured in the chapter
“Set Up DSN for a CA Business Intelligence Connection” (step 3), as well as
the database name, and the database login information that was created in the
chapter “Configure SQL Server for Use as the CA Business Intelligence
Database” (steps 2-5).
Note: Once the actual installation starts, it can take up to two hours to
complete.
The Microsoft Windows systems that you are installing on must meet or exceed
the following requirements:
CPU - P3 700 MHz
Memory - 2 GB;
Disk space - 7.5 GB (r2); 8.5 GB (r2.1)

8/3/2019 Windows SQL Server
http://slidepdf.com/reader/full/windows-sql-server 20/34
Error! No text of specified style in document.
20 Installation for Microsoft Windows 2003 and Microsoft SQL Server 2005
To successfully install CA BI on Windows, the user who runs the installation
must be a member of the local Administrators group.
The following steps detail the CA BI installation process:
1. Double-click "install.exe" in the CA BI installation media at <...\cabi-
windows\Disk1\InstData\VM>.
8/3/2019 Windows SQL Server
http://slidepdf.com/reader/full/windows-sql-server 21/34
Error! No text of specified style in document.
Chapter 4: CA Business Intelligence Installation 21
2. Click "OK" on the Language selection screen.
8/3/2019 Windows SQL Server
http://slidepdf.com/reader/full/windows-sql-server 22/34
Error! No text of specified style in document.
22 Installation for Microsoft Windows 2003 and Microsoft SQL Server 2005
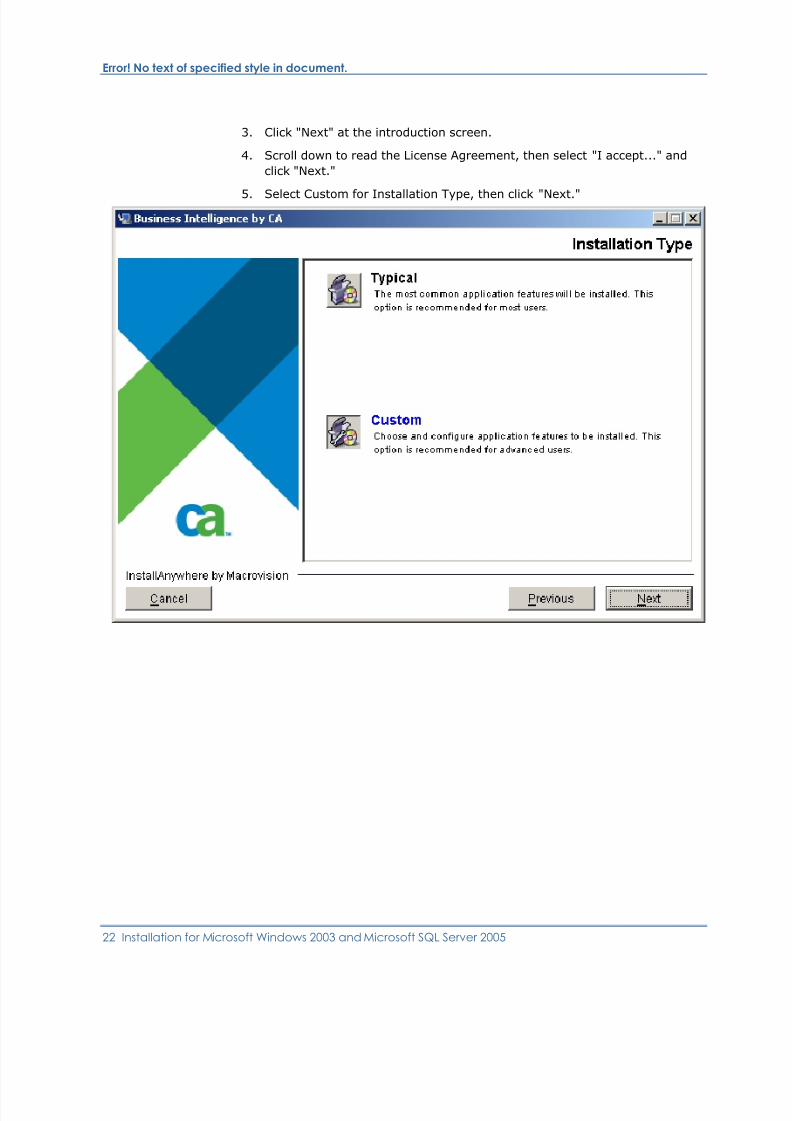
3. Click "Next" at the introduction screen.
4. Scroll down to read the License Agreement, then select "I accept..." and
click "Next."
5. Select Custom for Installation Type, then click "Next."
8/3/2019 Windows SQL Server
http://slidepdf.com/reader/full/windows-sql-server 23/34
Error! No text of specified style in document.
Chapter 4: CA Business Intelligence Installation 23
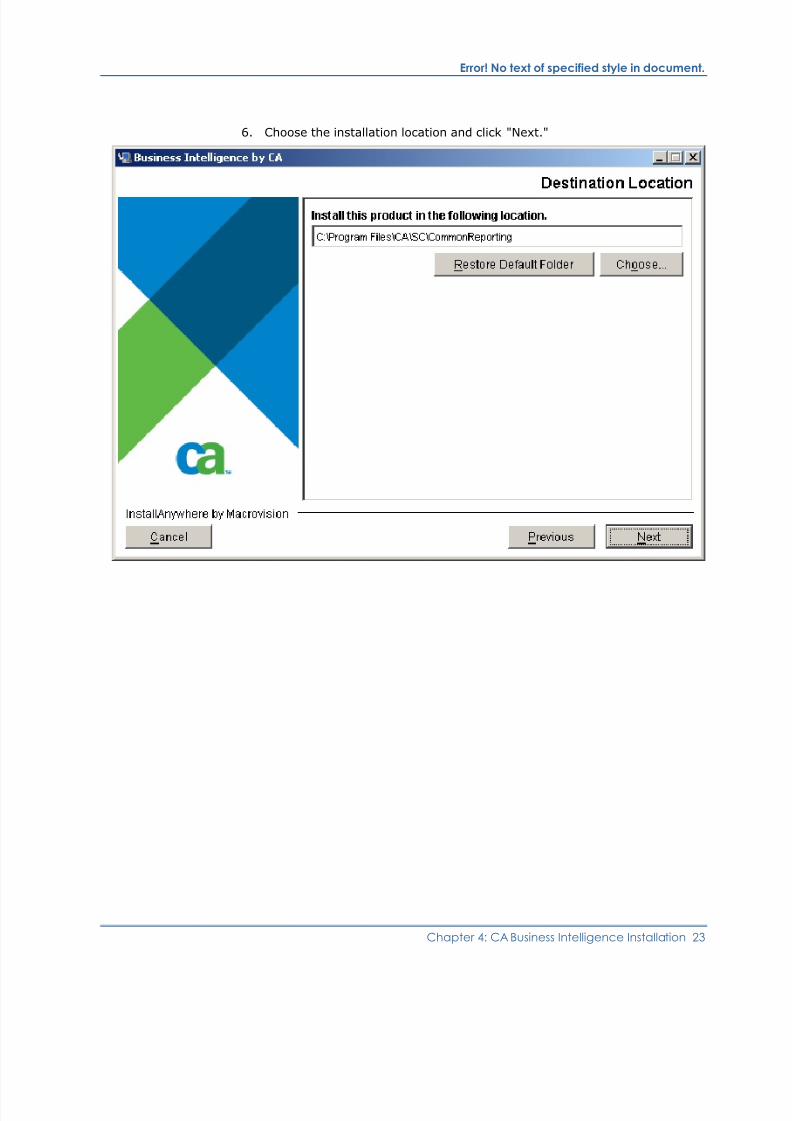
6. Choose the installation location and click "Next."

8/3/2019 Windows SQL Server
http://slidepdf.com/reader/full/windows-sql-server 24/34
Error! No text of specified style in document.
24 Installation for Microsoft Windows 2003 and Microsoft SQL Server 2005
7. Enter a Business Objects XI administrator password (this will be used to
log into the installed product). The password must be complex, which is
enforced by the dialog.

8/3/2019 Windows SQL Server
http://slidepdf.com/reader/full/windows-sql-server 25/34
Error! No text of specified style in document.
Chapter 4: CA Business Intelligence Installation 25
8. Select "Use Existing DBMS" and "Microsoft SQL Server" and click "Next."

8/3/2019 Windows SQL Server
http://slidepdf.com/reader/full/windows-sql-server 26/34
Error! No text of specified style in document.
26 Installation for Microsoft Windows 2003 and Microsoft SQL Server 2005
9. Enter information from the previous chapters for DSN Name, Database
Name, User Name, and Password.
8/3/2019 Windows SQL Server
http://slidepdf.com/reader/full/windows-sql-server 27/34
Error! No text of specified style in document.
Chapter 4: CA Business Intelligence Installation 27
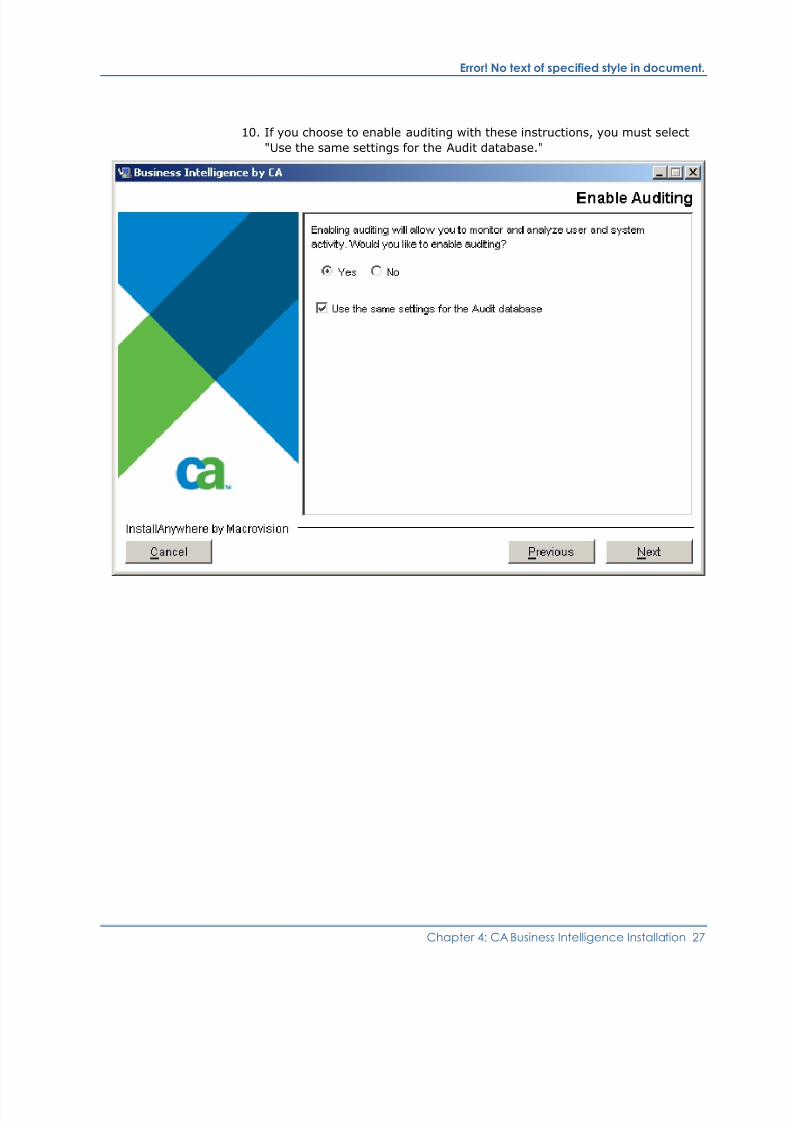
10. If you choose to enable auditing with these instructions, you must select
"Use the same settings for the Audit database."
8/3/2019 Windows SQL Server
http://slidepdf.com/reader/full/windows-sql-server 28/34
Error! No text of specified style in document.
28 Installation for Microsoft Windows 2003 and Microsoft SQL Server 2005
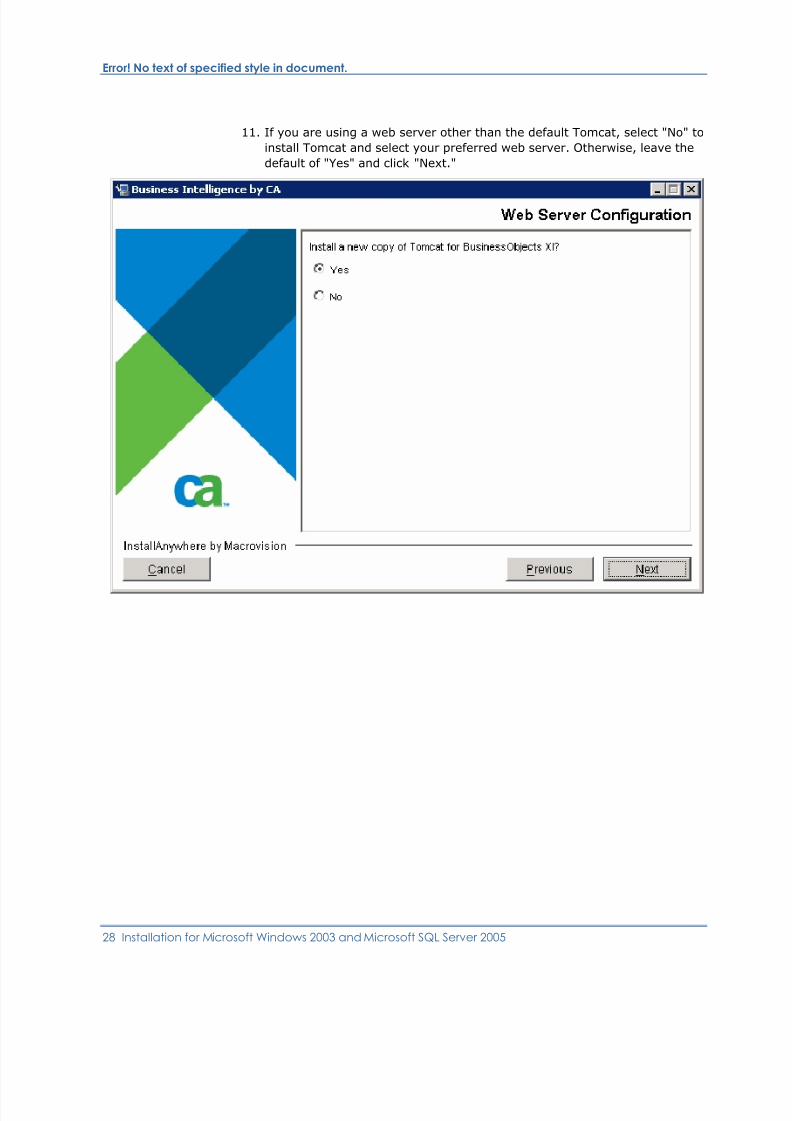
11. If you are using a web server other than the default Tomcat, select "No" to
install Tomcat and select your preferred web server. Otherwise, leave the
default of "Yes" and click "Next."
8/3/2019 Windows SQL Server
http://slidepdf.com/reader/full/windows-sql-server 29/34
Error! No text of specified style in document.
Chapter 4: CA Business Intelligence Installation 29
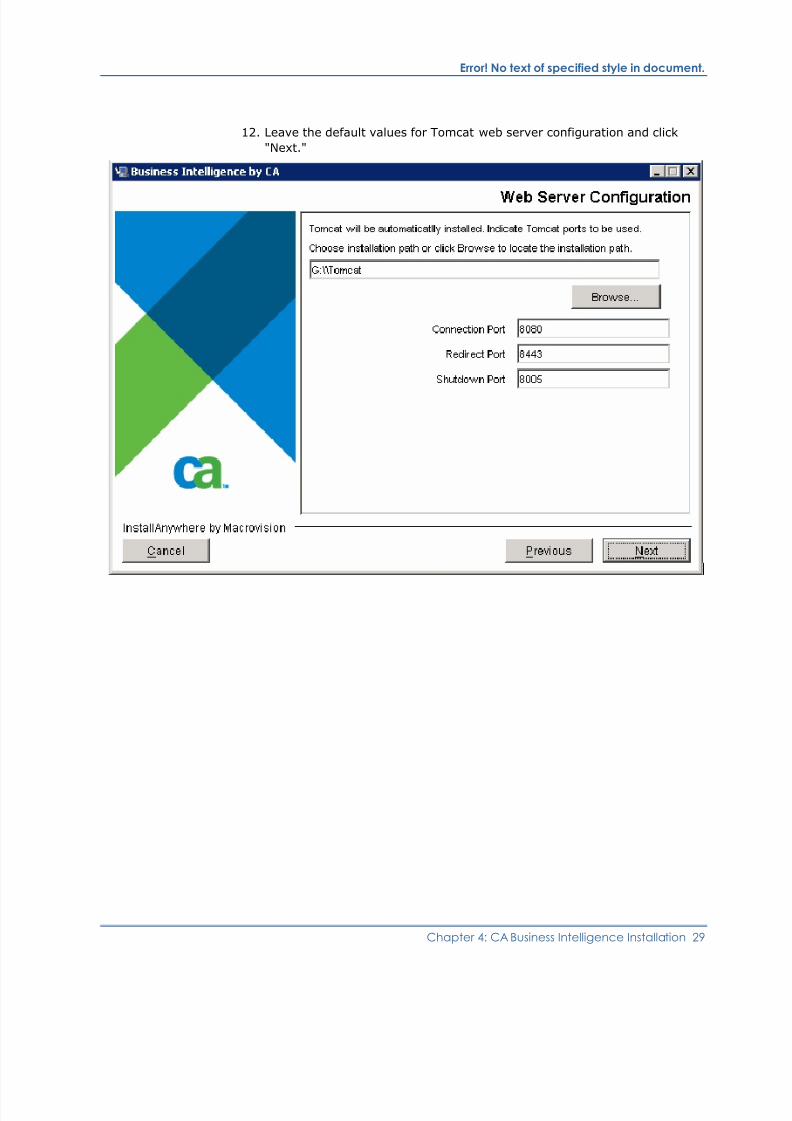
12. Leave the default values for Tomcat web server configuration and click
"Next."

8/3/2019 Windows SQL Server
http://slidepdf.com/reader/full/windows-sql-server 30/34
Error! No text of specified style in document.
30 Installation for Microsoft Windows 2003 and Microsoft SQL Server 2005
13. Select "Yes" to install sample databases and templates, then click "Next" to
assist with installation confirmation.

8/3/2019 Windows SQL Server
http://slidepdf.com/reader/full/windows-sql-server 31/34
Error! No text of specified style in document.
Chapter 4: CA Business Intelligence Installation 31
14. At the installation settings confirmation screen, click "Install."
8/3/2019 Windows SQL Server
http://slidepdf.com/reader/full/windows-sql-server 32/34
Error! No text of specified style in document.
32 Installation for Microsoft Windows 2003 and Microsoft SQL Server 2005
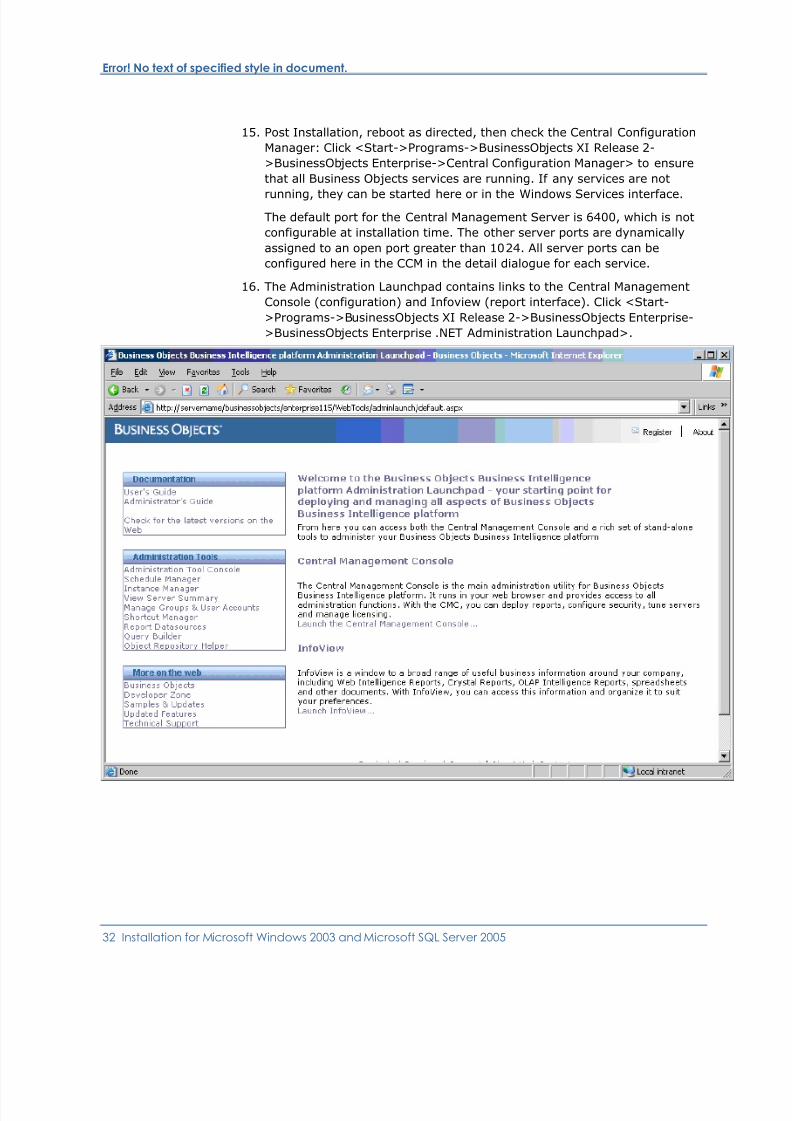
15. Post Installation, reboot as directed, then check the Central Configuration
Manager: Click <Start->Programs->BusinessObjects XI Release 2-
>BusinessObjects Enterprise->Central Configuration Manager> to ensure
that all Business Objects services are running. If any services are not
running, they can be started here or in the Windows Services interface.
The default port for the Central Management Server is 6400, which is not
configurable at installation time. The other server ports are dynamically
assigned to an open port greater than 1024. All server ports can be
configured here in the CCM in the detail dialogue for each service.
16. The Administration Launchpad contains links to the Central Management
Console (configuration) and Infoview (report interface). Click <Start-
>Programs->BusinessObjects XI Release 2->BusinessObjects Enterprise-
>BusinessObjects Enterprise .NET Administration Launchpad>.
8/3/2019 Windows SQL Server
http://slidepdf.com/reader/full/windows-sql-server 33/34
Error! No text of specified style in document.
Chapter 4: CA Business Intelligence Installation 33
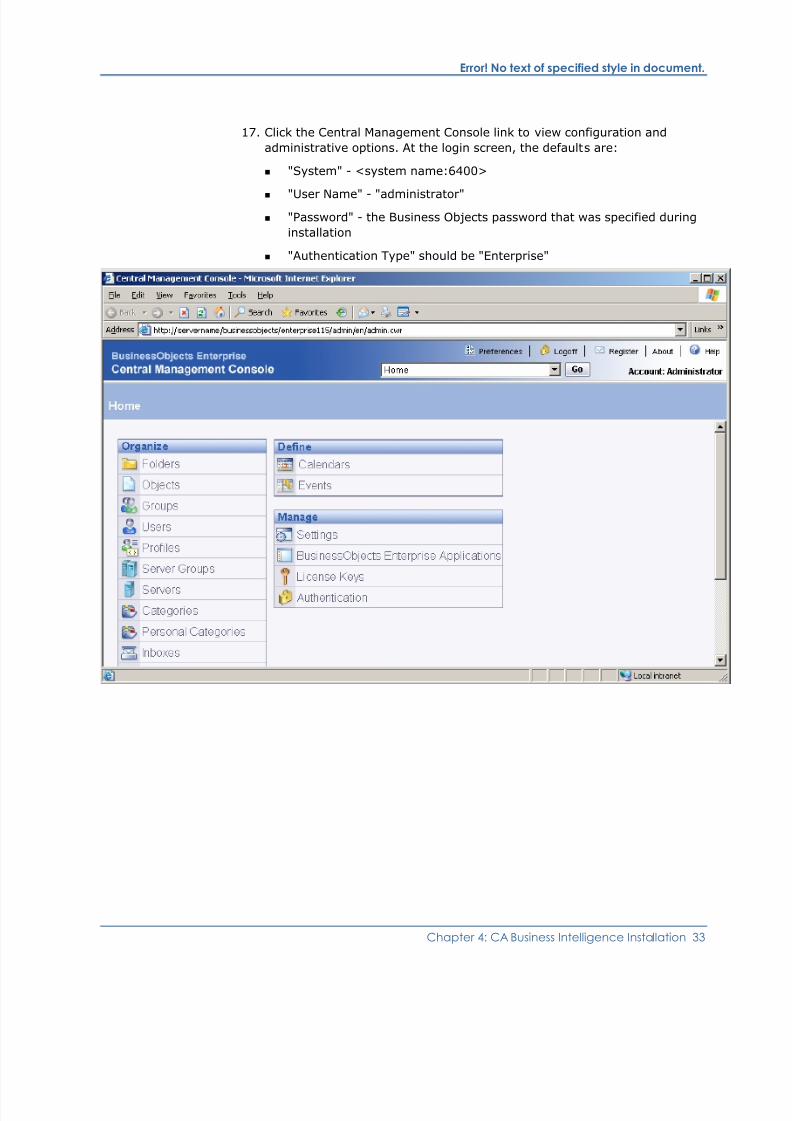
17. Click the Central Management Console link to view configuration and
administrative options. At the login screen, the defaults are:
"System" - <system name:6400>
"User Name" - "administrator"
"Password" - the Business Objects password that was specified during
installation
"Authentication Type" should be "Enterprise"
8/3/2019 Windows SQL Server
http://slidepdf.com/reader/full/windows-sql-server 34/34
Error! No text of specified style in document.
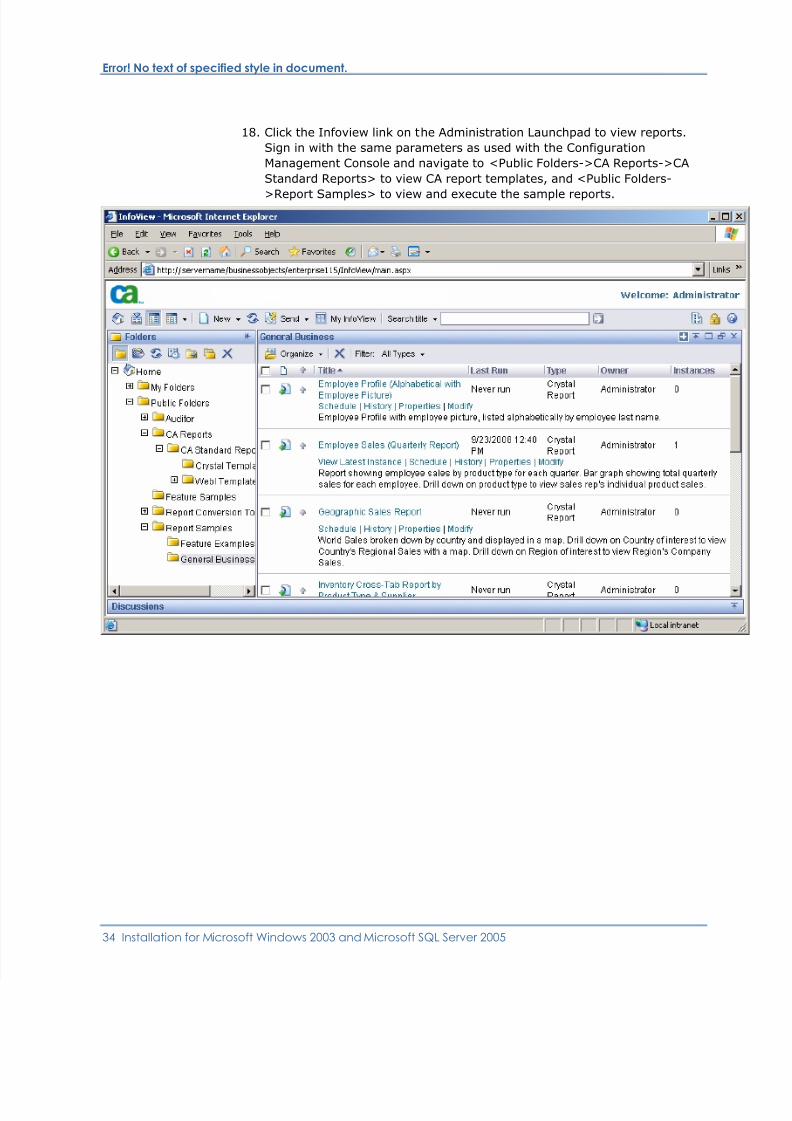
18. Click the Infoview link on the Administration Launchpad to view reports.
Sign in with the same parameters as used with the Configuration
Management Console and navigate to <Public Folders->CA Reports->CA
Standard Reports> to view CA report templates, and <Public Folders-
>Report Samples> to view and execute the sample reports.