word essentials - csun.edu · what is assistive technology? assistive technology (at) are...
TRANSCRIPT

Word Essentials
Windows

Building Accessible Documents
• Heading Styles
• Table of Contents
• Columns and Lists
• Extra Spaces
• Paragraph Spacing
• Descriptive Hyperlinks
• Images & Multimedia
• Tables
• Reading Order
• Headers and Footers
• Color Contrast
• Accessibility Checker

What is Assistive Technology?Assistive Technology (AT) are “products, equipment, and systems that enhance
learning, working, and daily living for persons with disabilities.”
Screen Readers Magnification Software
Speech Recognition Trackball Mouse Keyboard
Zoom Text Braille Captions/Subtitles Captioned Telephone
Video Relay Services
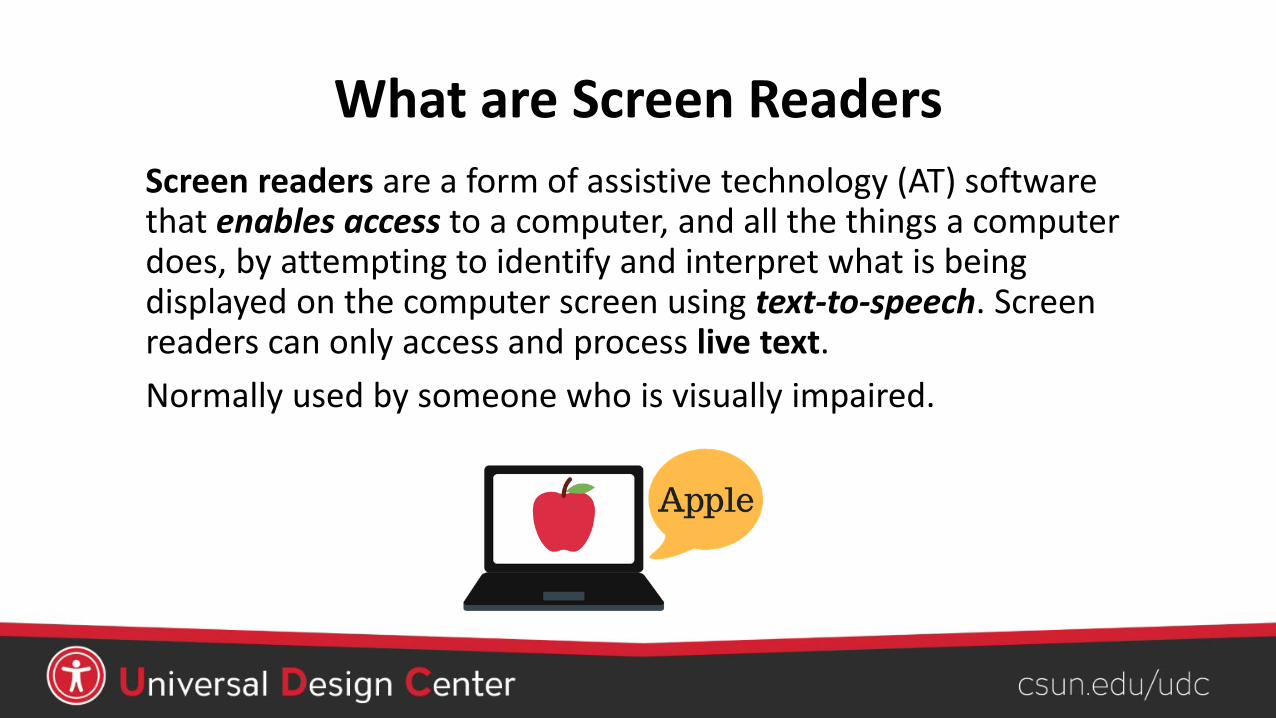
What are Screen ReadersScreen readers are a form of assistive technology (AT) software that enables access to a computer, and all the things a computer does, by attempting to identify and interpret what is being displayed on the computer screen using text-to-speech. Screen readers can only access and process live text.Normally used by someone who is visually impaired.
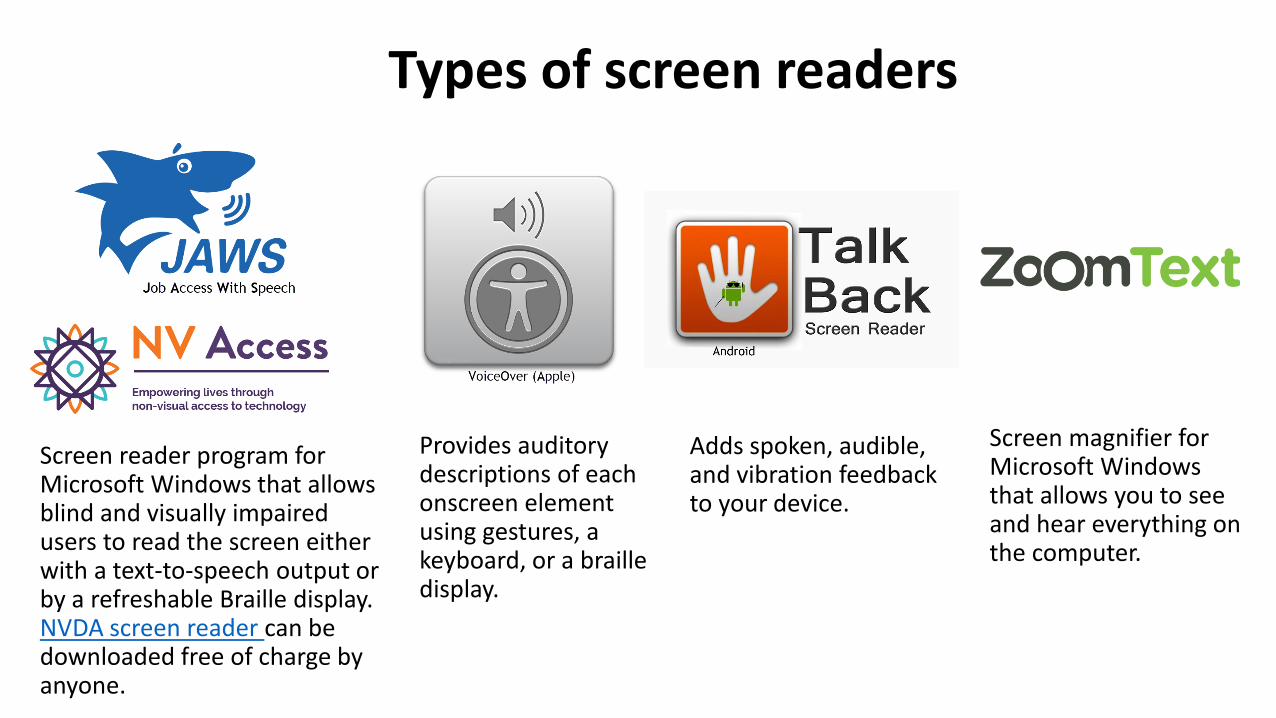
Types of screen readers
Screen reader program for Microsoft Windows that allows blind and visually impaired users to read the screen either with a text-to-speech output or by a refreshable Braille display. NVDA screen reader can be downloaded free of charge by anyone.
Provides auditory descriptions of each onscreen element using gestures, a keyboard, or a braille display.
Adds spoken, audible, and vibration feedback to your device.
Screen magnifier for Microsoft Windows that allows you to see and hear everything on the computer.
Benefits of using a screen reader
• provides access to someone who does not have useful vision, mobility or has a learning disability to access text on the screen
• offers same level of independence and privacy as anyone else

Digital Accessibility Content Analogy
Organize content with headings, subheadings, images, videos, and footer are important for usability and accessibility.

Readability• Divide large blocks of text into smaller sections
• Avoid overly complex sentences
• Provide adequate whitespace
• Use line or paragraph spacing (avoid Enter/Return for “blank” space)
• Font size between 12 – 18 point
• San-serif fonts are more suited to electronic formats (Arial, Calibri, Verdana or Franklin Gothic Book)
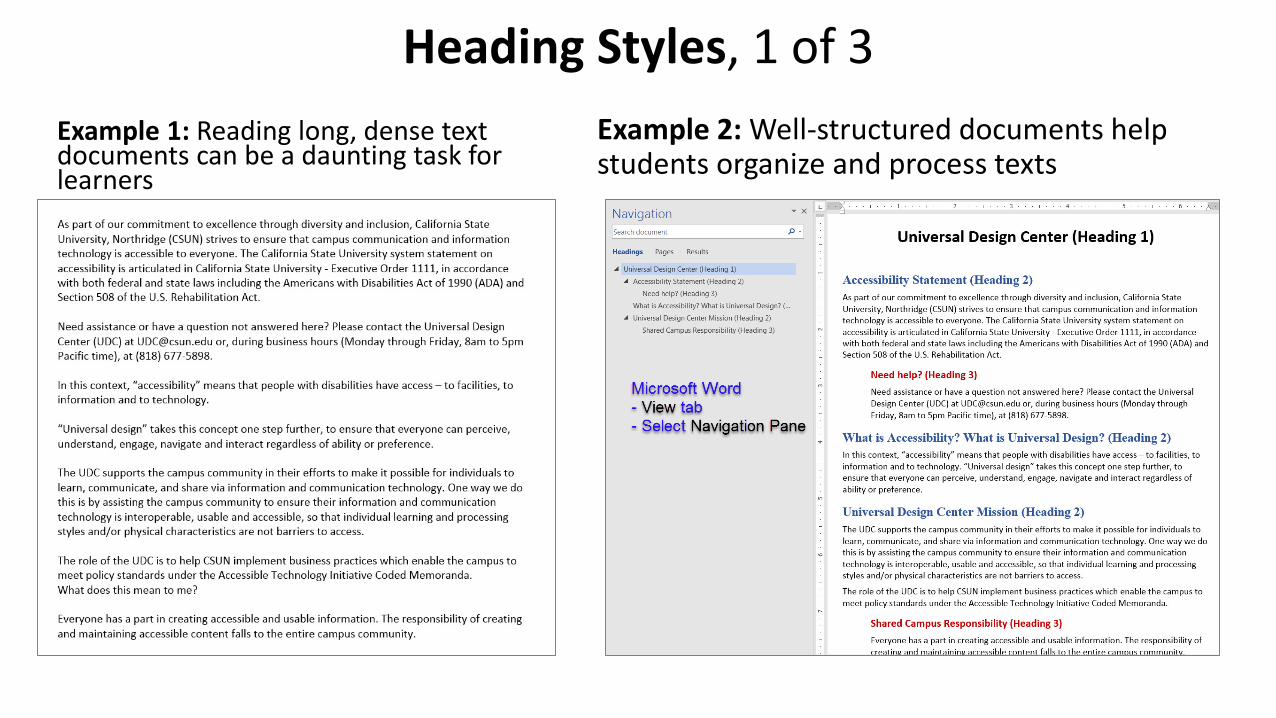
Heading Styles, 1 of 3Example 1: Reading long, dense text documents can be a daunting task for learners
Example 2: Well-structured documents help students organize and process texts
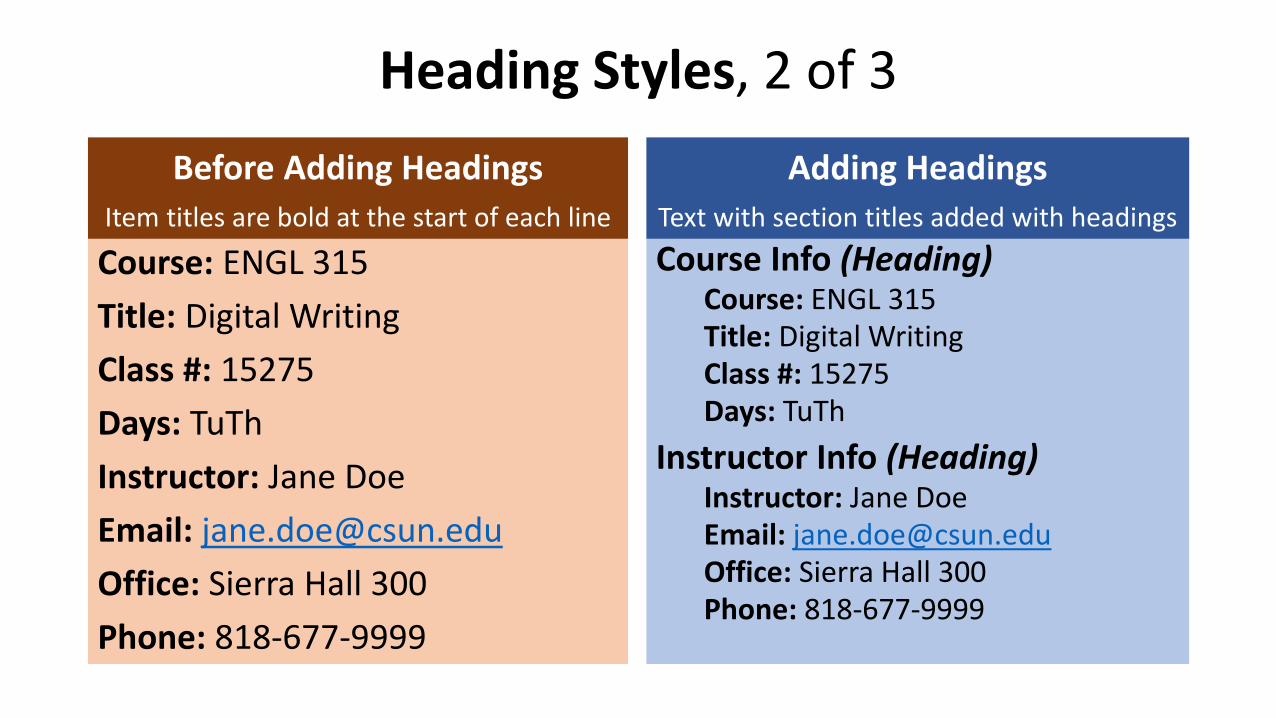
Heading Styles, 2 of 3Before Adding Headings
Item titles are bold at the start of each line
Course: ENGL 315Title: Digital WritingClass #: 15275Days: TuThInstructor: Jane DoeEmail: [email protected]: Sierra Hall 300Phone: 818-677-9999
Adding HeadingsText with section titles added with headingsCourse Info (Heading)
Course: ENGL 315Title: Digital WritingClass #: 15275Days: TuTh
Instructor Info (Heading)Instructor: Jane DoeEmail: [email protected]: Sierra Hall 300Phone: 818-677-9999

Heading Styles, 3 of 3• Use Heading Styles in a logical sequence• Heading Styles (Heading 1 through Heading 6)
• Heading 1: Document Title or a major section• Heading 2: Major subsection titles• Heading 3: Further subsection titles, and so forth
• Modify ALL Heading Styles before first use• Using heading styles means you can also quickly build a table
of contents, reorganize your document, and reformat its design without having to manually change each heading's text.
Headings are styles to give a document structure by category or topic.
Without headings, a person using assistive technology like a screen reader cannot navigate by sections, subsections, or scan section titles to understand the document structure.
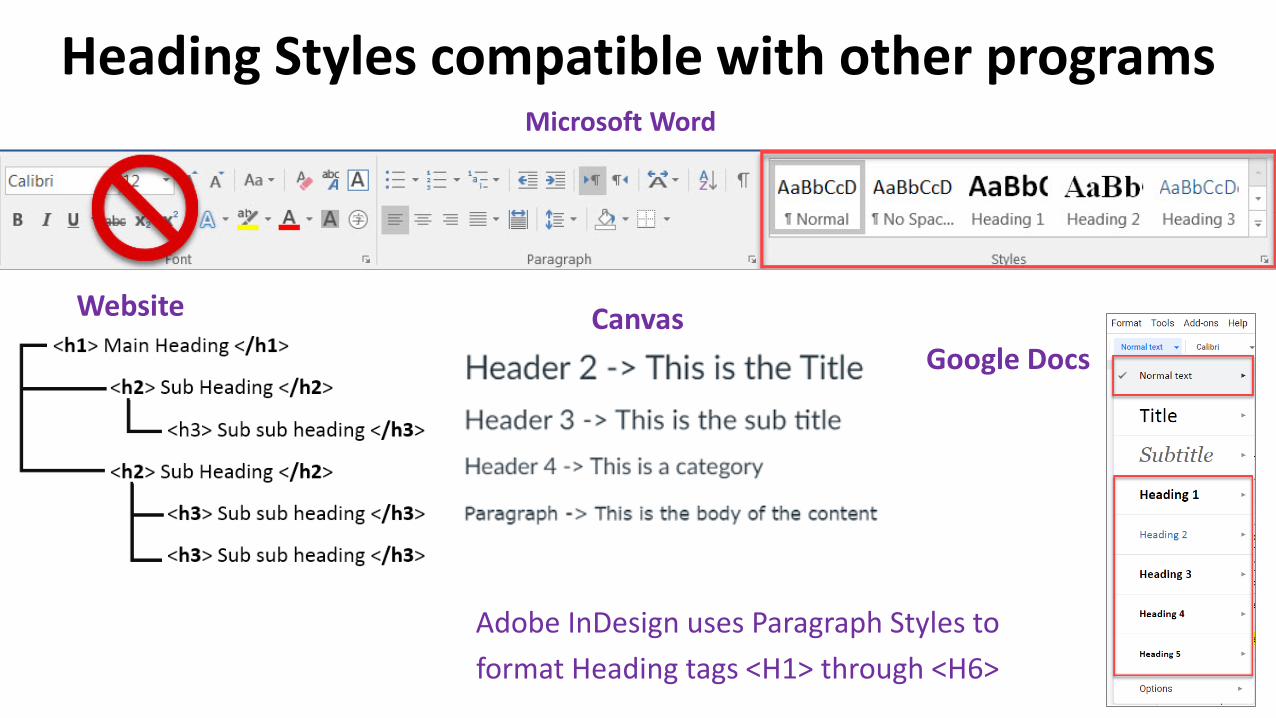
Heading Styles compatible with other programsMicrosoft Word
Website CanvasGoogle Docs
Adobe InDesign uses Paragraph Styles to format Heading tags <H1> through <H6>

Heading 1 – Modify Style
• Modify heading styles to match your preference
• Repeat for Heading 2 to 6 Modify Style
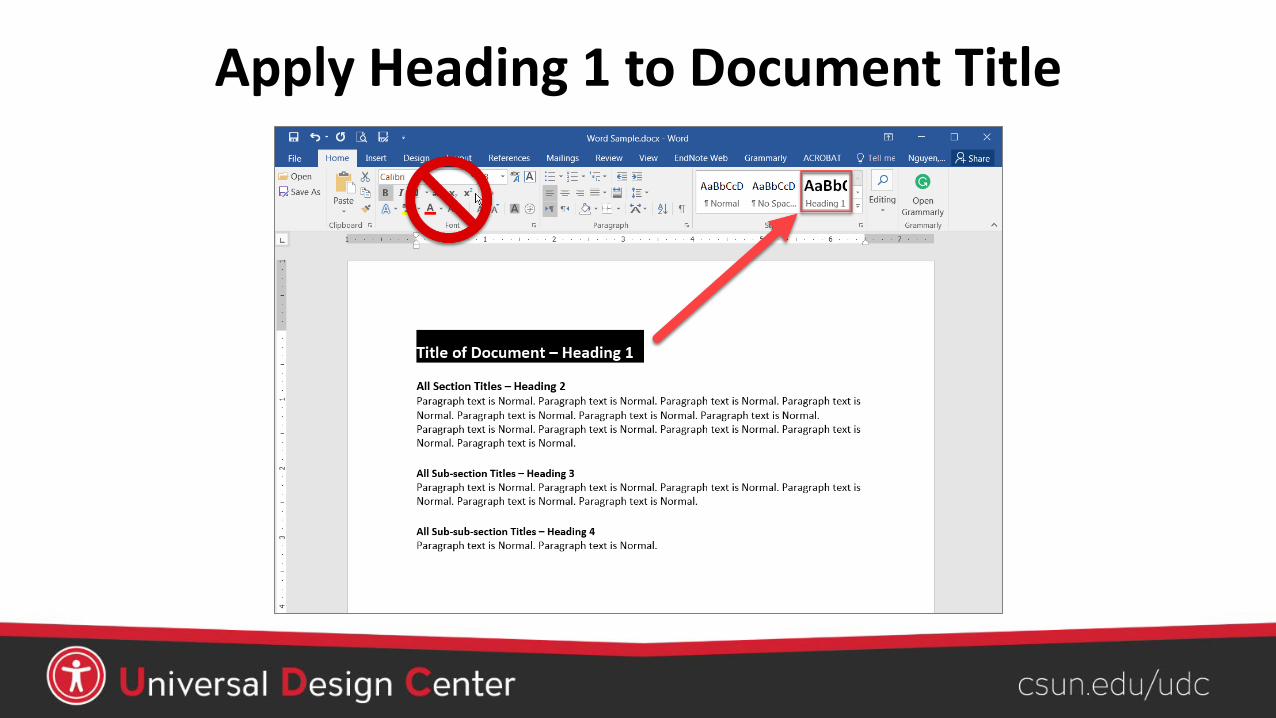
Apply Heading 1 to Document Title
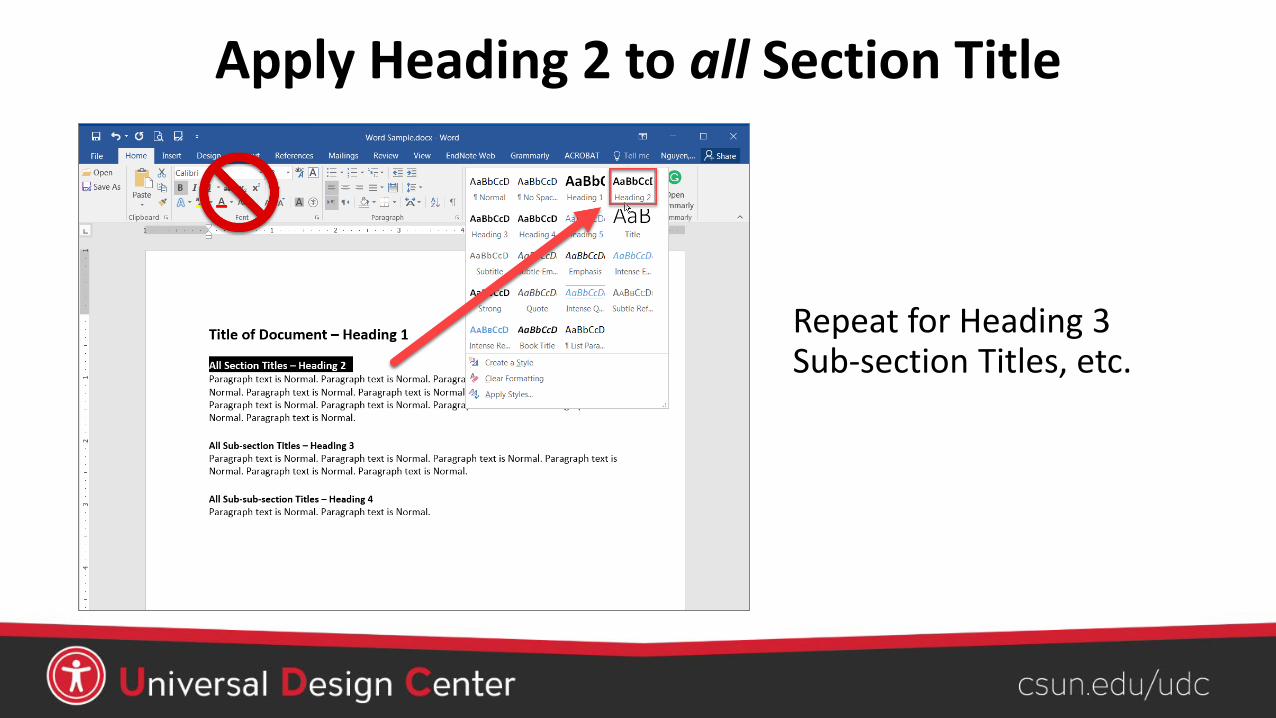
Apply Heading 2 to all Section Title
Repeat for Heading 3 Sub-section Titles, etc.

View – Navigation PaneThe quickest way to check a document’s heading structure is to open the Navigation Pane • View tab• Select Navigation Pane• Expanding the headings
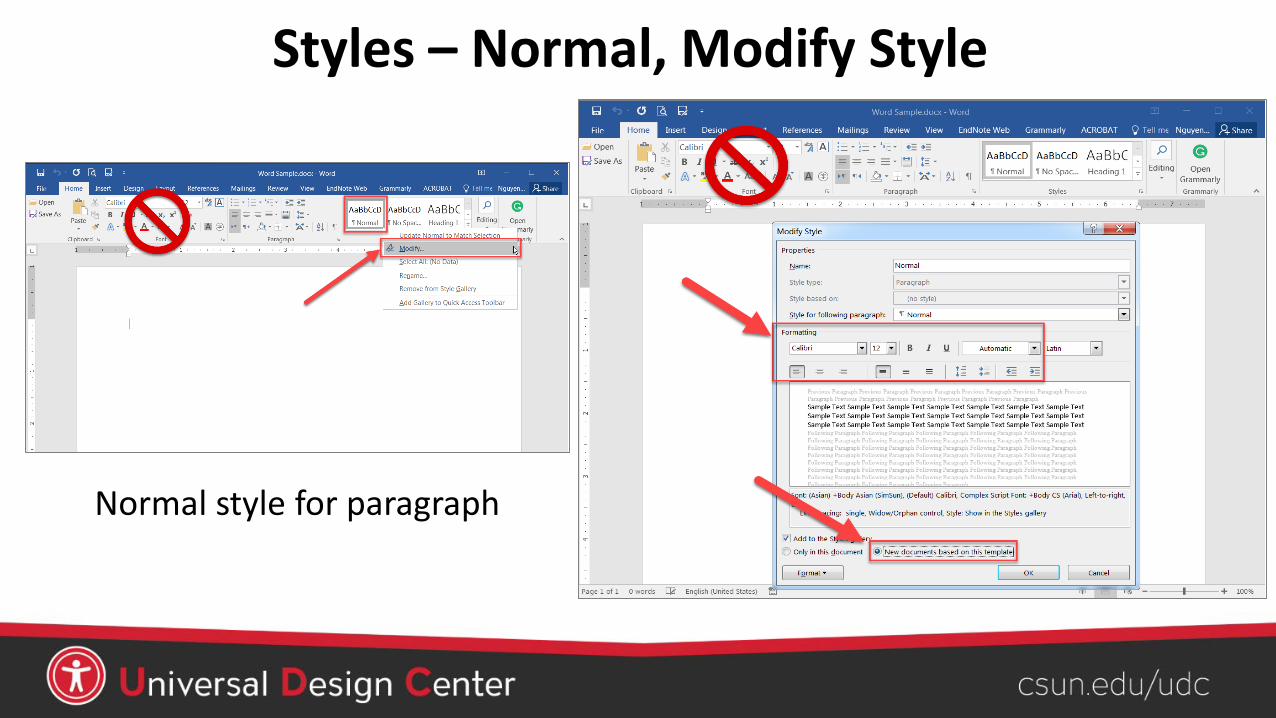
Styles – Normal, Modify Style
Normal style for paragraph

Styles for formatting
• Strong (instead of Bold)
• Emphasis (instead of Italics)
• Avoid underlining text unless it’s a link
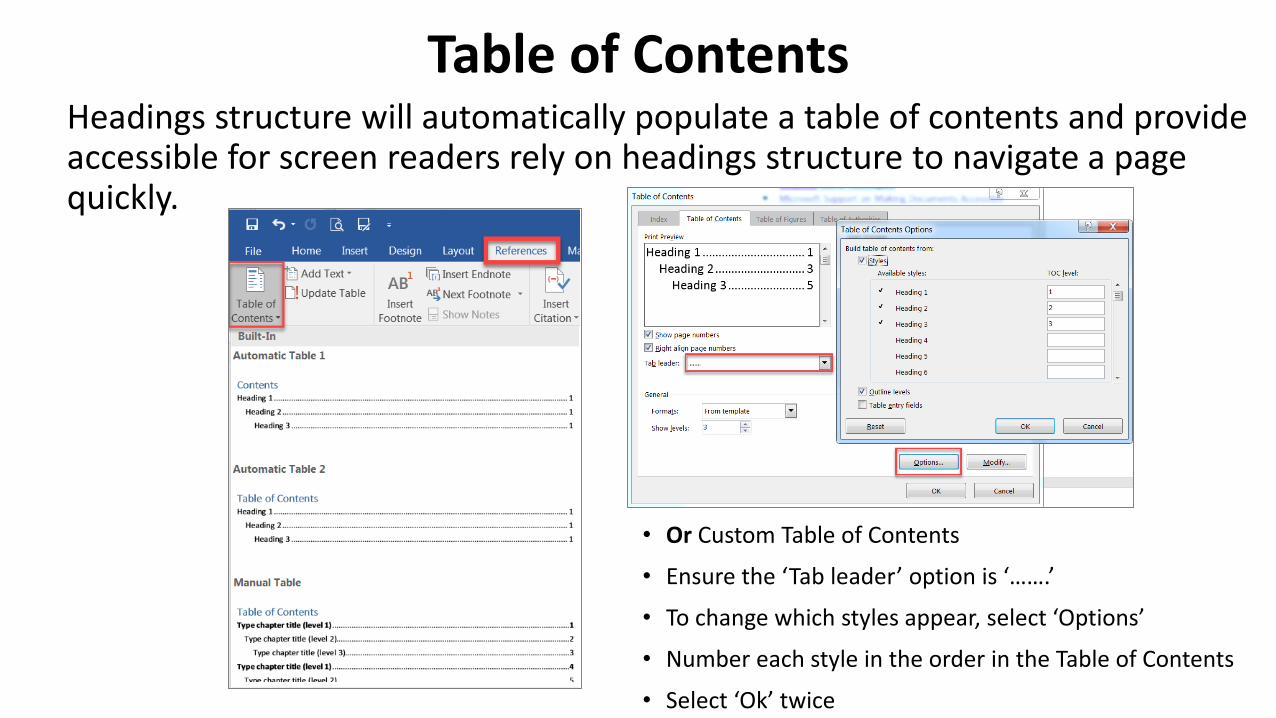
Table of ContentsHeadings structure will automatically populate a table of contents and provide accessible for screen readers rely on headings structure to navigate a page quickly.
• Or Custom Table of Contents
• Ensure the ‘Tab leader’ option is ‘…….’
• To change which styles appear, select ‘Options’
• Number each style in the order in the Table of Contents
• Select ‘Ok’ twice

True Columns and True Lists• Use Word’s built-in functionality to create:
• True Columns
• True Lists• Bulleted List (order of list items does not matter)
• Numbers List (order of list items does matter)
• Avoid • Spacebar, tab, enter• Only create “visual appearance” of columns and lists, but not accessible
structure
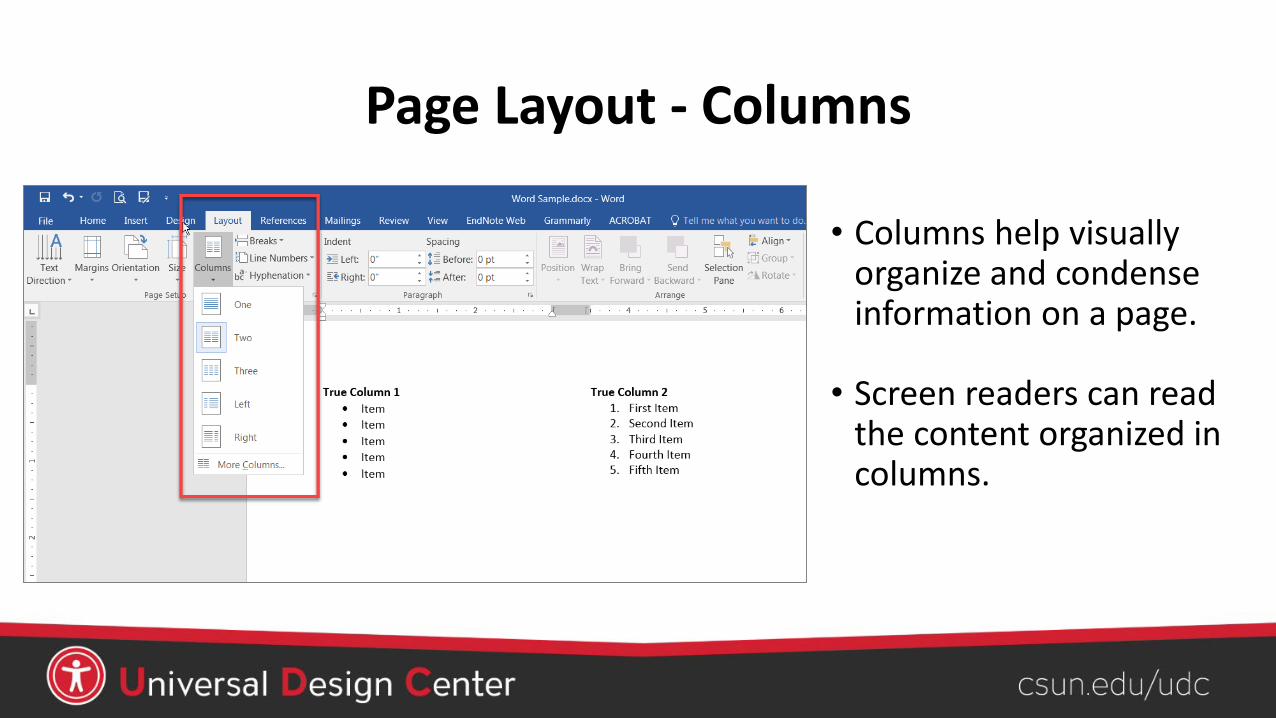
Page Layout - Columns
• Columns help visually organize and condense information on a page.
• Screen readers can read the content organized in columns.
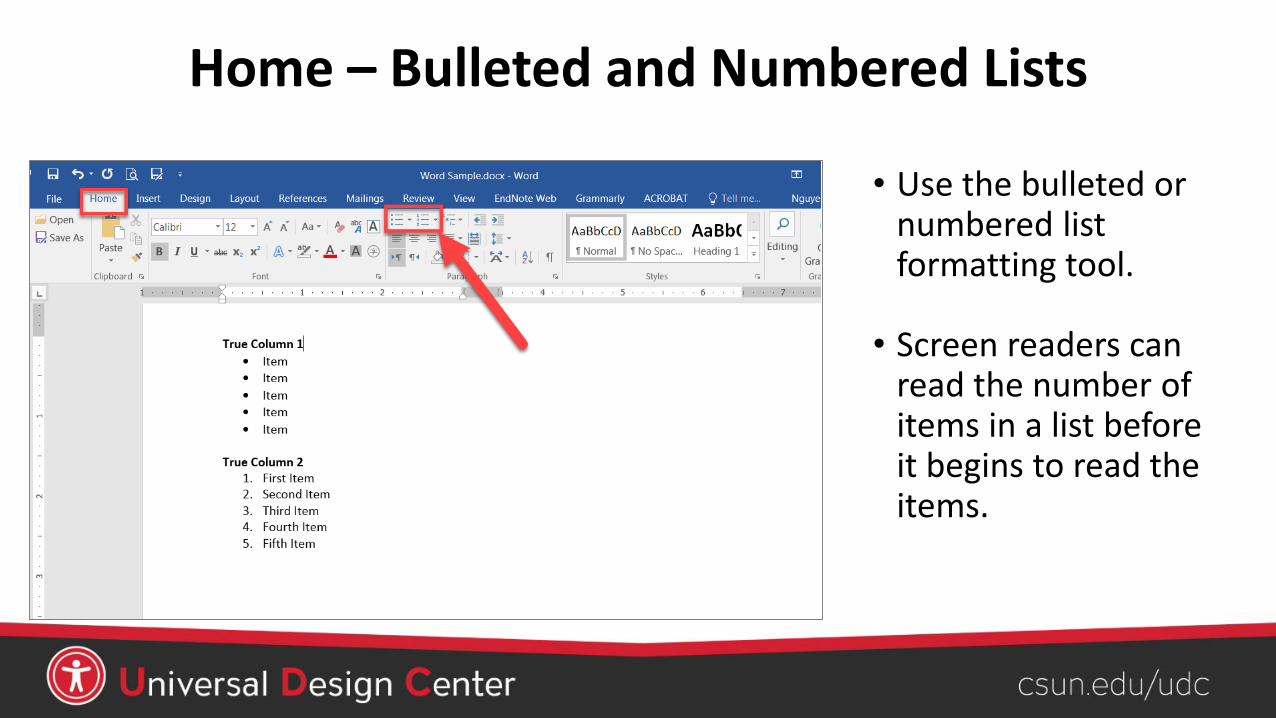
Home – Bulleted and Numbered Lists
• Use the bulleted or numbered list formatting tool.
• Screen readers can read the number of items in a list before it begins to read the items.

Avoid Extra Spaces, 1 of 3
• Screen readers will read blank or multiple spaces created using the space bar, empty line, empty tab, empty paragraphs or carriage returns as “Blank”.
• This can be very irritating for someone using assistive technology to listen multiple blank characters and may assume they’ve reached the end of a document.
Avoid Extra Spaces, 2 of 3
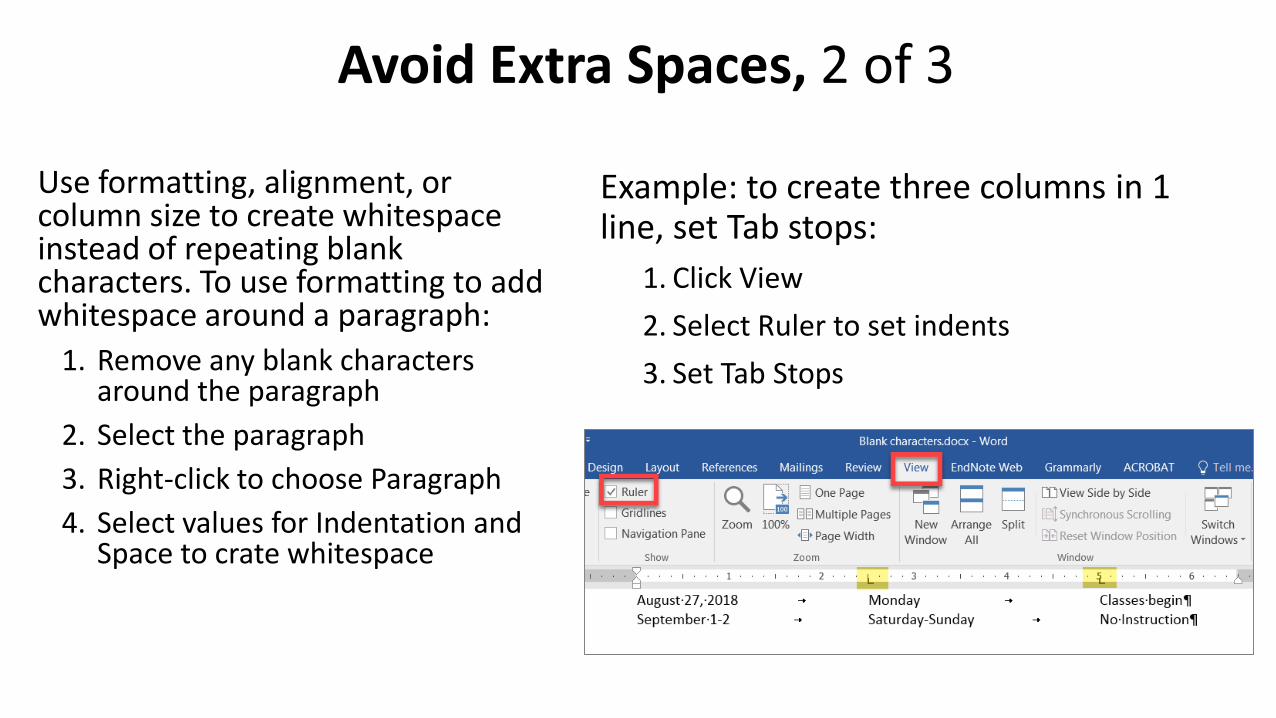
Use formatting, alignment, or column size to create whitespace instead of repeating blank characters. To use formatting to add whitespace around a paragraph:
1. Remove any blank characters around the paragraph
2. Select the paragraph3. Right-click to choose Paragraph4. Select values for Indentation and
Space to crate whitespace
Example: to create three columns in 1 line, set Tab stops:
1. Click View2. Select Ruler to set indents3. Set Tab Stops
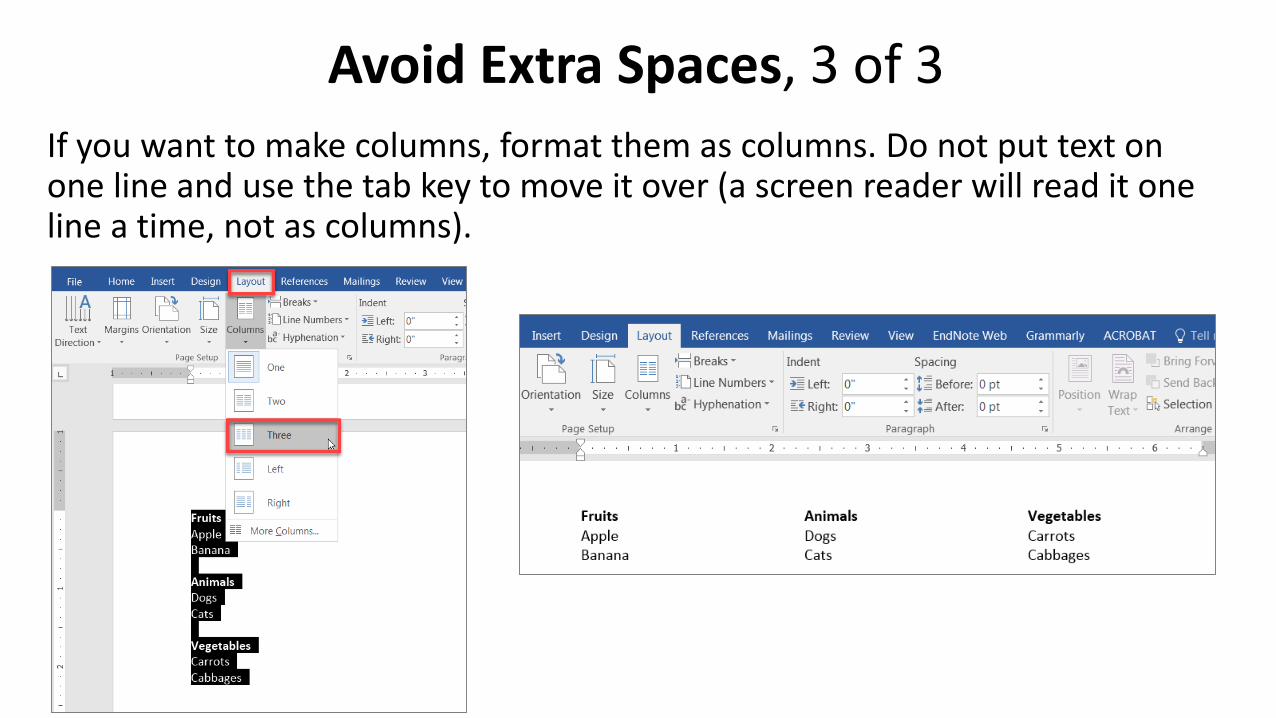
Avoid Extra Spaces, 3 of 3If you want to make columns, format them as columns. Do not put text on one line and use the tab key to move it over (a screen reader will read it one line a time, not as columns).
Paragraph Spacing, 1 of 2
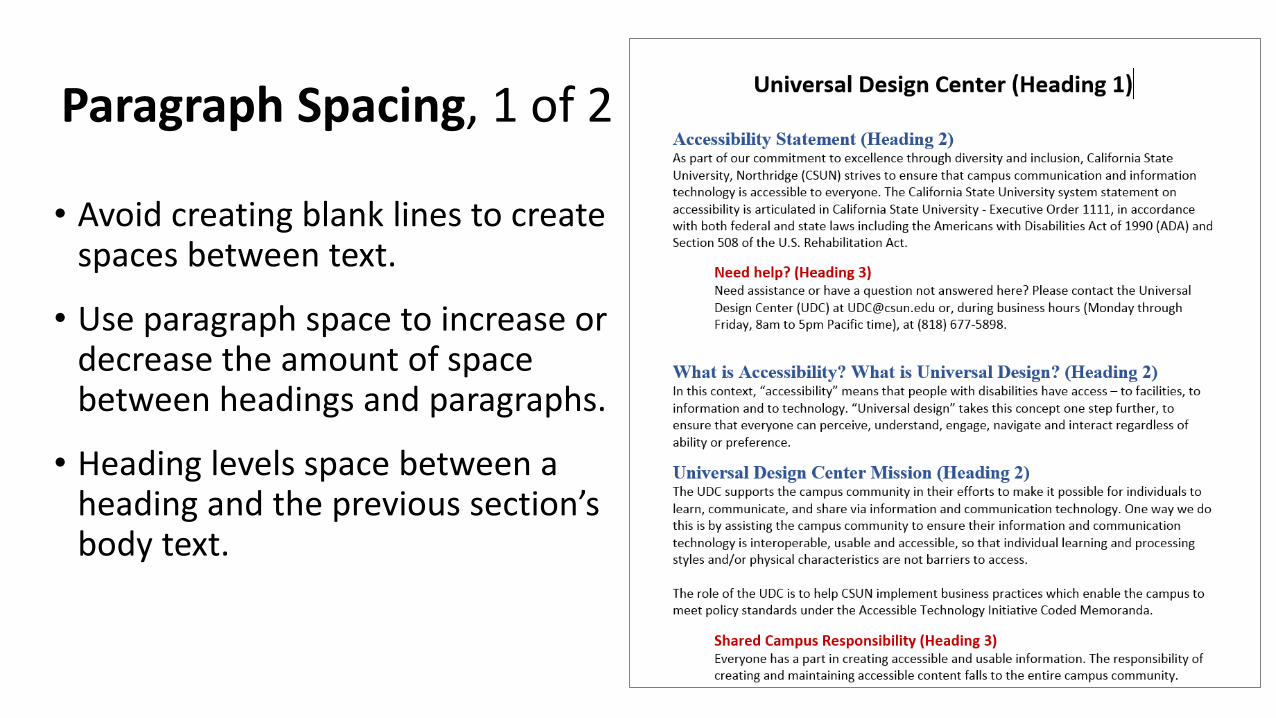
• Avoid creating blank lines to create spaces between text.
• Use paragraph space to increase or decrease the amount of space between headings and paragraphs.
• Heading levels space between a heading and the previous section’s body text.
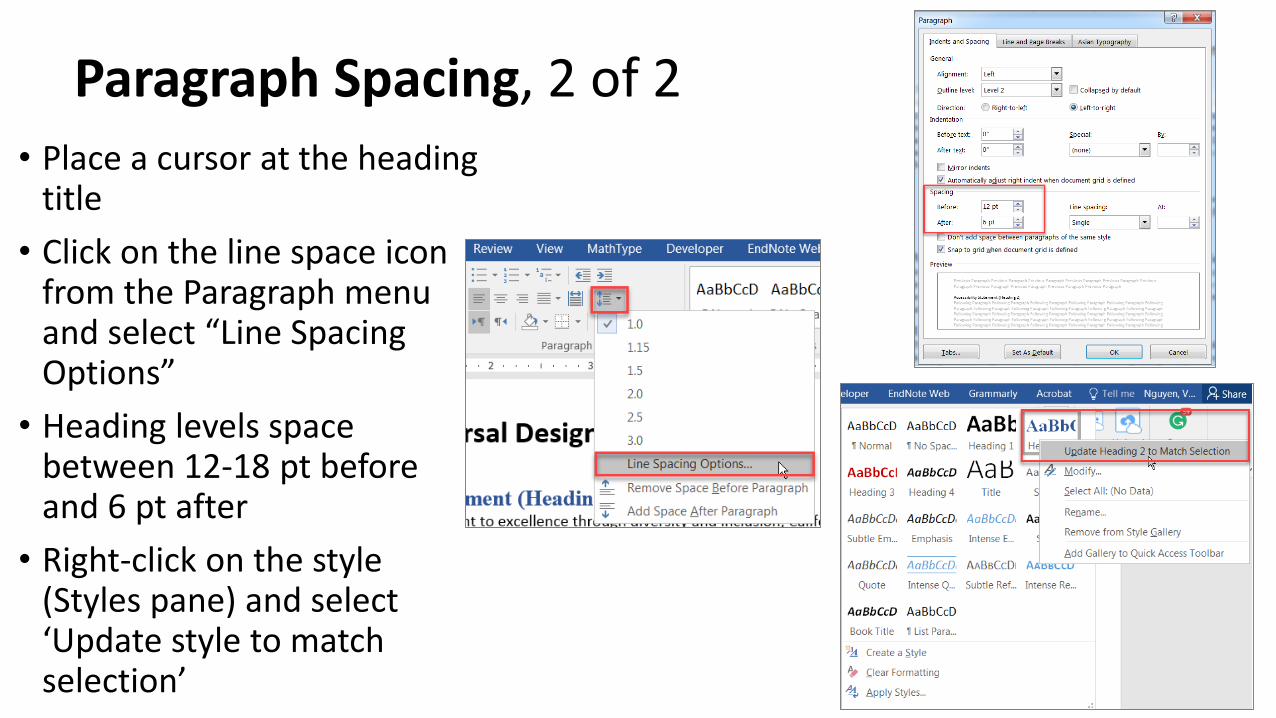
Paragraph Spacing, 2 of 2• Place a cursor at the heading
title• Click on the line space icon
from the Paragraph menu and select “Line Spacing Options”
• Heading levels space between 12-18 pt before and 6 pt after
• Right-click on the style (Styles pane) and select ‘Update style to match selection’

Descriptive Hyperlinks, 1 of 3Not Accessible – vague and redundant Accessible – descriptive and unique
• Read more, click here, email me, or continue is vague and redundant• Full URL text https://www.csun.edu/universal-design-center
(raw URL may not make sense to screen reader users or others, so make the link text descriptive i.e. Universal Design Center)

Descriptive Hyperlinks, 2 of 3• Link text should clearly identify the target of each link.
Good link text should not be overly general. • Make sense when read out of context.
• Describe the destination (document name, website).
• Be unique for unique destinations.
• Do not use click here or read more or continue.
• Do not use different link text to refer to the same resource.
• Do not to use the same link text to refer to different resources.
• Best practice is to bold or underline links.
• Do not use color links as the only method to convey important information.

Descriptive Hyperlinks, 3 of 3
A presentation that is intended to be displayed electronically and in a printout, include the URL and a description in the link text. For example, “Universal Design Center (www.csun.edu/universal-design-center).”
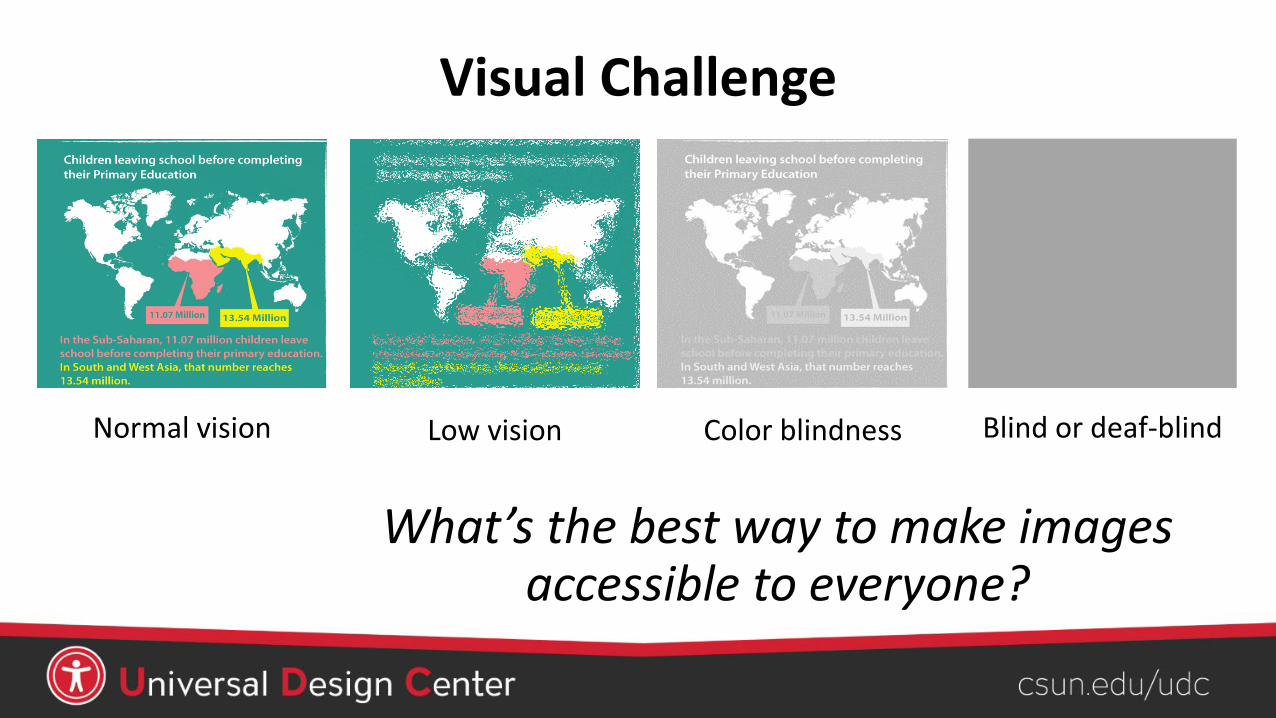
Visual Challenge
Normal vision Low vision Color blindness Blind or deaf-blind
What’s the best way to make images accessible to everyone?
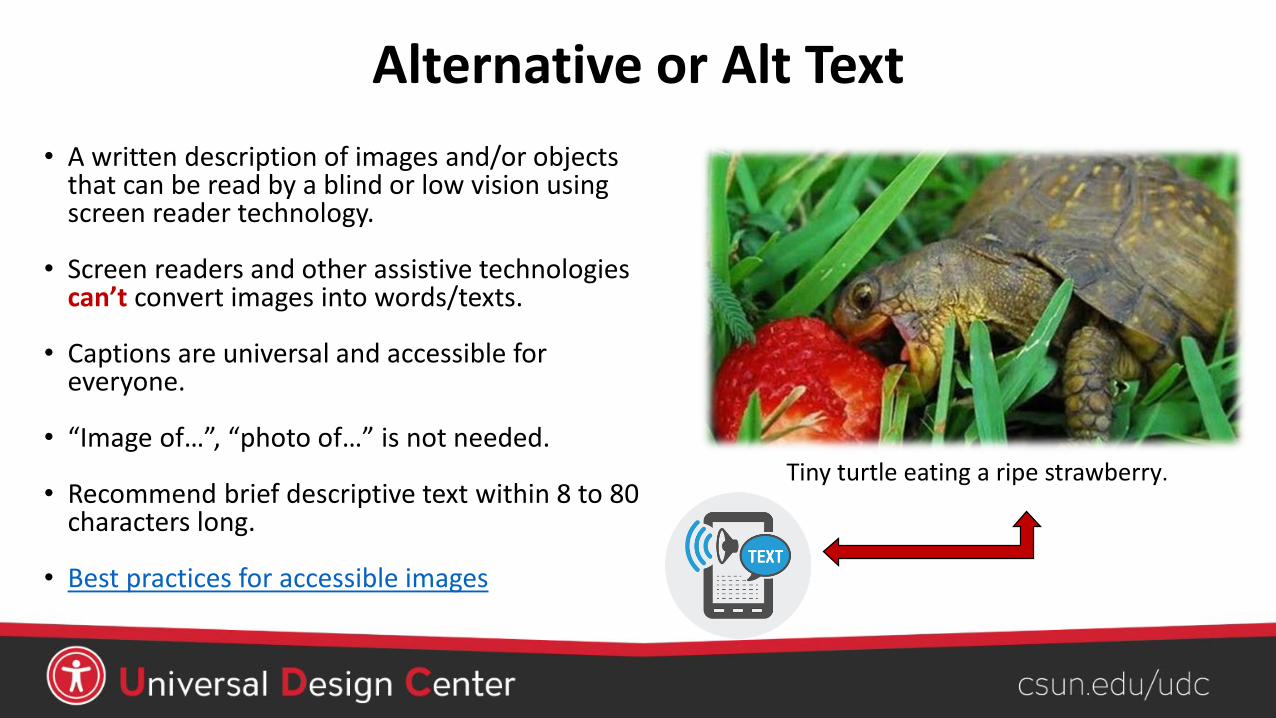
Alternative or Alt Text• A written description of images and/or objects
that can be read by a blind or low vision using screen reader technology.
• Screen readers and other assistive technologies can’t convert images into words/texts.
• Captions are universal and accessible for everyone.
• “Image of…”, “photo of…” is not needed.
• Recommend brief descriptive text within 8 to 80 characters long.
• Best practices for accessible images
Tiny turtle eating a ripe strawberry.
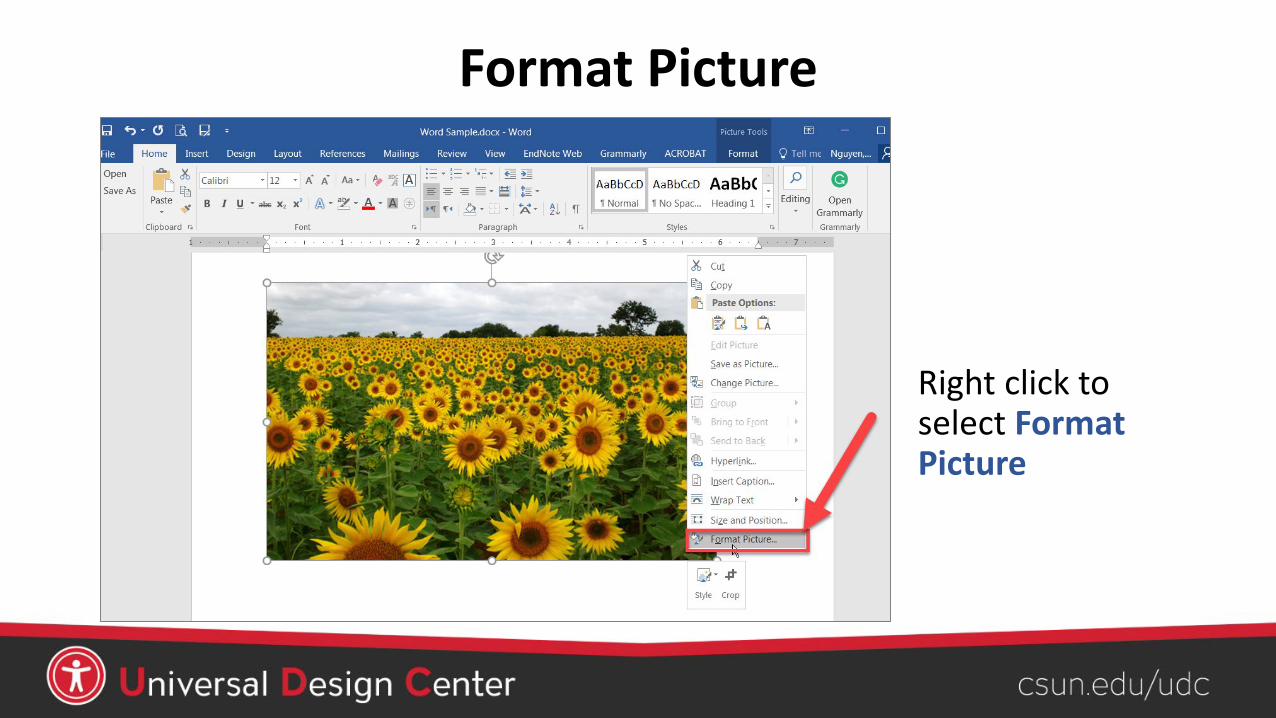
Format Picture
Right click to select Format Picture
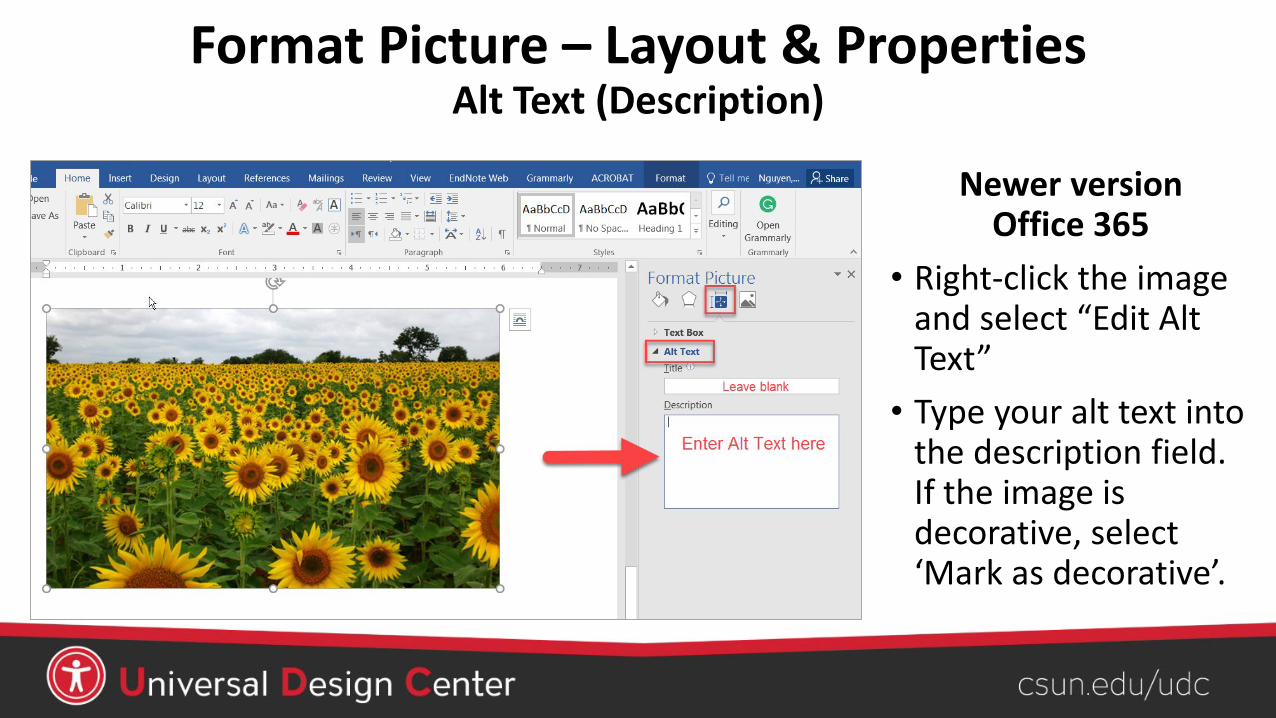
Format Picture – Layout & PropertiesAlt Text (Description)
Newer version Office 365
• Right-click the image and select “Edit Alt Text”
• Type your alt text into the description field. If the image is decorative, select ‘Mark as decorative’.
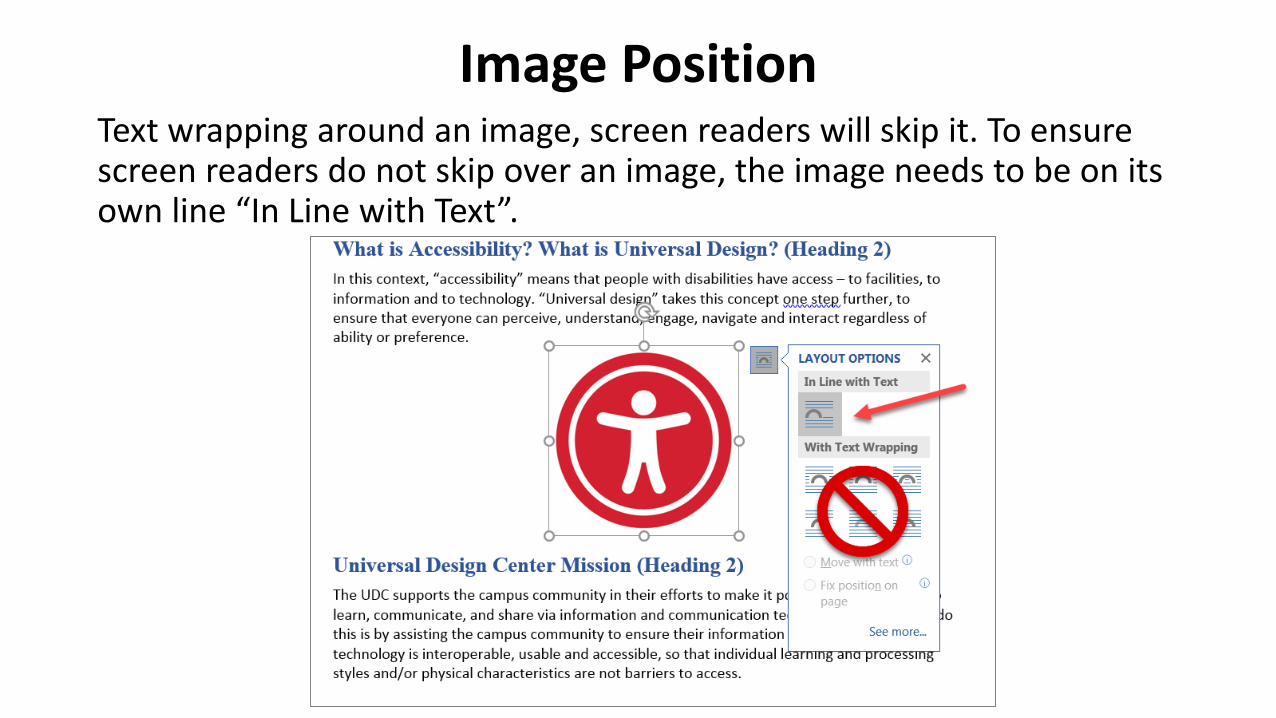
Image PositionText wrapping around an image, screen readers will skip it. To ensure screen readers do not skip over an image, the image needs to be on its own line “In Line with Text”.
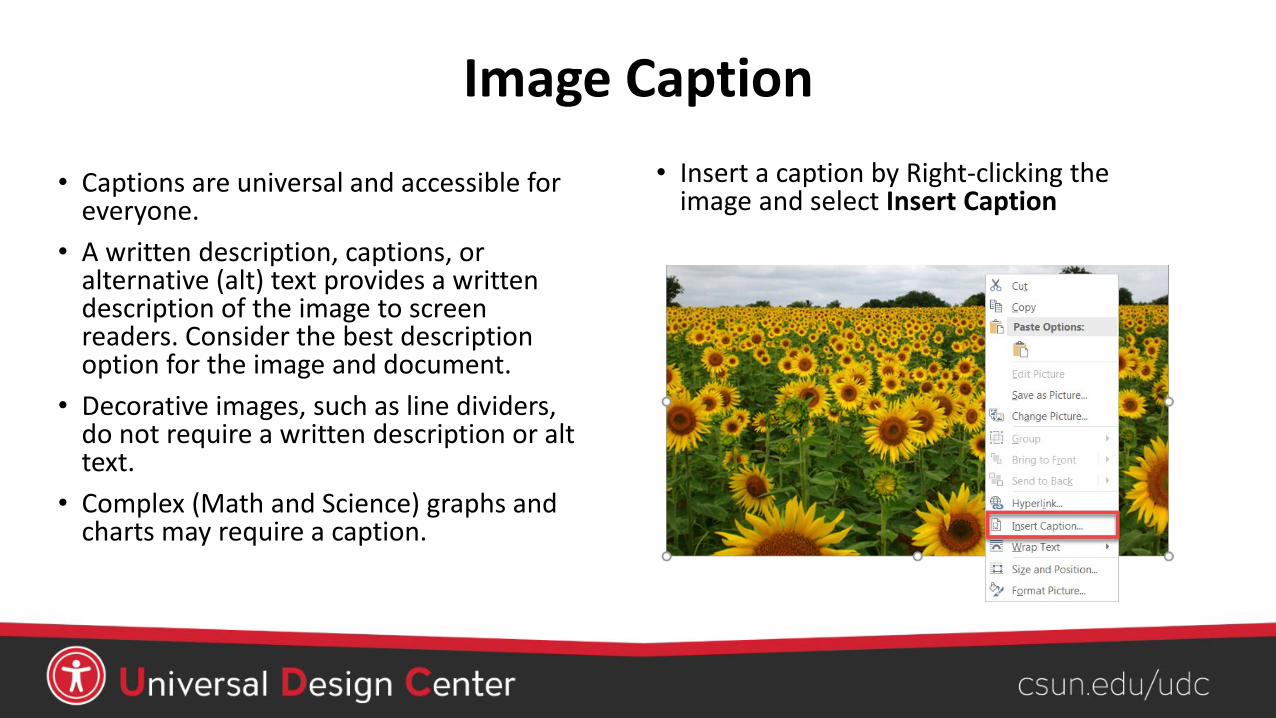
Image Caption
• Captions are universal and accessible for everyone.
• A written description, captions, or alternative (alt) text provides a written description of the image to screen readers. Consider the best description option for the image and document.
• Decorative images, such as line dividers, do not require a written description or alt text.
• Complex (Math and Science) graphs and charts may require a caption.
• Insert a caption by Right-clicking the image and select Insert Caption
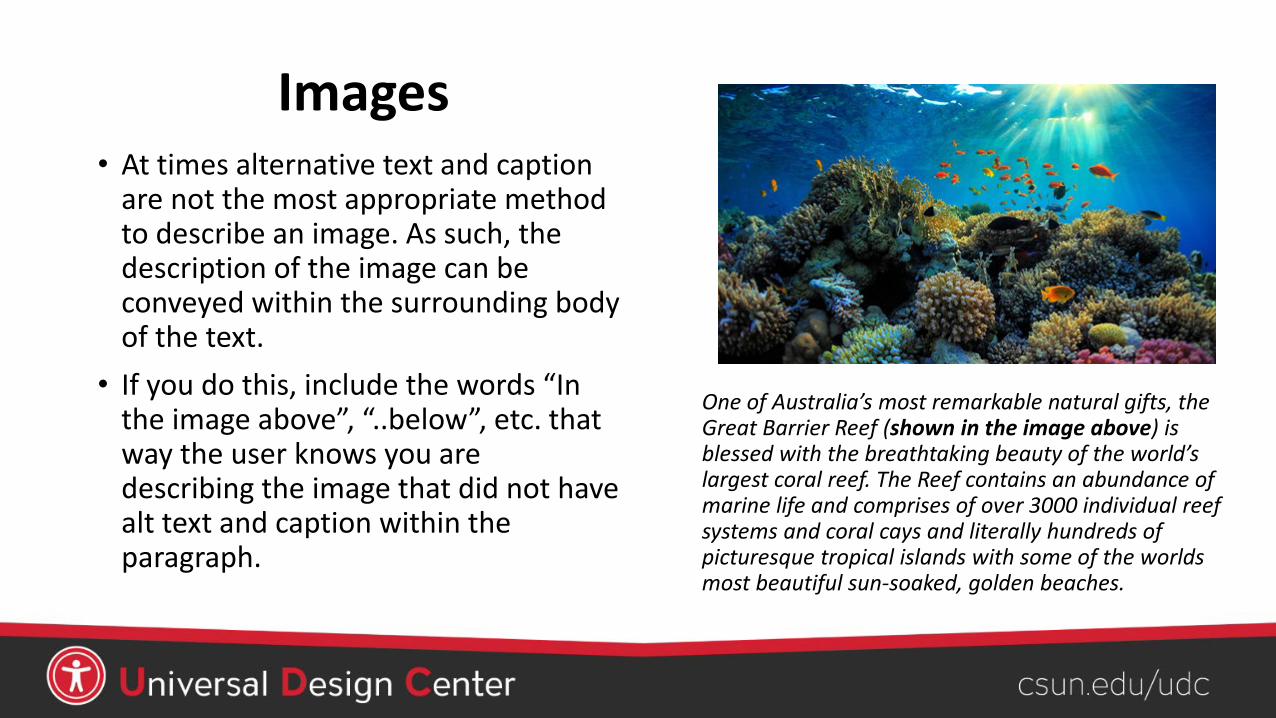
Images.• At times alternative text and caption
are not the most appropriate method to describe an image. As such, the description of the image can be conveyed within the surrounding body of the text.
• If you do this, include the words “In the image above”, “..below”, etc. that way the user knows you are describing the image that did not have alt text and caption within the paragraph.
One of Australia’s most remarkable natural gifts, the Great Barrier Reef (shown in the image above) is blessed with the breathtaking beauty of the world’s largest coral reef. The Reef contains an abundance of marine life and comprises of over 3000 individual reef systems and coral cays and literally hundreds of picturesque tropical islands with some of the worlds most beautiful sun-soaked, golden beaches.

Art or SmartArt ShapesOften shapes are used behind text to create emphasis. Most screen readers will not identify shapes, and you will often split up your text in awkward ways to make it fit within the shape.
The example below exemplifies what not to do (notice how the reading order is impacted when a shape is moved to the background in order for the text to show on top)
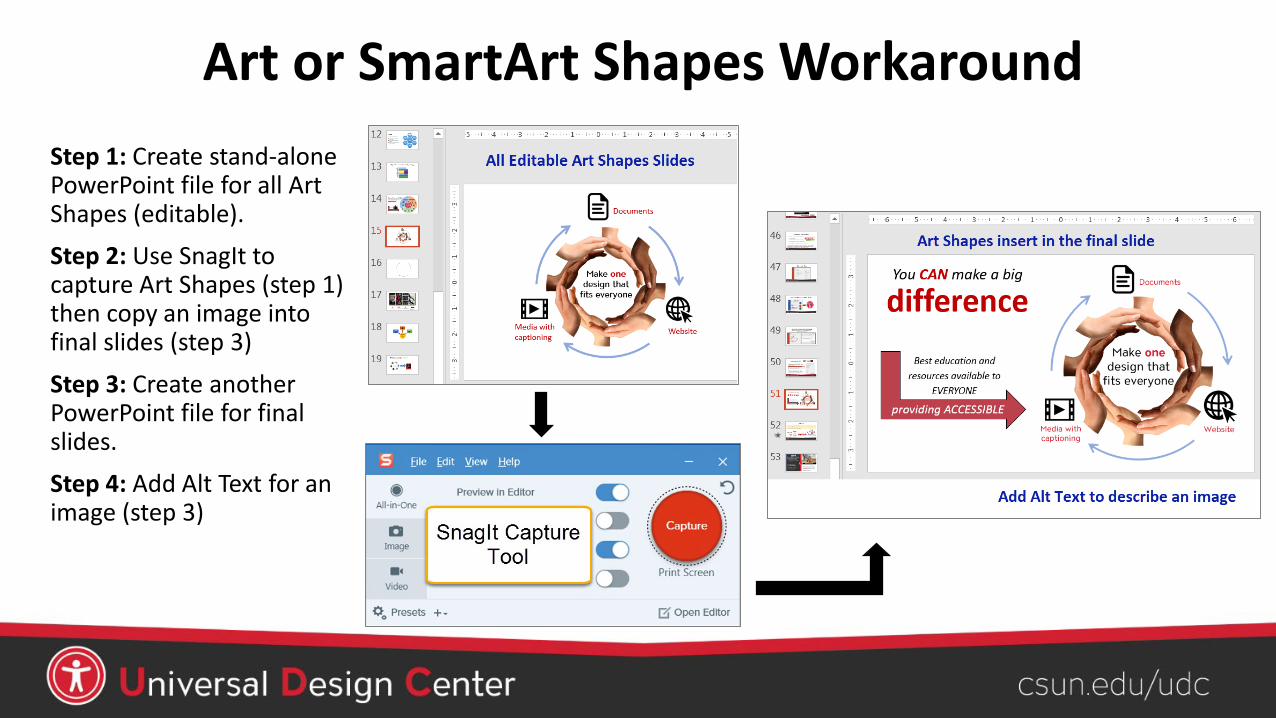
Art or SmartArt Shapes WorkaroundStep 1: Create stand-alone PowerPoint file for all Art Shapes (editable).Step 2: Use SnagIt to capture Art Shapes (step 1) then copy an image into final slides (step 3)
Step 3: Create another PowerPoint file for final slides.Step 4: Add Alt Text for an image (step 3)

Multimedia Captioning, 1 of 2
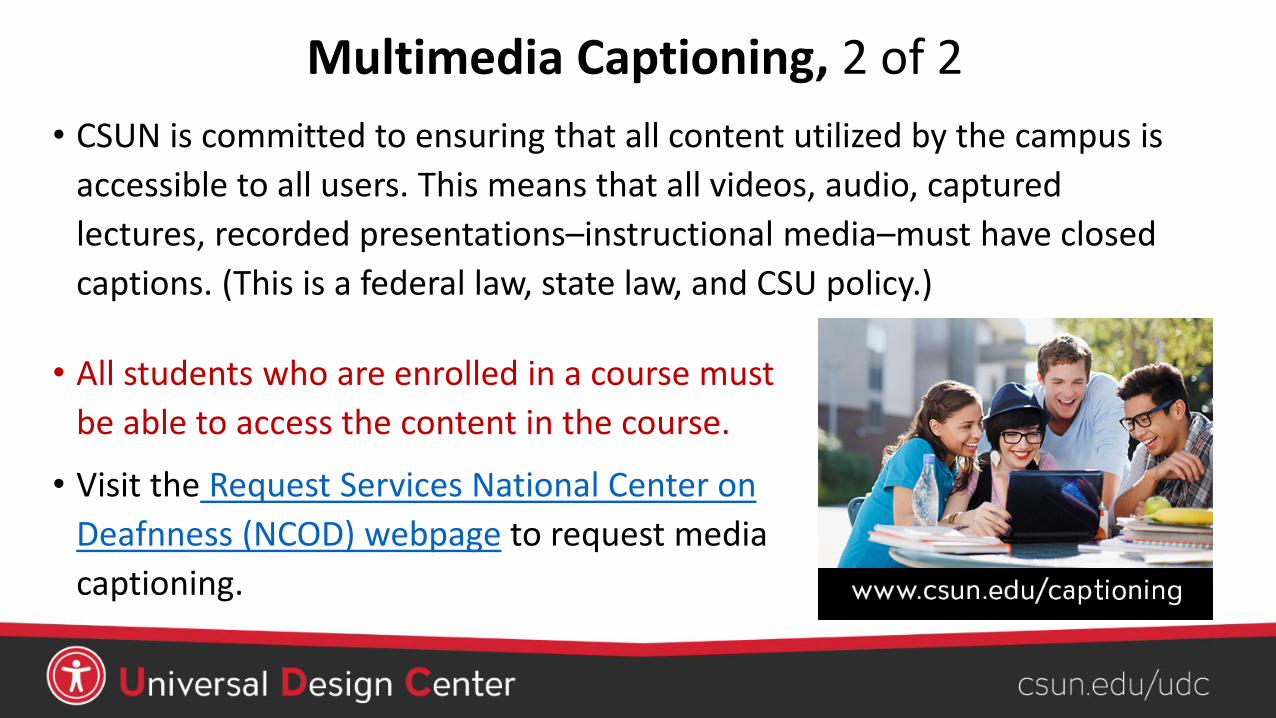
Multimedia Captioning, 2 of 2• CSUN is committed to ensuring that all content utilized by the campus is
accessible to all users. This means that all videos, audio, captured lectures, recorded presentations–instructional media–must have closed captions. (This is a federal law, state law, and CSU policy.)
• All students who are enrolled in a course must be able to access the content in the course.
• Visit the Request Services National Center on Deafnness (NCOD) webpage to request media captioning.

Insert Online Video
Q: Can I add accessible videos into word documents?
A: Embedded videos are not accessible to screen reader users or users navigating with a keyboard or some other navigation device other than a mouse. To make it accessible, put the link of the video underneath the video itself. Also add Alt text to the video.
Apple-Accessibility-Sady video
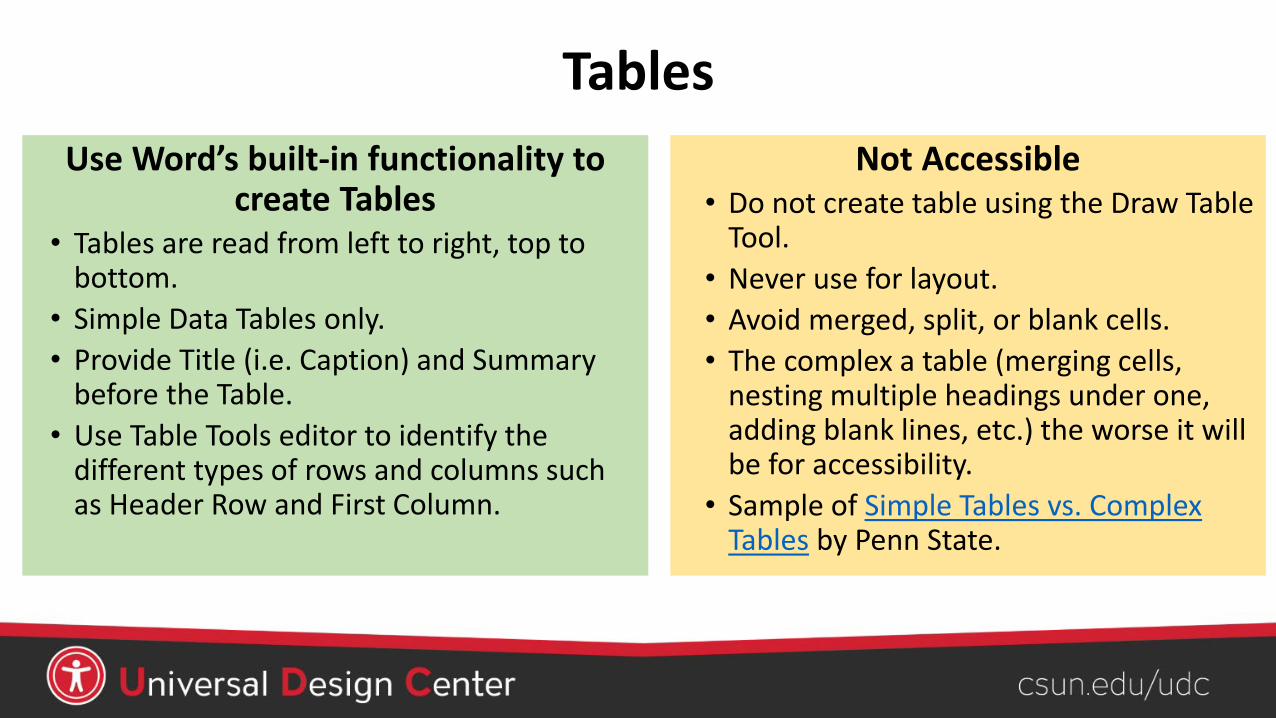
TablesUse Word’s built-in functionality to
create Tables• Tables are read from left to right, top to
bottom.• Simple Data Tables only. • Provide Title (i.e. Caption) and Summary
before the Table.• Use Table Tools editor to identify the
different types of rows and columns such as Header Row and First Column.
Not Accessible• Do not create table using the Draw Table
Tool.• Never use for layout.• Avoid merged, split, or blank cells. • The complex a table (merging cells,
nesting multiple headings under one, adding blank lines, etc.) the worse it will be for accessibility.
• Sample of Simple Tables vs. Complex Tables by Penn State.

Insert - Table• Use tables to organize data not
format information
• Create table headings
• Include table captions or brief description
• Select Insert tab, then select Table• Select the number of rows and
columns by highlighting the boxes on the grid.
• Type in the table data
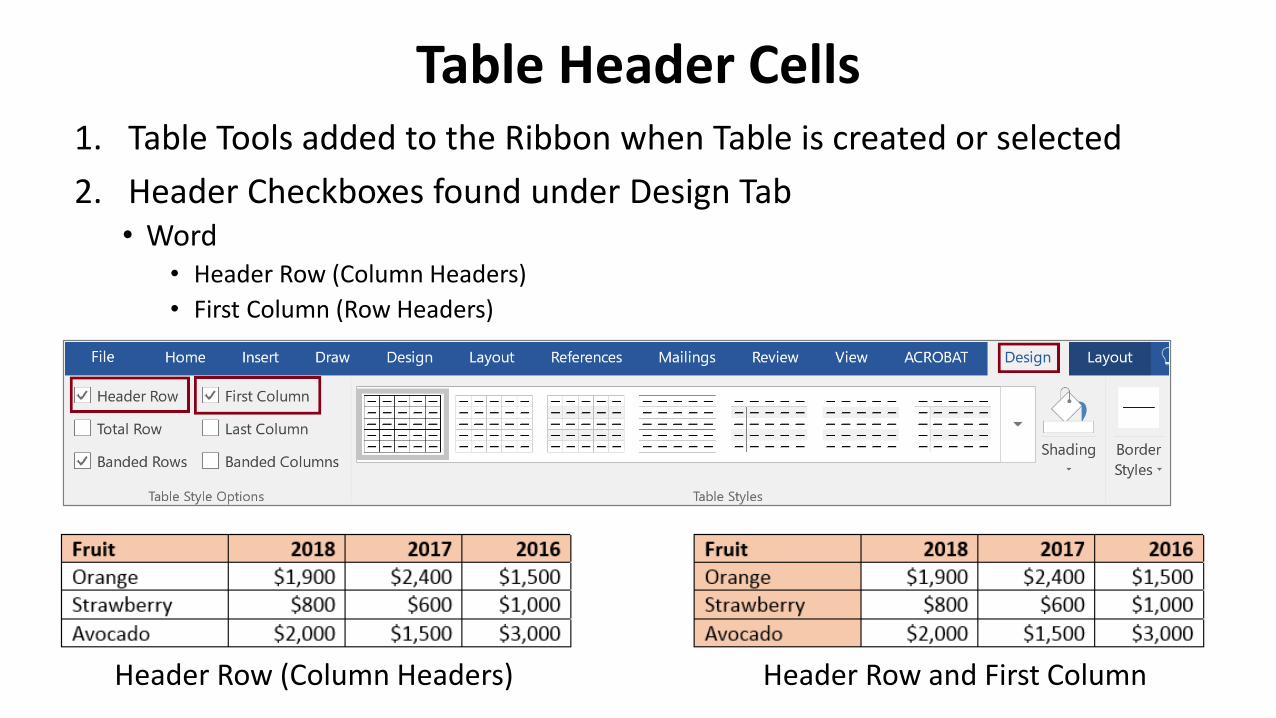
Table Header Cells
Header Row and First Column
1. Table Tools added to the Ribbon when Table is created or selected2. Header Checkboxes found under Design Tab
• Word • Header Row (Column Headers) • First Column (Row Headers)
Header Row (Column Headers)
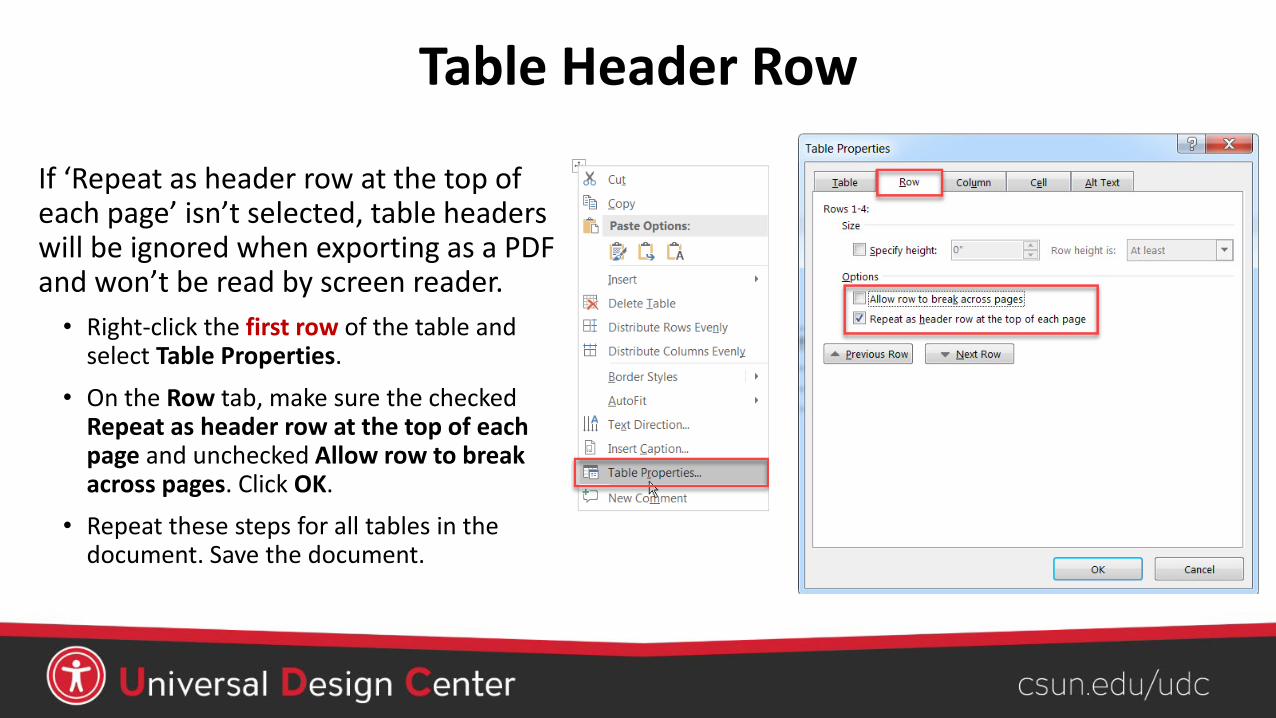
Table Header Row
If ‘Repeat as header row at the top of each page’ isn’t selected, table headers will be ignored when exporting as a PDF and won’t be read by screen reader.
• Right-click the first row of the table and select Table Properties.
• On the Row tab, make sure the checked Repeat as header row at the top of each page and unchecked Allow row to break across pages. Click OK.
• Repeat these steps for all tables in the document. Save the document.
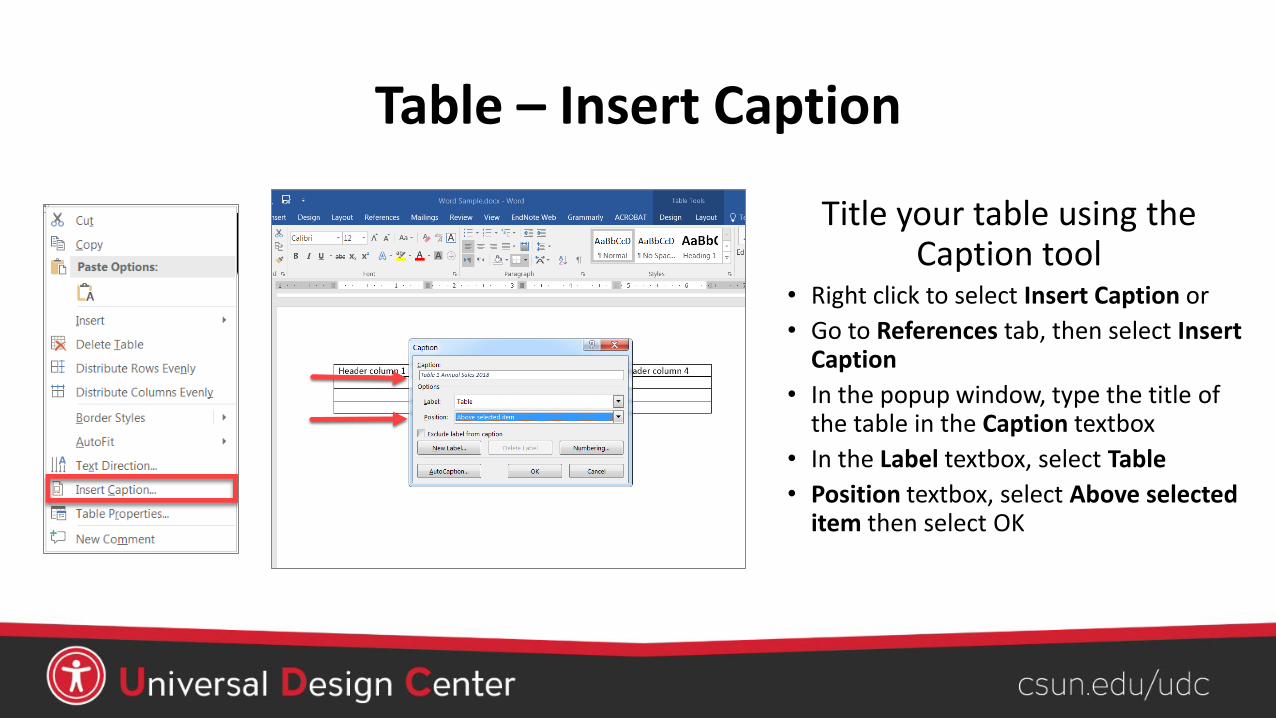
Table – Insert Caption
Title your table using the Caption tool
• Right click to select Insert Caption or • Go to References tab, then select Insert
Caption• In the popup window, type the title of
the table in the Caption textbox• In the Label textbox, select Table• Position textbox, select Above selected
item then select OK

Table – Alt Text
Add Alt text description to Table• Right click on the Table and select
Table Properties• In the popup window, select Alt Text
tab• Type in a description of your table

Alternative way without using Table (no header row)
Example: to create three columns in 1 line, set Tab Stops:1. Click View2. Select Ruler to set indents3. Set Tab Stops (to set a left tab at 2.5”, click the 2.5” mark on the ruler)
Avoid multiple tabs key, space bar, and blank lines, someone with assistive technology like screen readers will listen excess spaces and lines.
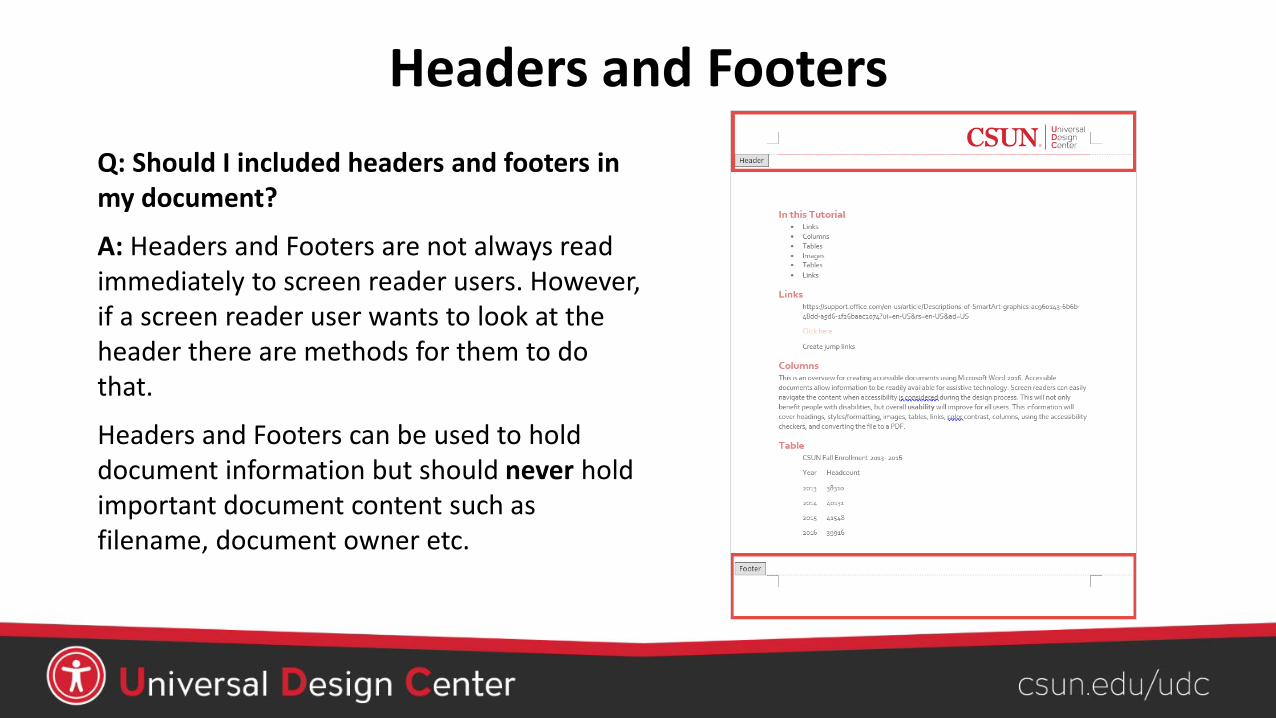
Headers and FootersQ: Should I included headers and footers in my document?
A: Headers and Footers are not always read immediately to screen reader users. However, if a screen reader user wants to look at the header there are methods for them to do that.
Headers and Footers can be used to hold document information but should never hold important document content such as filename, document owner etc.

Headers and Footers…
• Insert tab• Select Header or Footer• Insert text or other document
information• Always include page numbers in
the footer with the “Normal” style
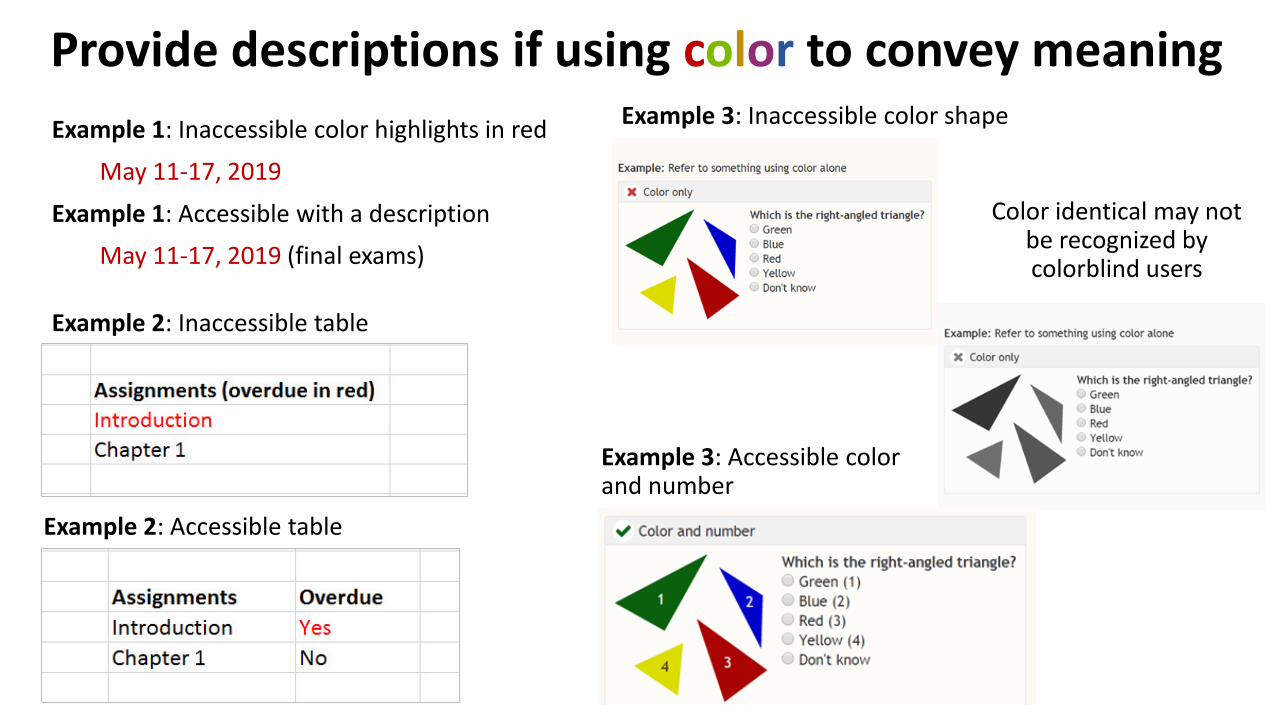
Provide descriptions if using color to convey meaningExample 1: Inaccessible color highlights in red
May 11-17, 2019
Example 1: Accessible with a descriptionMay 11-17, 2019 (final exams)
Example 2: Inaccessible table
Example 2: Accessible table
Example 3: Inaccessible color shape
Color identical may not be recognized by colorblind users
Example 3: Accessible color and number
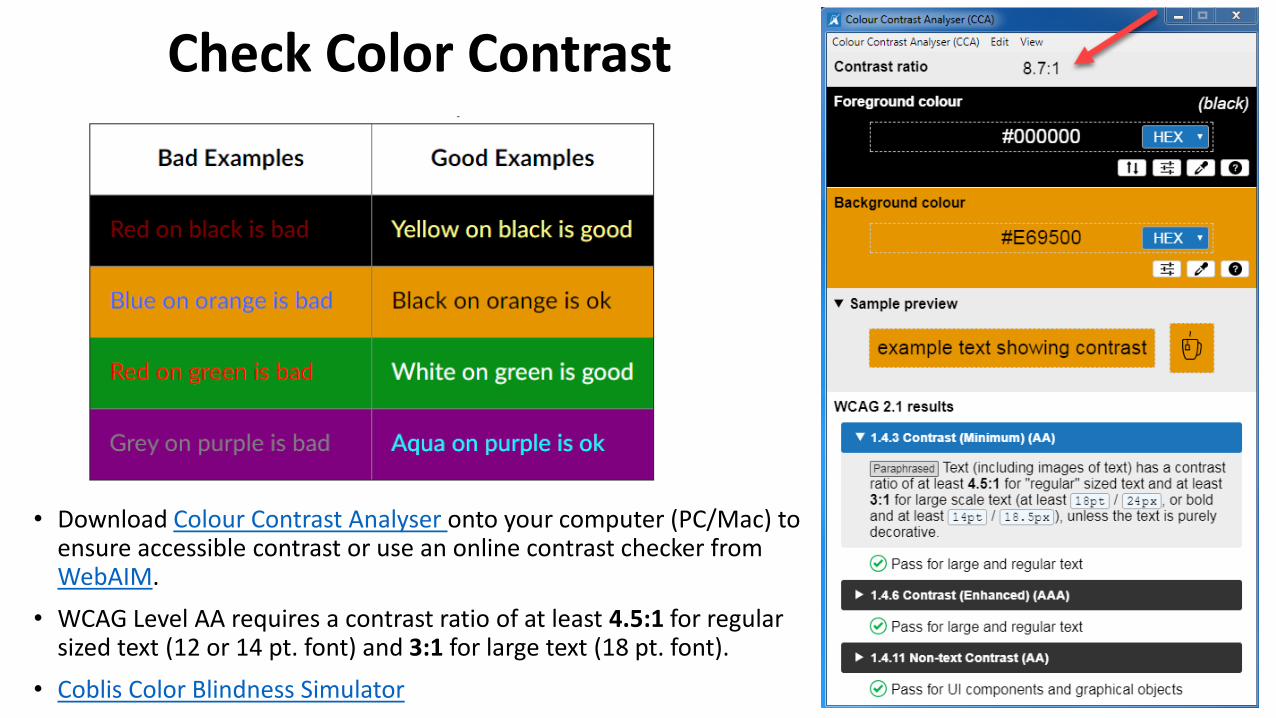
Check Color Contrast
• Download Colour Contrast Analyser onto your computer (PC/Mac) to ensure accessible contrast or use an online contrast checker from WebAIM.
• WCAG Level AA requires a contrast ratio of at least 4.5:1 for regular sized text (12 or 14 pt. font) and 3:1 for large text (18 pt. font).
• Coblis Color Blindness Simulator
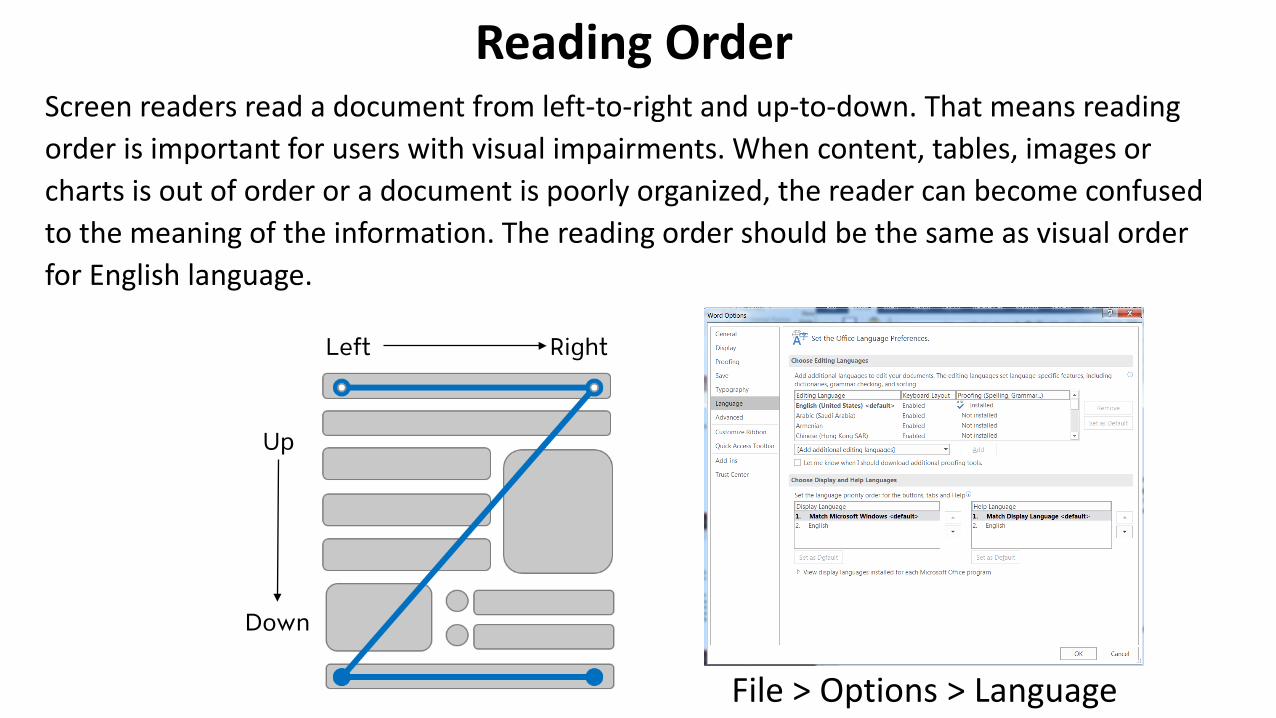
Reading OrderScreen readers read a document from left-to-right and up-to-down. That means reading order is important for users with visual impairments. When content, tables, images or charts is out of order or a document is poorly organized, the reader can become confused to the meaning of the information. The reading order should be the same as visual order for English language.
Left Right
Up
Down
File > Options > Language

File – Info - Title
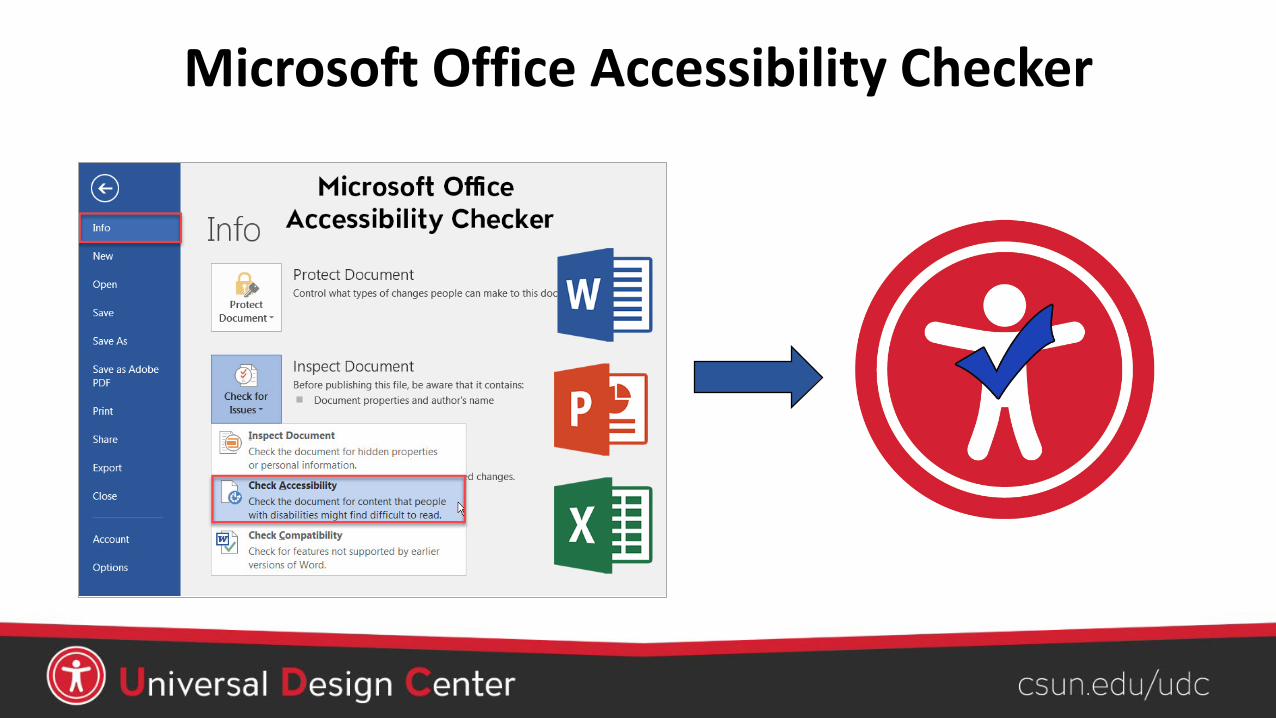
Microsoft Office Accessibility Checker
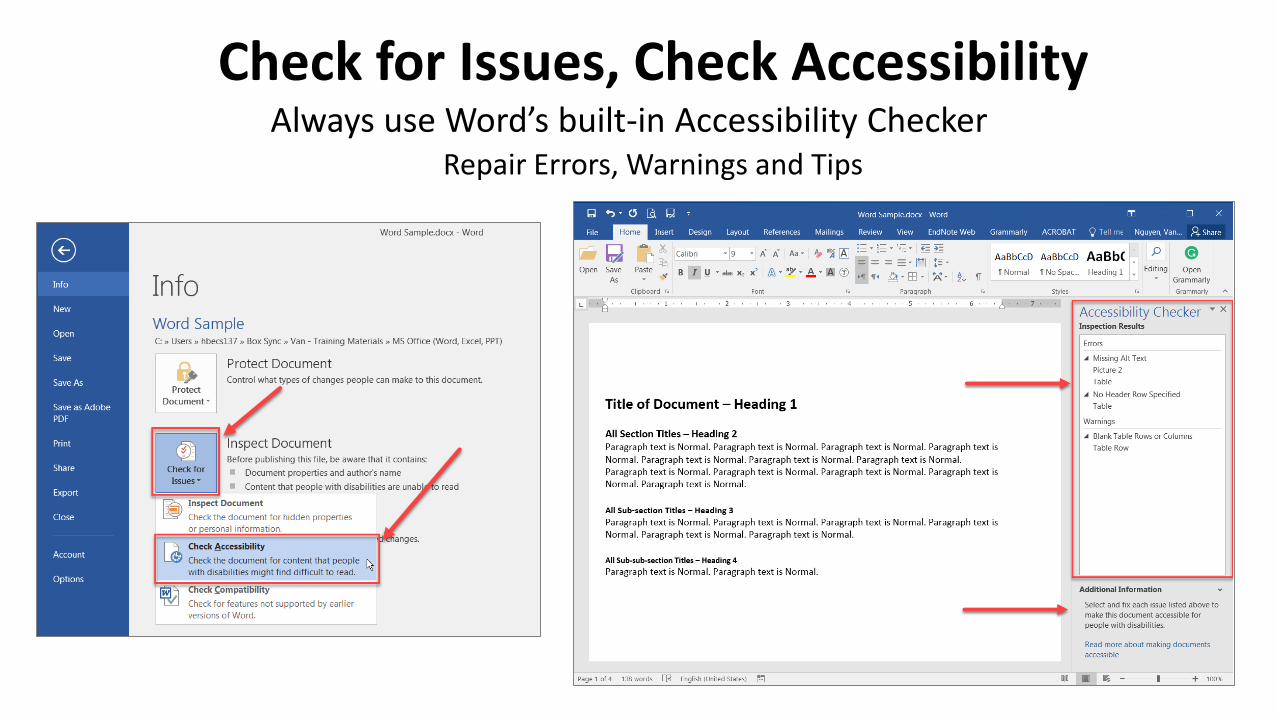
Check for Issues, Check AccessibilityAlways use Word’s built-in Accessibility Checker
Repair Errors, Warnings and Tips

Converting to PDFOption 1: Office Save As
Option 1: Under More Options, open Options and make sure Headings are used for Bookmarks is checked.
Option 2: Save As Adobe PDF
Option 2: Under Options, PDF Options and make sure Convert Word Headings to Bookmarks is checked.

Print to PDF
Print to PDF utilities are never the best way to make a PDF accessible from any software because that method usually doesn’t contain either live text, a logical reading order, or tags structure for digital documents. Use either Save As PDF or Export to PDF.
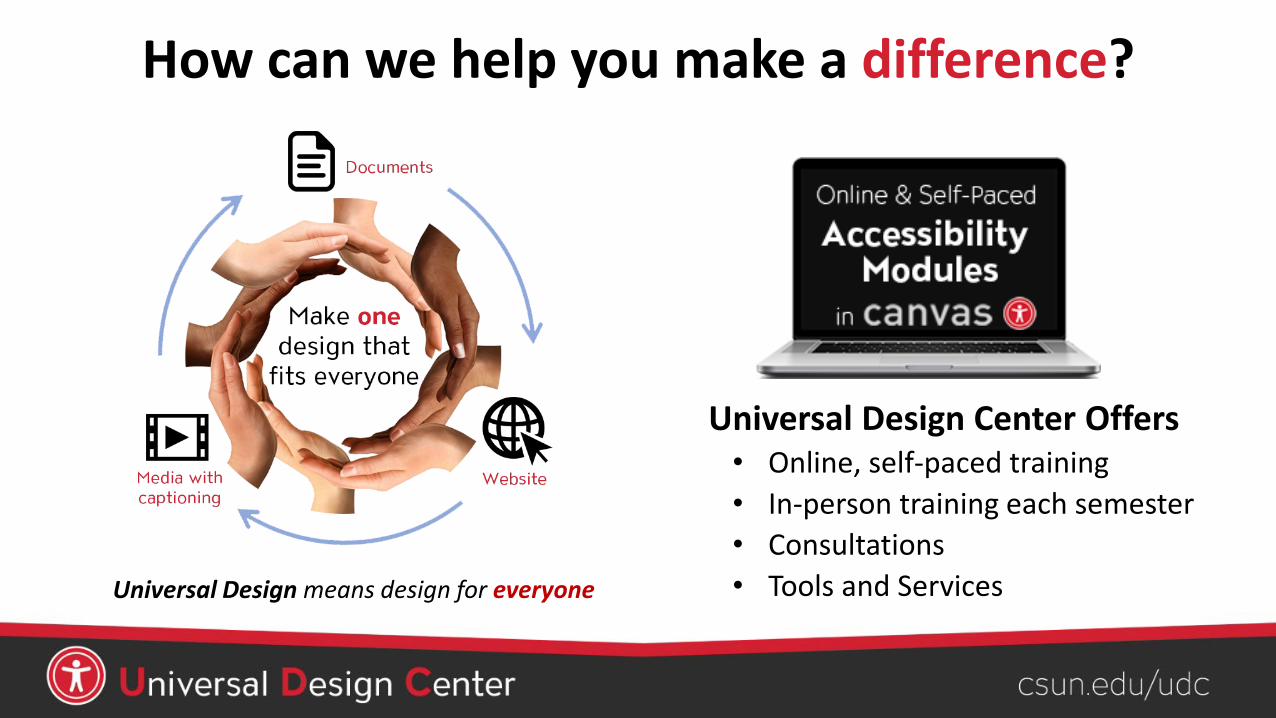
How can we help you make a difference?
Universal Design means design for everyone
Universal Design Center Offers• Online, self-paced training• In-person training each semester• Consultations• Tools and Services