employee login manual - e-salary::login page::esalaryhry.nic.in/documents/payee login manual.pdf ·...
TRANSCRIPT
EMPLOYEE LOGIN MANUAL
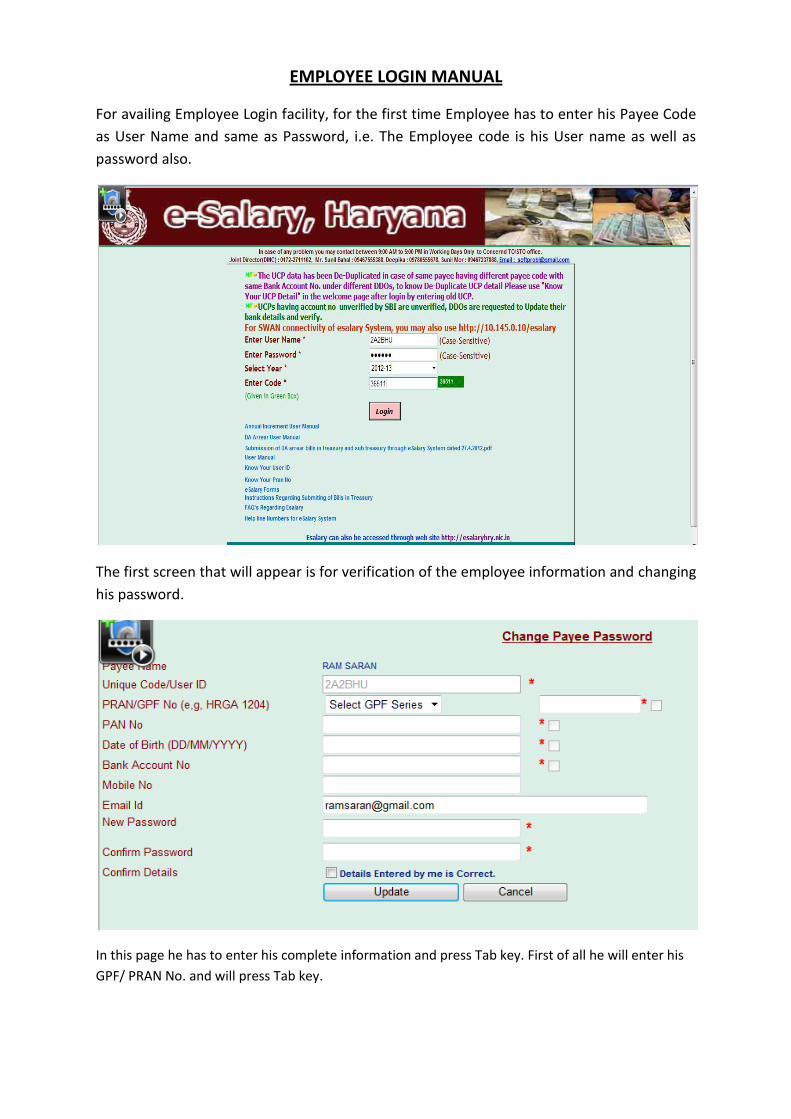
For availing Employee Login facility, for the first time Employee has to enter his Payee Code
as User Name and same as Password, i.e. The Employee code is his User name as well as
password also.
The first screen that will appear is for verification of the employee information and changing
his password.
In this page he has to enter his complete information and press Tab key. First of all he will enter his
GPF/ PRAN No. and will press Tab key.
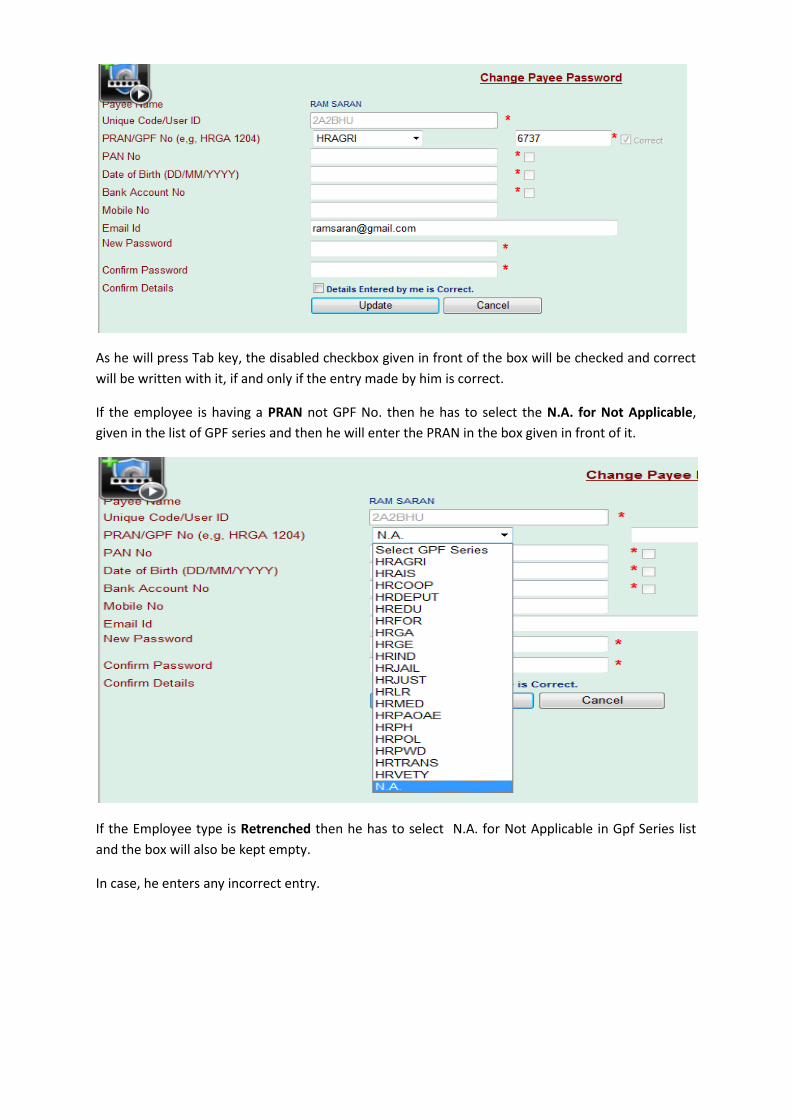
As he will press Tab key, the disabled checkbox given in front of the box will be checked and correct
will be written with it, if and only if the entry made by him is correct.
If the employee is having a PRAN not GPF No. then he has to select the N.A. for Not Applicable,
given in the list of GPF series and then he will enter the PRAN in the box given in front of it.
If the Employee type is Retrenched then he has to select N.A. for Not Applicable in Gpf Series list
and the box will also be kept empty.
In case, he enters any incorrect entry.
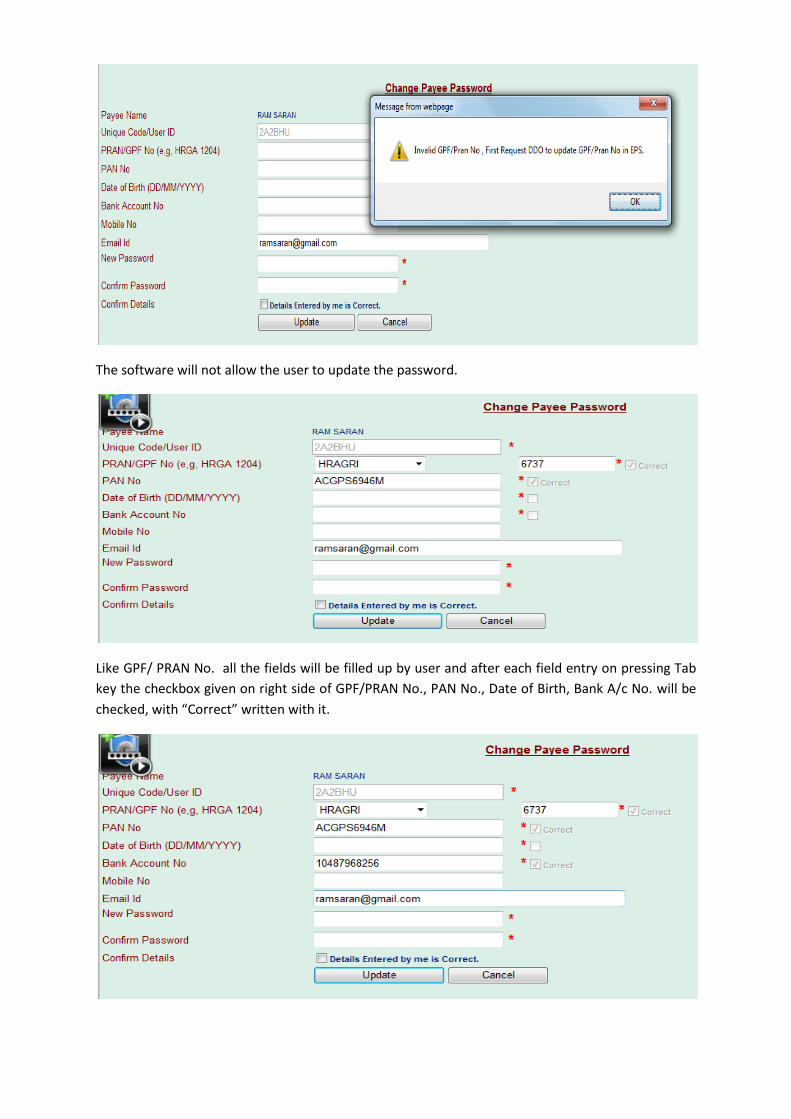
The software will not allow the user to update the password.
Like GPF/ PRAN No. all the fields will be filled up by user and after each field entry on pressing Tab
key the checkbox given on right side of GPF/PRAN No., PAN No., Date of Birth, Bank A/c No. will be
checked, with “Correct” written with it.
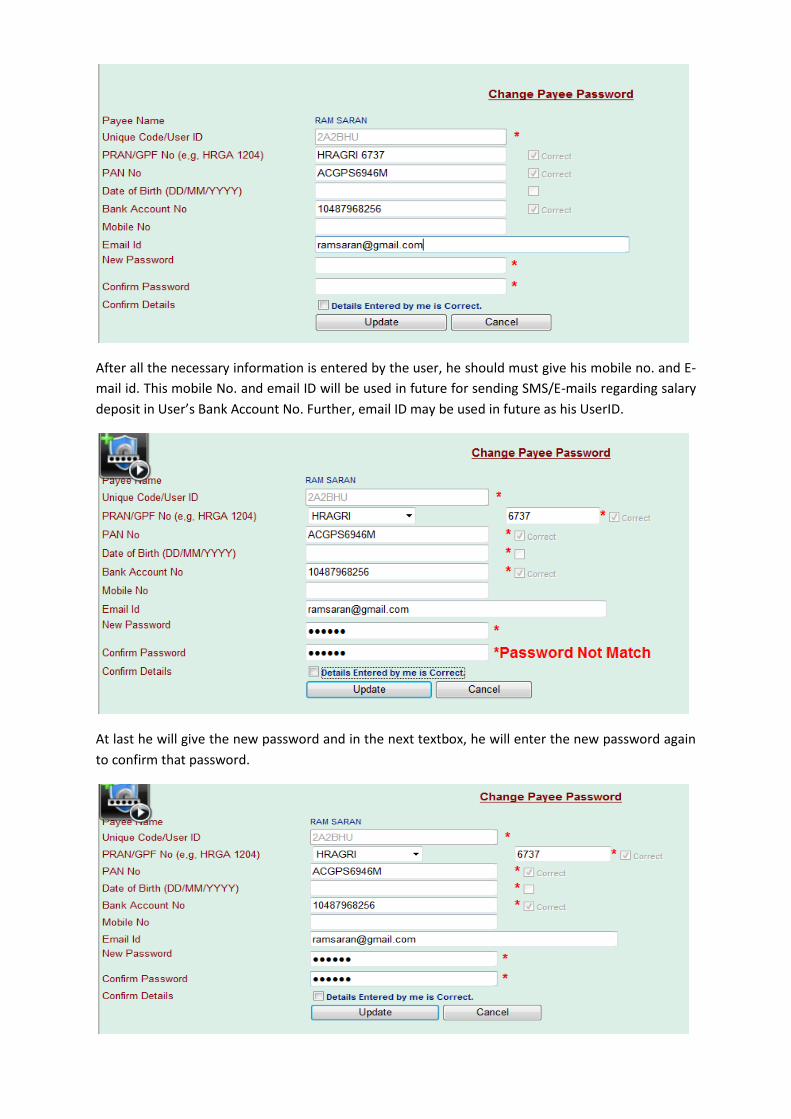
After all the necessary information is entered by the user, he should must give his mobile no. and E-
mail id. This mobile No. and email ID will be used in future for sending SMS/E-mails regarding salary
deposit in User’s Bank Account No. Further, email ID may be used in future as his UserID.
At last he will give the new password and in the next textbox, he will enter the new password again
to confirm that password.
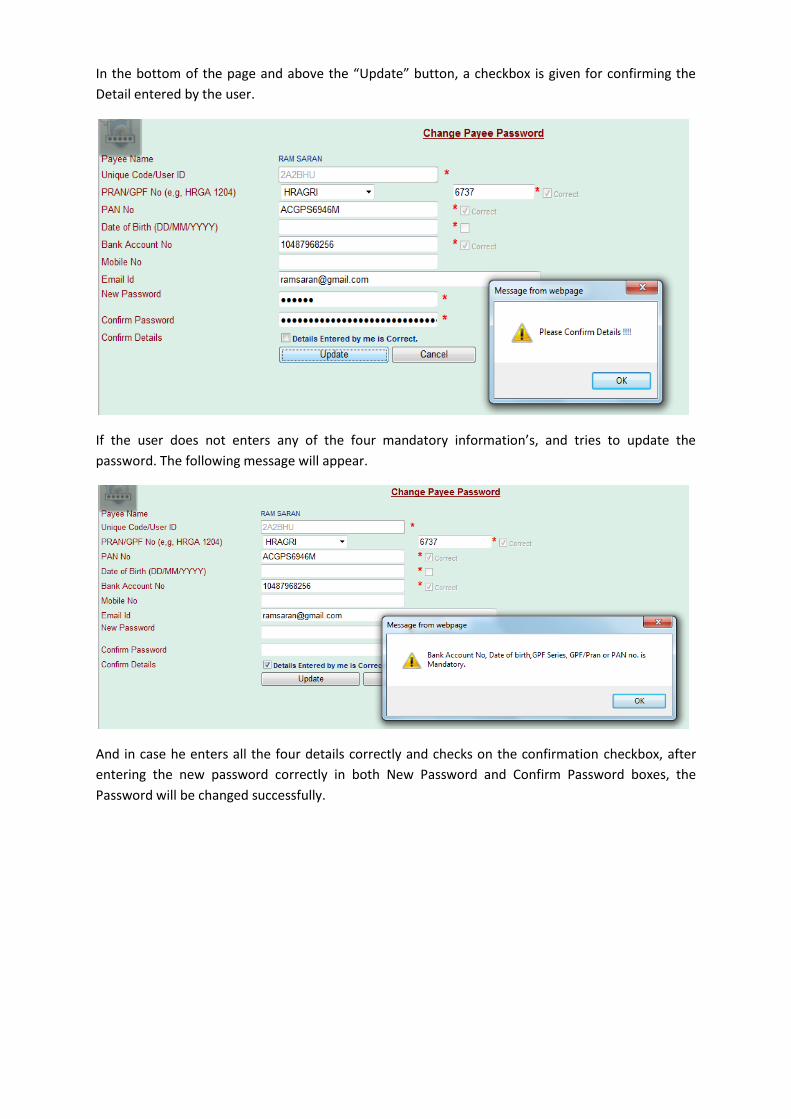
In the bottom of the page and above the “Update” button, a checkbox is given for confirming the
Detail entered by the user.
If the user does not enters any of the four mandatory information’s, and tries to update the
password. The following message will appear.
And in case he enters all the four details correctly and checks on the confirmation checkbox, after
entering the new password correctly in both New Password and Confirm Password boxes, the
Password will be changed successfully.
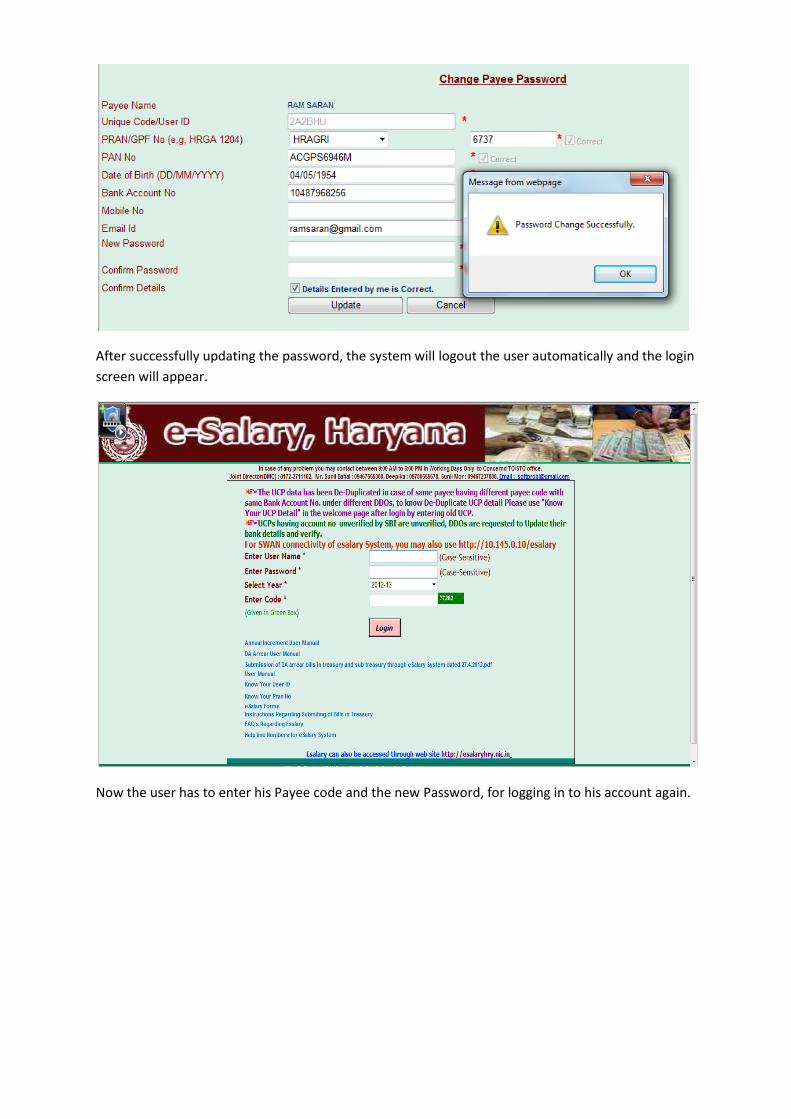
After successfully updating the password, the system will logout the user automatically and the login
screen will appear.
Now the user has to enter his Payee code and the new Password, for logging in to his account again.
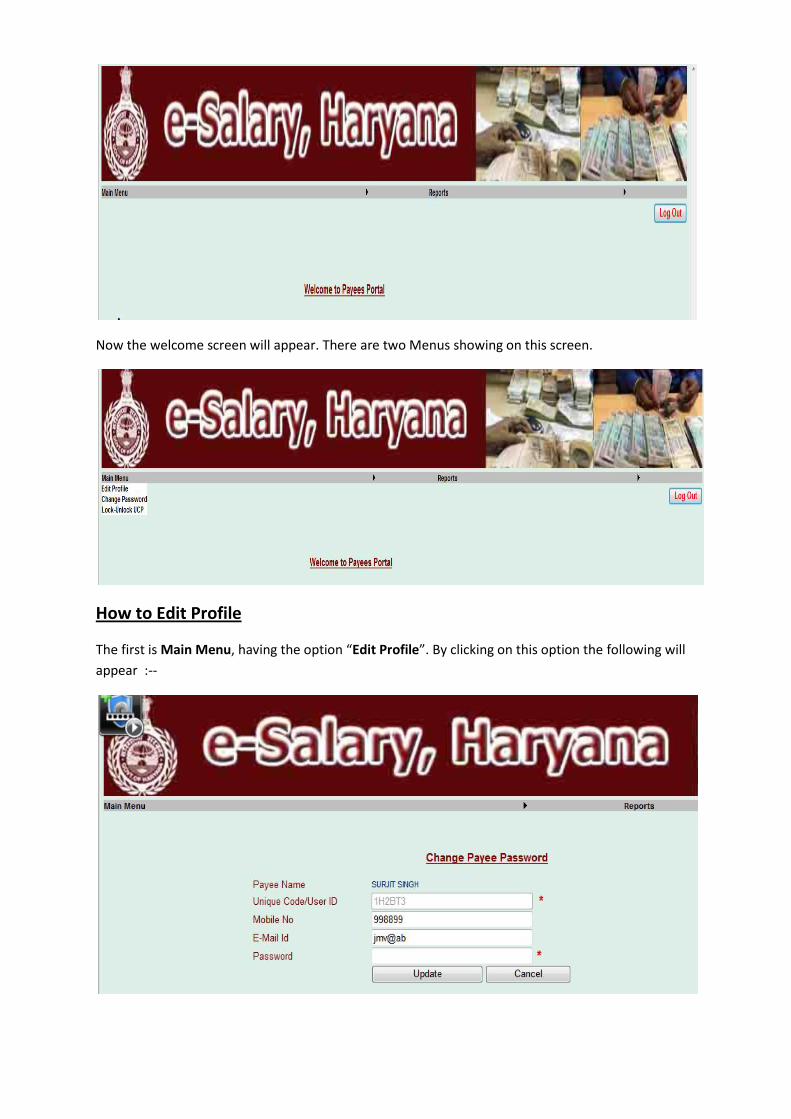
Now the welcome screen will appear. There are two Menus showing on this screen.
How to Edit Profile
The first is Main Menu, having the option “Edit Profile”. By clicking on this option the following will
appear :--
In this page He will see his name, Unique Code or we can say User ID, Mobile No., Email-ID. But for
updating Mobile No. and Email ID he has to enter his Password, then only he will be able to update
this page.
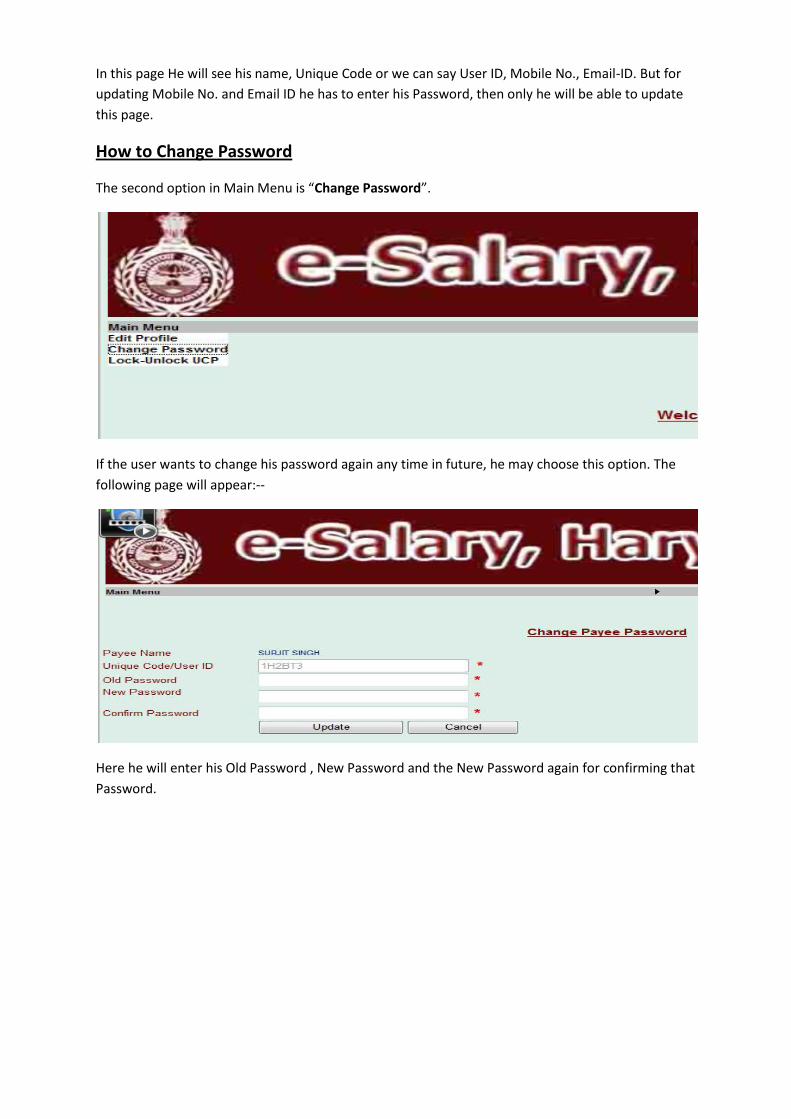
How to Change Password
The second option in Main Menu is “Change Password”.
If the user wants to change his password again any time in future, he may choose this option. The
following page will appear:--
Here he will enter his Old Password , New Password and the New Password again for confirming that
Password.
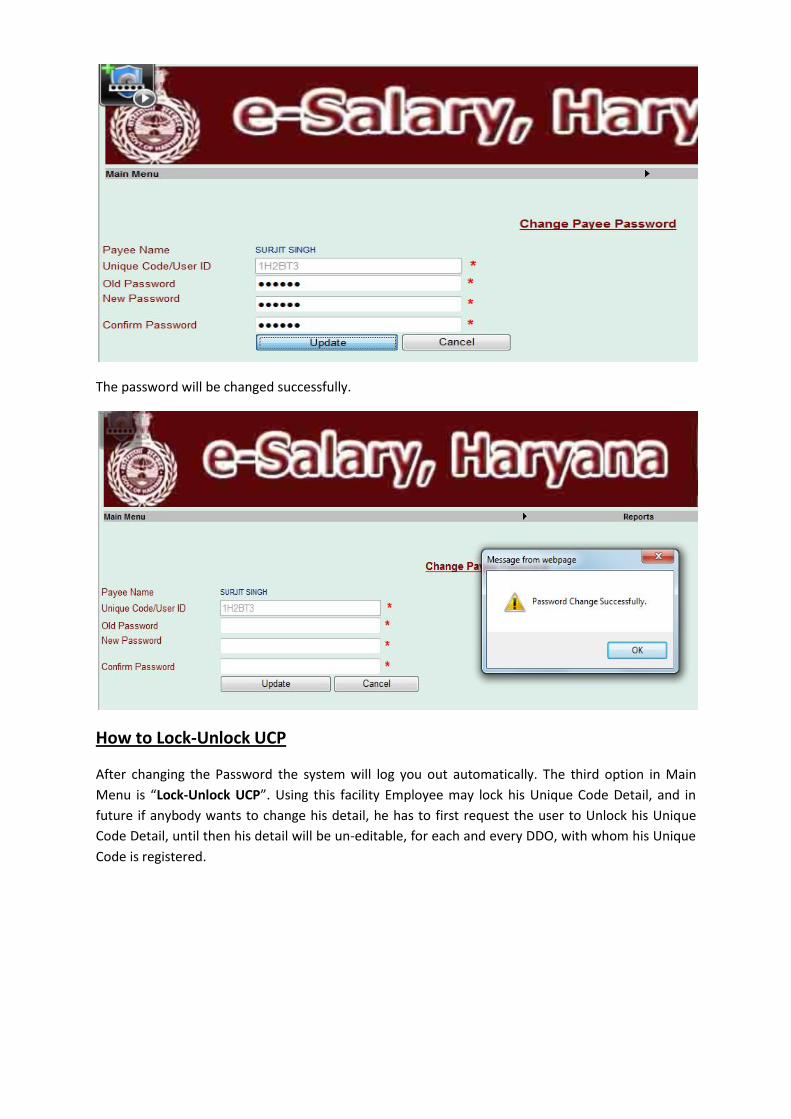
The password will be changed successfully.
How to Lock-Unlock UCP
After changing the Password the system will log you out automatically. The third option in Main
Menu is “Lock-Unlock UCP”. Using this facility Employee may lock his Unique Code Detail, and in
future if anybody wants to change his detail, he has to first request the user to Unlock his Unique
Code Detail, until then his detail will be un-editable, for each and every DDO, with whom his Unique
Code is registered.

If the complete information is correct, then Employee may lock his Unique Code Detail by clicking on
the button given for this purpose.
By clicking on Lock button, his detail will be locked and this will not be editable by DDO Login unless
the Employee Unlocks this detail from his login. If any Employee’s detail is already locked the he will
see Unlock button on this page. As, in case of this Employee, now, if the user selects the same option
again from Main Menu.
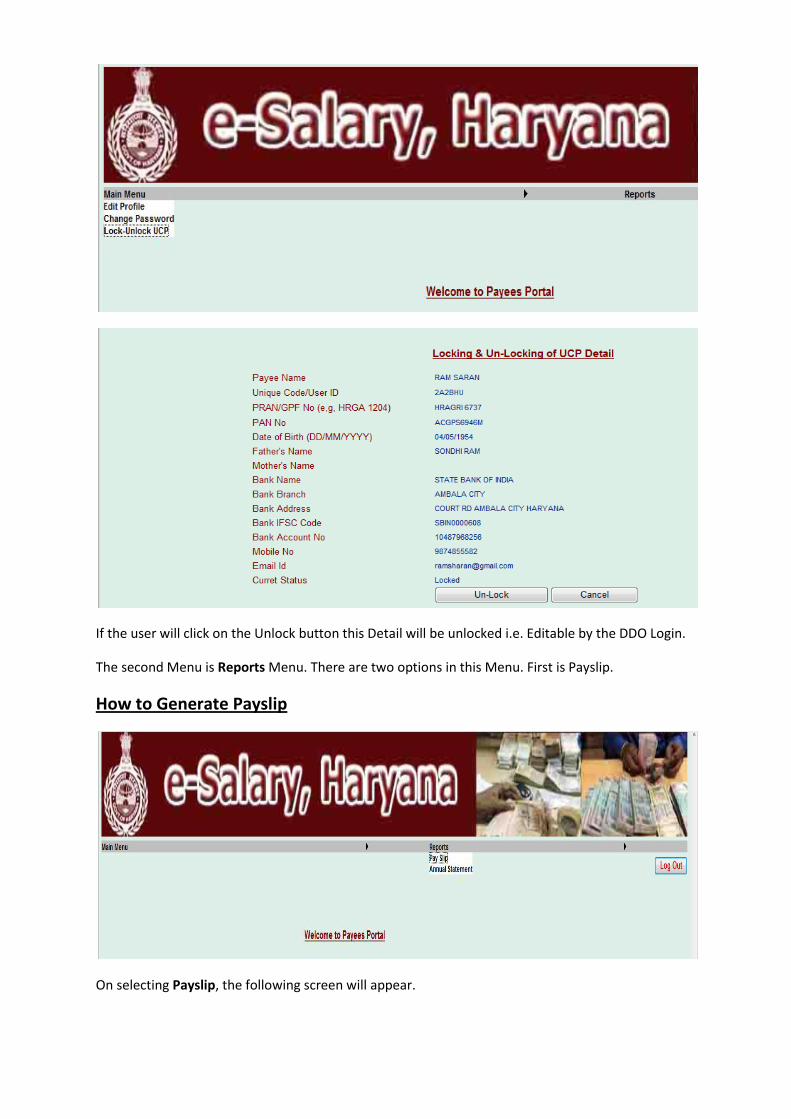
If the user will click on the Unlock button this Detail will be unlocked i.e. Editable by the DDO Login.
The second Menu is Reports Menu. There are two options in this Menu. First is Payslip.
How to Generate Payslip
On selecting Payslip, the following screen will appear.
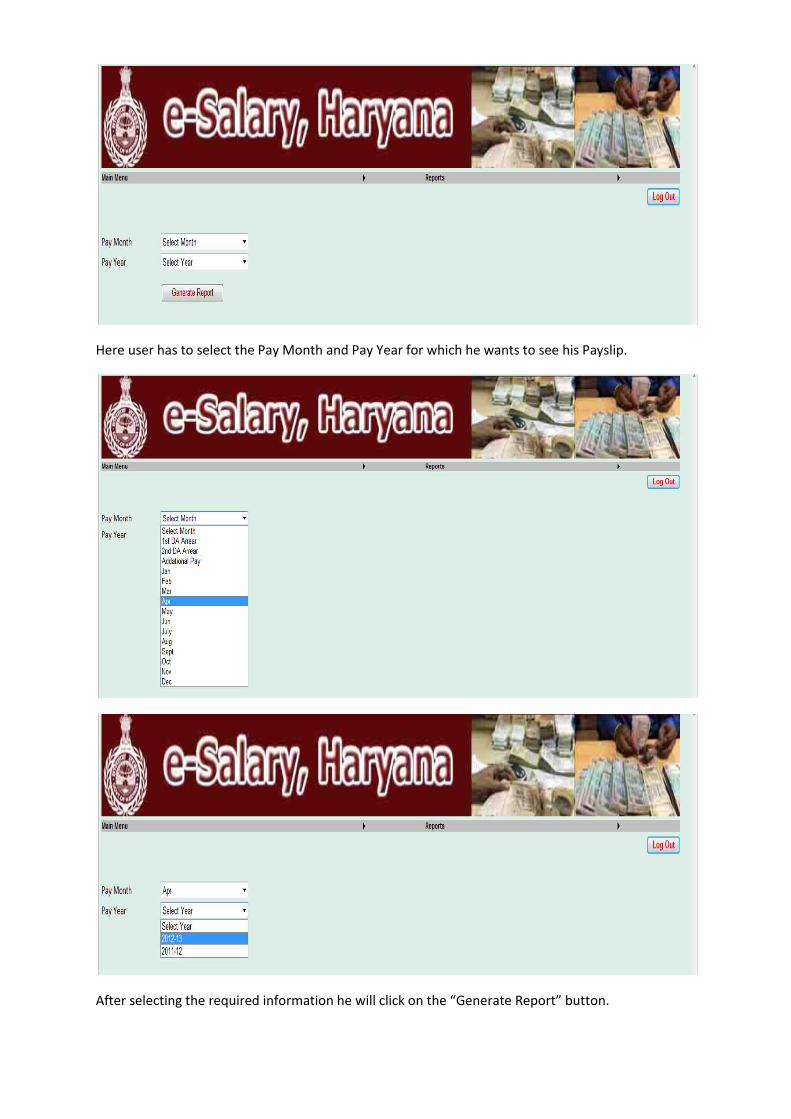
Here user has to select the Pay Month and Pay Year for which he wants to see his Payslip.
After selecting the required information he will click on the “Generate Report” button.
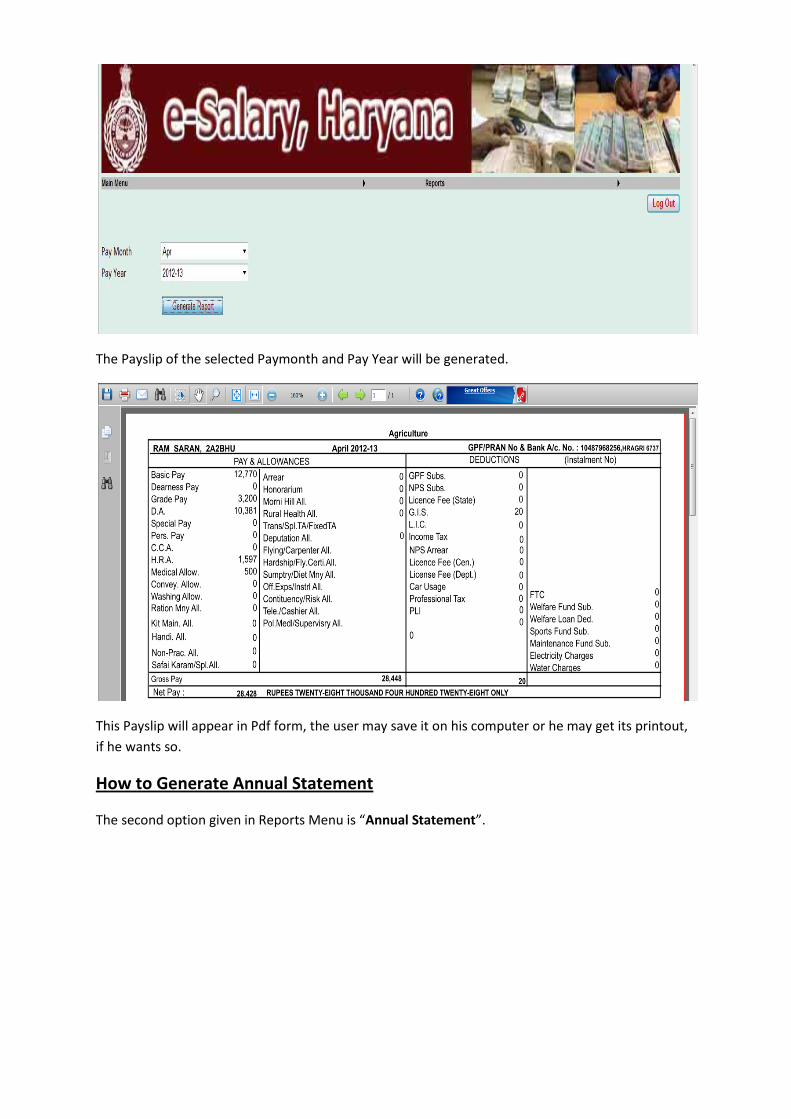
The Payslip of the selected Paymonth and Pay Year will be generated.
This Payslip will appear in Pdf form, the user may save it on his computer or he may get its printout,
if he wants so.
How to Generate Annual Statement
The second option given in Reports Menu is “Annual Statement”.
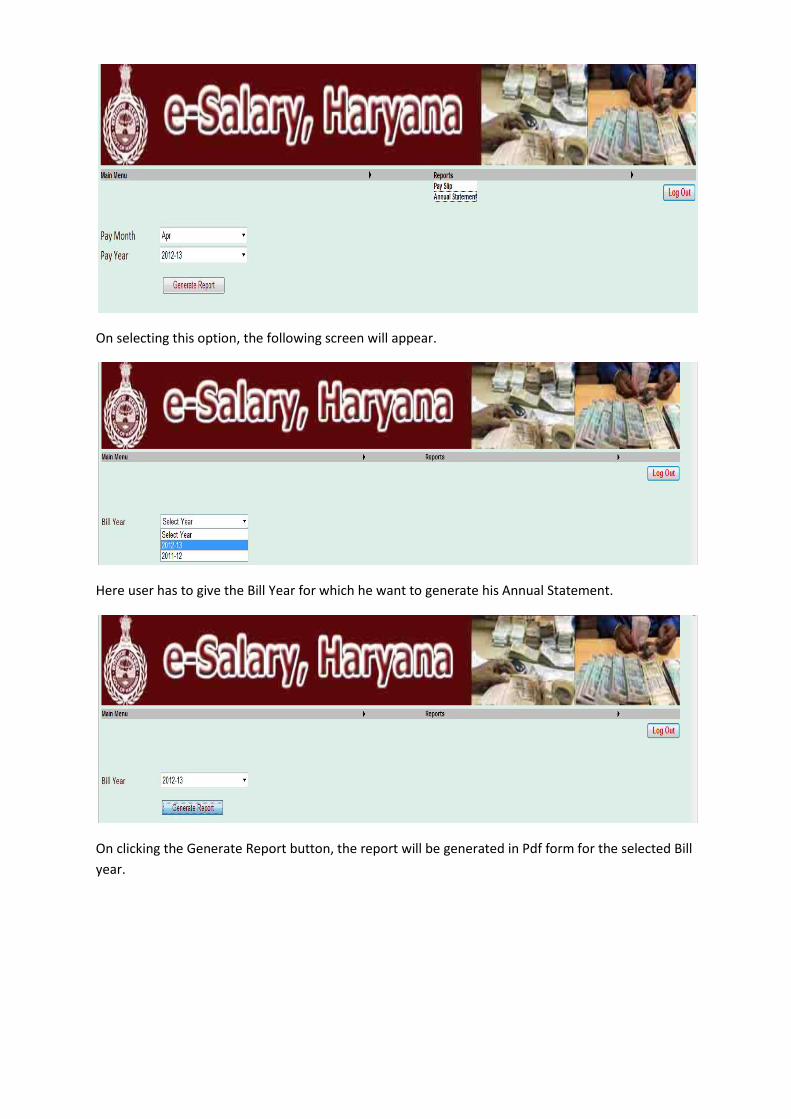
On selecting this option, the following screen will appear.
Here user has to give the Bill Year for which he want to generate his Annual Statement.
On clicking the Generate Report button, the report will be generated in Pdf form for the selected Bill
year.
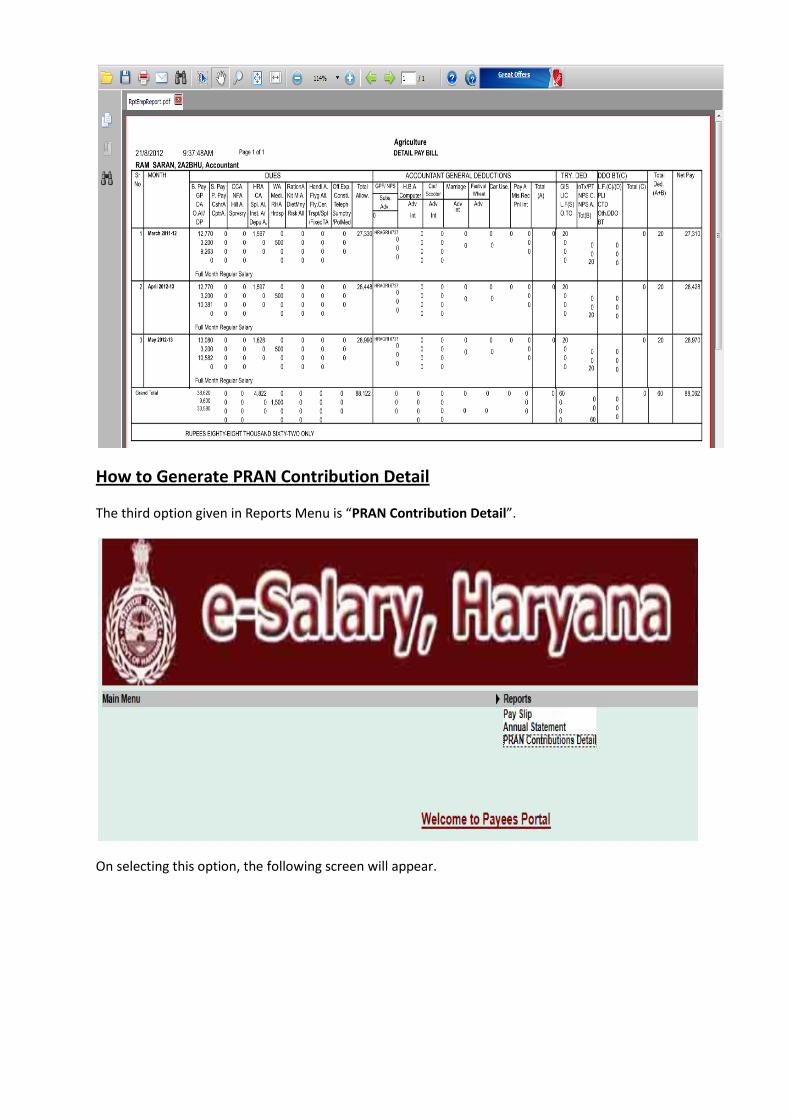
How to Generate PRAN Contribution Detail
The third option given in Reports Menu is “PRAN Contribution Detail”.
On selecting this option, the following screen will appear.
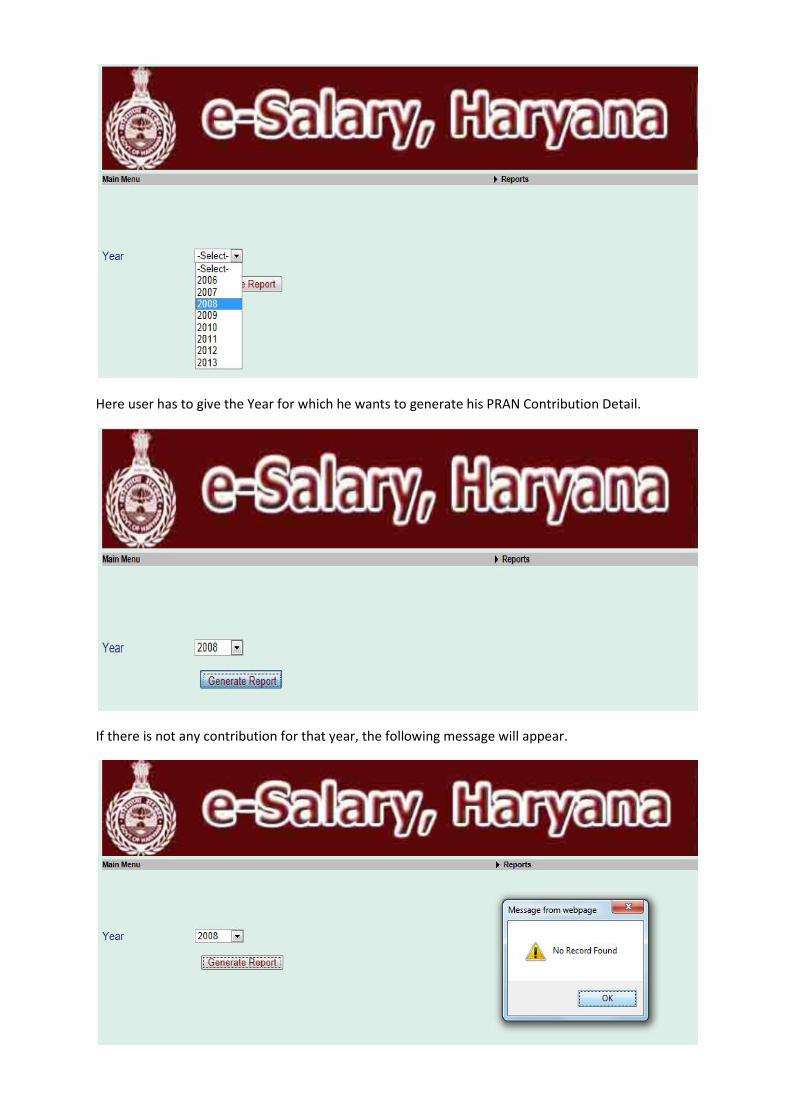
Here user has to give the Year for which he wants to generate his PRAN Contribution Detail.
If there is not any contribution for that year, the following message will appear.
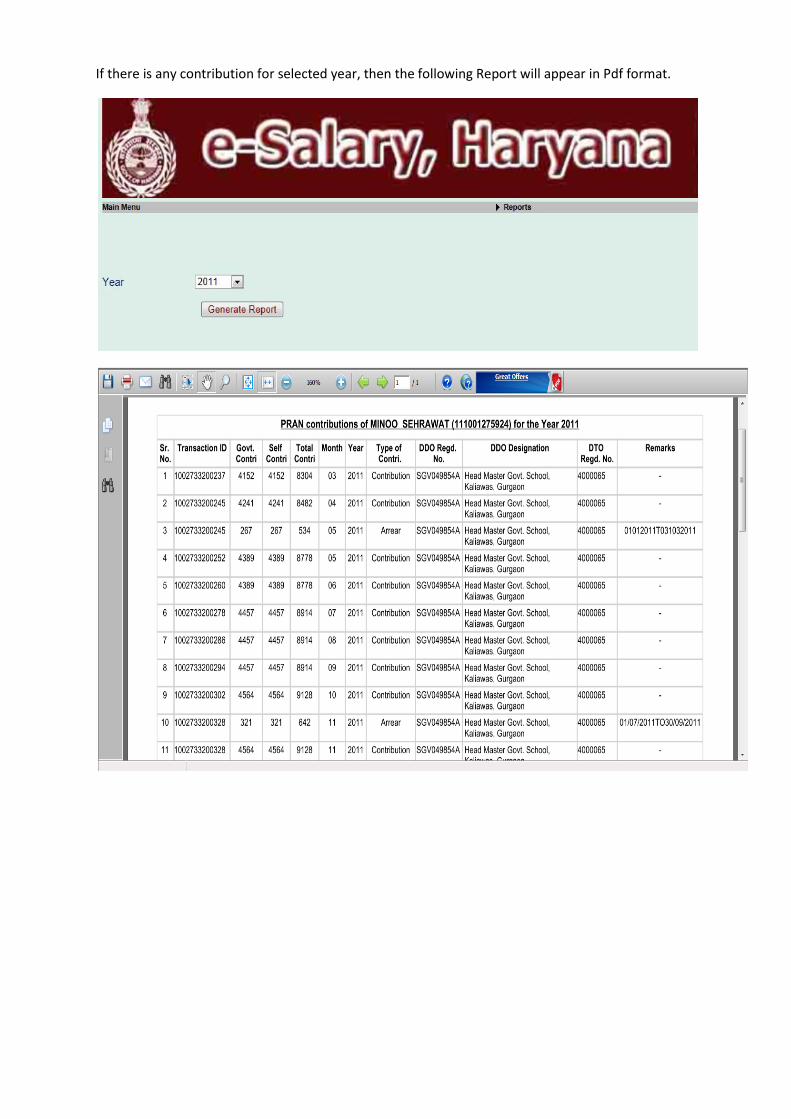
If there is any contribution for selected year, then the following Report will appear in Pdf format.