lap throw size assembling fabric pieces...
TRANSCRIPT

Copyright 2015 Jubilee Creative Studio; all rights reserved.
Broken Bars Quilt Top Tutorial Lap Throw Size (44” x 61”)
While this tutorial assumes you have basic sewing experience, it is very possible to make this as your first quilt. This tutorial makes a very soft, wonderful, quilt you or your recipient will enjoy for years. No store-bought quilt beats a homemade quilt! Start to finish in 3 days—a 2nd quilt will take even less time. While this quilt was made from rag bags, you could also make this quilt from 5” charm squares or yardage if you prefer. Click for: Jubilee Fabric rag bags Jubilee Fabric 5" Charm Packs
ASSEMBLING FABRIC PIECES FROM RAG BAGS WHY YOU MIGHT LIKE TO BUY RAG BAGS:
1. You’re a beginning quilter and want to start your first quilt most economically. 2. You’re into appliqué and need a stash for arts and crafts without having to purchase yards of fabric. 3. You love the look of homespun fabric and want to see all the different colors and patterns. 4. You’re an experienced quilter and want to make numerous quilts in the most economical way. 5. You just love to quilt or appliqué and make quilts for charity or fundraising purposes. 6. You love the convenience of precut fabrics and just don’t want to pay the extra cost.
MATERIALS NEEDED—the usual suspects:
1. Rotary cutter and mat. You could use scissors, but a rotary cutter will be much faster and easier. 2. 6” x 24” quilter’s ruler—you’ll love that ruler for many reasons! 3. Sewing machine, needles, thread, and I like a snipper to cut the inevitable threads. 4. Walking foot (if you can) or free motion quilting foot. 5. Ironing board and iron. 6. Multiple bottoms to prewind—you’ll thank yourself later! 7. Seam ripper. Mistakes -- everyone makes them! 8. Quilters’ safety pins (you’ll be happy to use these, too!) 9. Chalk pencil for marking 10. Batting (I used cotton batting, but quilter’s flannel also a good choice for a lighter weight quilt). 11. Backing—Good quality muslin or tea dyed fabric from JubileeFabric.com.

Copyright 2015 Jubilee Creative Studio; all rights reserved.
Step 1—Sorting Each of the four rag bags and two strip bags had 2-20 pieces of each fabric. Four rag bags yielded 1-2 handfuls of greens, orange/browns, burgundies, blues, black/browns, and brights. Photo: 4 Rag Bags—Sorted by Color Families:
With supplemental yardage for sashing (if you like), 4 rag bags could make about 4-5 lap-size quilt tops—very economical. SHRINKAGE NOTES: I experienced about 10% shrinkage in the fabric pieces after washing. Experienced quilters know the quilting process itself shrinks the quilt 1-2%. Shrinkage of batting is about another 3%. My quilt top was 48" wide, and when done, was 41" wide. However, this is what makes that wrinkly, crinkly texture of homemade quilts. So, for example, if you want a net 60" width, add about 15% to your quilt top, or 69" gross (60" x 1.15 = 69") Step 2—Color Selection Many colors go together well. Most harvest colors go well together, and most of the brights go well together. For this quilt, I picked reds/blues/browns and burgundies, mostly in cool tones. Step 3—Assembling Stacks of Pieces/Strips I made 10 stacks of the same 20 pieces, varying between lights and darks, in the same order. This will make 10 rows for the length, and 20 pieces across for width (“broken bars”). I planned to reverse each sewed-together row, so if red was #1 in the 1st row, and you flip the 2nd row, red will #20 in the 2nd row. Planned randomness—the same fabrics should not be next to each other. I laid out the piles with the selvage edge on the same side, using the selvage as the straight edge to sew together. Do the same sorting and color selection for sashings and binding strips. You can estimate total running inches needed by adding together twice the length to twice the width.
CONSTRUCTION OF QUILT TOP

Copyright 2015 Jubilee Creative Studio; all rights reserved.
Step 4—Sew Together, Press, and Trim Rows Note--while the WIDTH of each piece varies (and adds its own charm to the quilt), the LENGTH of each piece is fairly constant. This enables you to pick up each piece, place right sides together, and sew your ¼” seam, and keep adding each piece until you have 20 pieces sewn together in a row. Easy. Repeat with additional 9 stacks, so you now have 10 sewn rows, each row having 20 pieces. Press each row. Some quilters prefer to iron seams open to reduce bulk. For simplicity’s sake, I alternated pressing the seam allowances on each row-- first away from me on the ironing board, and then towards me, so that the seam allowances would alternate. Either way would work. Trim each row. Each row was about 50” long, so I doubled them over, and was able to trim about ¼” inch from each side of the row. Here is where your 6” x 24” ruler comes in handy to even up your rows. My rows trimmed to 5 ½” wide. Step 5—Sashing I used strips from strip rag bags to add sashing between rows. Otherwise, you could buy 1 to 1 ½ yards of fabric and cut strips. I cut 2 ½” strips at right angles to the fold, across the width of the fabric. Repeat alternate sashing between rows, so 11 sashes, top to bottom, for the 10 rows of sewn-together pieces. Step 6—Add Two Borders Getting close to done! Add 2 sash strips to the sides of your quilt top, and you now have lovely borders! Photo—Quilt Top (folded in half)
Step 7—Wash and Iron Quilt Top While I normally pre-wash fabric yardage to preshrink the fabric, because the pieces are too small to launder individually, I washed (gentle cycle) and dried (medium or low heat) the completed quilt top after the top was finished. Lightly press the quilt top to restore fabric. Expect some shrinkage.
GENERAL QUILTING INSTRUCTIONS
If you already know how to finish your quilt, quilt as desired. Otherwise, see below for detailed instructions.
Copyright 2015 Jubilee Creative Studio; all rights reserved.
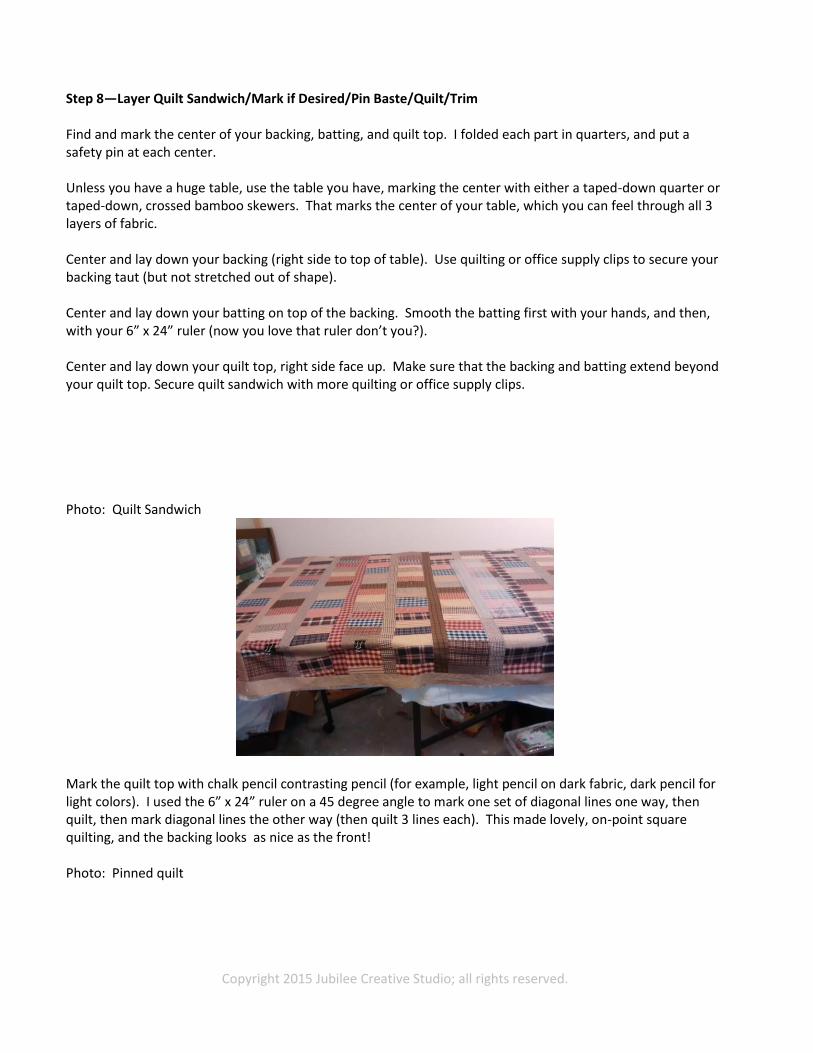
Step 8—Layer Quilt Sandwich/Mark if Desired/Pin Baste/Quilt/Trim Find and mark the center of your backing, batting, and quilt top. I folded each part in quarters, and put a safety pin at each center. Unless you have a huge table, use the table you have, marking the center with either a taped-down quarter or taped-down, crossed bamboo skewers. That marks the center of your table, which you can feel through all 3 layers of fabric. Center and lay down your backing (right side to top of table). Use quilting or office supply clips to secure your backing taut (but not stretched out of shape). Center and lay down your batting on top of the backing. Smooth the batting first with your hands, and then, with your 6” x 24” ruler (now you love that ruler don’t you?). Center and lay down your quilt top, right side face up. Make sure that the backing and batting extend beyond your quilt top. Secure quilt sandwich with more quilting or office supply clips. Photo: Quilt Sandwich
Mark the quilt top with chalk pencil contrasting pencil (for example, light pencil on dark fabric, dark pencil for light colors). I used the 6” x 24” ruler on a 45 degree angle to mark one set of diagonal lines one way, then quilt, then mark diagonal lines the other way (then quilt 3 lines each). This made lovely, on-point square quilting, and the backing looks as nice as the front! Photo: Pinned quilt

Copyright 2015 Jubilee Creative Studio; all rights reserved.
After marking, and before quilting—pin baste quilt sandwich (about every hands’ width apart), avoiding your quilt markings so as to not run into pins while quilting. I used a walking foot to quilt. You can free motion quilt if you like. You could also quilt with a regular foot, which I have done on a baby quilt by sewing the quilt first one way, then the other, to minimize overall quilt distortion—but I recommend getting a walking foot if you can. I also sewed parallel rows of straight stitch quilting on the borders—it looks awesome! Then, use that lovely 6” x 24” ruler and your rotary cutter and trim/square up your quilt top. Step 9—Label I made a label with a light-colored piece from the stash and a Sharpie marker. Add “Especially made for/Made with Love for” [their name], your name, date, the occasion, and the city—your friends will adore it! Attach the label to back of your quilt with either a tight zig zag or blanket stitch. Reverse thread colors—for example, if the quilt top is dark and backing is light, put dark thread in the bobbin and light thread in the top. Photo: Personalized Label

Copyright 2015 Jubilee Creative Studio; all rights reserved.
Step 10—Binding Photo: Binding
I bind by machine with my walking foot. The best tutorial I found on youtube.com is by the “gourmet quilter,” Susan Claire, found here: https://youtu.be/Pq2Q3F17lv0 She is a great teacher and was kind enough to agree to share her video on binding. You can like her video/subscribe to her channel, too. Additional info at end of tutorial. Photos: Quilted Quilt—Before Washing
Launder your completed quilt and dry. It should have that wrinkly, crinkly look of antique quilts. The finished size turned out to be: 44” x 61”—a good size for lap throw.

Copyright 2015 Jubilee Creative Studio; all rights reserved.
Photo—Finished Lap Quilt & Quilted Border on Reverse
Give yourself a high five! You just finished your quilt! Tutorial by Marguerite Niven. Fresno, California
Gourmet Quilter info: SusanClaire. GourmetQuilter, New Zealand
YouTube: https://www.youtube.com/user/GourmetQuilter
The homespun fabrics & rag bags featured in this tutorial are available at www.JubileeFabric.com