obstacle avoiding robot kit - techshopbd · introduction: what is an obstacle avoiding robot? : ......
TRANSCRIPT

Obstacle
avoiding
robot kit (Arduino)
Assembly guideline
V1.1 November , 2015
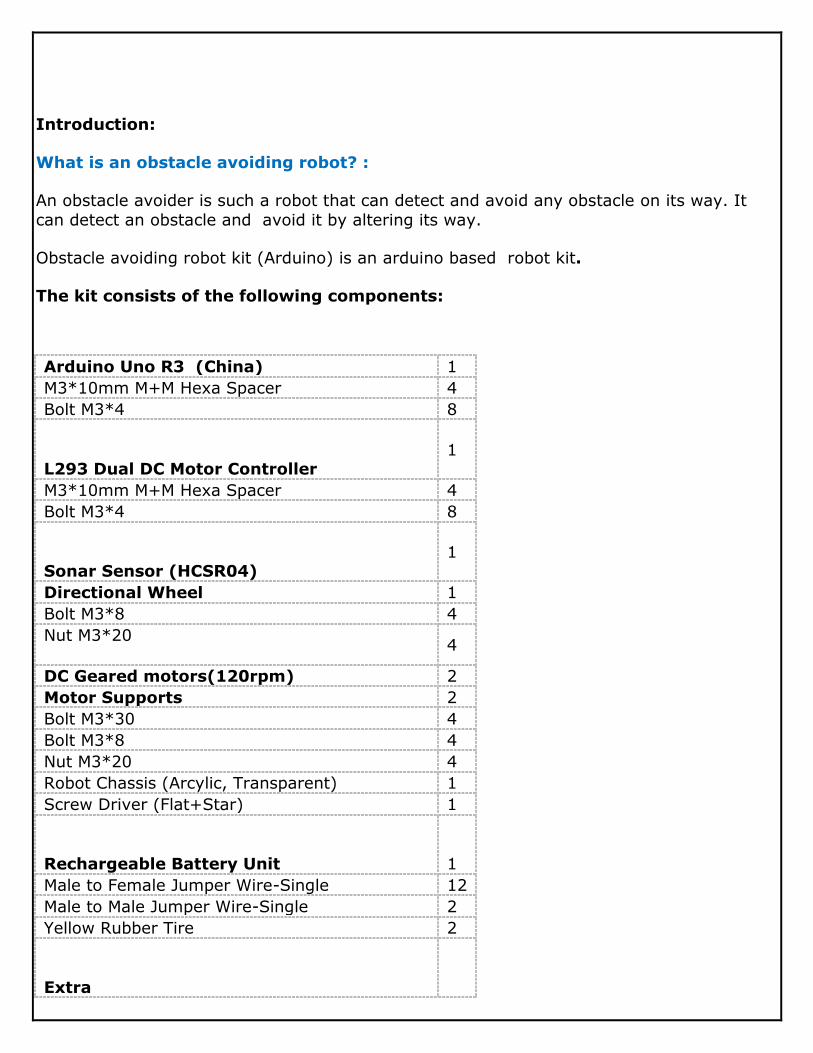
Introduction:
What is an obstacle avoiding robot? :
An obstacle avoider is such a robot that can detect and avoid any obstacle on its way. It
can detect an obstacle and avoid it by altering its way.
Obstacle avoiding robot kit (Arduino) is an arduino based robot kit.
The kit consists of the following components:
Arduino Uno R3 (China) 1
M3*10mm M+M Hexa Spacer 4
Bolt M3*4 8
L293 Dual DC Motor Controller
1
M3*10mm M+M Hexa Spacer 4
Bolt M3*4 8
Sonar Sensor (HCSR04)
1
Directional Wheel 1
Bolt M3*8 4
Nut M3*20
4
DC Geared motors(120rpm) 2
Motor Supports 2
Bolt M3*30 4
Bolt M3*8 4
Nut M3*20 4
Robot Chassis (Arcylic, Transparent) 1
Screw Driver (Flat+Star) 1
Rechargeable Battery Unit 1
Male to Female Jumper Wire-Single 12
Male to Male Jumper Wire-Single 2
Yellow Rubber Tire 2
Extra

TechShop, 39, ARA Bhaban, KaziNazrul Islam Avenue, Karwan Bazar, Dhaka-1215, Bangladesh
3
Bolt M3*4 4
Bolt M3*8 4
Nut M3*20 8
The sonar sensor works to measure the distance of the nearest obstacle in front of the
robot. Arduino Uno works as the brain of the robot. It takes data from the sonar sensor and makes decision to rotate the motors accordingly. L293D DC motor driver acts as an
interface between the arduino board and the motors.
How to assemble the kit?
Step by step assembly guideline for the kit is shown below.

TechShop, 39, ARA Bhaban, KaziNazrul Islam Avenue, Karwan Bazar, Dhaka-1215, Bangladesh
4
Step 1: Take the acrylic robot base.
Step 2: Fix the supportive structures for the motors.
TechShop, 39, ARA Bhaban, KaziNazrul Islam Avenue, Karwan Bazar, Dhaka-1215, Bangladesh
5
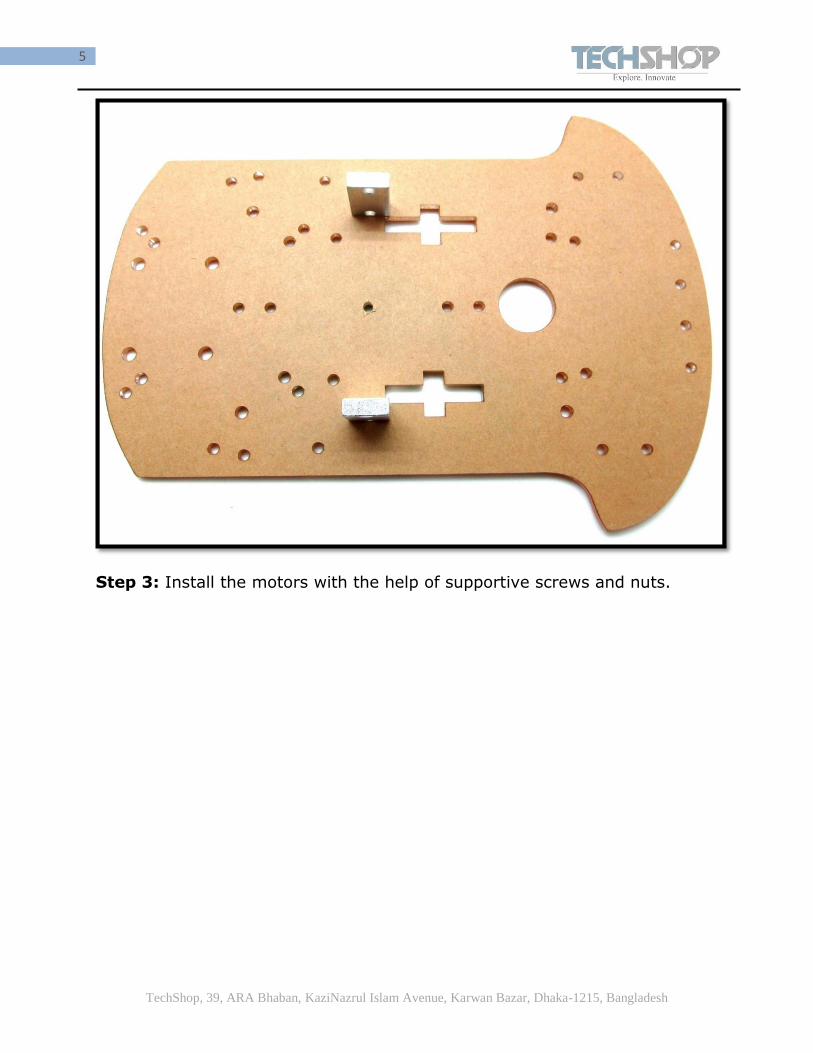
Step 3: Install the motors with the help of supportive screws and nuts.

TechShop, 39, ARA Bhaban, KaziNazrul Islam Avenue, Karwan Bazar, Dhaka-1215, Bangladesh
6

TechShop, 39, ARA Bhaban, KaziNazrul Islam Avenue, Karwan Bazar, Dhaka-1215, Bangladesh
7
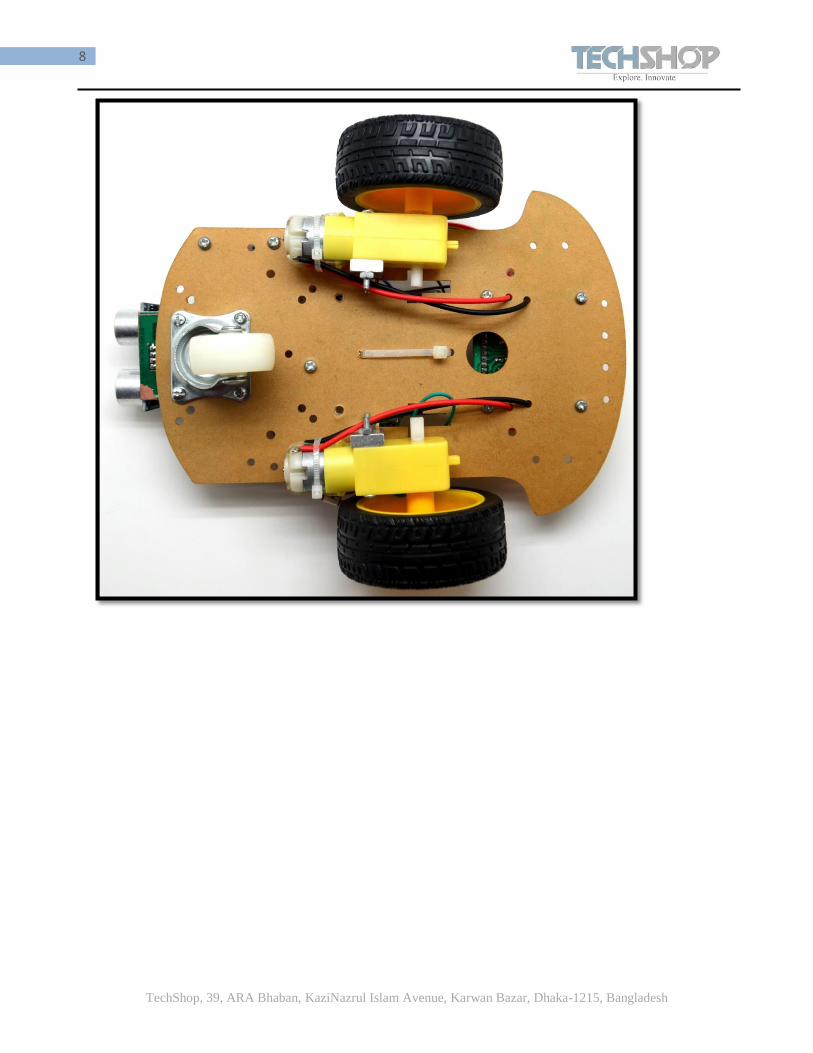
Step 4: Fix the tires with the motors.
Step 5: Fix the bi-directional wheel and the Sonar sensor with the chassis.
TechShop, 39, ARA Bhaban, KaziNazrul Islam Avenue, Karwan Bazar, Dhaka-1215, Bangladesh
8

TechShop, 39, ARA Bhaban, KaziNazrul Islam Avenue, Karwan Bazar, Dhaka-1215, Bangladesh
9
Step 6: Fix the Arduino Uno board with the chassis.

TechShop, 39, ARA Bhaban, KaziNazrul Islam Avenue, Karwan Bazar, Dhaka-1215, Bangladesh
10

TechShop, 39, ARA Bhaban, KaziNazrul Islam Avenue, Karwan Bazar, Dhaka-1215, Bangladesh
11
Step 7: Fix the L293D Motor driver.
Attach the hexa spacers with the
chassis

TechShop, 39, ARA Bhaban, KaziNazrul Islam Avenue, Karwan Bazar, Dhaka-1215, Bangladesh
12
Step 8:Connect the motor wires with the motor driver with screw.

TechShop, 39, ARA Bhaban, KaziNazrul Islam Avenue, Karwan Bazar, Dhaka-1215, Bangladesh
13
Step 9: Tie the battery with cable tie and connect it to the circuit.

TechShop, 39, ARA Bhaban, KaziNazrul Islam Avenue, Karwan Bazar, Dhaka-1215, Bangladesh
14
Batteries should be in series like this-
TechShop, 39, ARA Bhaban, KaziNazrul Islam Avenue, Karwan Bazar, Dhaka-1215, Bangladesh
15
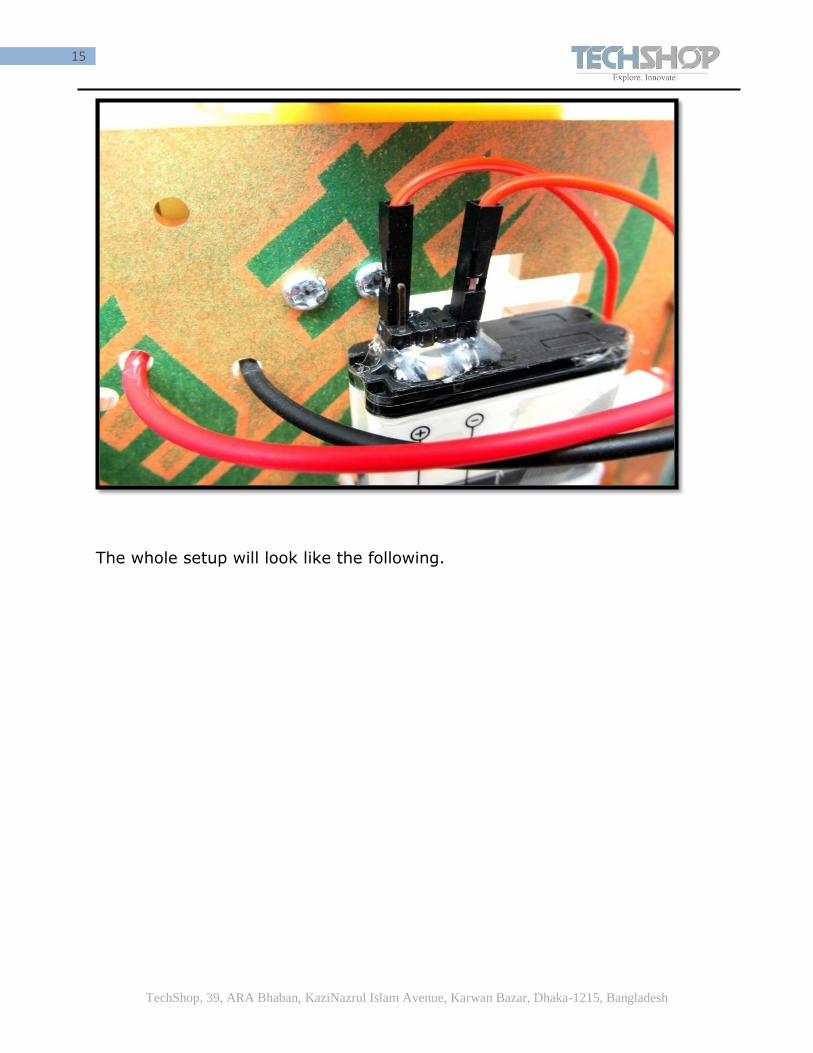
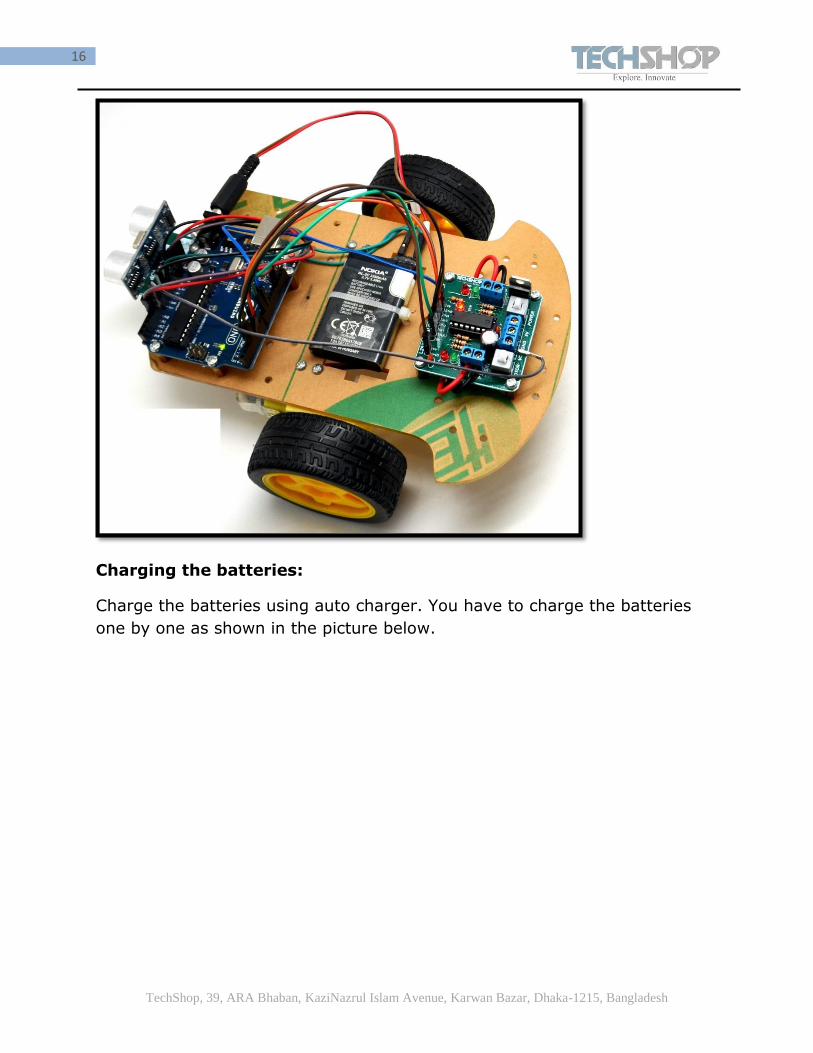
The whole setup will look like the following.
TechShop, 39, ARA Bhaban, KaziNazrul Islam Avenue, Karwan Bazar, Dhaka-1215, Bangladesh
16
Charging the batteries:
Charge the batteries using auto charger. You have to charge the batteries
one by one as shown in the picture below.

TechShop, 39, ARA Bhaban, KaziNazrul Islam Avenue, Karwan Bazar, Dhaka-1215, Bangladesh
17