usps instructions web certified mail users bpod · web certified mail instructions to obtain a usps...
TRANSCRIPT

Web Certified Mail Instructions to
Obtain a USPS Mailer ID and Register for Electronic
Return Receipt
Open the USPS Business Customer Gateway using the following link: https://gateway.usps.com/ Next, click the New User Registration link to get started.

Enter a Username, Password, and select two Security questions and populate answers.
Enter your First Name, Last Name, Phone Number, and Email address.
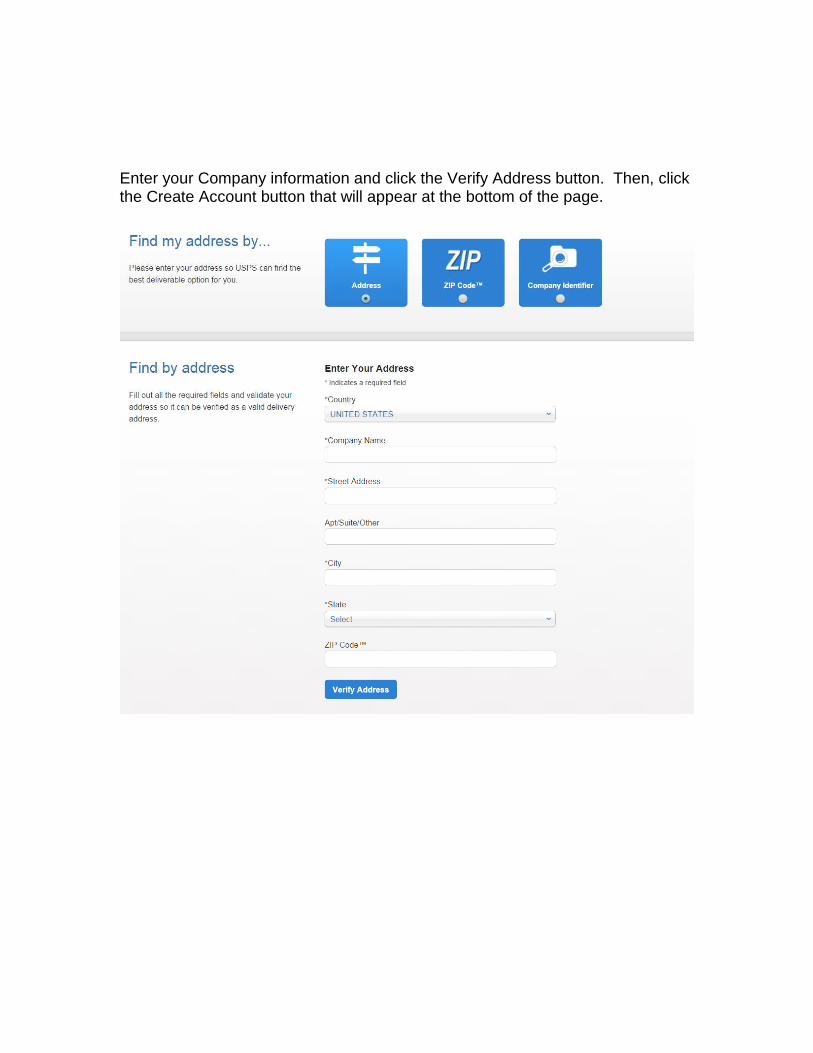
Enter your Company information and click the Verify Address button. Then, click the Create Account button that will appear at the bottom of the page.
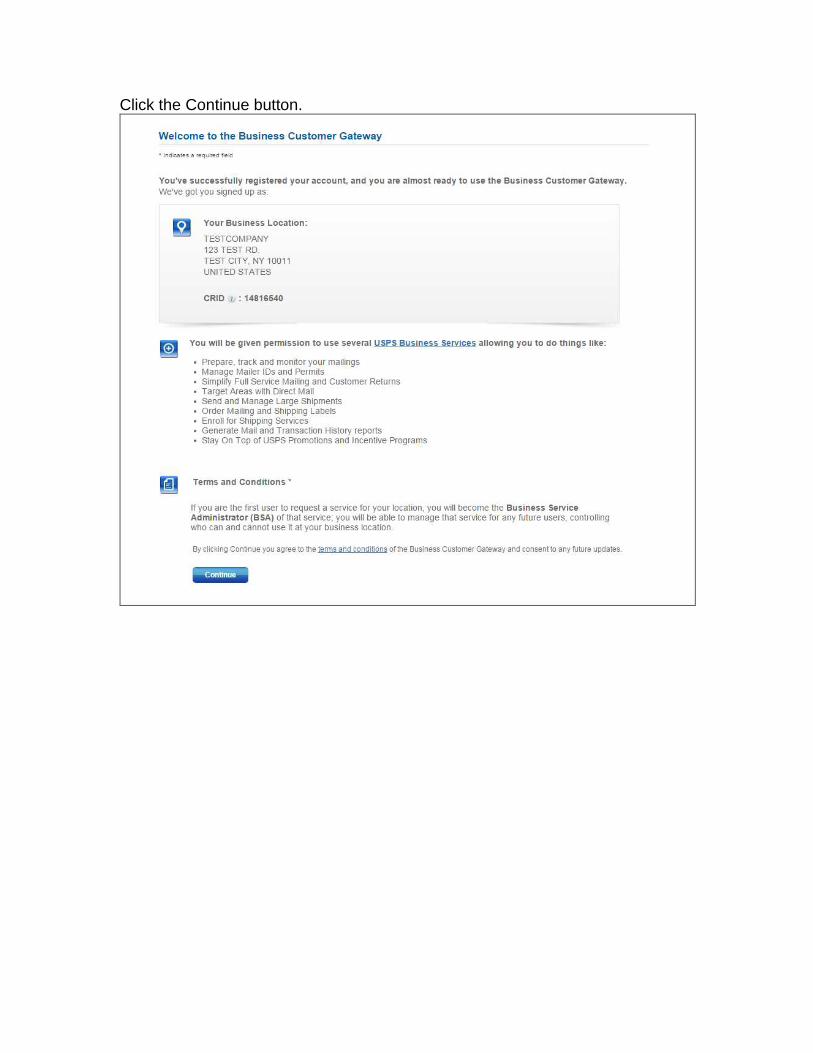
Click the Continue button.
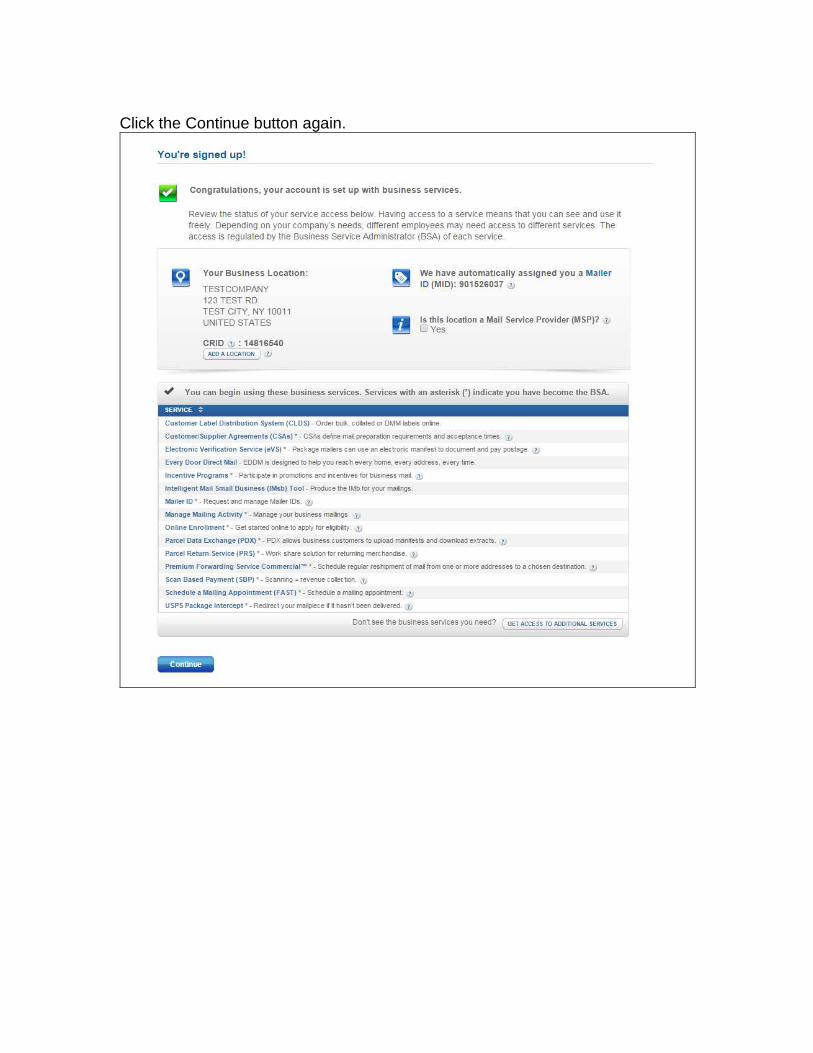
Click the Continue button again.
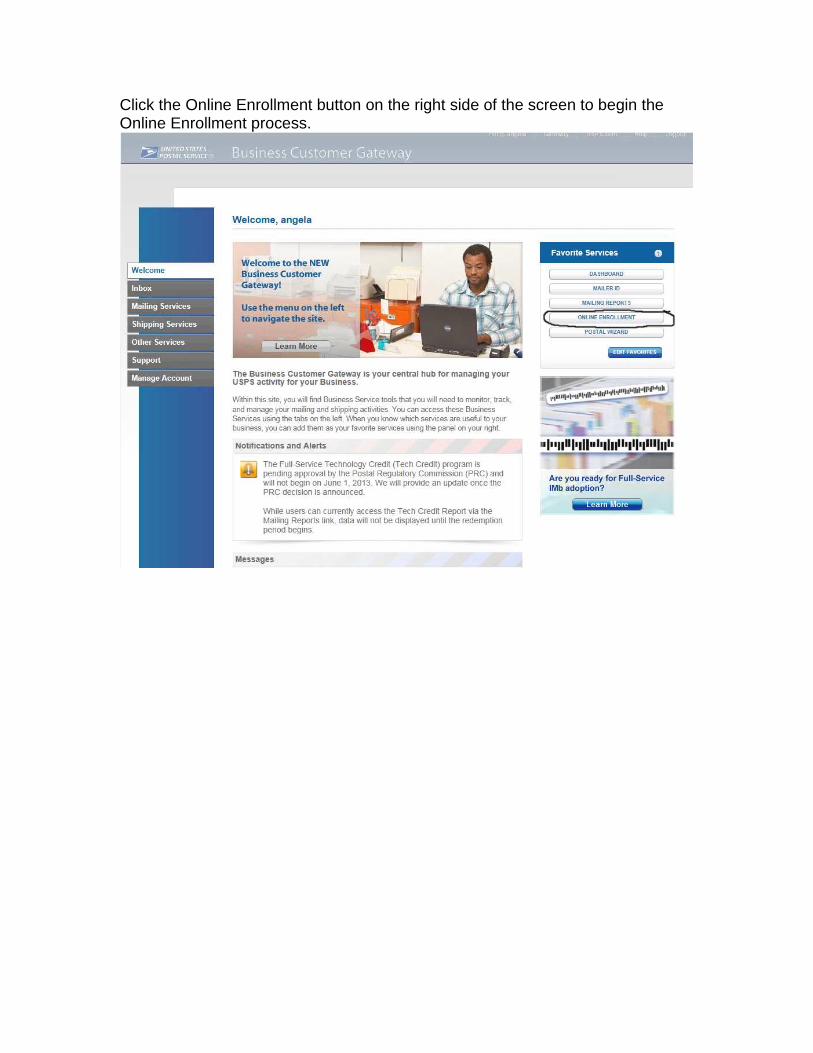
Click the Online Enrollment button on the right side of the screen to begin the Online Enrollment process.

Select Bulk Proof of Delivery (BPOD) from the dropdown box and click the Continue button.
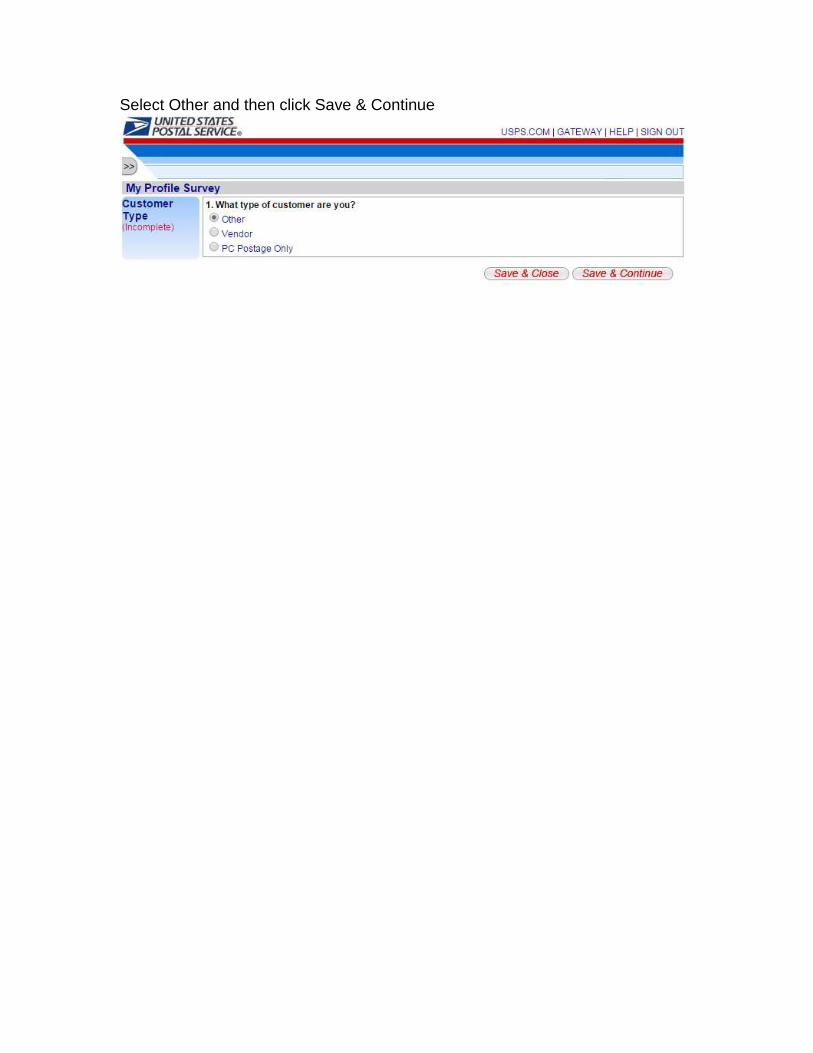
Select Other and then click Save & Continue
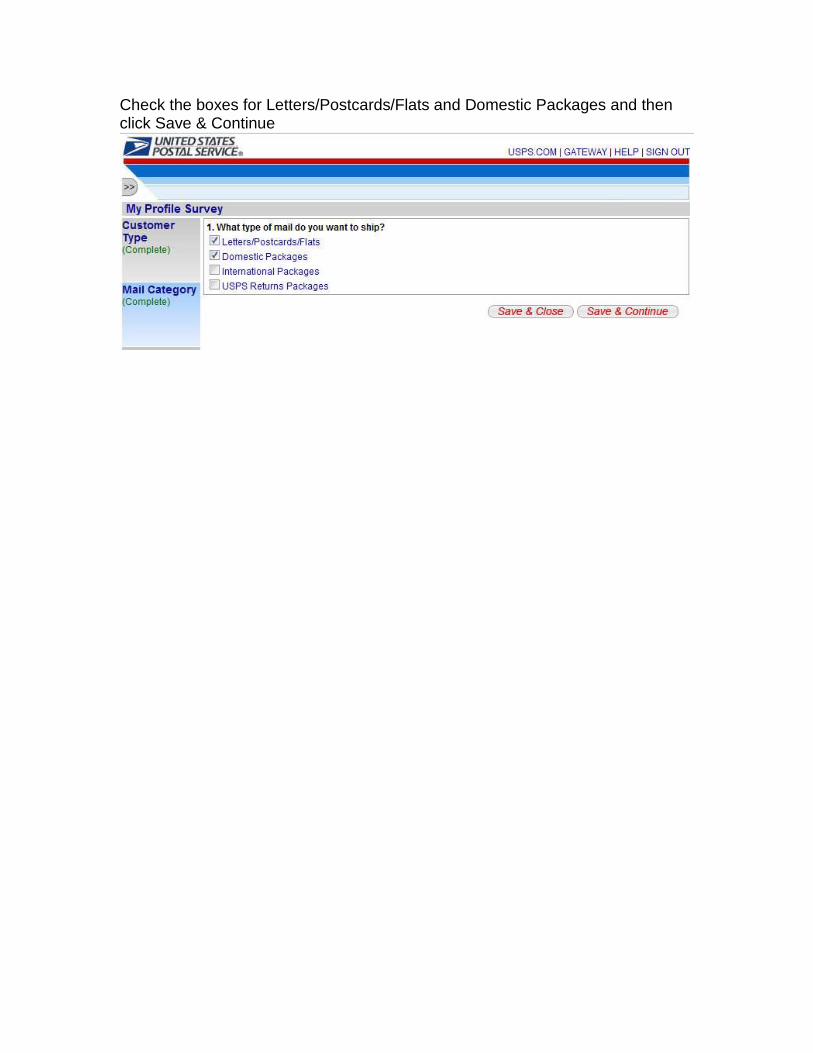
Check the boxes for Letters/Postcards/Flats and Domestic Packages and then click Save & Continue

Check the box for First-Class Mail and then click Save & Continue
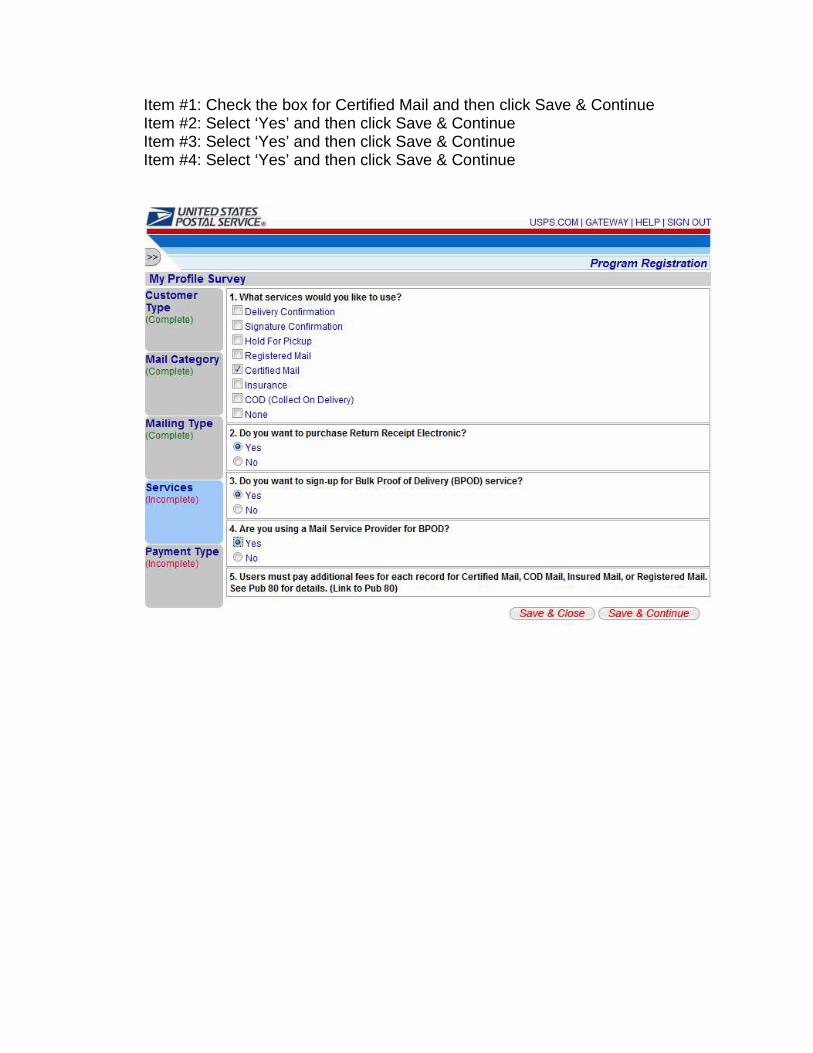
Item #1: Check the box for Certified Mail and then click Save & Continue Item #2: Select ‘Yes’ and then click Save & Continue Item #3: Select ‘Yes’ and then click Save & Continue Item #4: Select ‘Yes’ and then click Save & Continue

Check the box for Postage Meter and then click Save & Continue
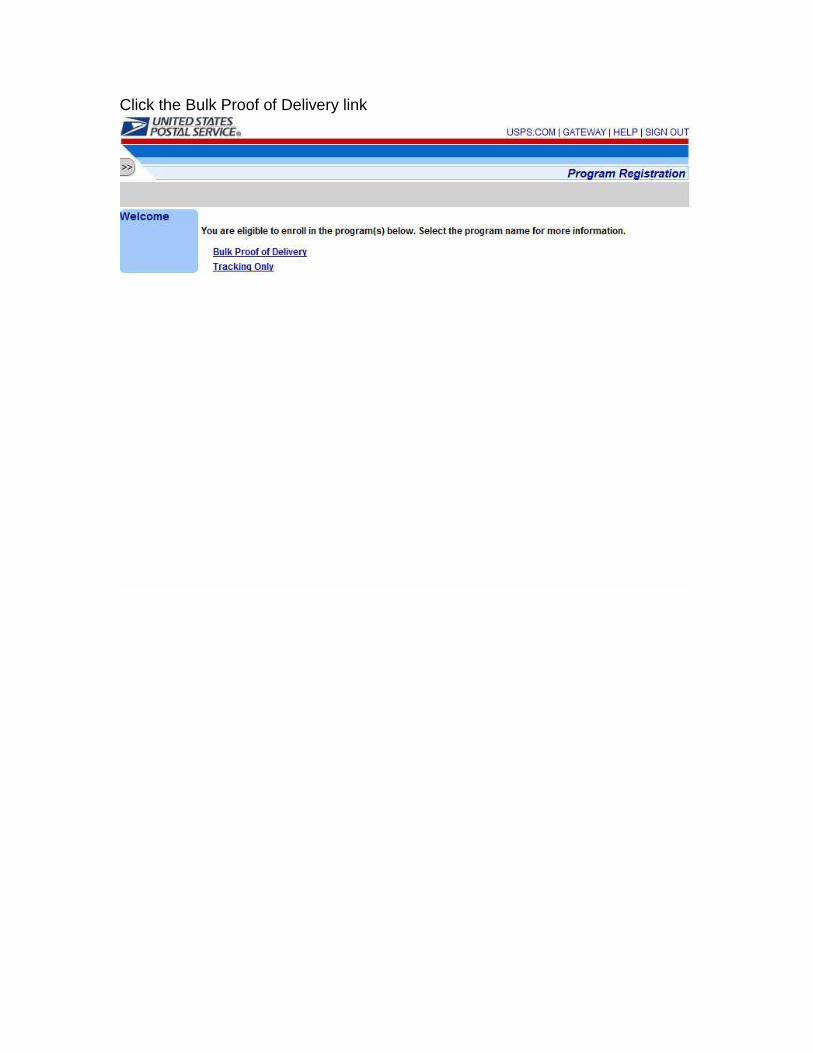
Click the Bulk Proof of Delivery link

Check the Begin Enrollment button on the right
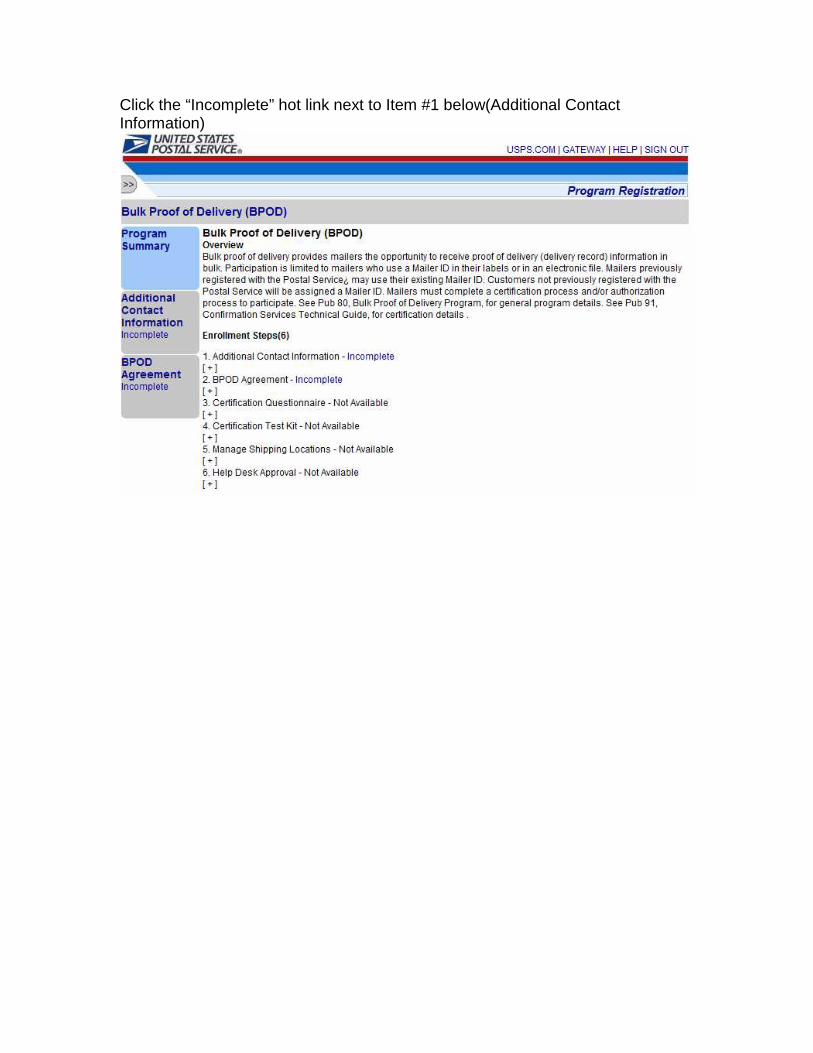
Click the “Incomplete” hot link next to Item #1 below(Additional Contact Information)

Enter the Technical Contact Information below and click the Save button

Click the “Incomplete” hot link next to Item #2 below(BPOD Agreement)

Select Signature Extract File Then, click Save & Continue

To receive your digital signatures in one Acrobat PDF file, select “Multiple BPOD letters in one PDF”.(Recommended) To have a separate .tar file for each digital signature, select “One BPOD letter with signature image per PDF”. Then, click Save & Continue

This screen pertains to Web Certified Mail users only Item #1: Enter 969009997 Item #2: Select ‘Yes’ Item #3: Select ‘No’ and then click Save & Continue

To include the Digital Signature fee when placing postage on the Certified Mail pieces, select Prepay. To omit the Digital Signature fee when placing postage on the Certified Mail pieces and pay for the Digital Signature fee via a Credit Card when the signatures are compiled, select Pay as Compiled. Then, click Save & Continue

If you apply postage to your Certified Mail with a postage meter or pay for your postage when dropping your mail at your local post office, select Postage Meter. If you apply postage to your Certified Mail with PC Postage, select PC Postage. Then, click Save & Continue
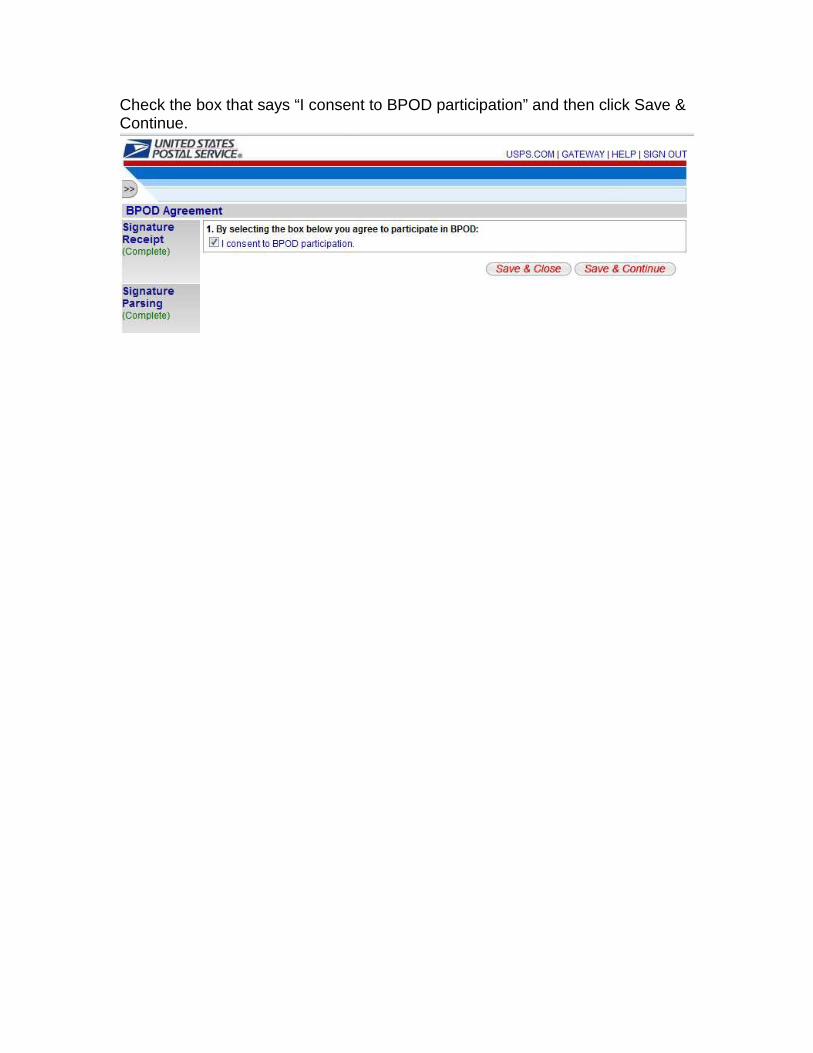
Check the box that says “I consent to BPOD participation” and then click Save & Continue.
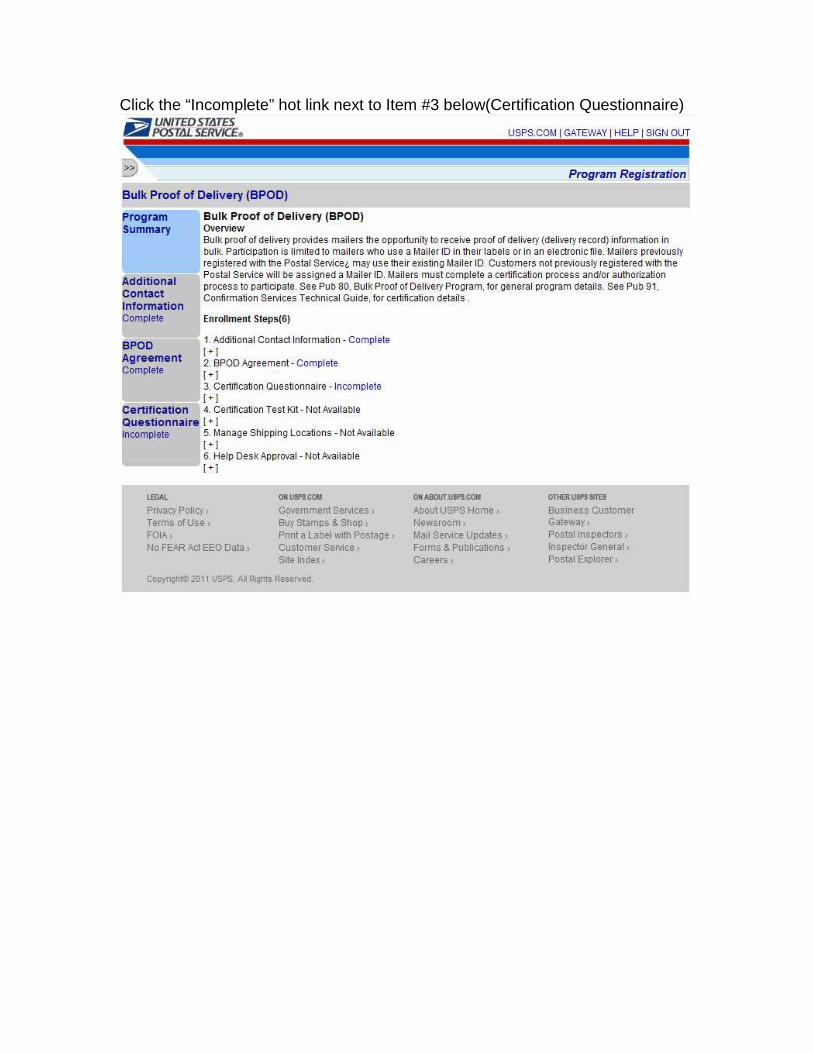
Click the “Incomplete” hot link next to Item #3 below(Certification Questionnaire)
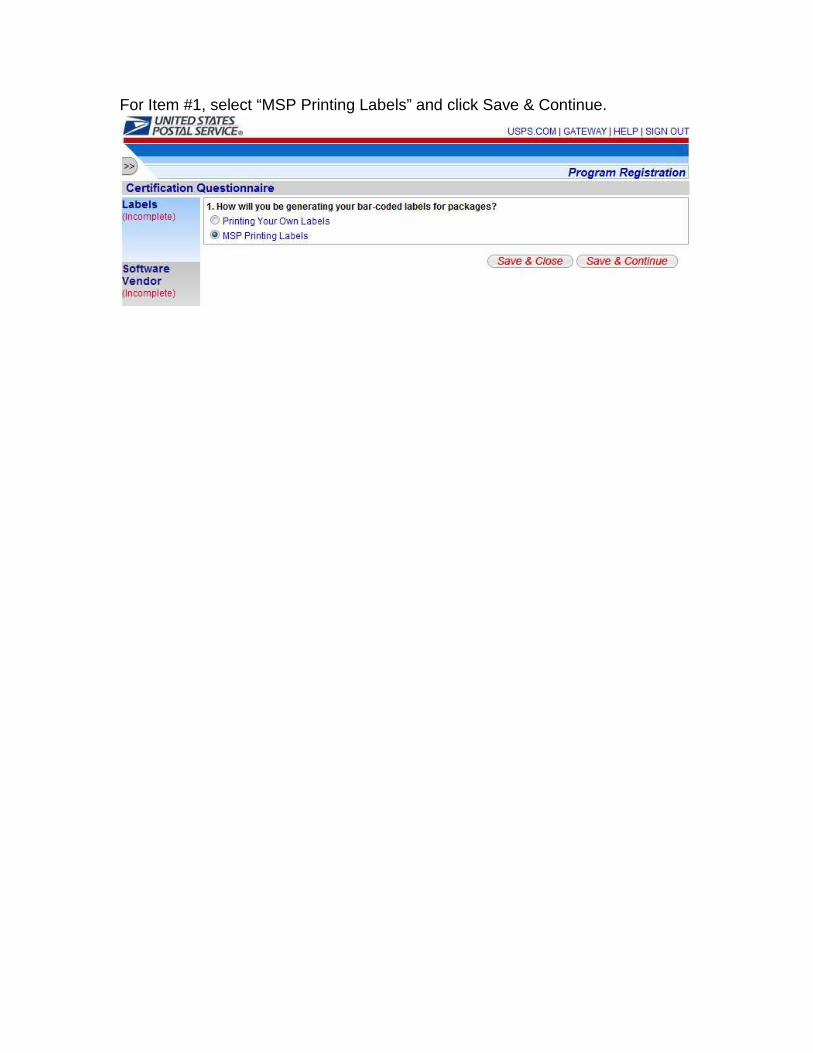
For Item #1, select “MSP Printing Labels” and click Save & Continue.

For Item #1, select ‘Yes’ and click Save & Continue.

For Item #2, select Laser Substrates, Inc. – Web Certified Mail system and click Save & Continue.
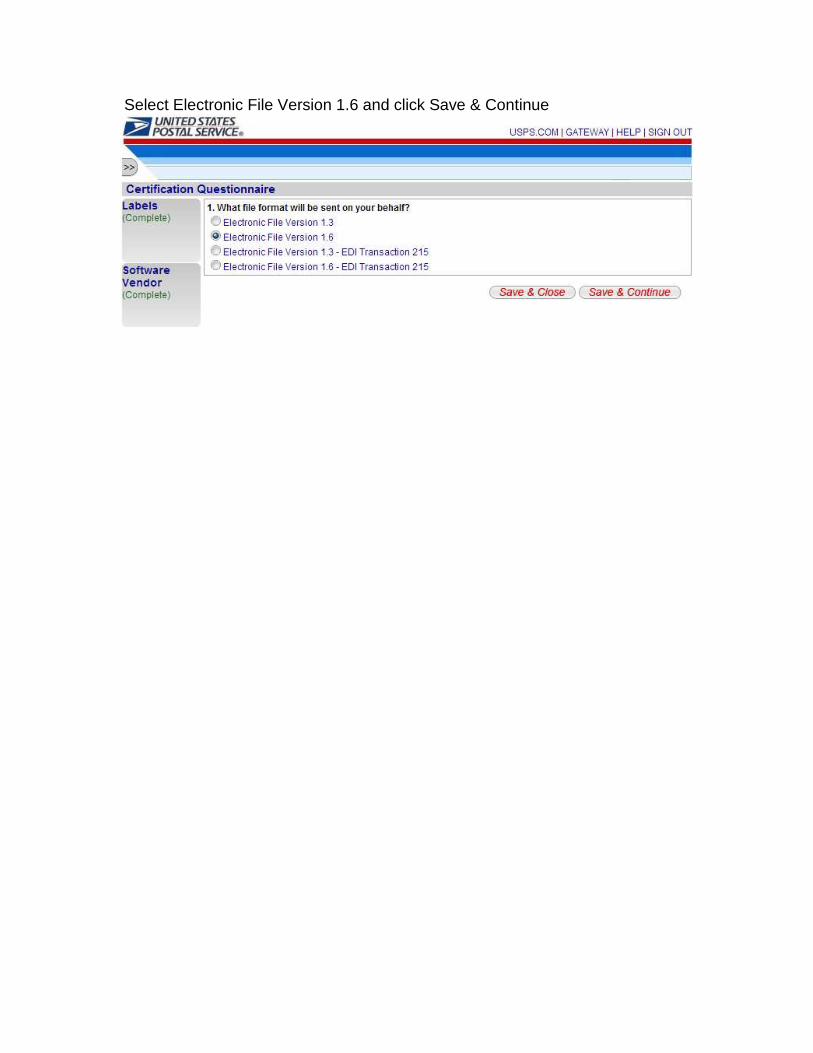
Select Electronic File Version 1.6 and click Save & Continue
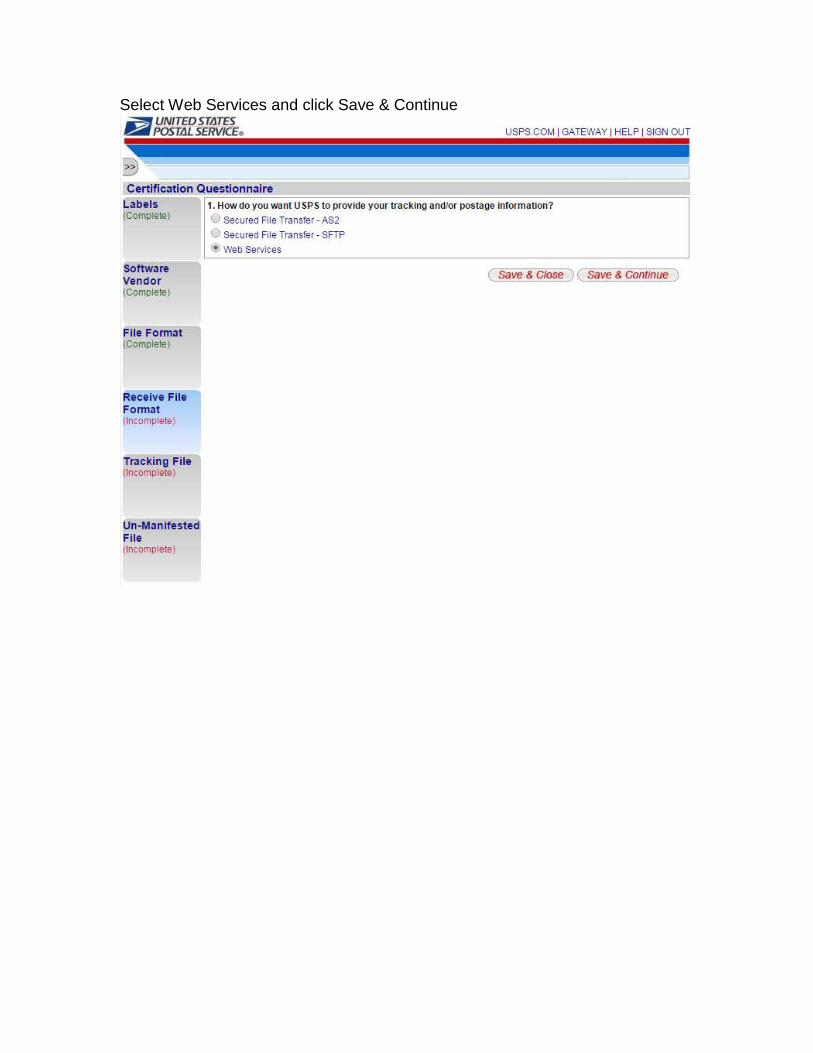
Select Web Services and click Save & Continue
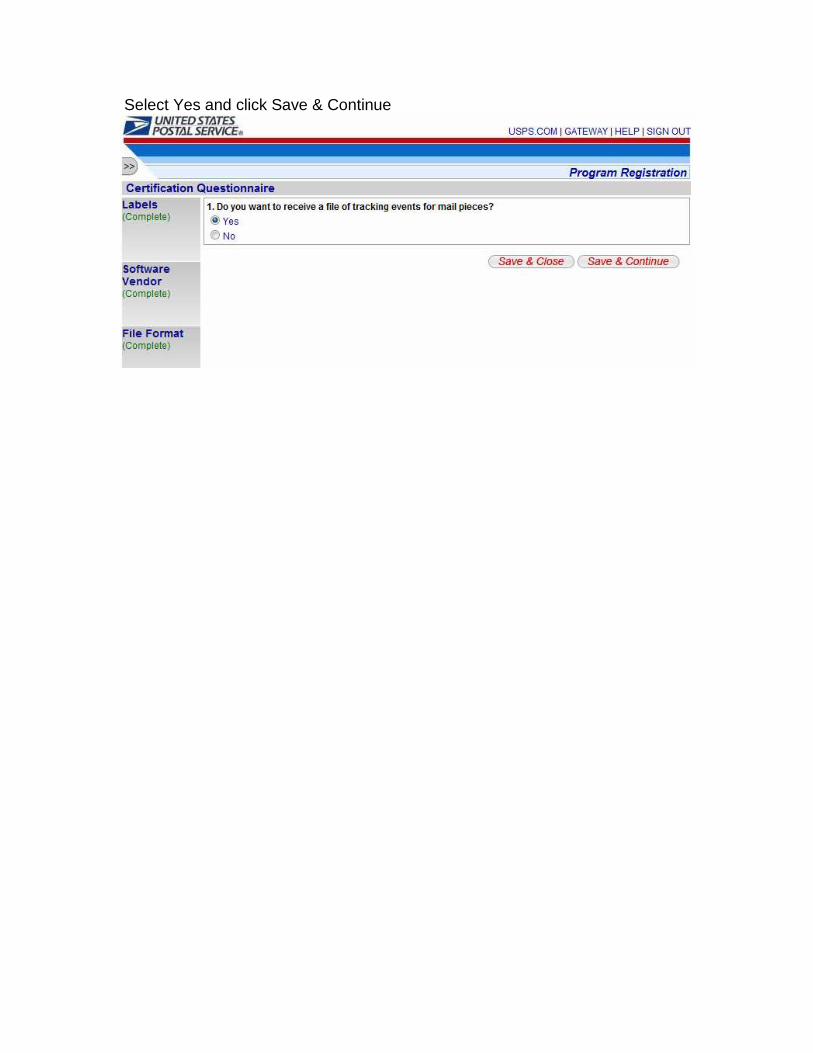
Select Yes and click Save & Continue
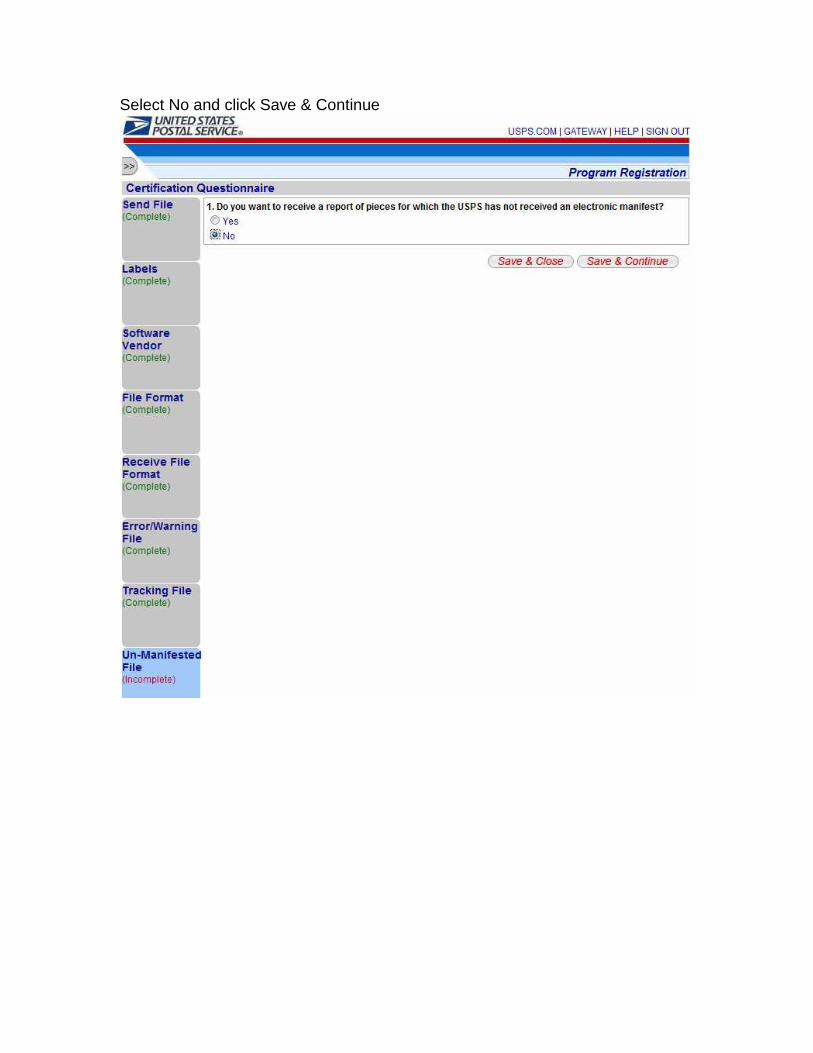
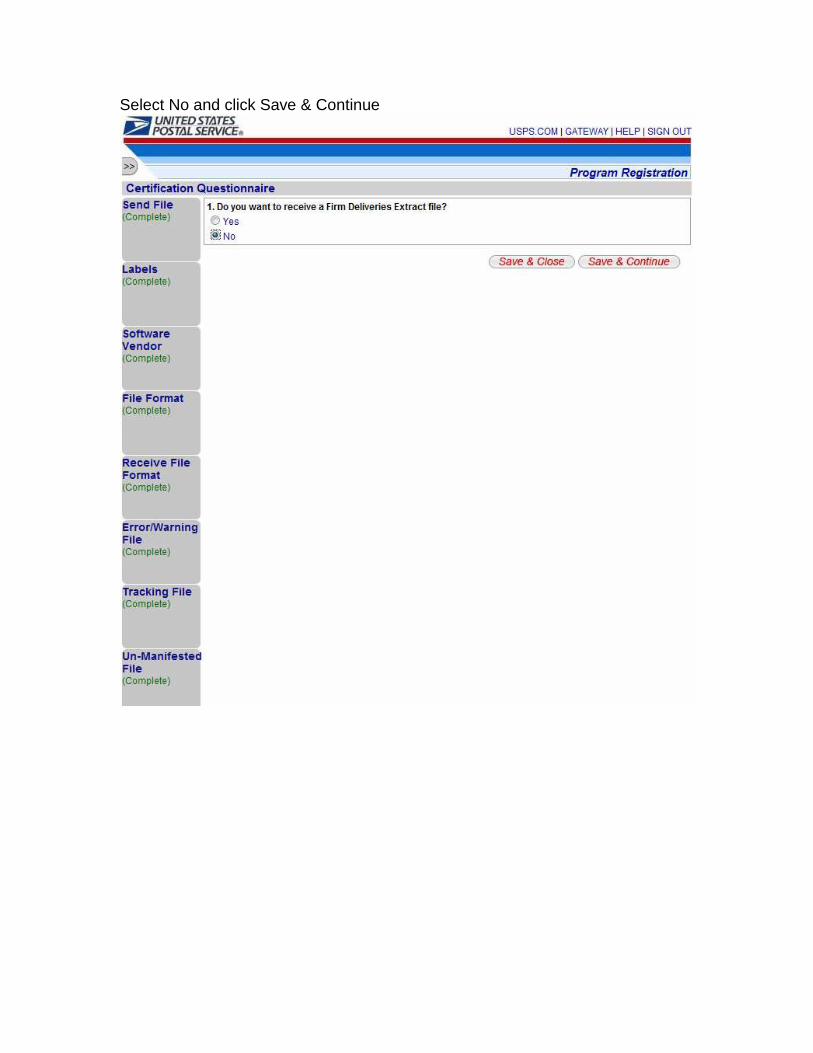
Select No and click Save & Continue
Select No and click Save & Continue
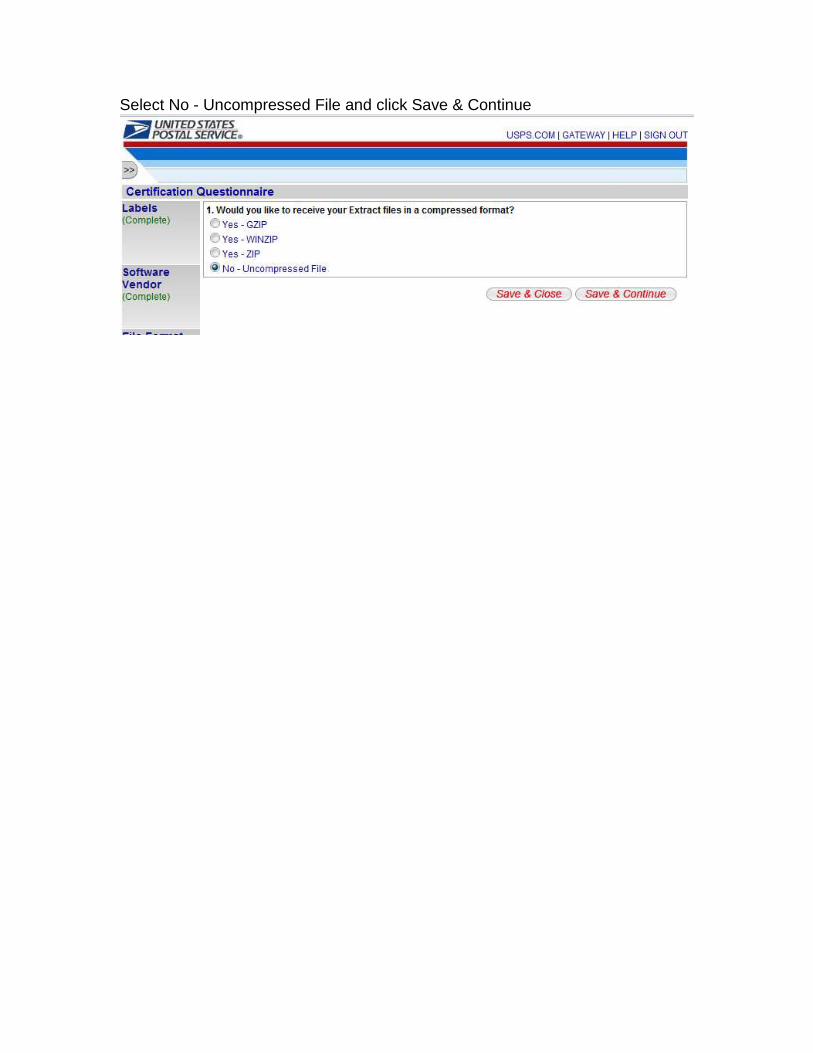
Select No - Uncompressed File and click Save & Continue

Click the “Incomplete” hot link next to Item #5 below(Manage Shipping Locations)
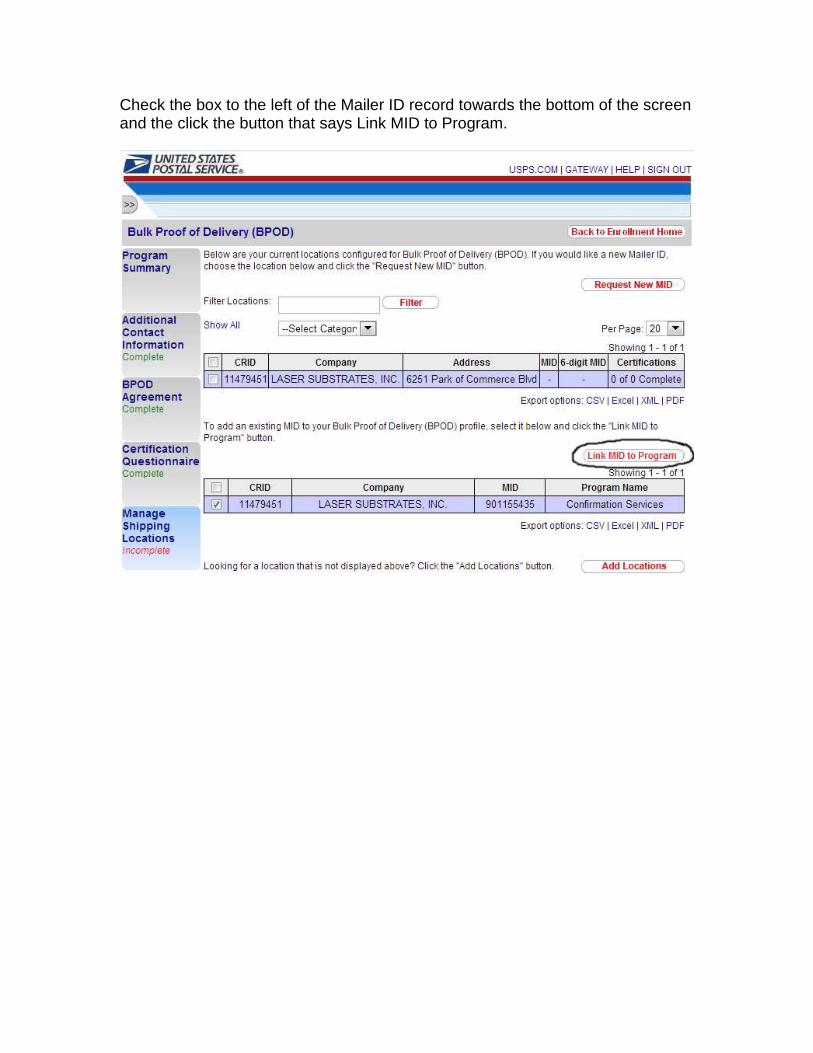
Check the box to the left of the Mailer ID record towards the bottom of the screen and the click the button that says Link MID to Program.

You should now see that your Mailer ID(MID) has been successfully linked to your account.

The next step is to Login to your account on the Web Certified Mail system and click the button in the bottom left that says Edit Senders and Postage Defaults. Next, copy and paste the Mailer ID into the Mailer ID field on the Edit Default Values screen and click the Save button below. Wait two business days to receive an email confirming your setup is complete. If you do not receive the email(as they are sometimes identified as Junk Mail or Spam), please contact our technical support department at 561-998-9000 to confirm the setup of your account is complete.