reflective journal: virtual environments 2/2013
DESCRIPTION
ÂTRANSCRIPT

envs 10008 _virtual environments
2/2012
reflective journal:reactive Dynamism
anna petrou_586090
this semester we were given a brief which asked us to action ideas of personal space
by designing a second skin. We had to use digital modelling and fabrication
techniques in our design, specifically Rhino and laser cutters. We were asked to used
an established material system to inform our design and also work to potentially
combine these systems to create our own kind of system.
throughout the process i considered areas of the body important for preserving and protecting our personal space and drew ideas from nature and human behaviour
when formulating the design.
i learnt to used digital fabrication techniques in combination with hand
crafting to produce an object which i think effectively meets the brief.
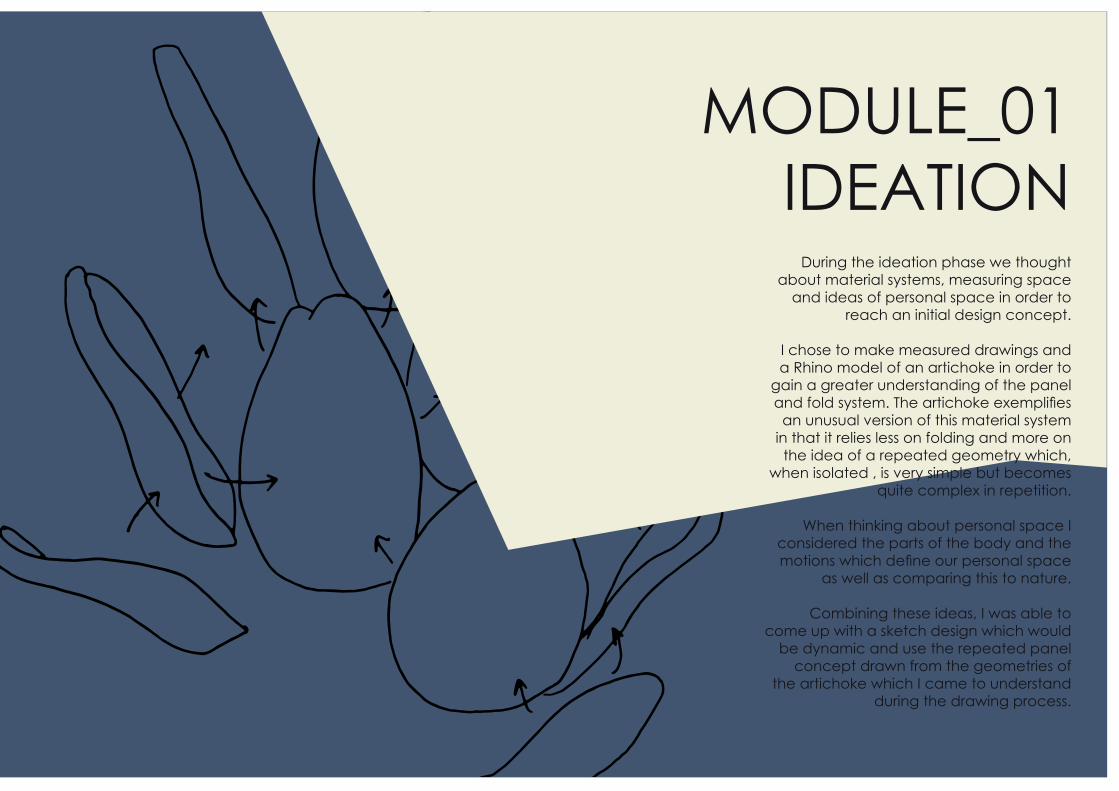
moDule_01iDeation
During the ideation phase we thought about material systems, measuring space
and ideas of personal space in order to reach an initial design concept.
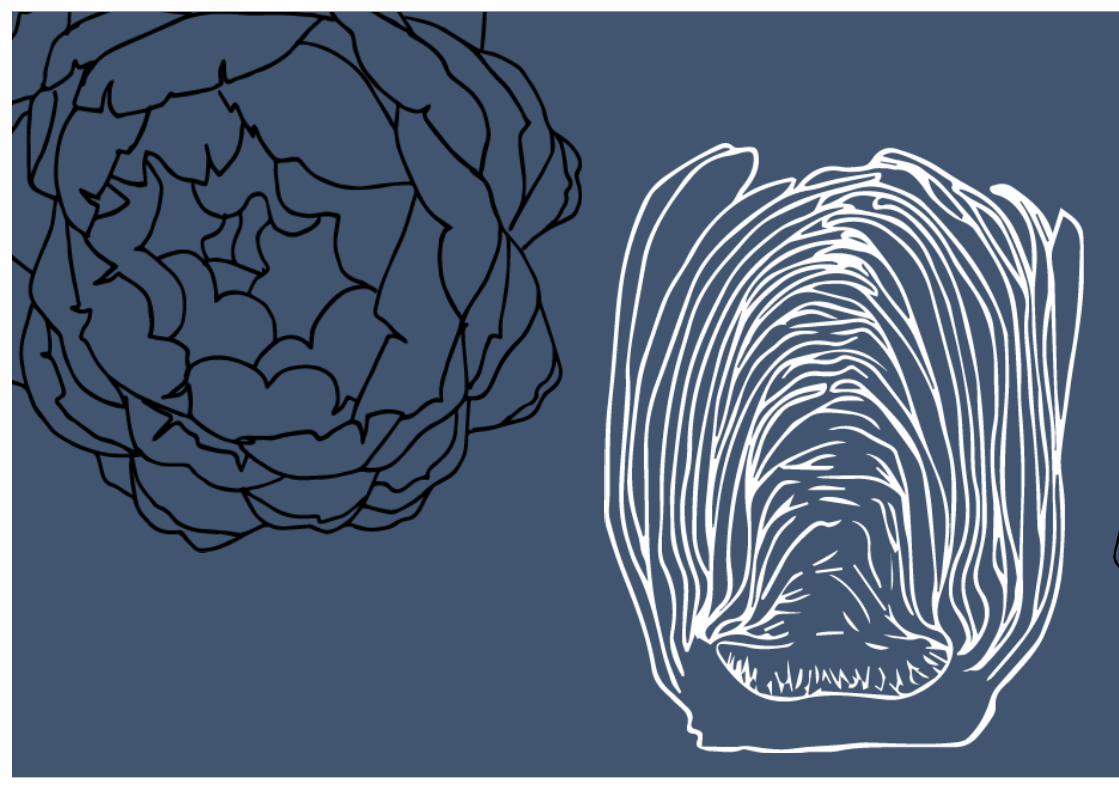
i chose to make measured drawings and a rhino model of an artichoke in order to
gain a greater understanding of the panel and fold system. The artichoke exemplifies
an unusual version of this material system in that it relies less on folding and more on the idea of a repeated geometry which,
when isolated , is very simple but becomes quite complex in repetition.
When thinking about personal space i considered the parts of the body and the motions which define our personal space
as well as comparing this to nature.
combining these ideas, i was able to come up with a sketch design which would
be dynamic and use the repeated panel concept drawn from the geometries of
the artichoke which i came to understand during the drawing process.
ENVS 10008_Virtual Environments
Inflatablecloud city_tomas saraceno
panel and foldicK pavilion_2012
skin and Bonesnowdon aviary_london Zoo_cedric price
Profile and Sectionairplane hangar_nervi _1938
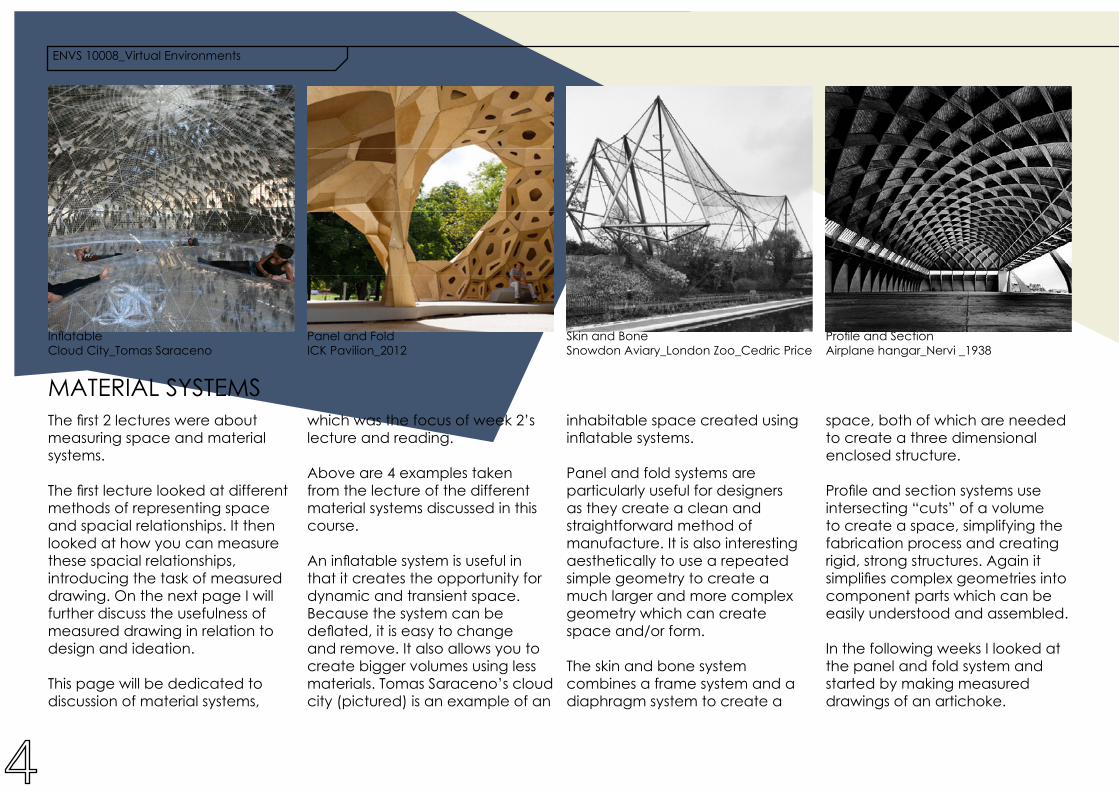
material systemsThe first 2 lectures were about measuring space and material systems.
The first lecture looked at different methods of representing space and spacial relationships. it then looked at how you can measure these spacial relationships, introducing the task of measured drawing. on the next page i will further discuss the usefulness of measured drawing in relation to design and ideation.
this page will be dedicated to discussion of material systems,
which was the focus of week 2’s lecture and reading.
above are 4 examples taken from the lecture of the different material systems discussed in this course.
An inflatable system is useful in that it creates the opportunity for dynamic and transient space. Because the system can be deflated, it is easy to change and remove. it also allows you to create bigger volumes using less materials. tomas saraceno’s cloud city (pictured) is an example of an
space, both of which are needed to create a three dimensional enclosed structure.
Profile and section systems use intersecting “cuts” of a volume to create a space, simplifying the fabrication process and creating rigid, strong structures. again it simplifies complex geometries into component parts which can be easily understood and assembled.
in the following weeks i looked at the panel and fold system and started by making measured drawings of an artichoke.
inhabitable space created using inflatable systems.
panel and fold systems are particularly useful for designers as they create a clean and straightforward method of manufacture. it is also interesting aesthetically to use a repeated simple geometry to create a much larger and more complex geometry which can create space and/or form.
the skin and bone system combines a frame system and a diaphragm system to create a

ENVS 10008_Virtual Environments
our brief asked us to address ideas of personal space in our design, so it was important to consider what personal space is for me and how i express my personal space for others.
personal space, for me, is very much defined by lines of sight and body language. it is more about signals than it is about true barriers. i noticed that when you’re facing someone you need more space between you than when you’re
behind someone. i found this interesting in that every individual’s needs of space can set up and overall emergent pattern of where people stand and walk in relation to each other.
in terms of body language and how we define our personal space, i noticed the importance of shoulders. shoulders create a boundary surrounding our heads, which are the part of us that needs the most space
personal space
or “protection”. this is why a common reaction to an invasion of personal space is to raise the shoulders to indicate our need for more space. these movements aren’t so much a physical deterrent as a visual cue to others that we feel uncomfortable that people respond to.
this idea reminded me of animals in nature who use bright colours and dangerous looking spikes to visually indicate that they are a
threat and therefore deter any other animals from approaching them. examples of this include the frill-necked lizard and the puffer fish.
their techniques of creating personal space are not only effective in nature, but also visually striking - and this is why it is a concept i wanted to follow up in my design.
100cm50cm
frill-necked lizardhttp://www.themagazine.ca/2011/04/09/frill-necked-lizard/#.unBp5rB6Kso
ENVS 10008_Virtual Environments
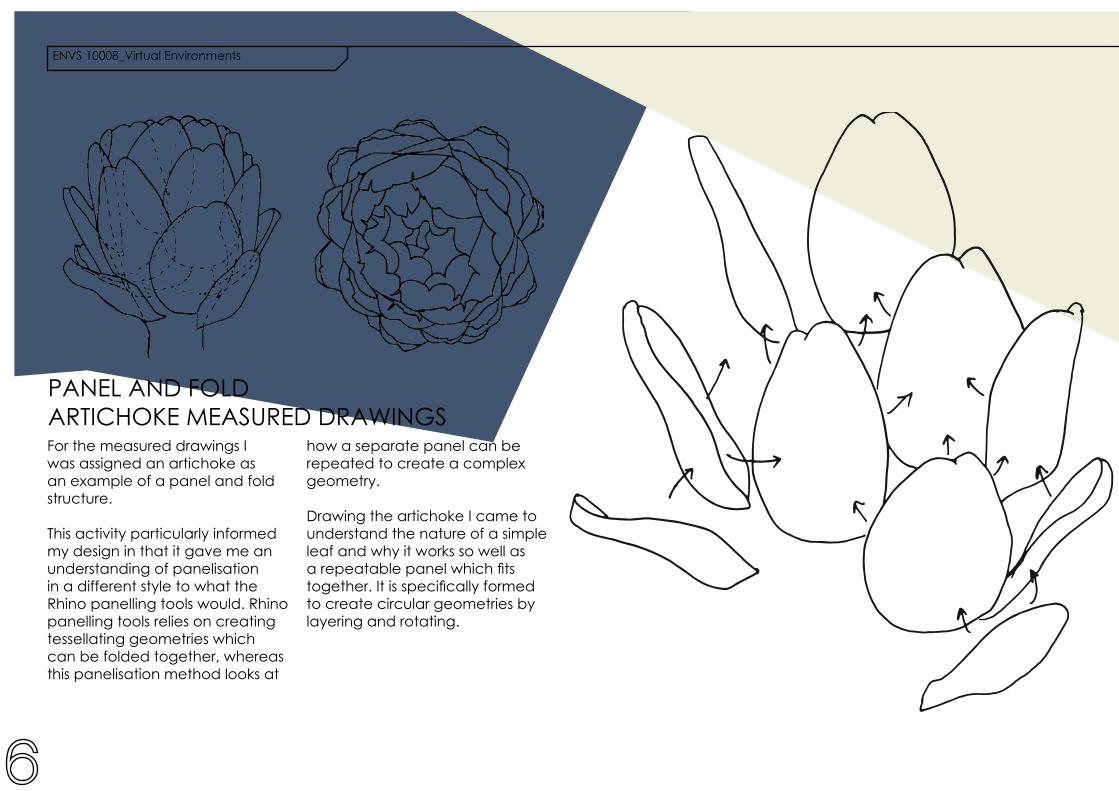
panel anD folDartichoKe measureD DraWingsfor the measured drawings i was assigned an artichoke as an example of a panel and fold structure.
this activity particularly informed my design in that it gave me an understanding of panelisation in a different style to what the rhino panelling tools would. rhino panelling tools relies on creating tessellating geometries which can be folded together, whereas this panelisation method looks at
how a separate panel can be repeated to create a complex geometry.
Drawing the artichoke i came to understand the nature of a simple leaf and why it works so well as a repeatable panel which fits together. It is specifically formed to create circular geometries by layering and rotating.
ENVS 10008_Virtual Environments
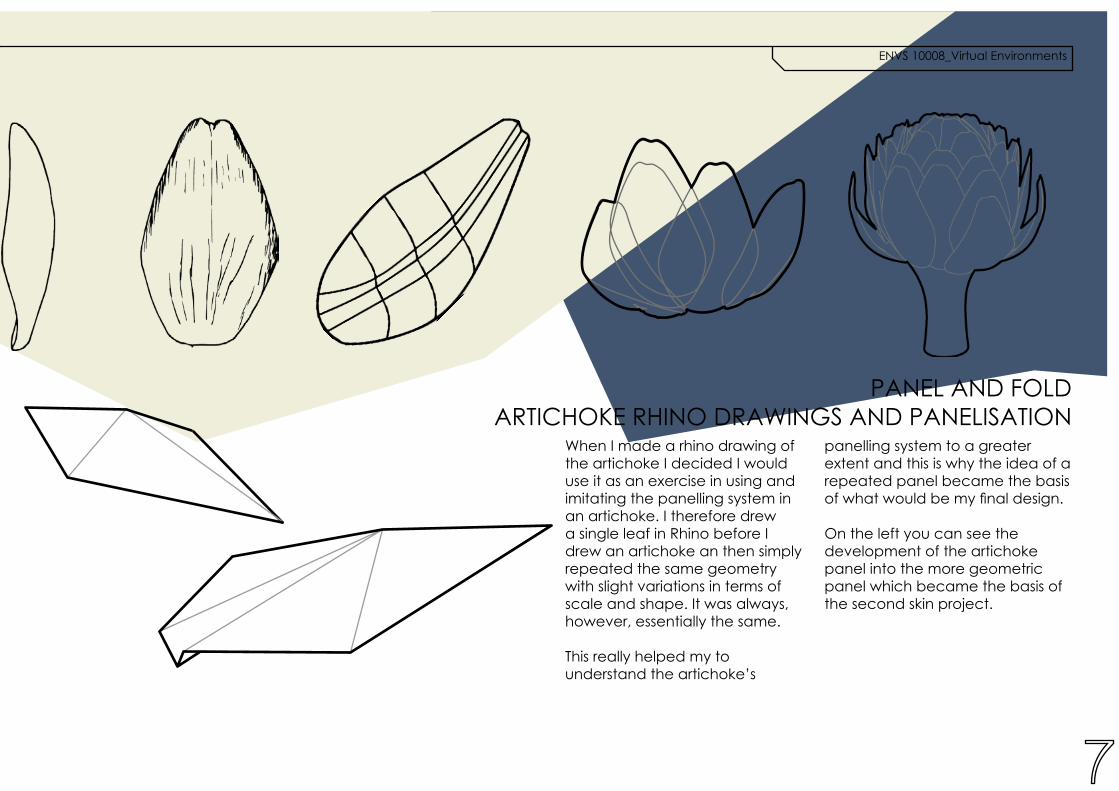
panel anD folDartichoKe rhino DraWings anD panelisation
When i made a rhino drawing of the artichoke i decided i would use it as an exercise in using and imitating the panelling system in an artichoke. i therefore drew a single leaf in rhino before i drew an artichoke an then simply repeated the same geometry with slight variations in terms of scale and shape. it was always, however, essentially the same.
this really helped my to understand the artichoke’s
panelling system to a greater extent and this is why the idea of a repeated panel became the basis of what would be my final design.
on the left you can see the development of the artichoke panel into the more geometric panel which became the basis of the second skin project.
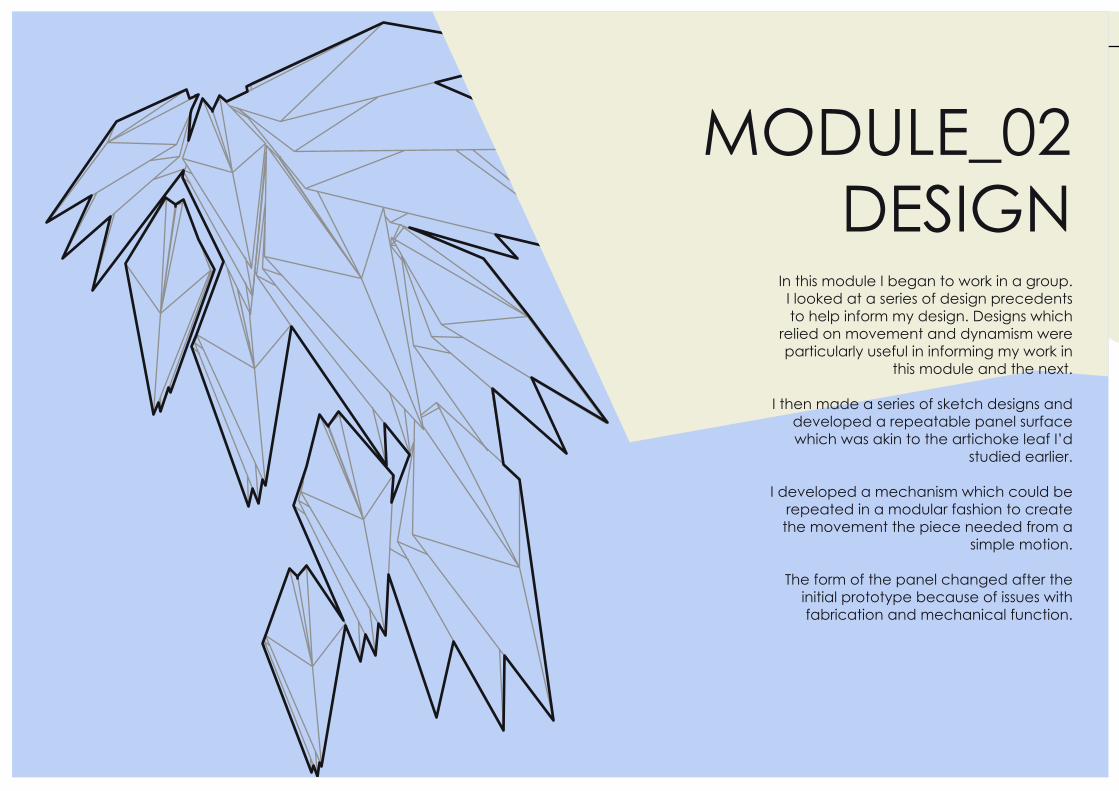
moDule_02Design
in this module i began to work in a group. i looked at a series of design precedents to help inform my design. Designs which
relied on movement and dynamism were particularly useful in informing my work in
this module and the next.
i then made a series of sketch designs and developed a repeatable panel surface which was akin to the artichoke leaf i’d
studied earlier.
i developed a mechanism which could be repeated in a modular fashion to create the movement the piece needed from a
simple motion.
the form of the panel changed after the initial prototype because of issues with fabrication and mechanical function.
envs 10008_virtual environments
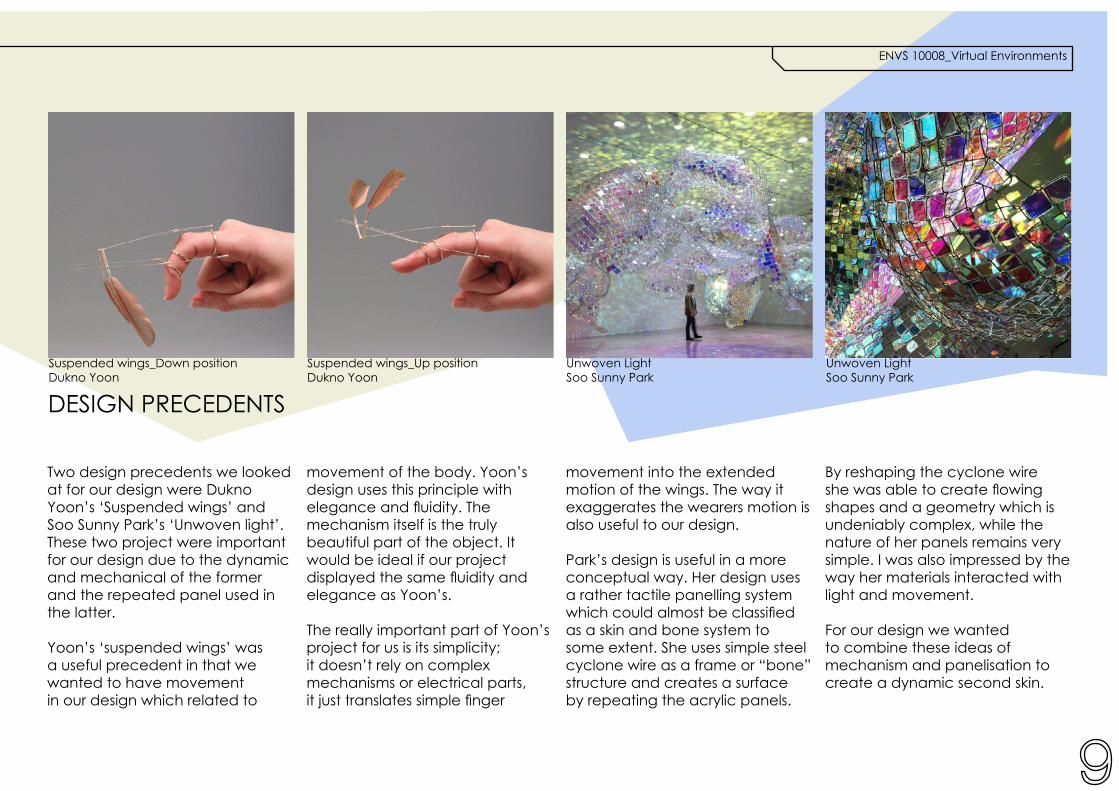
unwoven lightsoo sunny park
suspended wings_Down positionDukno yoon
two design precedents we looked at for our design were Dukno yoon’s ‘suspended wings’ and soo sunny park’s ‘unwoven light’. these two project were important for our design due to the dynamic and mechanical of the former and the repeated panel used in the latter.
yoon’s ‘suspended wings’ was a useful precedent in that we wanted to have movement in our design which related to
movement of the body. yoon’s design uses this principle with elegance and fluidity. The mechanism itself is the truly beautiful part of the object. it would be ideal if our project displayed the same fluidity and elegance as yoon’s.
the really important part of yoon’s project for us is its simplicity; it doesn’t rely on complex mechanisms or electrical parts, it just translates simple finger
suspended wings_up positionDukno yoon
unwoven lightsoo sunny park
Design preceDents
movement into the extended motion of the wings. the way it exaggerates the wearers motion is also useful to our design.
park’s design is useful in a more conceptual way. her design uses a rather tactile panelling system which could almost be classified as a skin and bone system to some extent. she uses simple steel cyclone wire as a frame or “bone” structure and creates a surface by repeating the acrylic panels.
By reshaping the cyclone wire she was able to create flowing shapes and a geometry which is undeniably complex, while the nature of her panels remains very simple. i was also impressed by the way her materials interacted with light and movement.
for our design we wanted to combine these ideas of mechanism and panelisation to create a dynamic second skin.
envs 10008_virtual environments
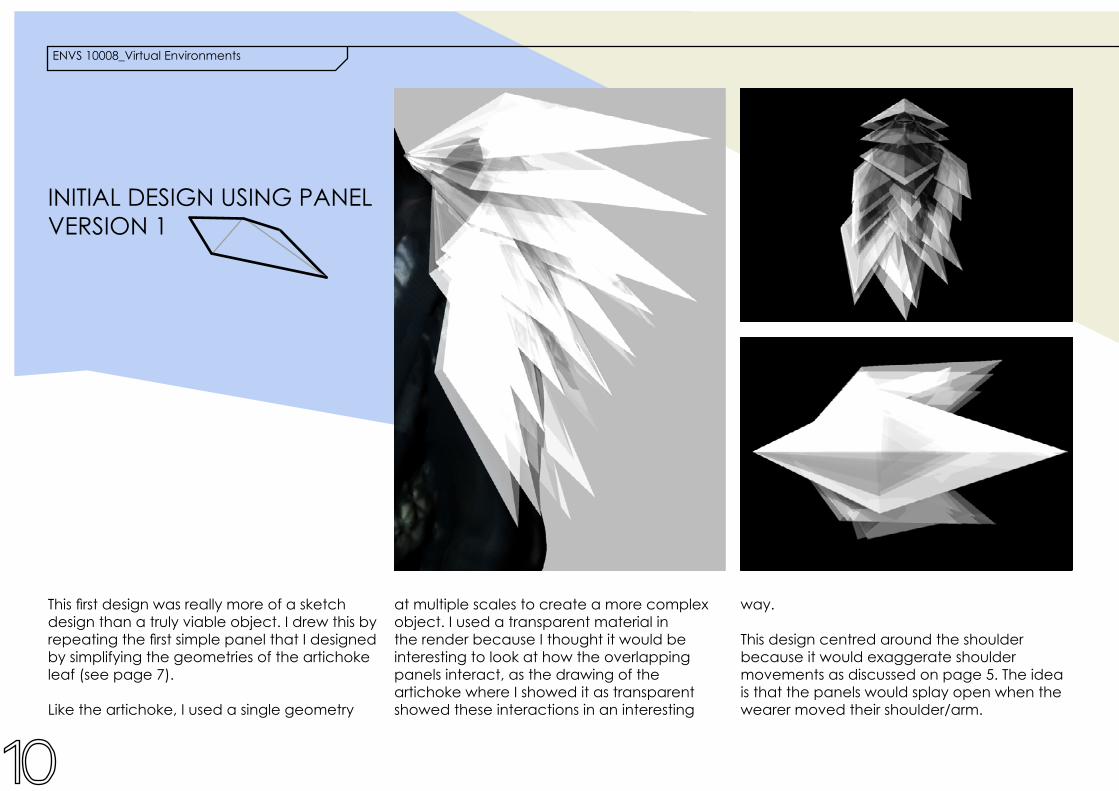
initial Design using panel version 1
at multiple scales to create a more complex object. i used a transparent material in the render because i thought it would be interesting to look at how the overlapping panels interact, as the drawing of the artichoke where i showed it as transparent showed these interactions in an interesting
way.
this design centred around the shoulder because it would exaggerate shoulder movements as discussed on page 5. the idea is that the panels would splay open when the wearer moved their shoulder/arm.
This first design was really more of a sketch design than a truly viable object. i drew this by repeating the first simple panel that I designed by simplifying the geometries of the artichoke leaf (see page 7).
like the artichoke, i used a single geometry
envs 10008_virtual environments
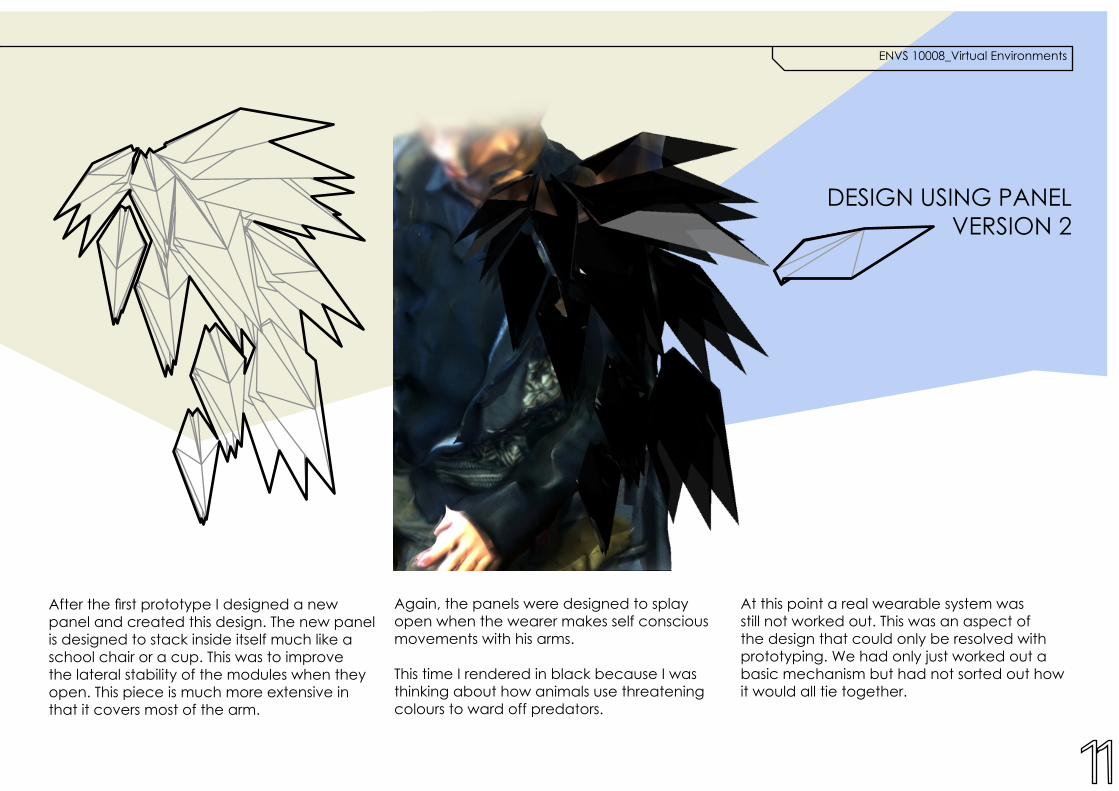
After the first prototype I designed a new panel and created this design. the new panel is designed to stack inside itself much like a school chair or a cup. this was to improve the lateral stability of the modules when they open. this piece is much more extensive in that it covers most of the arm.
again, the panels were designed to splay open when the wearer makes self conscious movements with his arms.
this time i rendered in black because i was thinking about how animals use threatening colours to ward off predators.
Design using panel version 2
at this point a real wearable system was still not worked out. this was an aspect of the design that could only be resolved with prototyping. We had only just worked out a basic mechanism but had not sorted out how it would all tie together.
envs 10008_virtual environments
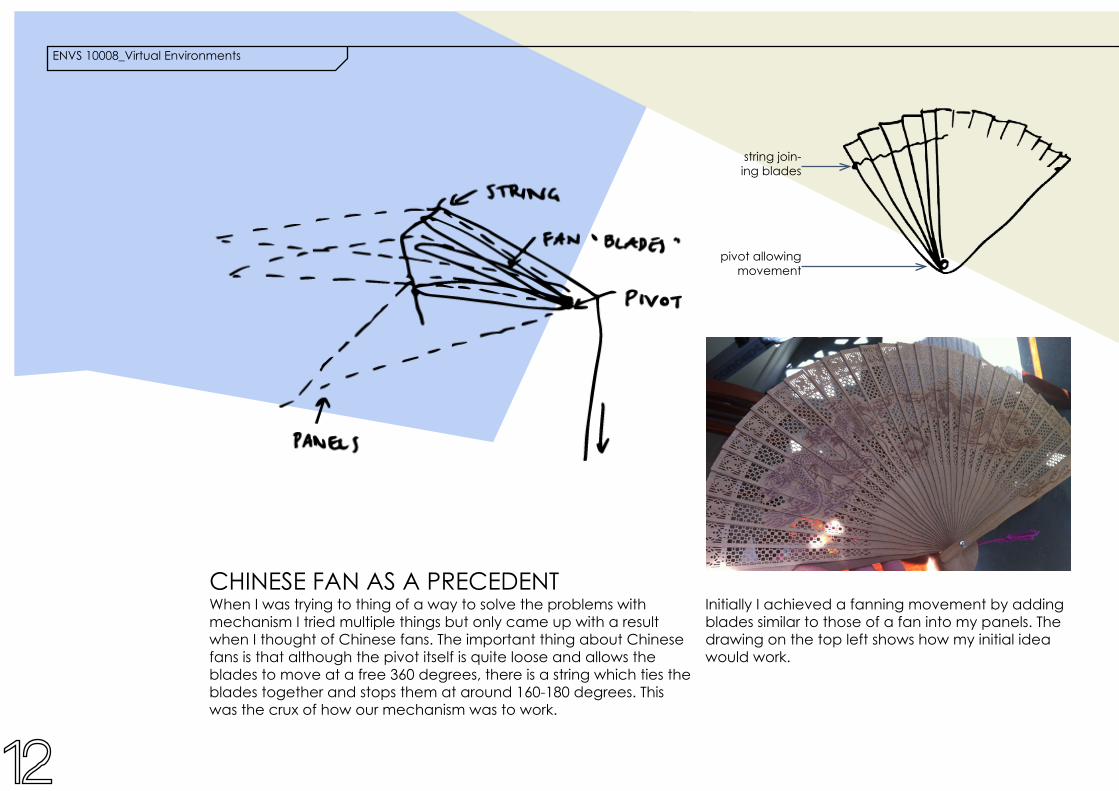
chinese fan as a preceDentWhen i was trying to thing of a way to solve the problems with mechanism i tried multiple things but only came up with a result when i thought of chinese fans. the important thing about chinese fans is that although the pivot itself is quite loose and allows the blades to move at a free 360 degrees, there is a string which ties the blades together and stops them at around 160-180 degrees. this was the crux of how our mechanism was to work.
initially i achieved a fanning movement by adding blades similar to those of a fan into my panels. the drawing on the top left shows how my initial idea would work.
string join-ing blades
pivot allowing movement

envs 10008_virtual environments
first prototype This first prototype was not quite part of the fabrication stage, it was more about designing the mechanism and panelisation. first i made these paper panels. i put the slit in 2 different places and as you can see the one with the slit on the smaller line (on the left) creates a much cleaner result.
next i actioned the idea i got from the chinese fan. i added card “blades” to the interior of the panels and connected them with a pivot system.i then tied a string to the bottom panel, threaded it through to the second one and tied it firm again. I did this one last time for the top panel and when you pulled the string the prototype would move.
the problem i had at this point was that the string needed to be guided in the correct direction to work, so i added the wire guide loop you can see in the photos.
the result was a smoothly moving mechanism, but due to the way the blades stacked there was a lot of lateral movement which i didn’t want. this is why i developed the 2nd panel iteration.
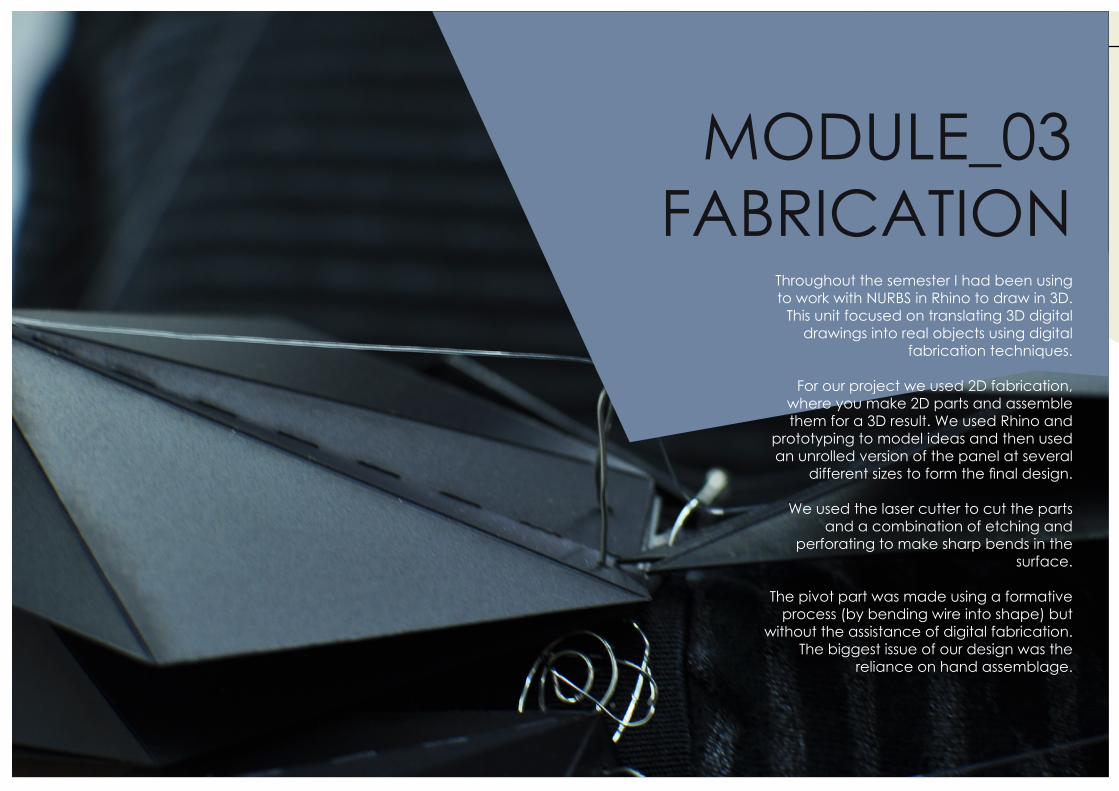
moDule_03faBrication
throughout the semester i had been using to work with nurBs in rhino to draw in 3D.
this unit focused on translating 3D digital drawings into real objects using digital
fabrication techniques.
for our project we used 2D fabrication, where you make 2D parts and assemble them for a 3D result. We used rhino and
prototyping to model ideas and then used an unrolled version of the panel at several
different sizes to form the final design.
We used the laser cutter to cut the parts and a combination of etching and
perforating to make sharp bends in the surface.
the pivot part was made using a formative process (by bending wire into shape) but
without the assistance of digital fabrication. the biggest issue of our design was the
reliance on hand assemblage.

ENVS 10008_Virtual Environmentsenvs 10008_virtual environments
2-dimensional fabricationaami park_cox architecture
3-Dimensional DigitisationDrawing from this project
the lectures and readings of this week looked at three main techniques of fabrication and their relationship with digital 3D modelling.
rhino is a modelling package which uses nurBs, a type of surface which is defined by mathematical formulae rather than by pixels. this means that they’re more regular and more manipulable. especially when
scaling.
nurBs are commonly used with digital fabrication, and this is why they are useful when using laser cutters as we did this semester.
one of the main types of fabrication is subtractive, where a material is taken in a block form and excess material is carved away to create a form. this is particularly useful for making
subtractive fabricationcnc milling_Beatty robotics
additive fabricationperpectives_3D printed ceramics_unfold design studiofaBrication
techniques
moulds but can also be used to create objects such as the one pictured by Beatty robotics.
additive fabrication in the digital sense is encompassed by 3D printing. 3D printing translates digital images into real life objects and today can be done with many materials. unfold’s perspectives used 3D printing to manufacture the ceramic objects
pictured.
2D fabrication is what i will be using from my project as it is the simplest. it relies on the panelisation of 3D objects and subsequent assemblage after their cutting or manufacture. this is used often in glazing systems such as the one at aami park (pictured).
ENVS 10008_Virtual Environmentsenvs 10008_virtual environments
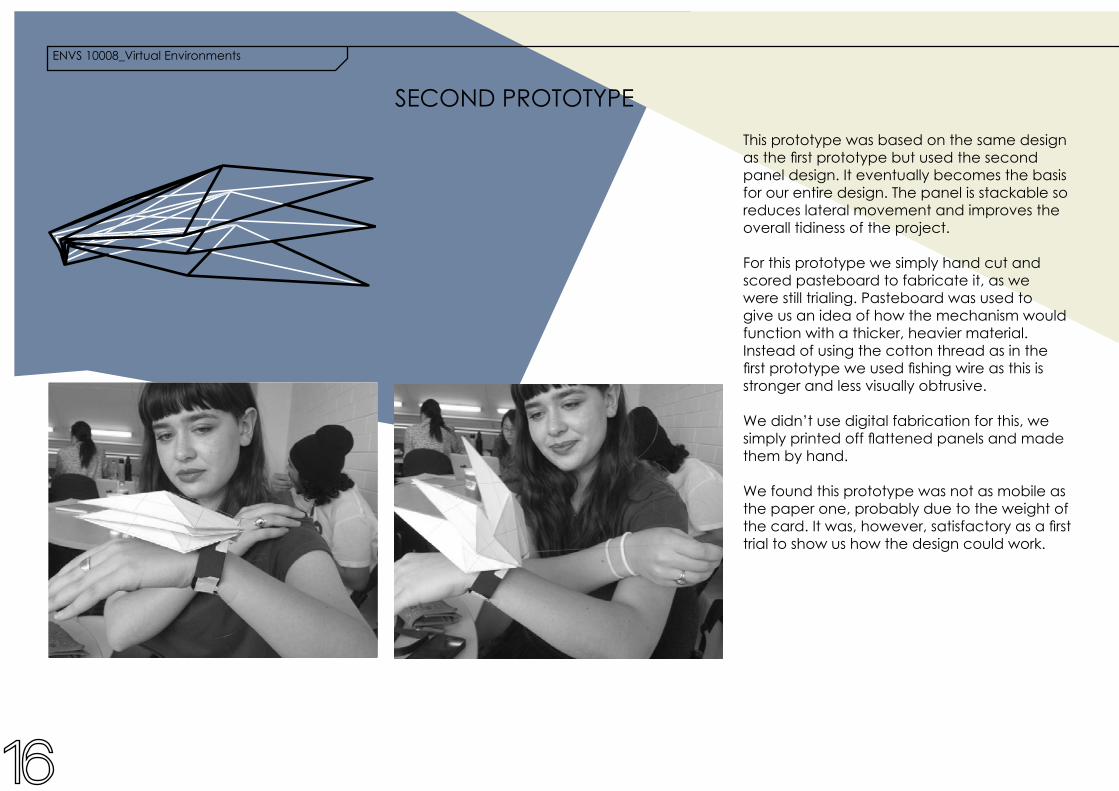
seconD prototypethis prototype was based on the same design as the first prototype but used the second panel design. it eventually becomes the basis for our entire design. the panel is stackable so reduces lateral movement and improves the overall tidiness of the project.
for this prototype we simply hand cut and scored pasteboard to fabricate it, as we were still trialing. pasteboard was used to give us an idea of how the mechanism would function with a thicker, heavier material. instead of using the cotton thread as in the first prototype we used fishing wire as this is stronger and less visually obtrusive.
We didn’t use digital fabrication for this, we simply printed off flattened panels and made them by hand.
We found this prototype was not as mobile as the paper one, probably due to the weight of the card. It was, however, satisfactory as a first trial to show us how the design could work.
ENVS 10008_Virtual Environmentsenvs 10008_virtual environments
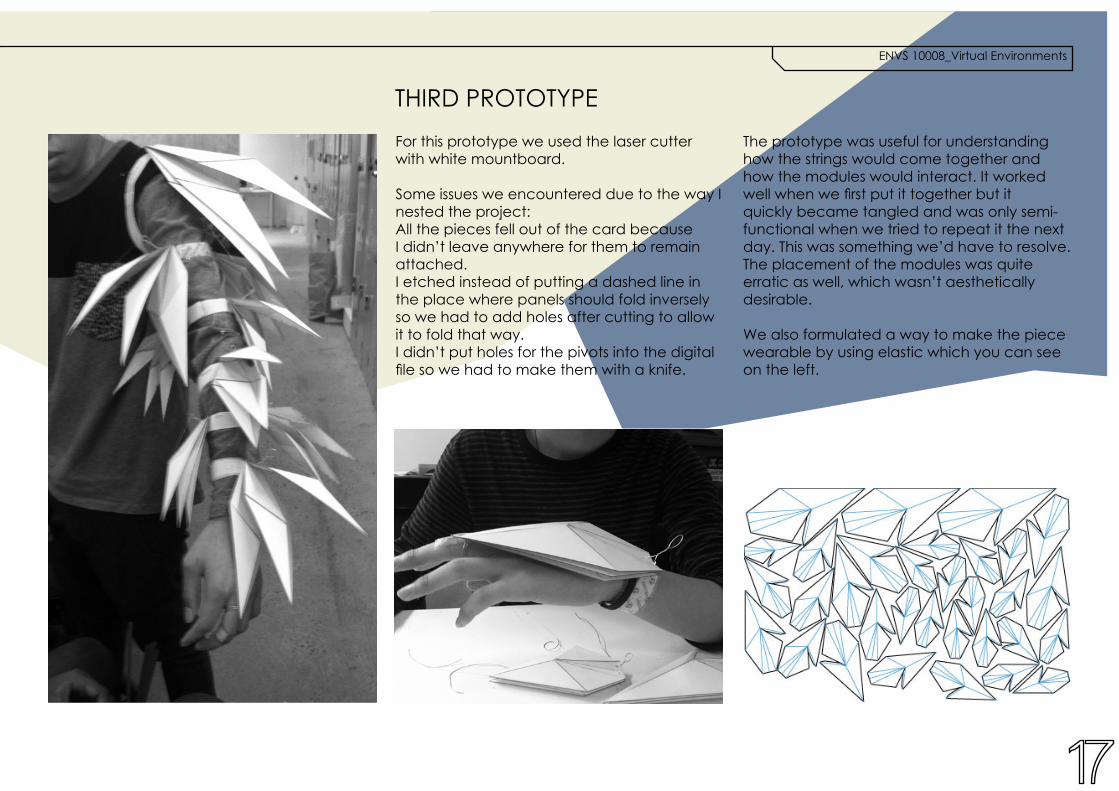
thirD prototypefor this prototype we used the laser cutter with white mountboard.
some issues we encountered due to the way i nested the project:all the pieces fell out of the card because i didn’t leave anywhere for them to remain attached.i etched instead of putting a dashed line in the place where panels should fold inversely so we had to add holes after cutting to allow it to fold that way.i didn’t put holes for the pivots into the digital file so we had to make them with a knife.
the prototype was useful for understanding how the strings would come together and how the modules would interact. it worked well when we first put it together but it quickly became tangled and was only semi-functional when we tried to repeat it the next day. this was something we’d have to resolve. the placement of the modules was quite erratic as well, which wasn’t aesthetically desirable.
We also formulated a way to make the piece wearable by using elastic which you can see on the left.
ENVS 10008_Virtual Environmentsenvs 10008_virtual environments
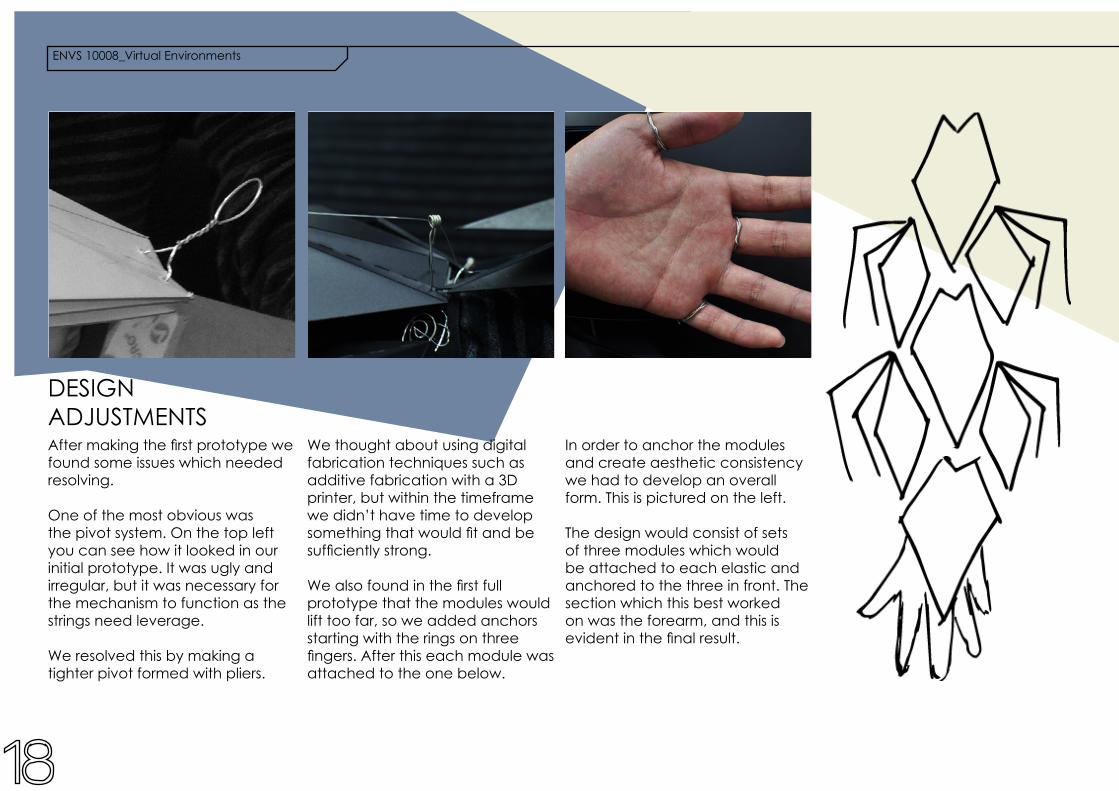
in order to anchor the modules and create aesthetic consistency we had to develop an overall form. this is pictured on the left.
the design would consist of sets of three modules which would be attached to each elastic and anchored to the three in front. the section which this best worked on was the forearm, and this is evident in the final result.
After making the first prototype we found some issues which needed resolving.
one of the most obvious was the pivot system. on the top left you can see how it looked in our initial prototype. it was ugly and irregular, but it was necessary for the mechanism to function as the strings need leverage.
We resolved this by making a tighter pivot formed with pliers.
We thought about using digital fabrication techniques such as additive fabrication with a 3D printer, but within the timeframe we didn’t have time to develop something that would fit and be sufficiently strong.
We also found in the first full prototype that the modules would lift too far, so we added anchors starting with the rings on three fingers. After this each module was attached to the one below.
Design aDjustments
ENVS 10008_Virtual Environmentsenvs 10008_virtual environments
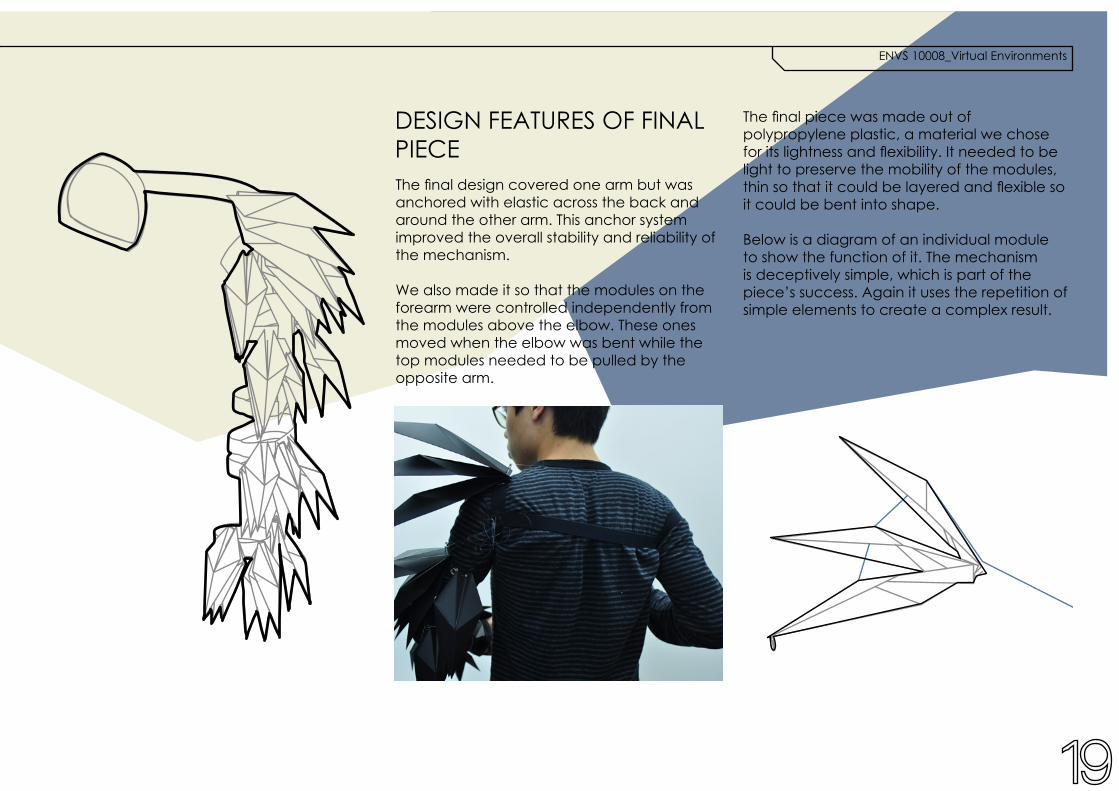
Design features of final pieceThe final design covered one arm but was anchored with elastic across the back and around the other arm. this anchor system improved the overall stability and reliability of the mechanism.
We also made it so that the modules on the forearm were controlled independently from the modules above the elbow. these ones moved when the elbow was bent while the top modules needed to be pulled by the opposite arm.
The final piece was made out of polypropylene plastic, a material we chose for its lightness and flexibility. It needed to be light to preserve the mobility of the modules, thin so that it could be layered and flexible so it could be bent into shape.
Below is a diagram of an individual module to show the function of it. the mechanism is deceptively simple, which is part of the piece’s success. again it uses the repetition of simple elements to create a complex result.
ENVS 10008_Virtual Environmentsenvs 10008_virtual environments
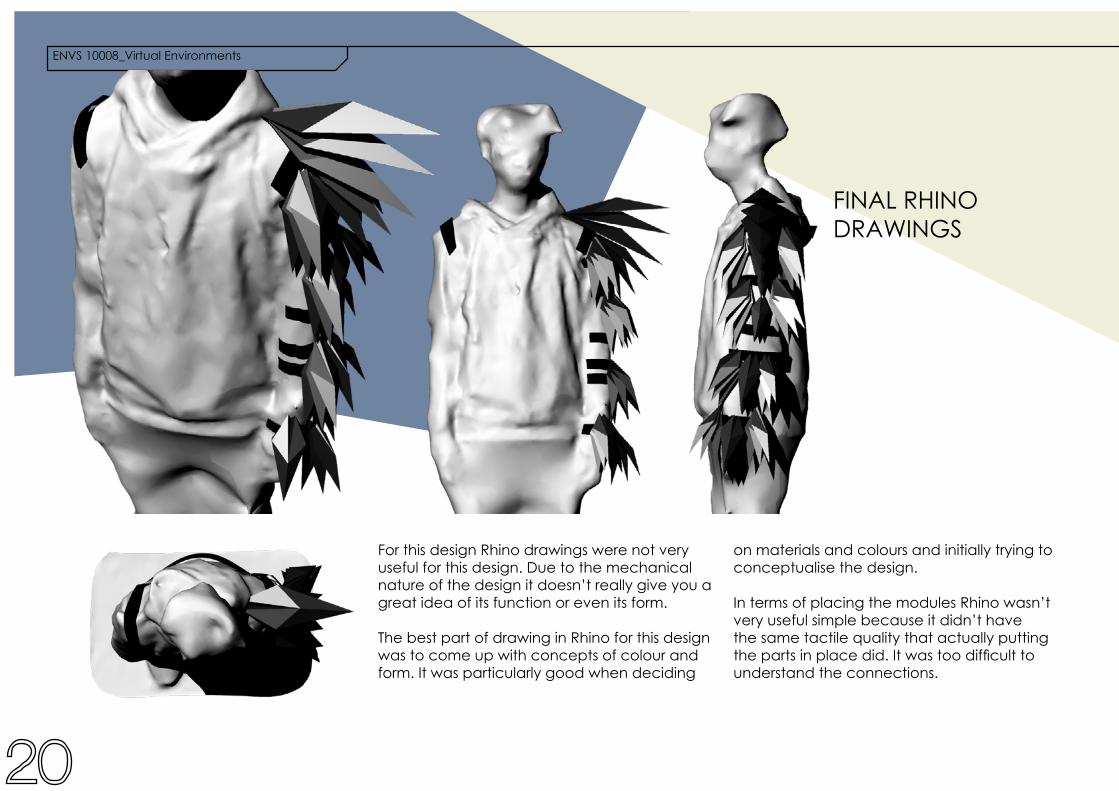
final rhino DraWings
for this design rhino drawings were not very useful for this design. Due to the mechanical nature of the design it doesn’t really give you a great idea of its function or even its form.
the best part of drawing in rhino for this design was to come up with concepts of colour and form. it was particularly good when deciding
on materials and colours and initially trying to conceptualise the design.
in terms of placing the modules rhino wasn’t very useful simple because it didn’t have the same tactile quality that actually putting the parts in place did. It was too difficult to understand the connections.
ENVS 10008_Virtual Environmentsenvs 10008_virtual environments
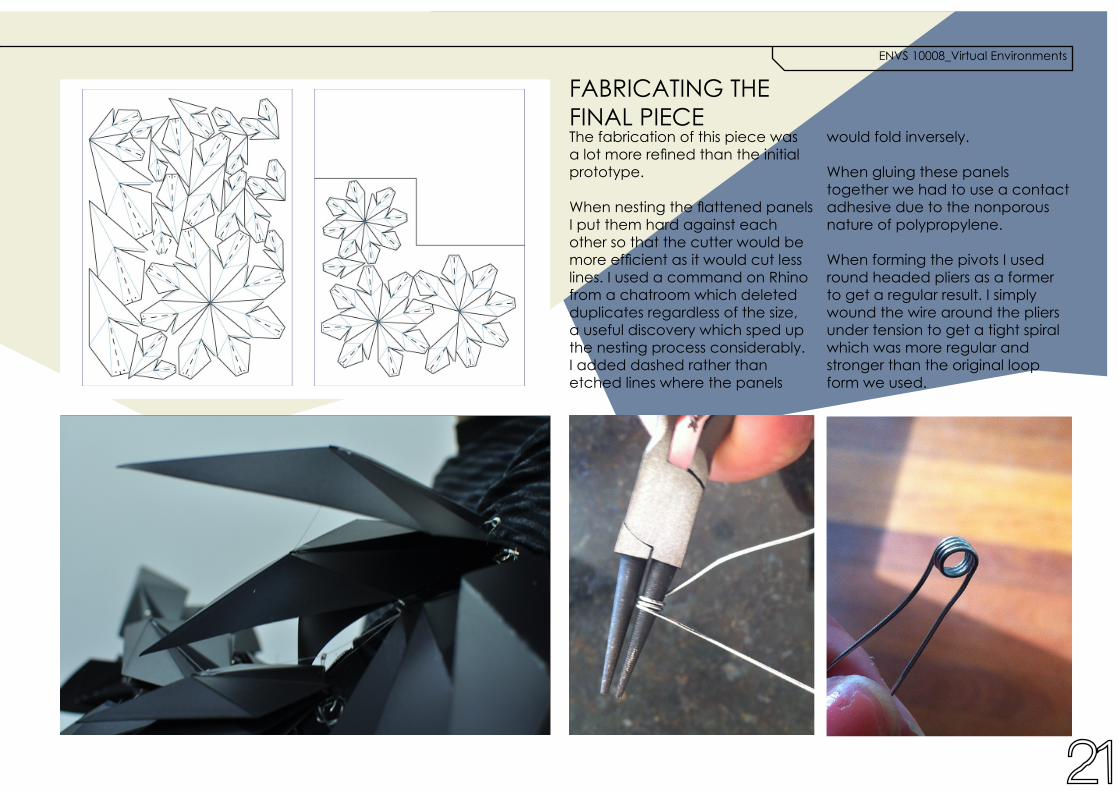
faBricating the final piecethe fabrication of this piece was a lot more refined than the initial prototype. When nesting the flattened panels i put them hard against each other so that the cutter would be more efficient as it would cut less lines. i used a command on rhino from a chatroom which deleted duplicates regardless of the size, a useful discovery which sped up the nesting process considerably. i added dashed rather than etched lines where the panels
would fold inversely.
When gluing these panels together we had to use a contact adhesive due to the nonporous nature of polypropylene.
When forming the pivots i used round headed pliers as a former to get a regular result. i simply wound the wire around the pliers under tension to get a tight spiral which was more regular and stronger than the original loop form we used.

moDule_04reflection
this semester i learned about techniques for ideation, designing, modelling and
fabricating projects which i can see will be very useful in my future studies as a
designer.
this project has forced me to go through a design process which has challenged
me. the challenge of creating a physical object at the end of the process has been the most useful part of this subject, as i feel
like it’s easy to think conceptually when designing and forget to consider this issues
you will face when it comes to actually constructing the object.
envs 10008_virtual environments
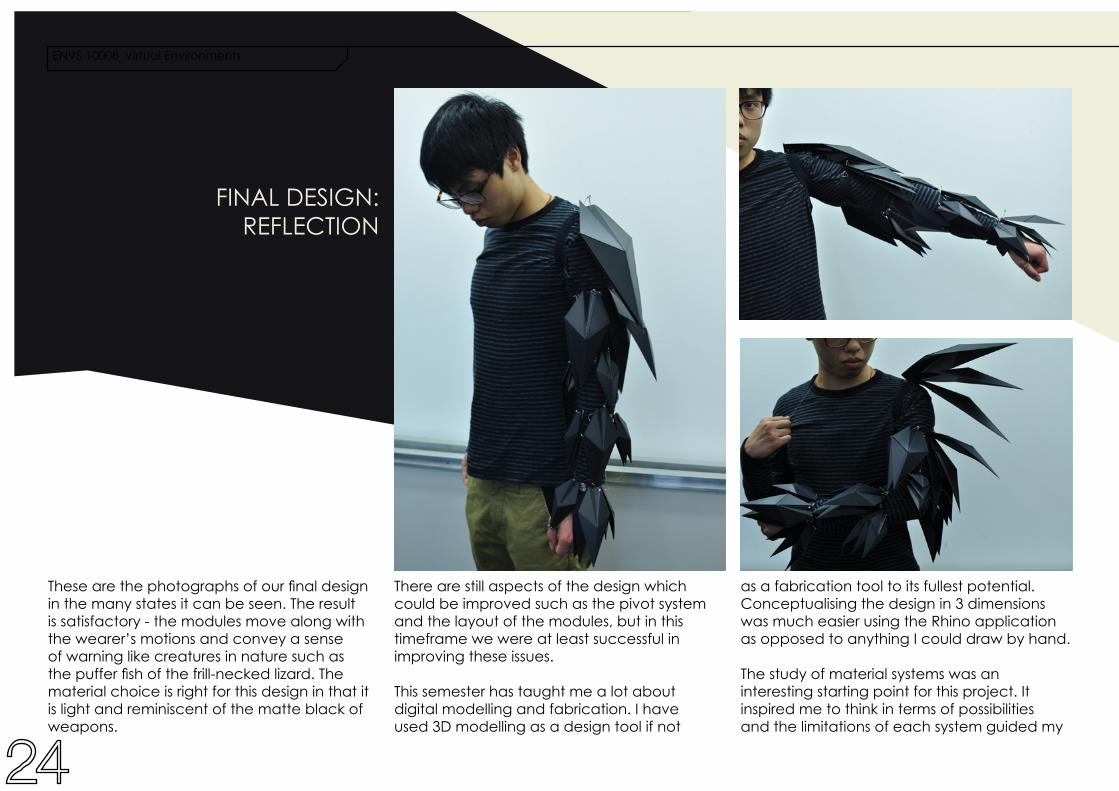
final Design: reflection
there are still aspects of the design which could be improved such as the pivot system and the layout of the modules, but in this timeframe we were at least successful in improving these issues.
this semester has taught me a lot about digital modelling and fabrication. i have used 3D modelling as a design tool if not
as a fabrication tool to its fullest potential. conceptualising the design in 3 dimensions was much easier using the rhino application as opposed to anything i could draw by hand.
the study of material systems was an interesting starting point for this project. it inspired me to think in terms of possibilities and the limitations of each system guided my
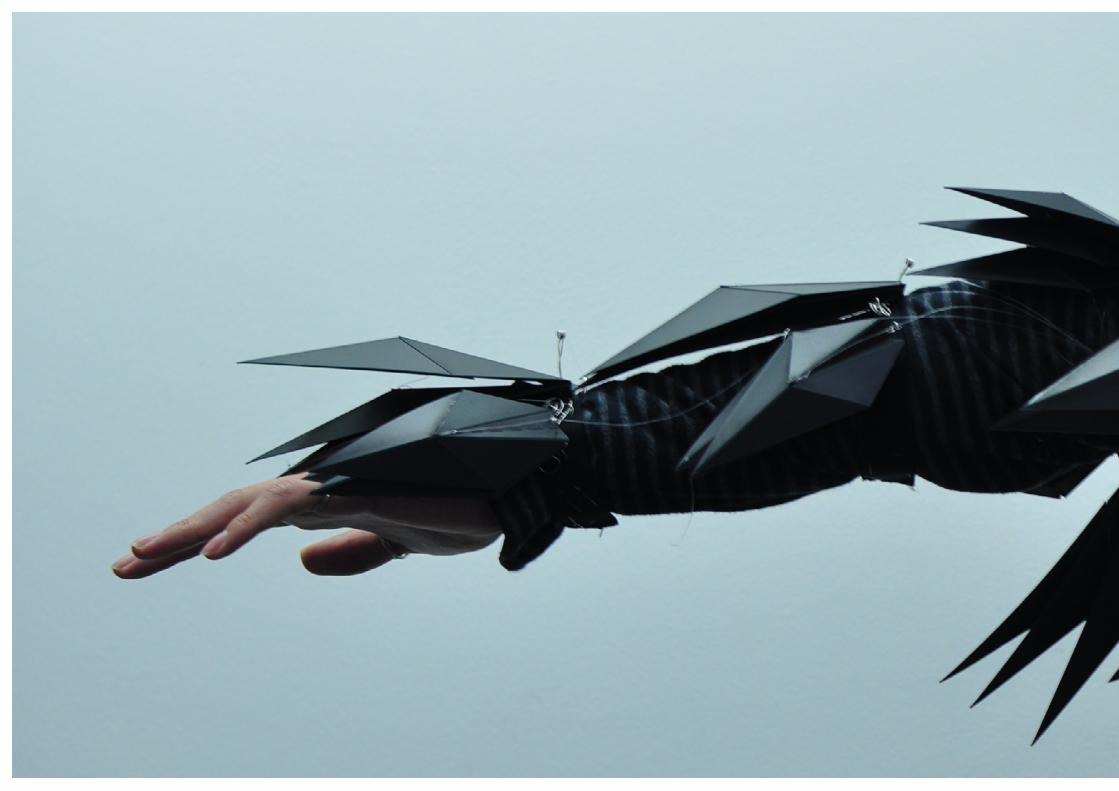
These are the photographs of our final design in the many states it can be seen. the result is satisfactory - the modules move along with the wearer’s motions and convey a sense of warning like creatures in nature such as the puffer fish of the frill-necked lizard. The material choice is right for this design in that it is light and reminiscent of the matte black of weapons.
envs 10008_virtual environments
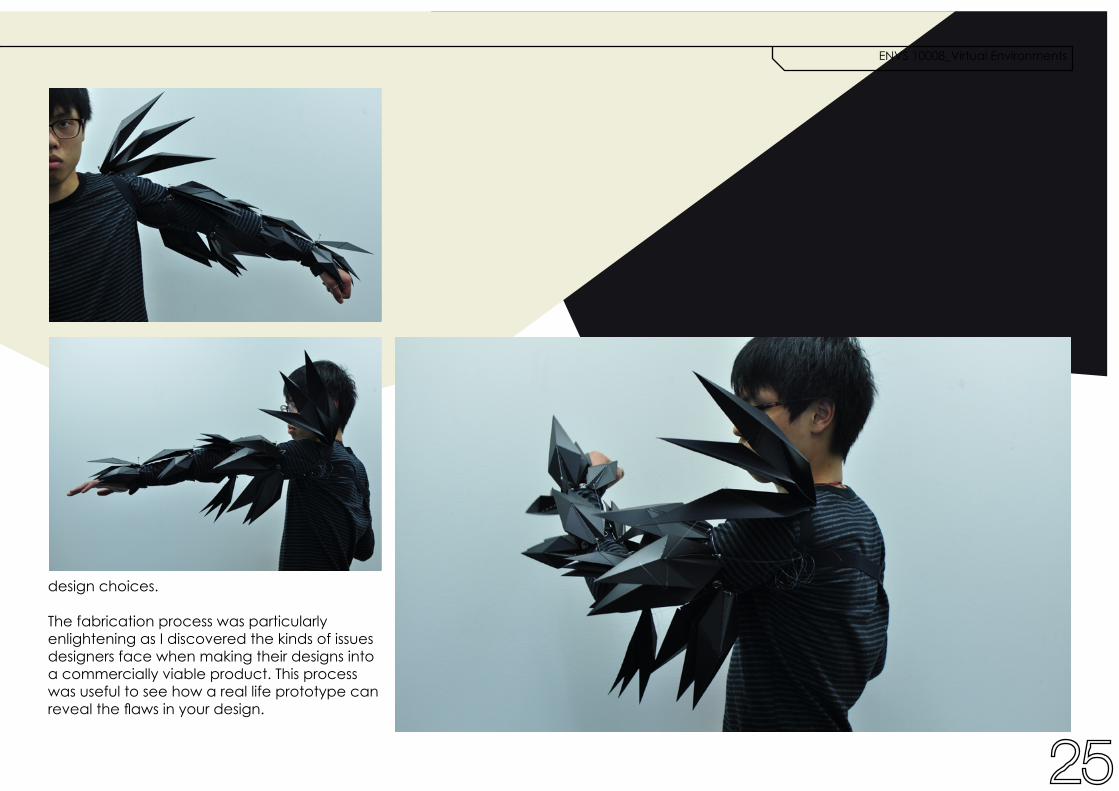
design choices.
the fabrication process was particularly enlightening as i discovered the kinds of issues designers face when making their designs into a commercially viable product. this process was useful to see how a real life prototype can reveal the flaws in your design.